Anatomy of a Paper Project Runway Dress

Image on left via Bravo TV
It took somewhere close to four hours to make. And that time was spread over two days (attention span shortage, anyone?). We have tabs open on our iPad showing google image search results for both “Taylor Swift dresses” and “Project Runway dresses” and Mayhem loves to scroll through them. She stumbled across the above left image last week and immediately said “Ooooooooh, Mom! This one! This ONE!”. To be honest, I denied the first five requests Mayhem made for this dress. I just couldn’t wrap my brain around how it all would come together. But if Mayhem is nothing else, she is relentless. I truly aspire to one day be as persistent as she is. The argument that sealed the deal was “Come on Mom, we don’t even have to make the headphones, remember Granny got me some for Christmas!” …. because clearly, the headphones would be the most difficult part
So we dove in headfirst and quickly found that making “feathers” by simply tearing strips of construction paper was going to be the key to this look. We did lots of tearing. Lots and lots. This was truly a 50-50 project as Mayhem did at least half of the tearing and half of the gluing. She also insisted on making the necklace solo. And since we get a LOT of questions about how things come together, I thought I’d share the dissected version of this dress.
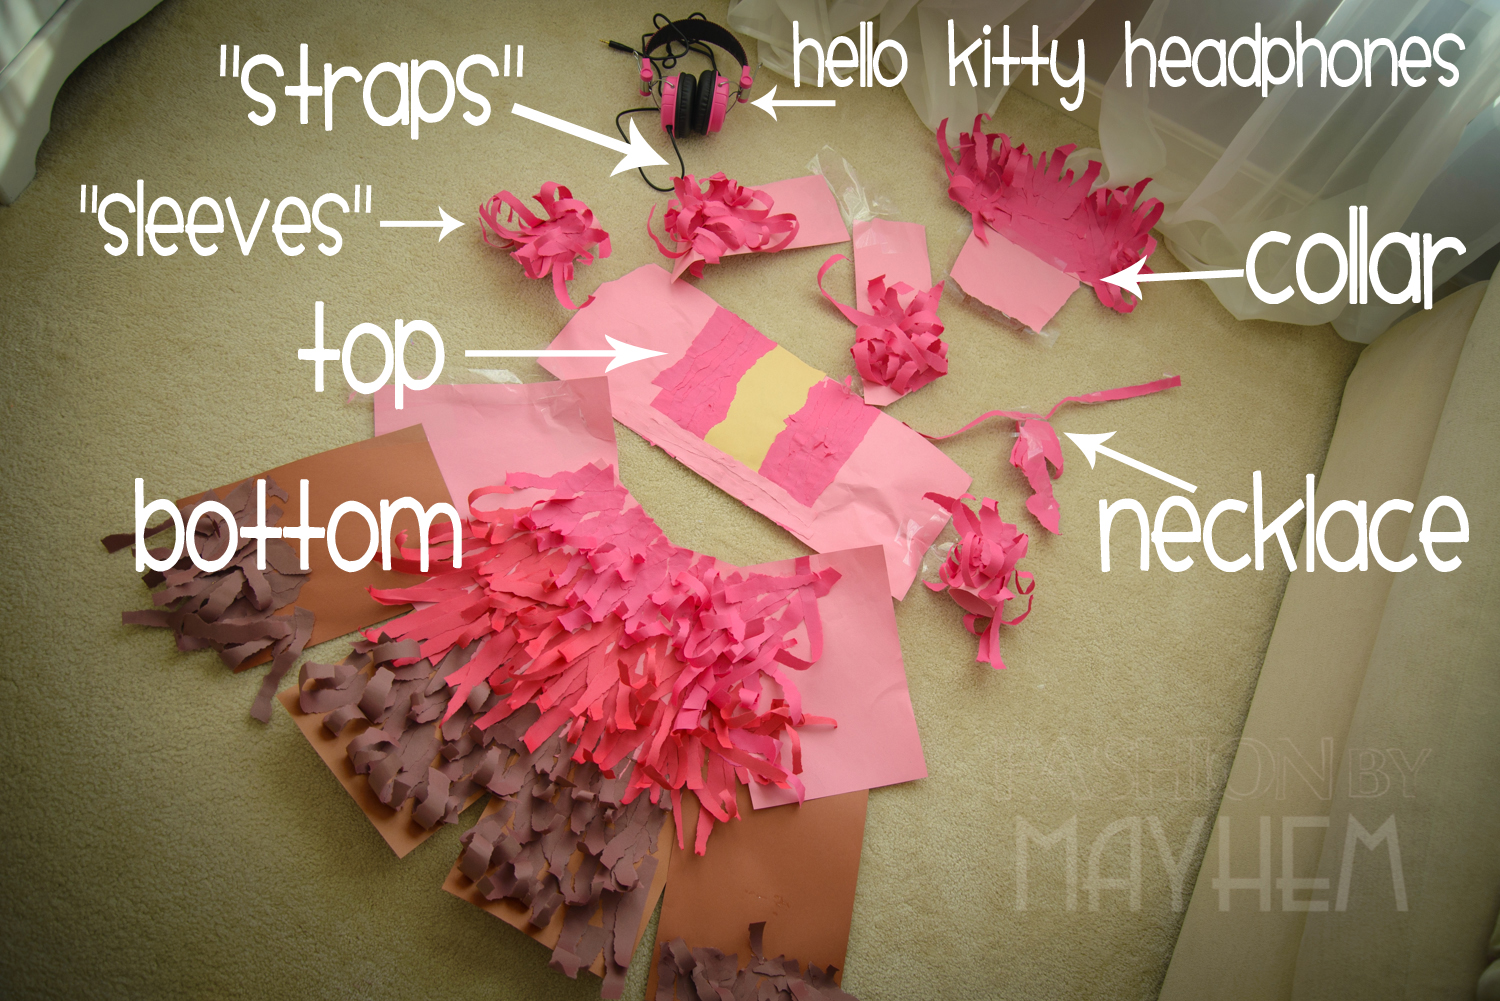

As you can see there are lots of pieces. We constructed each of the pieces independently and then taped them all on together to create our finished “dress”. The bottom wraps around her and the areas without “feathers” overlapped (which is where we taped it together). Next, we wrapped the top around her and taped it together in the back. We then added the “straps” which attached to the top in the front and back (with the “feathers” covering her shoulders). Next, the “sleeves” simply slipped onto her arms and stayed in place. The collar was then taped to the backside of the top (and straps) and simply stands up on it’s own. And the final piece is, of course, the necklace that reaches her waist.
In the end, we were both thrilled with our finished project. So much so, that it’s hanging on our “design studio” wall to serve as future inspiration.
So there you have it, the anatomy of our most time consuming dress (so far). And quite possibly, our newest favorite!