
MORE PHOTOGRAPHY TIPS: WHAT I SHOOT WITH

Last week I talked about how I’ve been editing and organizing photos. I thought it might be a good idea to follow up with a post on what I’m shooting with these days. I find this stuff endlessly fascinating since I’m a bit of a gear head. Blogging can be demanding and sometimes it’s nice to hear what other people are up to if it will save you money or time down the road.
There is lots of information available on how to improve your blog photos so I won’t rehash that all here, except to say that I became much happier with the quality of my photos once I invested in a good camera and lens and started venturing outside to take advantage of natural lighting and all the weird little alleys Montreal has to offer (I get really uncomfortable “posing” in public so the more private, the better.) Of course not everyone has the budget to buy expensive cameras, and you can definitely get good results with simpler setups. If you are interested in upgrading, this post may be for you.
My blog photos are definitely a work in progress that I hope to improve with every post, but I think most of us can agree that this is a huge improvement from the backlit horror that is this. Having a great camera doesn’t just mean better blog photos either; I think we’d all benefit if we stepped away from our iphones every once and a while and used cameras that actually take great photos, images that we will treasure longer than an ephemeral instagram snap (something I have to remind myself whenever I am too lazy to bring my camera on vacation – I always regret it).
Over the years I’ve worked with a number of cameras, from point and shoots to DSLRs. I traded in my Canon Rebel last year for a camera that I am utterly in love with. I think it is pretty much an ideal choice as a blogging camera because of its size, cost, flexibility and ease of use.

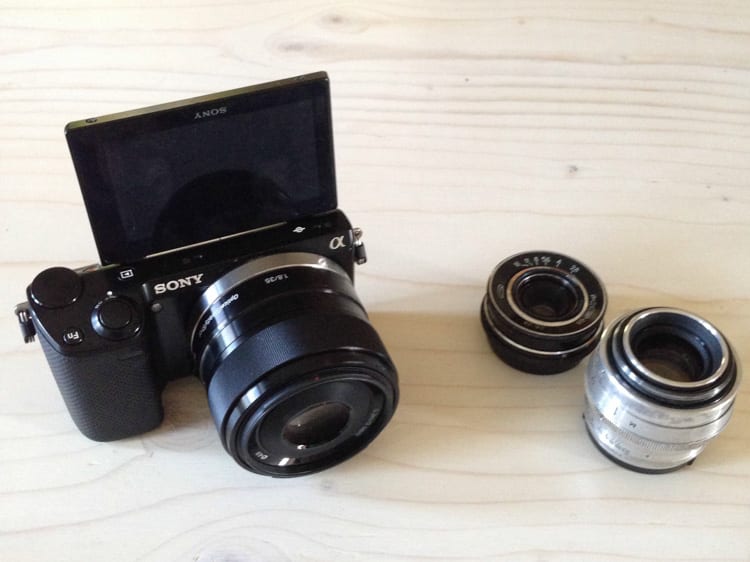
A photography nerd friend of mine traded in his DSLR setup for the Sony NEX5N and I was an immediate convert when I started playing with it (the model has since been updated to the Sony NEX-5TL

The biggest advantage in my eyes is the size; my Sony is about two thirds the size of my old Canon. It fits in my purse and is easy to keep on me at all times. Photography purists may disagree, but I dislike using viewfinders; rather than looking into one to compose your shot on a DSLR, you can preview your shot directly on the LCD screen, which makes playing with manual settings much more fun for beginners (although there is a viewfinder

It is very easy to find cheap accessories on ebay (like remotes


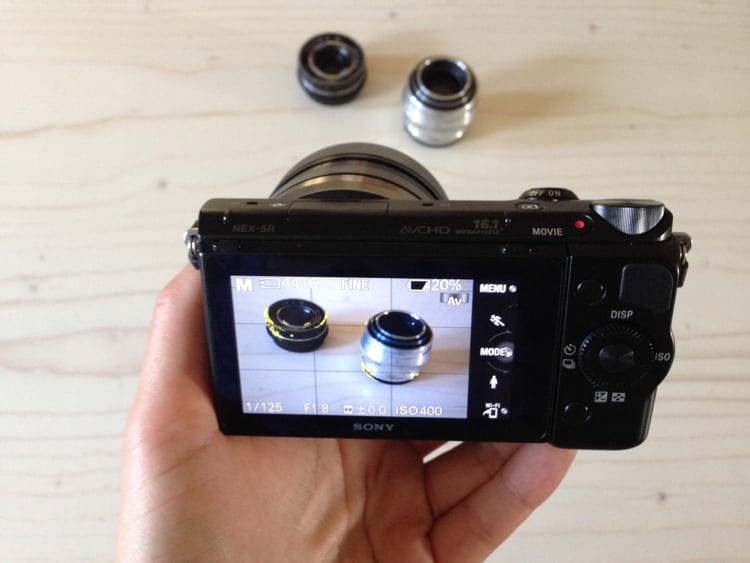
When the Sony NEX is set to manual focus, you can highlight in a chosen colour what is in focus on the screen. If you’ve ever tried to take a photo in low light situations you may have found that it is hard to autofocus on the subject using the built in focus beam. This highlight means you don’t have to squint through a viewfinder and hope for the best since it shows you exactly what is in focus before you take the picture.

Check out this sweet highlighted focus action. Also, it fits in the palm of my hand.
For the first year, I used the included kit lens which is very serviceable but won’t give you knockout results. Unfortunately if you want to really up your photography game, you’ll have to invest in a good prime lens at some point. A prime lens means it doesn’t zoom; it has a fixed focal length which let’s you widen the aperture so more light comes in, meaning you can shoot images at a faster shutter speed. If you’ve ever tried to take photos indoors on a crappy camera, you know how difficult it is to get nice, bright photos without any blur. A big ol’ aperture helps you achieve that, along with creating that lovely softness behind the subject that makes outfits pop.
I did a lot of research and settled on this 35mm f/1.8 prime

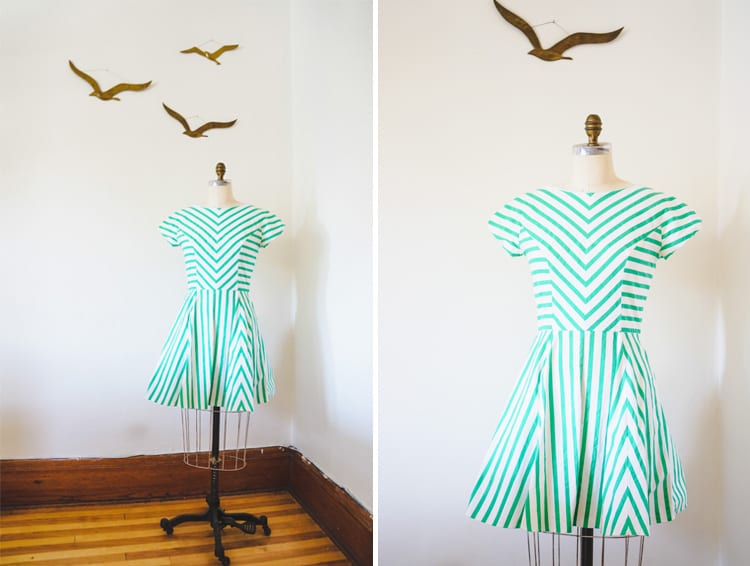
This “zoomed” in quality is confusing if you haven’t worked with lenses before so I took two photos from the same spot in my studio. The image on the left was shot using the kit lens. The image on the right is using my 35mm. As you can see, the kit lens shows much more in the frame, but I had to use a very slow shutter speed (1/8 of a second) to get the same amount of light. If I tried to shoot myself I would have to be very still or risk blurriness. The widest aperture on the kit lens is f/3.5, which is half as much light available using my f/1.8 prime lens. I shot the 35mm prime lens using 1/30 of second; easy to take photos of people without blur. I’d have to be standing about 12 feet away to capture a head to toe shot, so you do lose some space, but you gain speed and light, like Superman.

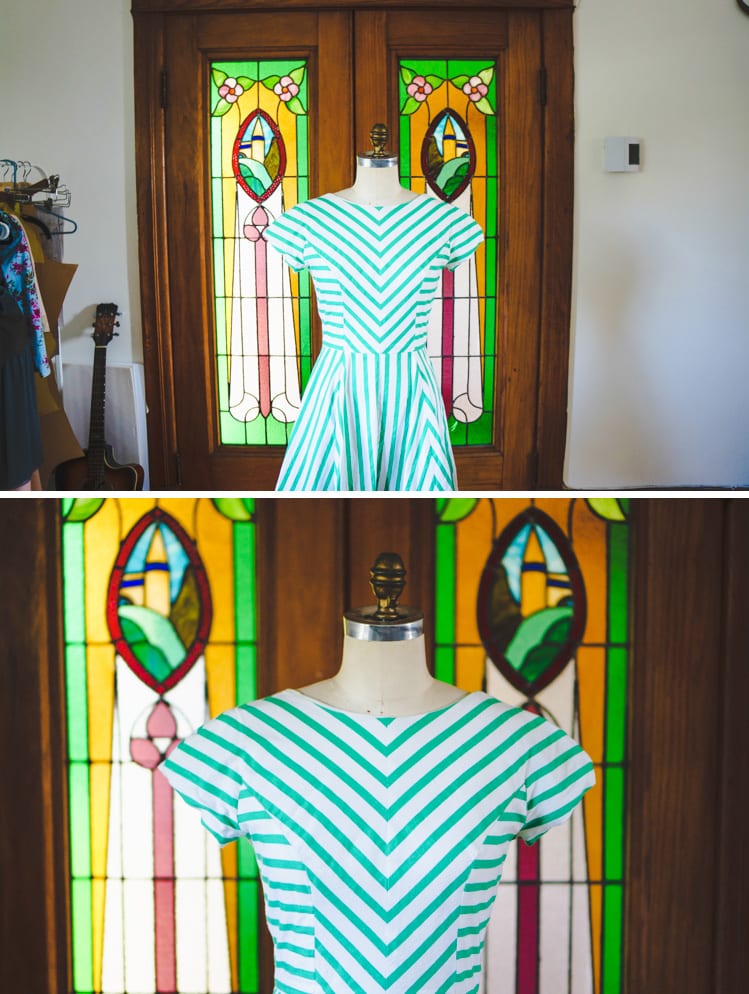
I also took a few photos of the dummy pulled away from the background so you can see the lovely soft blurry effect you get from using the 35mm lens. That blurred background really makes what you are focusing on stand out.

If you’re looking to upgrade cameras, I highly suggest taking a look at the Sony NEX system. They have an affordable starter model called the NEX-3NL

For lenses, I recommend the 35mm f/1.8 prime


Whoof. I think that was my most technical post ever. Hopefully someone got something out of this! There isn’t one perfect answer to the camera conundrum, but I am totally thrilled with my current system after a lot of trial and error. Does anyone else use a NEX? What kind of camera are you shooting on these days? Anything else you’d like to know?
Related posts:
- PHOTOGRAPHY TIPS: EDITING & FORMATTING BLOG PHOTOS
- NEW HOME & NEW BEGINNINGS
- SCHIAPARELLI & PRADA: IMPOSSIBLE CONVERSATIONS