
Ikea Hack ~ Sprout's New Kitchen
Are you on the look out for a play kitchen, but can't find what you're looking for? How about trying this simple Ikea hack?....

This post contains affiliate links. *Not sure what an affiliate link is? – If you click on any of the links in this post and make a purchase I will earn a small percentage of what you have spent, however it will cost you no more than normal! Thanks for your support!*
As you may have gathered, Sprout is quite a girly girl! She will only wear skirts and dresses - the pinker the better. Trousers are a definite no-no in her world!! With this in mind, when Sprout's Daddy and I decided to buy her a play kitchen for her birthday we knew instantly what the number one search criteria would be - it had to be pink!
After having a good scout around, we chose the Ikea Duktig kitchen for a couple of reasons - firstly it was pretty reasonably priced at £65, second height wise it seemed to be one of the tallest with the option to make it 3 different heights and lastly it wasn't a sickly pale pink colour! The great thing about the Ikea play kitchen is that you can easily customise it to suit your child's tastes or just leave it as it is.
Equipment:
Ikea Duktig Kitchen
Rust-oleum Surface Primer


- Sprout chose Berry Pink!
sand paper
damp cloth
drop cloth
Time: 2-3 hours over 5 days
1. Decide which pieces of the kitchen you want to spray.
2. Lightly sand each piece to provide a key for the primer.
3. Use a damp cloth to wipe the dust off each piece and allow to dry.
4. Set up your spraying area. I used a couple of pallets over a drop cloth - you will definitely need to be outside for this part.

5. Spray each section with surface primer and allow to dry. It is always best to start lightly and then re-spray if you need to. This will help to avoid drips!
6. Allow to cure for 24-48 hours.

7. Spray each section with your chosen colour. Allow to dry and re-coat until you have completely covered the each piece and built up a good depth of colour.
8. Allow to cure for 24-48 hours.
9. Build the kitchen! (I have to confess that this took me a good two hours to do! Although Ikea, provide an Allen/Hex key you will definitely need a Phillips screwdriver and a hammer too!!)

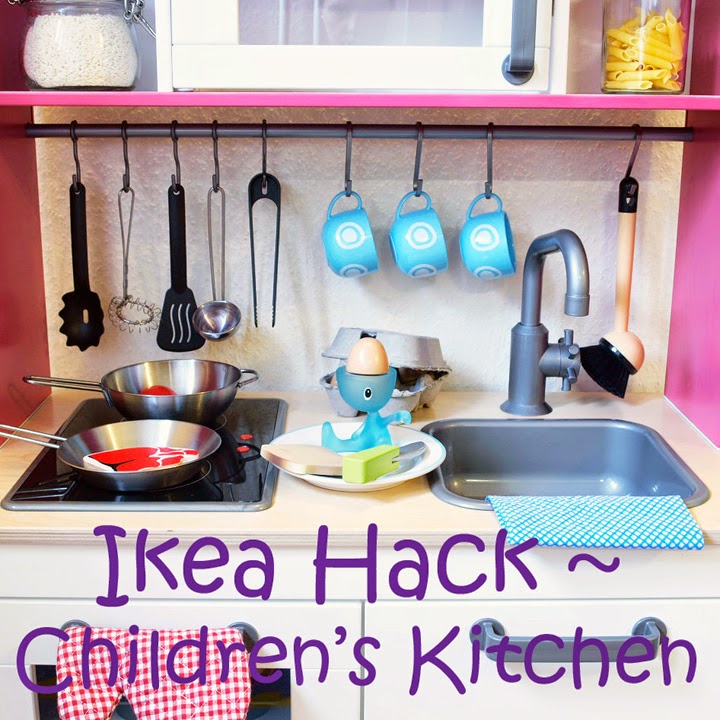
For her birthday, we also bought her the Ikea Duktig cookware set, utensil set and also a plate and bowl set to get her kitchen started! She was lucky enough to receive all the other bits and pieces from friends and family - Early Learning Centre eggs and tea set, GLTC cupcake decorating set and a Melissa and Doug cookie decorating set.
This is my first Ikea hack. Have you ever done an Ikea hack? For some amazing inspiration, have a look at this selection of boards from pinterest. Happy Hacking!!
Sprout’s House
xox


Pssst....If you enjoyed my post, I'd be really grateful if you shared it using the PINK buttons below.
Linking up at ~
Redoux Interiors
The Pin Junkie
Five Little Chefs
Bloom Designs Online
Huckleberry Love
Tumbleweed Contessa
I Should Be Mopping The Floor
It's So Very Cheri
More posts from V de Trense