Waterless Snowglobe Tutorial

Hello everyone!! Christmas is just around the corner and I have been having lots of fun making Christmas crafts and gifts for my friends!
These waterless snowglobes came out so cute, I thought I would share with you how I made them. :)

I started by bleaching out a bunch of bottle brush trees that I purchased at Michaels. I just threw them in bucket of water with a bleach solution of about 4:1 (water to bleach) After about 15 min they looked like this.


...and I covered it with this cool burlap and lace ribbon that I found at Hobby Lobby. You could also cover the box with any paper or fabric.


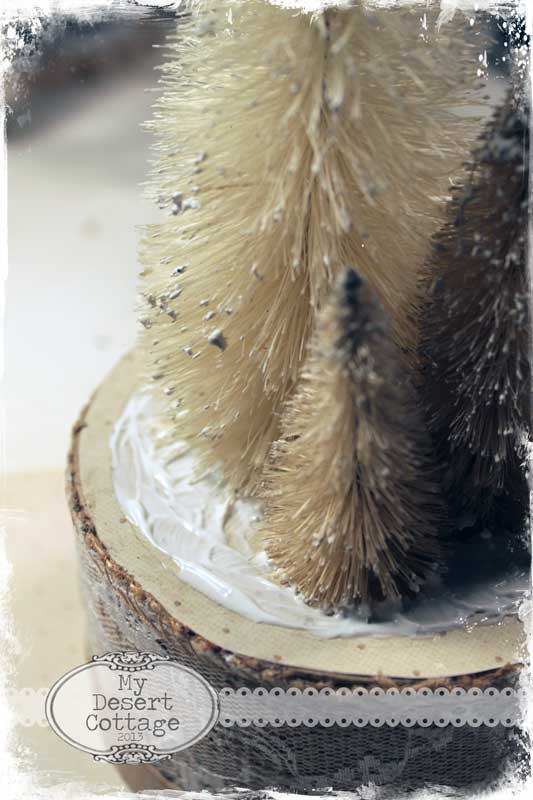
I added paper to the top, but found that it was really unnecessary. I poked holes where I wanted the trees to go.

As you can see, I pulled the bases off the trees because I wanted them to sit lower on the box. I used a bit of glue to secure them.


...and sprinkled mica snow on it. Then I decorated the trees with pearl garlands, pearls and rhinestone beads. (After I finished the whole piece, I realized I had actually planned on doing something a little different, so I made some changes... I'll show what I did in a few more pics)

I wanted to mix rustic with refined so I used natural jute to wrap around the top of the jar. I used a hot glue gun for this because I wanted it to hold right away.

Decorating the box came next. I used gathered lace on the bottom as well as silver tinsel garland and Platinum Stickles glitter glue.

Then I glued the jar upside down onto the top of the box, and added some more Platinum Stickles glitter glue to the top of the jute.


Then I added some jingle bells that had been wired together and glued the whole thing on top of the jar.

This is what it looked like when I was finished, but as I said... I was a doofus and didn't do what I had originally planned. I decided to carefully tear it apart and make some changes.:)

What I really wanted was an image of vintage children playing in the snow. I printed the image out on my computer and glued it to a piece of heavy cardstock.


Once I ripped out the front tree and replaced it with the image, the whole thing came together the way I had originally wanted it. :)


Here is the second one I did. Instead of using a box for the base I used a large inverted tart tin for the base as well as a small one for the top. The jar is smaller too. I added some snowflakes to the outside using Frosted Lace Stickles glitter glue. Then I decided I didn't like it and scraped it all off! LOL! Hey, it's a girls prerogative to charge her mind right???

Well I hope you enjoyed my little tutorial and it inspired you to do something creative today!!
More posts from