Reupholstering a chair... Before and After!

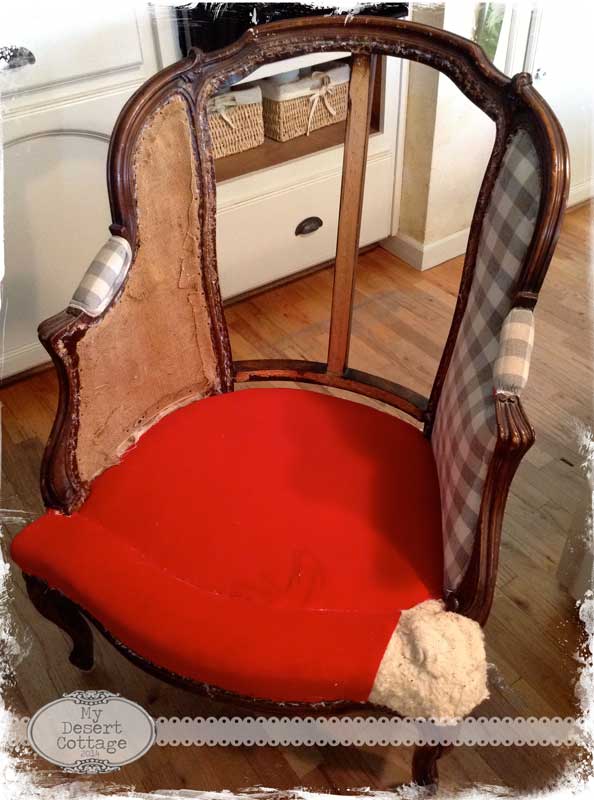
Almost 15 years ago my Mom gave me this chair that belonged to my grandmother. When I received it, it was a bright orange and totally not my style! Then several years ago I had the opportunity to get it professionally reupholstered with this blue and grey check. (The cushion is missing in this photo but it matched the blue check) At the time, my style had a lot more color in it and was a little more "country". For the last 5 years or so the chair has been cast off into the storage room never to see the light of day. Until now!!!

I got the wild idea that I was going to attempt to redo the chair myself! I slowly began stripping it down layer by layer. I was hoping that after removing most of layers I would be left with a perfectly lovely deconstructed chair like I have pinned on my Pinterest board "Love affair with Chairs" Alas... that was not to be. :(

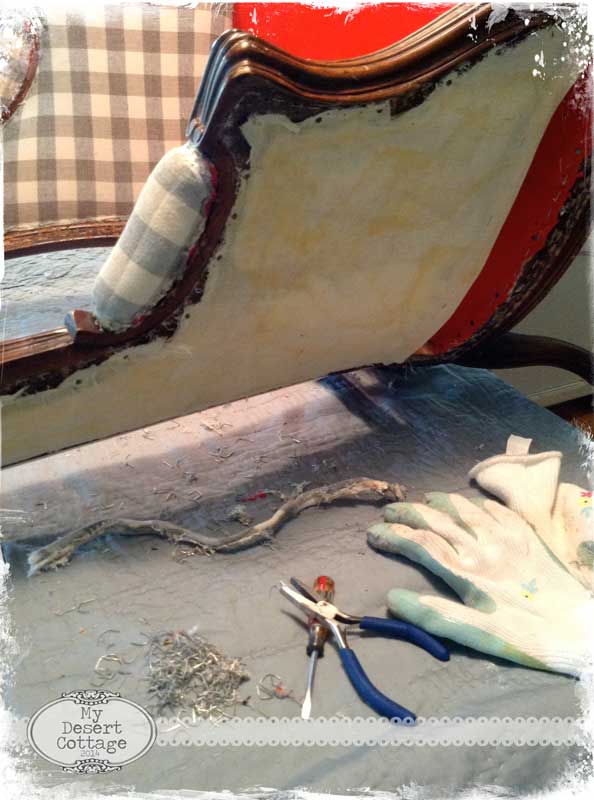
I broke out the gloves (really important... trust me) pliers and a flat head screw driver and began removing the thousands of staples that were in this chair. (I am not exaggerating!) It seems that every time this chair was redone (about 4 times I am guessing) they never removed the old staples and only added to them!!


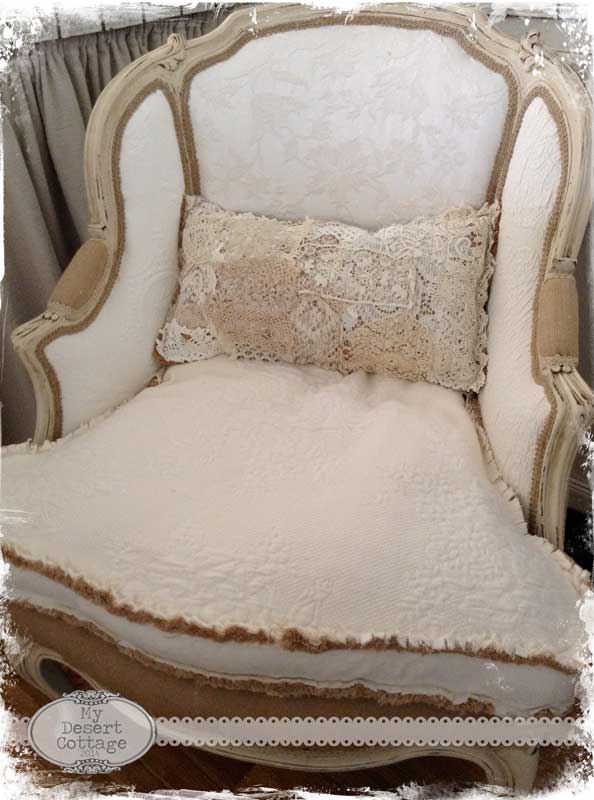
I decided to paint the frame and distress it before I started added fabric back.
Are you ready to see the after???
Are you ready to see the after???

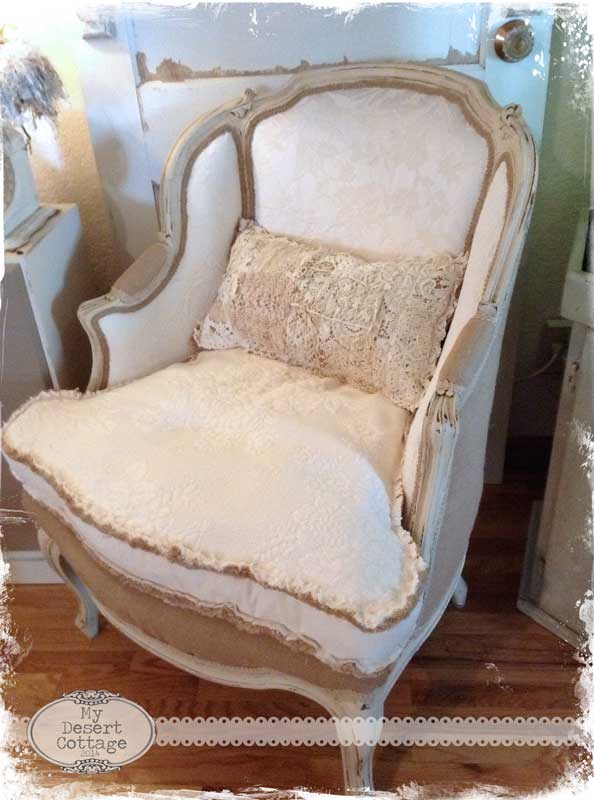
Ta Da!! Holy Moley was it a lot of work, but I'm really happy with results and I saved myself about 400 dollars!!

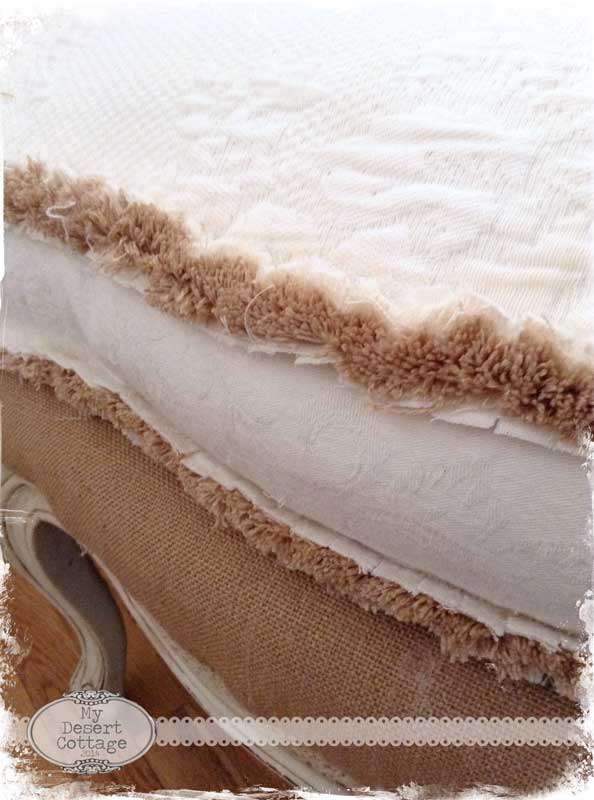
The back and the bottom under the cushion is all done with a very tight weave upholstery grade burlap fabric.

I decided I didn't want to spend any money so I patchworked it all together using a different fabric on each of the panels and the cushion. They are all different patterns of matlesse' or textured tone on tone fabric.

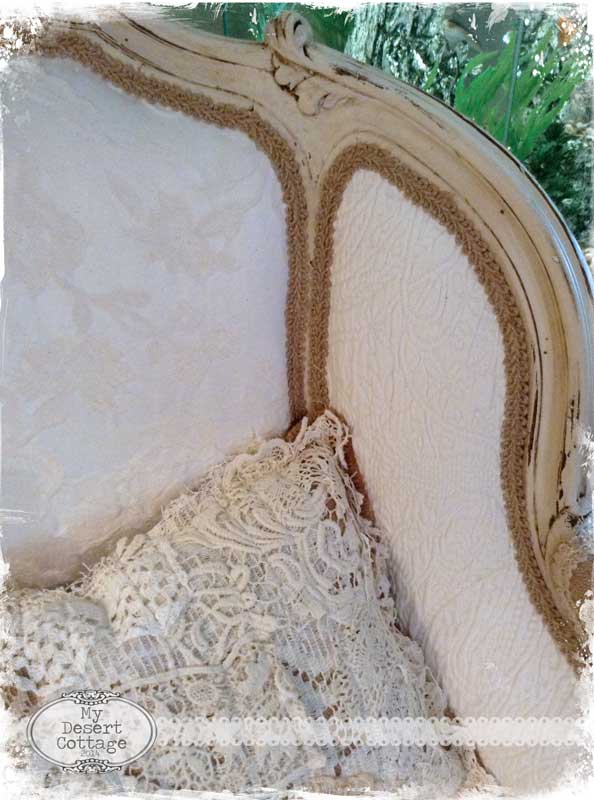
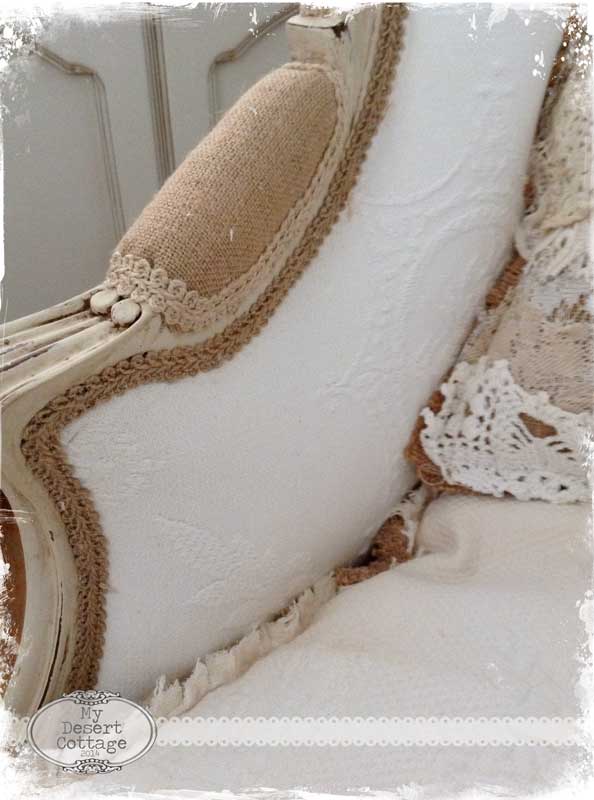
I didn't have enough burlap gimp of either color to do the whole thing, so used both!! I like the way it looks and I think it adds to patchwork look.

To help give me a little of the "deconstructed" look I really wanted, I sewed the seams on the cushion inside out so that they showed. I added some burlap colored fringe to them to to bring some of that color to the cushion.


And last but not least... this is the pillow I made for it. I saw something similar at a store called Rustic Stuff here in town. I fell in love with it, but at $120.00 it was out of my budget. I used some more of that tight weave burlap I had and sewed layers of lace pieces to it using vertical lines about an inch apart. I left the seams on the outside of this one too. I like the look for stuff like this and it is sooo much easier than turning the seams when you are using heaver or bulky fabric.
Well that's it!! I hope you are inspired and realize that you can do it too!!!!
I'm linking up at Inspire Me Monday this week!!
Well that's it!! I hope you are inspired and realize that you can do it too!!!!
I'm linking up at Inspire Me Monday this week!!
More posts from