
Watermelon Nail Art Tutorial

My Watermelon nails received a very warm reception when I posted them a few days back so I'm back with a tutorial for the look. I've seen so many takes on watermelon nails which is what inspired me to do some of my own and I think I put enough of a twist on it to make it something a bit new. The 3/4 border is a cute and simple trick that I really love and find myself going back to time and again. It works on every nail shape but I have to admit that I think it looks extra spectacular on square nails but I'm probably biased on that front. Digital high five to all my square sisters out there!

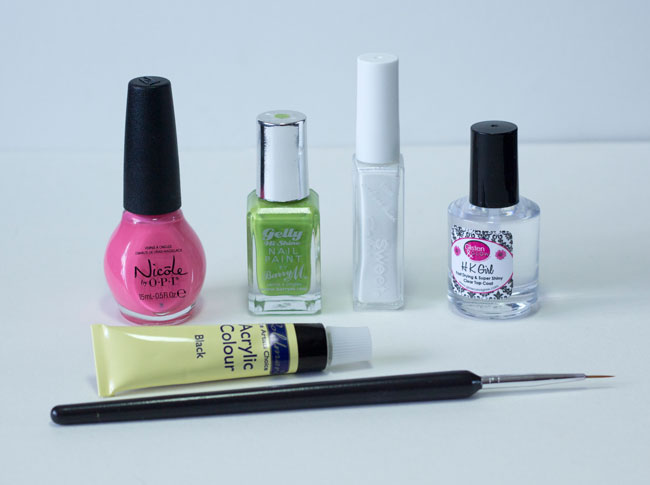
You'll Need
Pink nail polish - Nicole by OPI LeaPink for Joy Green nail polish - Barry M Key Lime Something to outline in white - Sweet Color Liner Polish A Nail Art Brush Black acrylic paint or Black Nail Polish Top coat - Glisten & Glow HK Girl

The Steps
Step 1: Paint on your pink base polish and wait for it to dryStep 2: Using a nail art brush with the green polish, paint a border around your nail but leave the tip
Step 3: Line between the two colours using a liner polish or white polish on a nail art brush
Step 4: Dip the very end of your nail art brush in to the black acrylic paint and simply press down once to create each seed
Step 5: Add your top coat and clean up around the edges using pure acetone on a clean-up brush.
#looknailasaurus
If you fancy trying this yourself, I'd love it if you tag it with #looknailasaurus on Instagram so I can see!If you’re reading this anywhere else besides thenailasaurus.com or your own subscription to The Nailasaurus, then this article has been shamefully stolen.
More posts from Sammy