
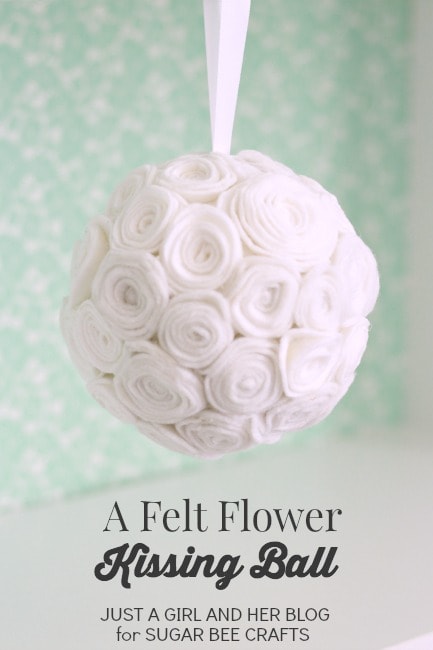
Felt Flower Kissing Ball
Hi there, Sugar Bee Crafts readers! I’m Abby from Just a Girl and Her Blog where I write about home ideas, organization, creative projects, and random happy thoughts. I am so thrilled that Mandy invited me over today to share my felt flower kissing ball with you!

In my house growing up, we always hung a kissing ball at Christmas time rather than mistletoe, so when I had my own house and family, I continued that tradition. Unfortunately, the store-bought kissing ball we had been using up to this point broke last year, so of course I did what any good little blogger would do– I made a new one! Here’s what I used:

- Styrofoam Ball
- White Felt
- Hot Glue Gun ( Extra Glue Sticks)
- Ribbon
- Scissors
- 2 Straight Pins
Step 1- Attach the Ribbon
Before I started on my felt flowers, I needed to attach a loop of ribbon to my styrofoam ball so that it would be able to hang. To do this, I simply cut the ribbon to my desired length, created a loop by folding the ribbon in half, and hot glued the ends of the ribbon to the styrofoam. As an extra precaution to keep the ribbon from falling off, I also inserted two straight pins so it would be nice and snug.

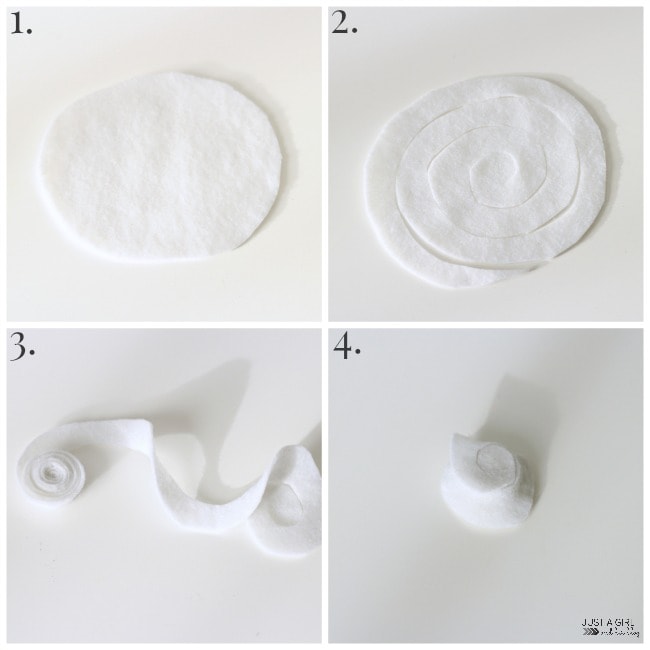
Step Two- Make the Felt Flowers
I then began to create my flowers. This is a good time to put on your favorite movie and get to work– these flowers are very easy, but you’ll need a lot of them, so they take some time.

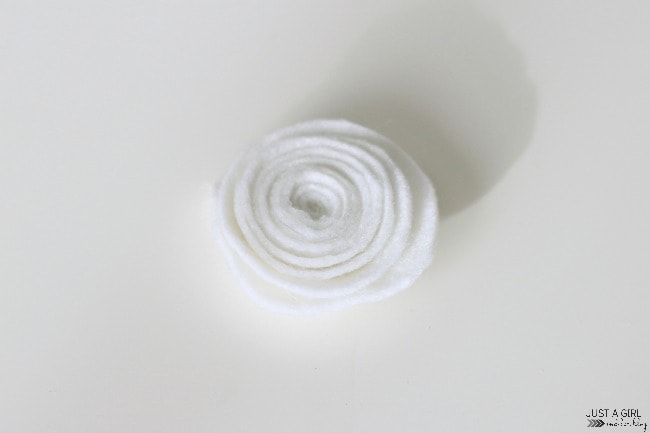
To make the flowers, I cut a circle out of the felt (1) and then cut a spiral shape into the circle (2). Starting at the outer end of the spiral, I rolled the felt around itself, adding a dot of hot glue every few rotations (3). When the felt was completely rolled, I glued the end tab to the bottom (4), and I had my flower!

Step Three- Glue the Flowers to the Styrofoam Ball
When I had made several flowers, I began attaching them to the styrofoam ball using hot glue. I made a mixture of bigger and smaller flowers so I would just work them around each other until they fit together nicely, not leaving any gaps.

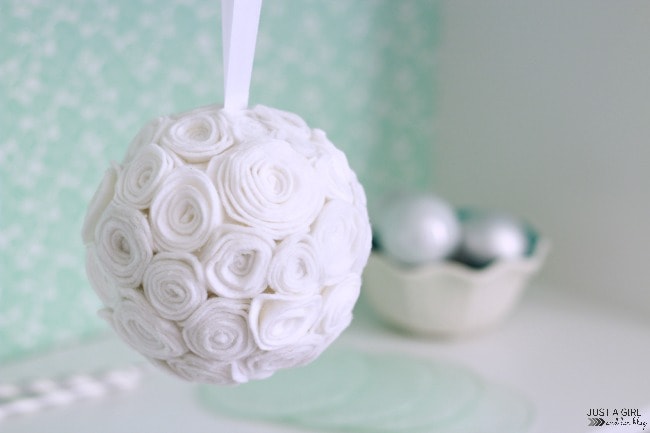
I then continued to make flowers as needed and add them to the ball until it was all filled up and my kissing ball was complete!

This project is so simple, and it’s definitely a good one to work away at when you’re stuck inside on those cold days that are becoming all too frequent! I love being able to carry on the kissing ball tradition in our home, and having one that is handmade makes it even more special.
Thank you so much to Mandy for having me today, and thank YOU for reading! I would love to have you over for a visit to Just a Girl and Her Blog where you’ll find more holiday projects like my monogrammed ornaments or my gold and white Advent Calendar. Hope to see you there! Have a wonderful day!

The post Felt Flower Kissing Ball appeared first on Sugar Bee Crafts.