Step by step how to PAINT GINGHAM WALLS

If you love "Gingham" I will show you step by step how to create a GINGHAM effect on your walls. By no means am I a professional painter or designer- however I love paint, especially Dulux. Dulux paint makes you think you are a professional with the results that you get.

Why Gingham? Well- I am a quilter, I design and sew QUILTS. I was inspired by a company called Riley Blake Designs, that manufactures fabric collections, especially GINGHAM. For years now I have been working with them creating Gingham Project Designs. The more I worked with GINGHAM, the more I got thinking I must PAINT my sewing studio to reflect this classic. There is something about YELLOW and WHITE that just screams FRESH, BRIGHT and yes CLASSIC!
Can I just say, I WISH I HAD A TUT when I first thought of this...Which is one reason why I wanted to share this effect with you. Ohhh some asked about using a GLAZE, I am not a fan of GlAZES....they are expensive, and really don't give you the results of a good quality paint like DULUX. Also to answer questions about Benjamin Moore...it is an ok paint for just painting...but think about a high quality paint as you will be doing so many layers of paint...and as you can see, this Dulux paint came out perfectly....
Like to get started? You will need at least a week for this Gingham Effect. You don't want to go to all this trouble and not get PROFESSIONAL results do you?
TOOLS
Dulux Paint 3 gallons/litres 2 white Diamond Perle
, 1 contrast colour ( yellow) Corn Silk Ruler ( I used a quilting ruler 12.5) optional Scotch 3M painters tape 2-3 rolls ( I used 2.5 rolls) paint brush I used a 3 inch wide top of the line Dulux for Arylic roller and pan, extension pole if needed..
4 inch roller and a 3.5 inch Dulux paint brush for vertical lines pencil magic eraser
First you will need some TOOLS for this project, here is the list of "TOOLS" that I recommend.
I have tried numerous paints over the years but I swear by DULUX for coverage, brightness, and the ability to wipe off marks of any kind without removing the paint...

You can use any ruler that you like...but this is what I used. A 12.5 Quilting ruler, I chose this because I thought this would be a perfect size for my gingham squares. You can use any ruler that you like, but this makes it very easy to do.
Next you will need some this, Scotch 3m painters tape. I have tried others, this is the only one I recommend. You will need at least 2-3 rolls.

ScotchBlue™ Painter's Tape is the original blue tape that DIY Painter's and pros have loved for over 20 years in North America. Now this legendary tape is even better! ScotchBlue™ Painters Tape Delicate Surface 2080EL with Edge-Lock™ Paint Line Protector is ideal for freshly painted surfaces (24 hours old) and other delicate substrates because it removes cleanly with no surface damage. Edge-Lock™ Paint Line Protector provides extra insurance to achieve super sharp paint lines. Plus, this tape features the ScotchBlue™ logo and the product number printed in orange, right on the tape. So you can find it easily in a drawer or tool box and know what you're choosing and using.
Recommended For: Freshly painted surfaces (24 hours old), Accent walls, Stripes, Hardwood floors, Other delicate substrates Adhesion: Low to Medium Good for: Interior Removal Time: 60 day clean removal UV Resistant: Yes
Ok, now that we got the tools out of the way... Let's take a peak at my CANVAS ( walls) before I started..

I loved this sewing room, but it always seemed dark. Before it was my sewing studio it was the guest bedroom, so the taupe was ideal....but it needed to be brighter!

These photos were taken at around the same time of day... *8:22 am.
INSPIRED? ok, let's get started.
Take down all photos, window treatments and fill any holes that need filling, sand, wipe down all dust and cobwebs...
Now let's get rolling...I used Dulux, Diamond PERLE WHITE to cover my taupe walls. I did 3 coats, although 2 coats looked fine, I wanted to be sure my walls were a bright white canvas...This took 3 days, I wanted to be sure everything was completely dried and cured.
For the Gingham Effect, this is an important step, you want to be sure your walls are not just dry to the touch, they have to be dry between each coat...
My recommendation ....take your time. ( one coat each day for 3 days)
This photo is 3 coats of paint....no sign of the taupe walls!
Day 1-3


Paint chips that I used.. The Diamond Perle white was my canvas... and Corn Silk for the yellow... to create the gingham effect for the horizontal lines.....and then a combination of yellow and white for a lighter yellow for the vertical lines.... I took 2 cups of white and 2 cups of yellow to lighten it up for the brushing of the vertical lines..
Day 4
Start marking your walls...I began marking at the door....

I pushed the ruler right up to the ceiling and began marking with just a regular HD pencil.. I marked all of the lines, and kept moving the ruler from the ceiling all away around the room. and then put the ruler below my last mark .
To make the Gingham effect, I chose to do only 5 rows ... You will see why as we continue...
So first mark all your walls like the diagram below... This will take you up to an hour depending on the size of your room.
I used a step ladder to mark my walls ( yes you will need some kind of ladder)


You are only going to tape the horizontal walls first... be sure to tape below your marking lines....
TIDBIT....when I added the blue tape I took a credit card and made sure the tape was adhered to the wall securely....
Next step...You will use some of your white paint to go over all your tape lines ...just use a small brush and paint on the wall right on your blue tape edges- this will give you a nice seal so when you paint your contrast colour, ( my yellow) it will be sure not to bleed through the tape)
Top line towards ceiling no PAINT, second row, CONTRAST in yellow, third row, NO PAINT fourth row, CONTRAST in yellow. fifth row, NO PAINT. Bottom will be all white... You will be adding some moulding once all completed...

Once completely dry....I waited 3 hours before I began rolling my contrast colour...
Now open your can of YELLOW paint...
I rolled on being very careful not to roll too much paint, otherwise it would splatter on my
white walls...If I had an accident...I used my MR Clean magic sponge to wipe off any spills..
I think I had 1splatter, which I wiped immediately.


2nd row all completed....Now walk away for 24 hours... do not even try to remove that tape....leave it on - no peaking.
Day 5
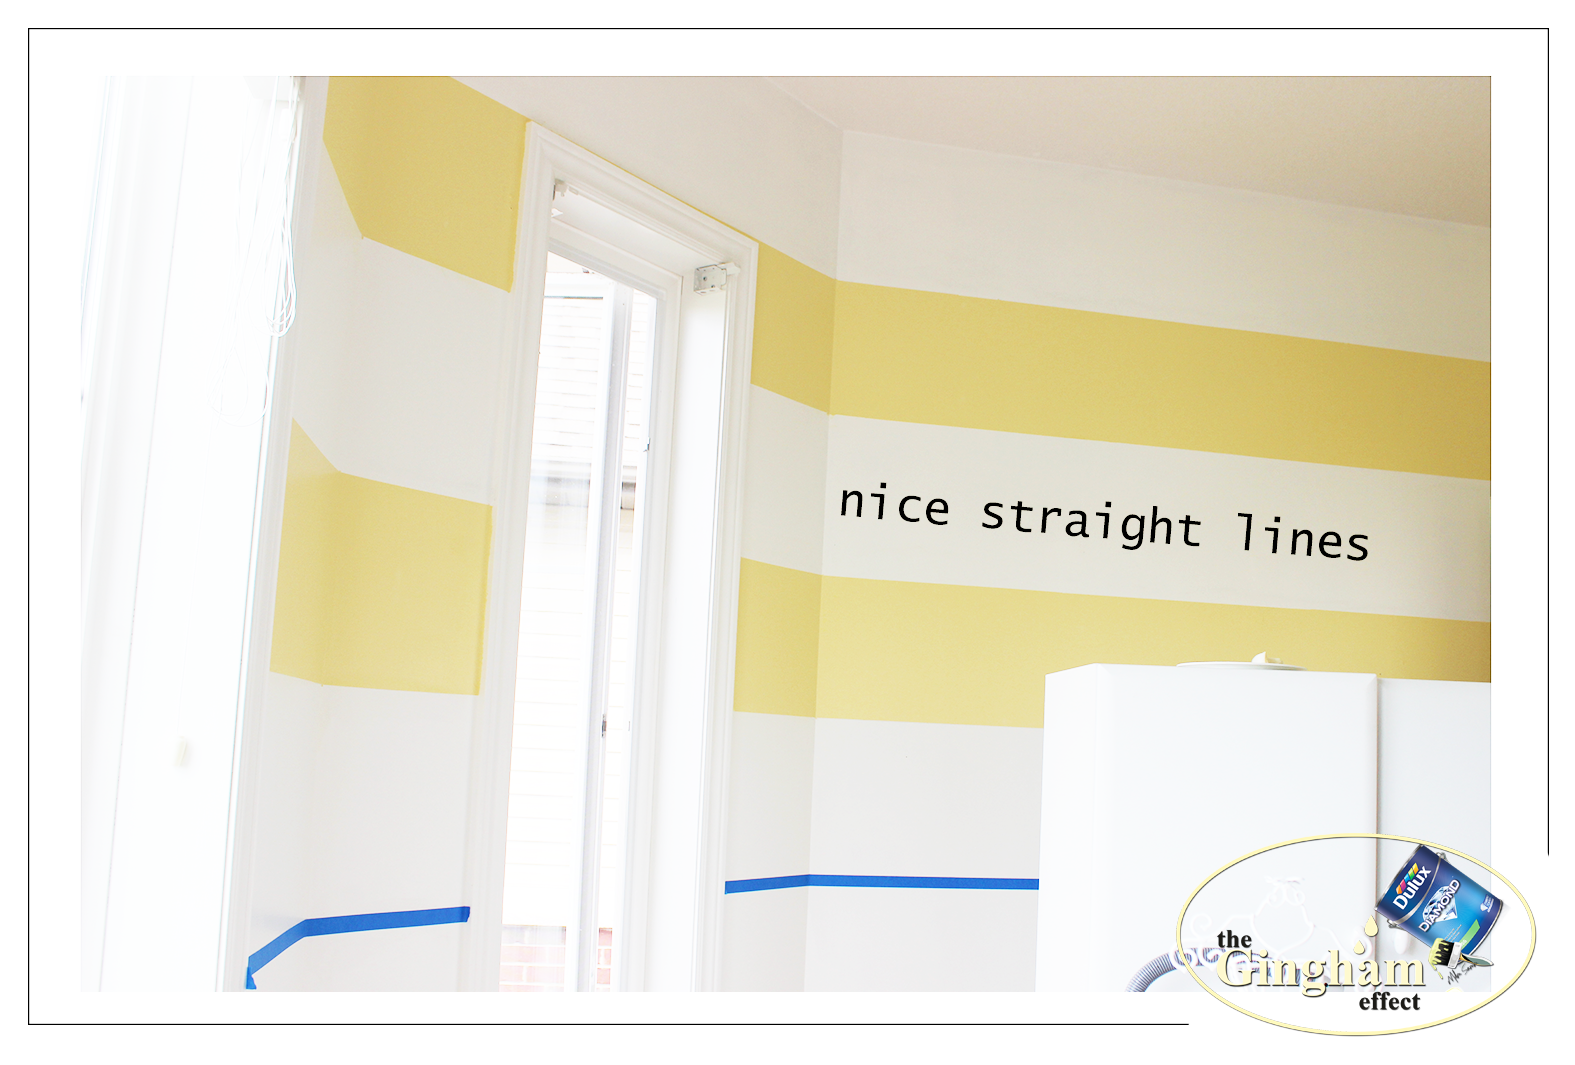
Now we are going to remove the tape.....it will come off sooooo easily,
and you will be left with perfectly straight horizontal lines.


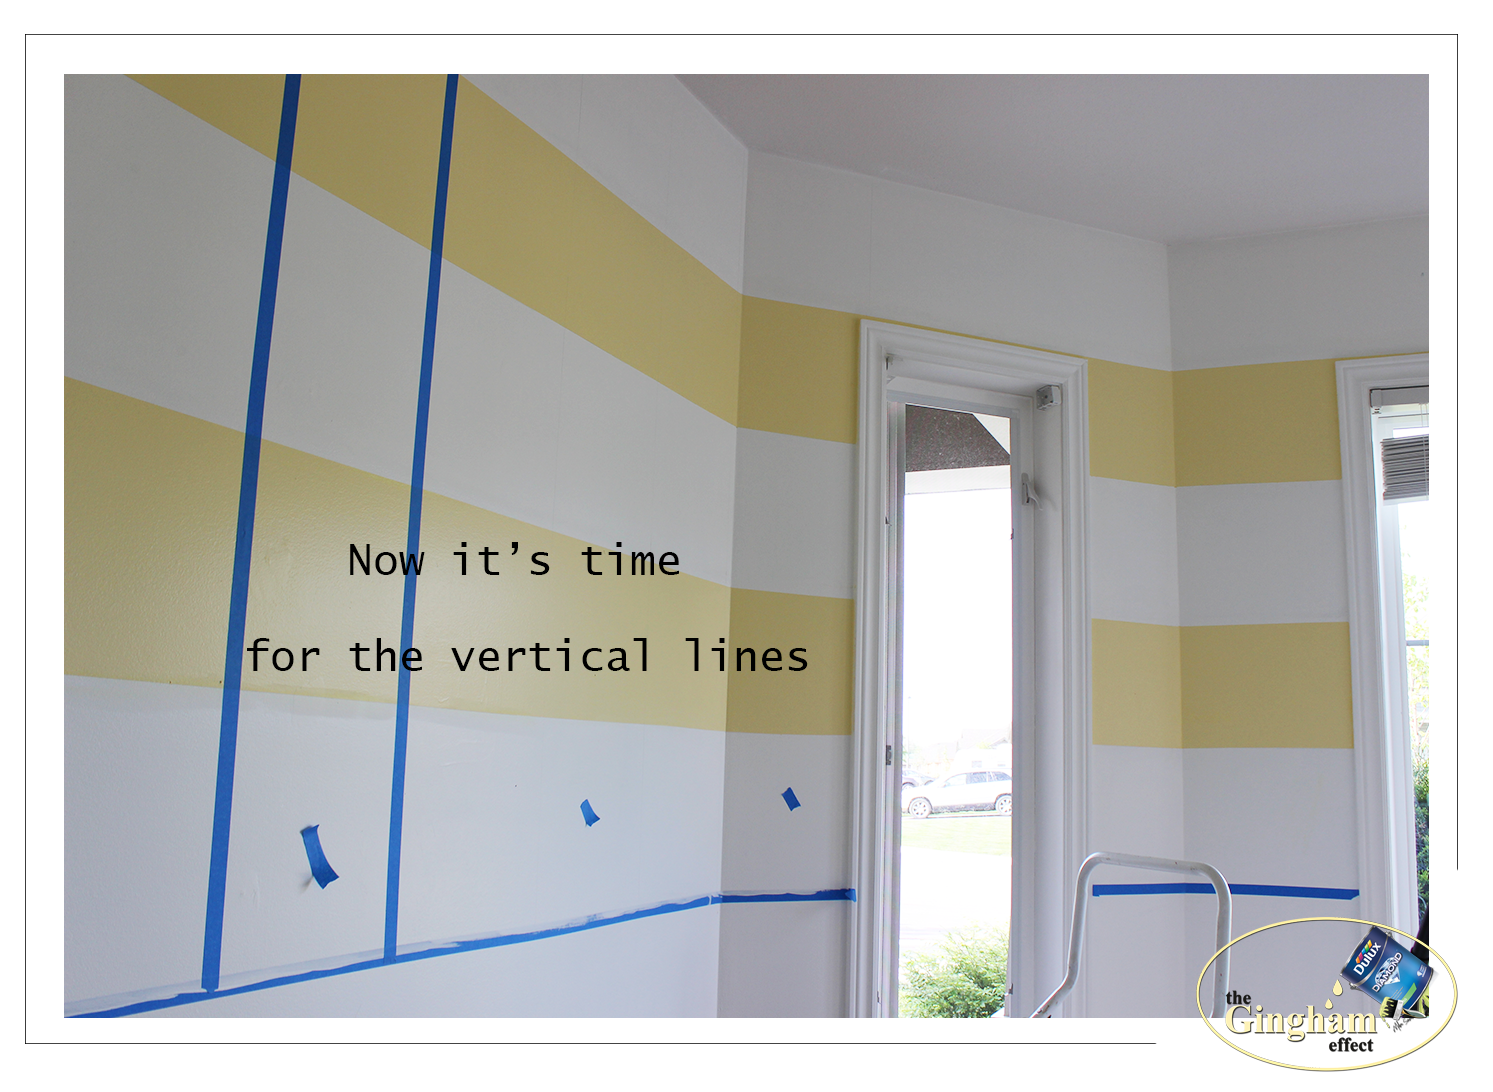
Still on Day 5, now you are going to mark your lines vertical...
using your ruler once again, 12.5 square inches apart...
( the blue tape...leave that one on, so you know where to stop drawing your lines)


Now you will repeat with the tape every 12.5 inches around the whole room...Place your tape
on the outside of each drawn line... and like I did on the horizontal lines, you will brush a thin coat of paint
on the inside lines but this time using your yellow paint.
YOU WILL WALK AWAY for another 24 hours...
To be sure it is dry completed...
Day 6
Almost done.....today you will be BRUSHING on your paint using
vertical strokes....This way it will go on lighter and will give you
that GINGHAM EFFECT you will be wanting.
Brush your paint on using vertical strokes..
TIDBIT: I had tried on a small board rolling paint on both
horizontal and vertical, it did not have that gingham effect...
it just looked like solid yellow squares....
So rolling horizontal and brushing on the paint
looked so much better!

One one coated added ( only one needed) ....this is still wet in this photo.. and the one below....the next day (DAY 7) when I peeled off the tape ( just noted...the lines were painted to the ceiling...forgot to take a photo of that.. I needed a bigger ladder)
Below you can see they were painted flush with ceiling.

You can see your lines on the very bottom...this is where you will add moulding or chair rail....
I added just a thin moulding because I wanted my cabinets to sit flush against the wall.
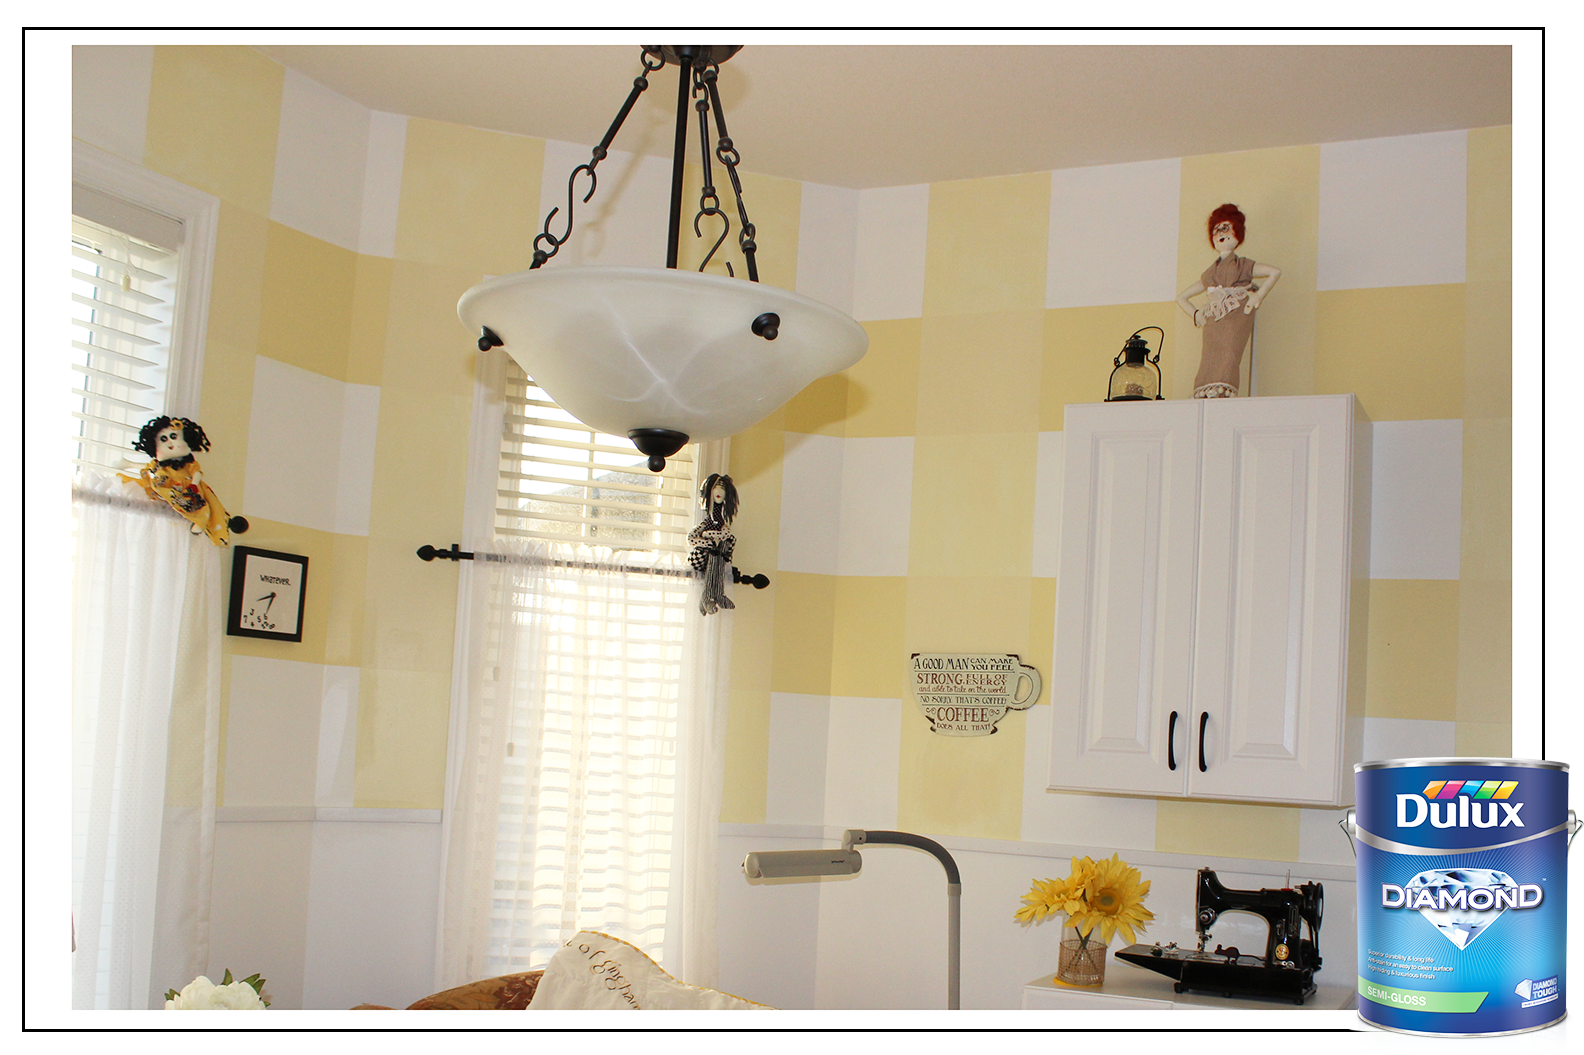
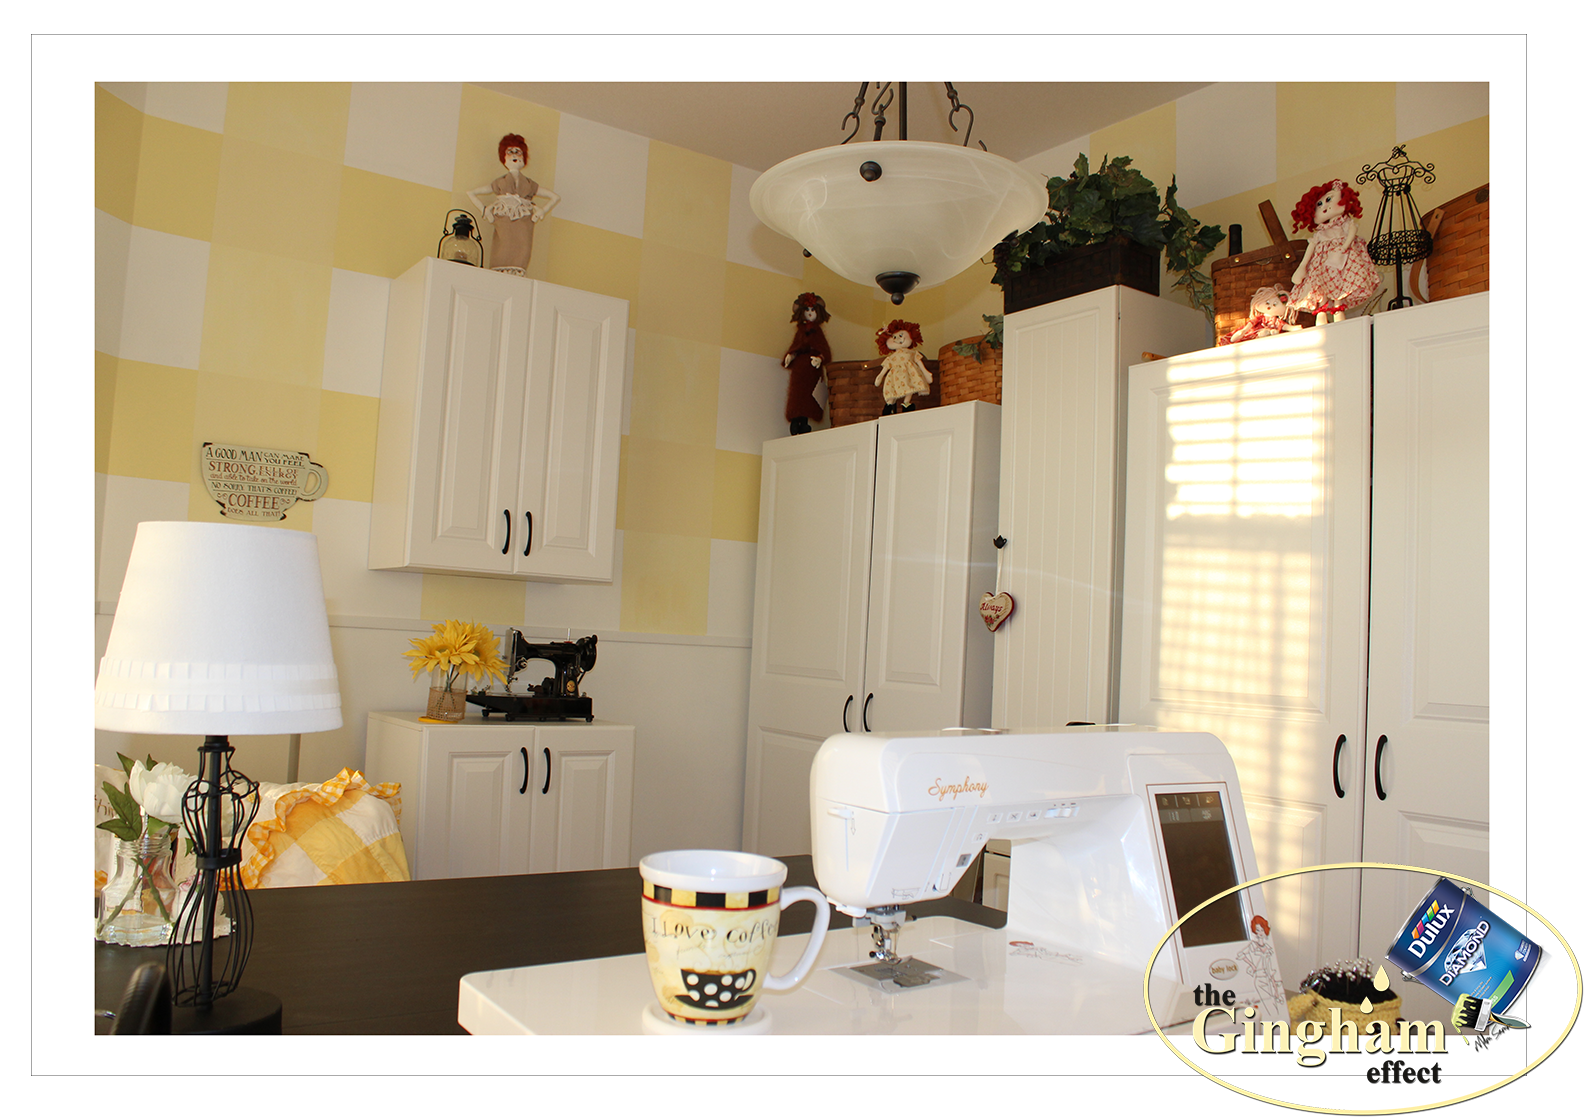
Here are some photos of what the rooms looks like completed with window treatments
and cabinets...
DAY 8
Everything is completed....
I can only imagine doing this treatment in blues for dining room
or greens and taupes for a bedroom, I did think of reds but unless you had perfect
walls and a very large room, I think it would show every little mark on your walls...
I am just not that brave to try it YET?
Any questions you have, drop me a line
[email protected]
I will do my best to cheer you on!
I added just a thin moulding because I wanted my cabinets to sit flush against the wall.
Here are some photos of what the rooms looks like completed with window treatments
and cabinets...
DAY 8
Everything is completed....
I can only imagine doing this treatment in blues for dining room
or greens and taupes for a bedroom, I did think of reds but unless you had perfect
walls and a very large room, I think it would show every little mark on your walls...
I am just not that brave to try it YET?
Any questions you have, drop me a line
[email protected]
I will do my best to cheer you on!


Plan on 7 days to do this treatment, if you follow all the steps you too will get the same results...
Even in the evening this room is very bright. A great colour choice for a North -East Exposure.
Even in the evening this room is very bright. A great colour choice for a North -East Exposure.

More posts from