
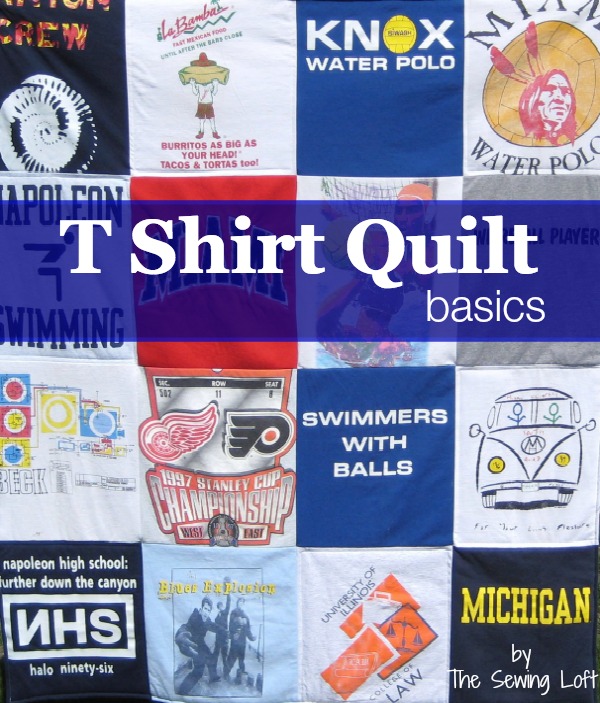
How to Make a Tee Shirt Quilt: Materials & Cutting
Over the years, I have made countless memory quilts for clients. The materials range from baby clothes to concert shirts to full-blown 3-piece suits. The excitement and joy my clients express during the “big reveal” of their memory quilt is always truly touching. The one question that I am always asked is, “How did you do that?”
This “How To” series will walk you through the basics of creating a T-shirt quilt from start to finish! Since it’s back-to-school time, this is a good opportunity to go through your kids’ closets and pull out all the T-shirts that don’t fit them any more, and then turn them into a memory quilt (or several). So let’s get started!

This project is for all levels.
Skill Level- 1 1/2 Buttons
Today we’re going to cover gathering your materials, determining your finished quilt size, and cutting.
Materials for making a T-shirt quilt:
- T-Shirts
- Tricot fusible interlining
- Batting
- Backing fabric (I like to use flannel)
- Iron/Ironing board/Press Cloth
- Scissors
- Rotary cutter and mat with ruler
- Sewing Machine
- Ruler or measuring tape
For today’s portion of the instructions you will only need the T-shirts, cutting materials, pressing supplies, and tricot fusible.
Basic Instructions:
1. Gather all of the T-shirts you would like to include in your quilt. (Be sure that they are clean and ready to use!) Find a flat surface to lay out your T-shirts for cutting.

2. Determine the size of your finished quilt. Before you can start cutting each square, you need to determine the finished size of your quilt and number of squares you will be including.
Example: I will be creating a 25 square/pieced quilt that will finish as a full (82″ wide x 87″ tall, give or take).
I will create 5 rows of 5 blocks. Each block will finish 16 1/2″ wide x 17 1/2″ tall, but I need to add seam allowance.
To make things easy, I am going to add 1/4″ seam allowance to each side. Each cut block will be 17″ wide x 18″ tall.

3. To start my process, I like to cut fusible interlining larger than my finished block. (This will give me wiggle room later when cutting.) For speed, I suggest cutting them all at once. Cut 25 (or the number you will need for your quilt size). (This goes faster if you have a rotary cutter, cutting mat, and ruler!)
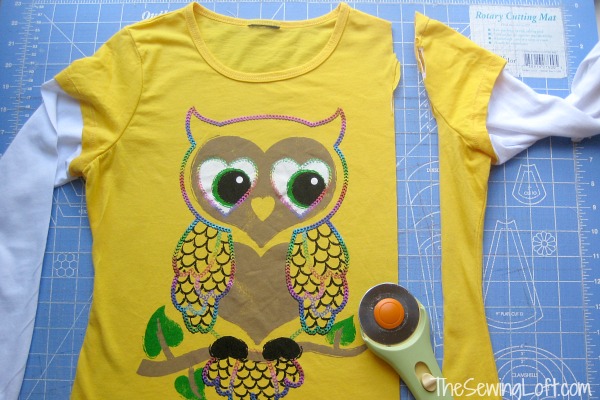
4. Use your scissors to cut off the necks and sides of tee shirts. You will be left with 2 large rectangles.

Tip: Consider fusing a larger piece and before cutting your tee shirt to size. Yes, it will use more interlining but it will be easier to line everything up during the ironing process.
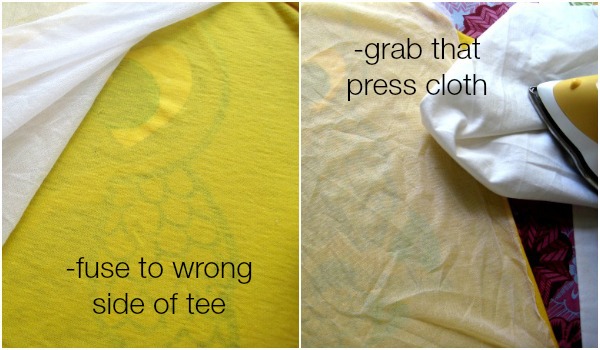
5. Following the manufacturer’s instructions, lay fusible interlining to the wrong side of your T-shirt fabric and fuse. For T-shirts, this would be the inside of the shirt, so that your graphic details show on the right side of the quilt. *Use your press cloth here! If you iron the wrong side of fusible it will melt to your iron. (Trust me, I have done this- it is no fun to remove!)

6. After all pieces are fused, cut them to the size you determined for your blocks in step 2.
Once you finish this, you’ll be ready to start stitching! Come back for more on How To Make a Tee Shirt Quilt!

Hello! Are you new to The Sewing Loft?
If so, I’m glad you stopped by and hope that something has inspired you to keep your needle moving! Don’t miss a single project and subscribe via email HERE! Bonus- free embroidery pattern with newsletter sign up. Another great way to connect with me is via Facebook, Pinterest, Twitter, Google or Follow my blog with Bloglovin. I’m looking forward to getting to know you and creating together!