
Robot Stamped Tote Bag

I don't know about you but I feel guilty every time someone hands me a plastic bag. I try to be that person who never needs to say yes to a plastic bag but often I find myself ducking into the shops on my lunch break or on my way home to grab groceries or last minute purchases. This is why I resolved to actually sew myself something that would help with this problem. Enter the roll up tote bag.
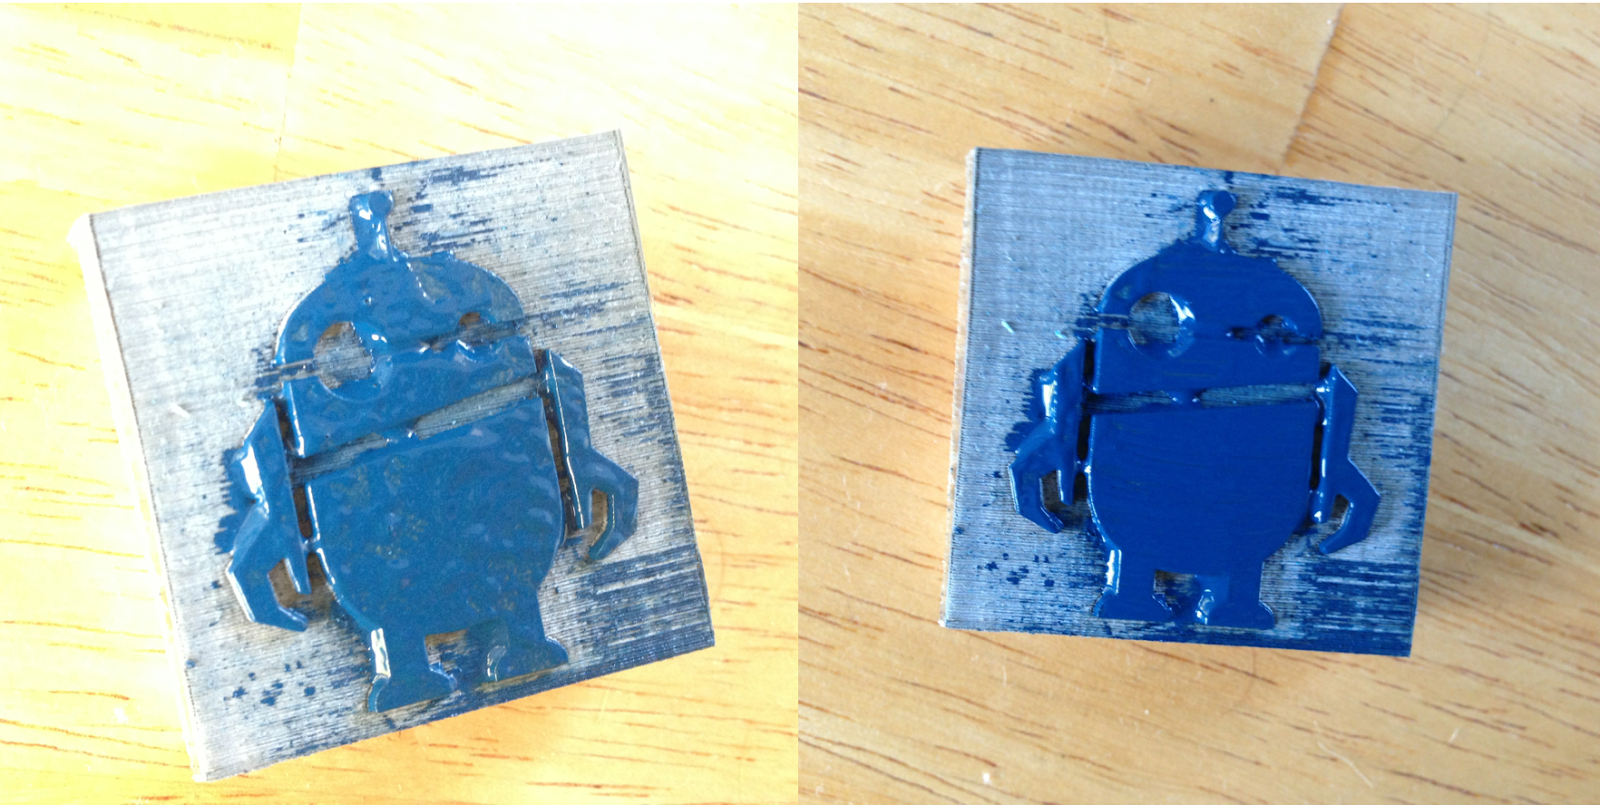
The lovely people at Craftpon offered me some products to blog about (lucky me!). I had a look through their 3 stores Craftpon, Stampcow and SNVY. I decided on these adorable robot stamps from their Stampcow store. I also chose some bird stamps too but I just couldn't resist working with the robots first!


I used two different fabric paints that you can buy from Lincraft or Spotlight (or a craft store of your choice if you're not in Australia).

Maybe you've made a tote bag before, maybe you haven't. So I'll share the measurements here for you anyway. Basically I wanted to end up with a tote bag 40 centimetres wide by 45 centimetres long. The measurements I cut were 49.5 (45 1.5cm bottom SA 3cm top SA) by 43 (40 1.5cm SA on either side). I wanted my straps to be 2.5cm wide by 67cm long. The measurements I cut were 73 (67 3cm SA on either end) by 10 (2.5 cm x 4 so I could fold the sides in halfway and then again ~ like bias tape). I also made some straps to sew in the bottom seam that I could sew a snap fastener on the end of. This way I can roll the bag up and snap the fastening shut and keep the rolled up bag in my handbag tucked away. I initially made straps 15 centimetres long based on rolling up my muslin but for the finished product I made them 19 centimetres because the straps and seams add extra bulk. I made one strap 1cm longer than the other so the straps were 11 (9 1 cm SA either side) and 13 (11 1cm SA either side) by 2.5 (1.5 1 cm SA either side) . Ok enough maths.

I stamped my pattern out on the fabric being super careful with the amount of paint I used. The photo below is a bit terrible but I learnt along the way that I got a really even stamped image when I dabbed the paint on covering the whole robot and then used the brush to stroke it evenly across the stamp.

You might be able to tell from the below photo that some of my stamping was better than others. Sometimes the light blue robot had two eyes, sometimes he had one. But that's cool it's all part of the charm right?
I left the fabric for about an hour to dry before coming back to sew it all together. I overlocked the seams then made the straps for the bottom.

I pinned the straps in place then french seamed on my regular machine. On a side note I did trim the excess before turning the straps out but they're still very round looking on the ends. I don't mind them being round but it wasn't my intention. Just sayin.

Finally I sewed up the straps, pinned them to the top of the bag, turned it over 1.5cm and over again another 1.5cm and sewed it all up.

And here she is! A ridiculously cute tote bag that I can roll up and stash in my handbag.
I'm not really sure why I waited so long to stamp some fabric, I've been dying to do this for ages. I think I just held a little bit of fear because I'd never done it before. Luckily theses stamps were so cute (and easy to use) that I was able to whip this up in one afternoon.

I didn't have time to sew on the snap before the sun went down but it's on there bein all snap like. Now I need not fear when people ask if I need yet another plastic bag. Never fear the robots are here!

Use your sewing powers for good!
More posts from Jodie Clark