
Making my Wedding Dress - The Many Muslins
So, the Wedding Dress. Long time no talk.
It's been quite a journey I've been on since October. I'm just very, very thankful I started this thing a year out from my wedding.
The story started at the end of last year with my inspiration for the dress. I ordered a whole lot of supplies online the day I blogged that and within the week I had started my first muslin.
Muslin #1
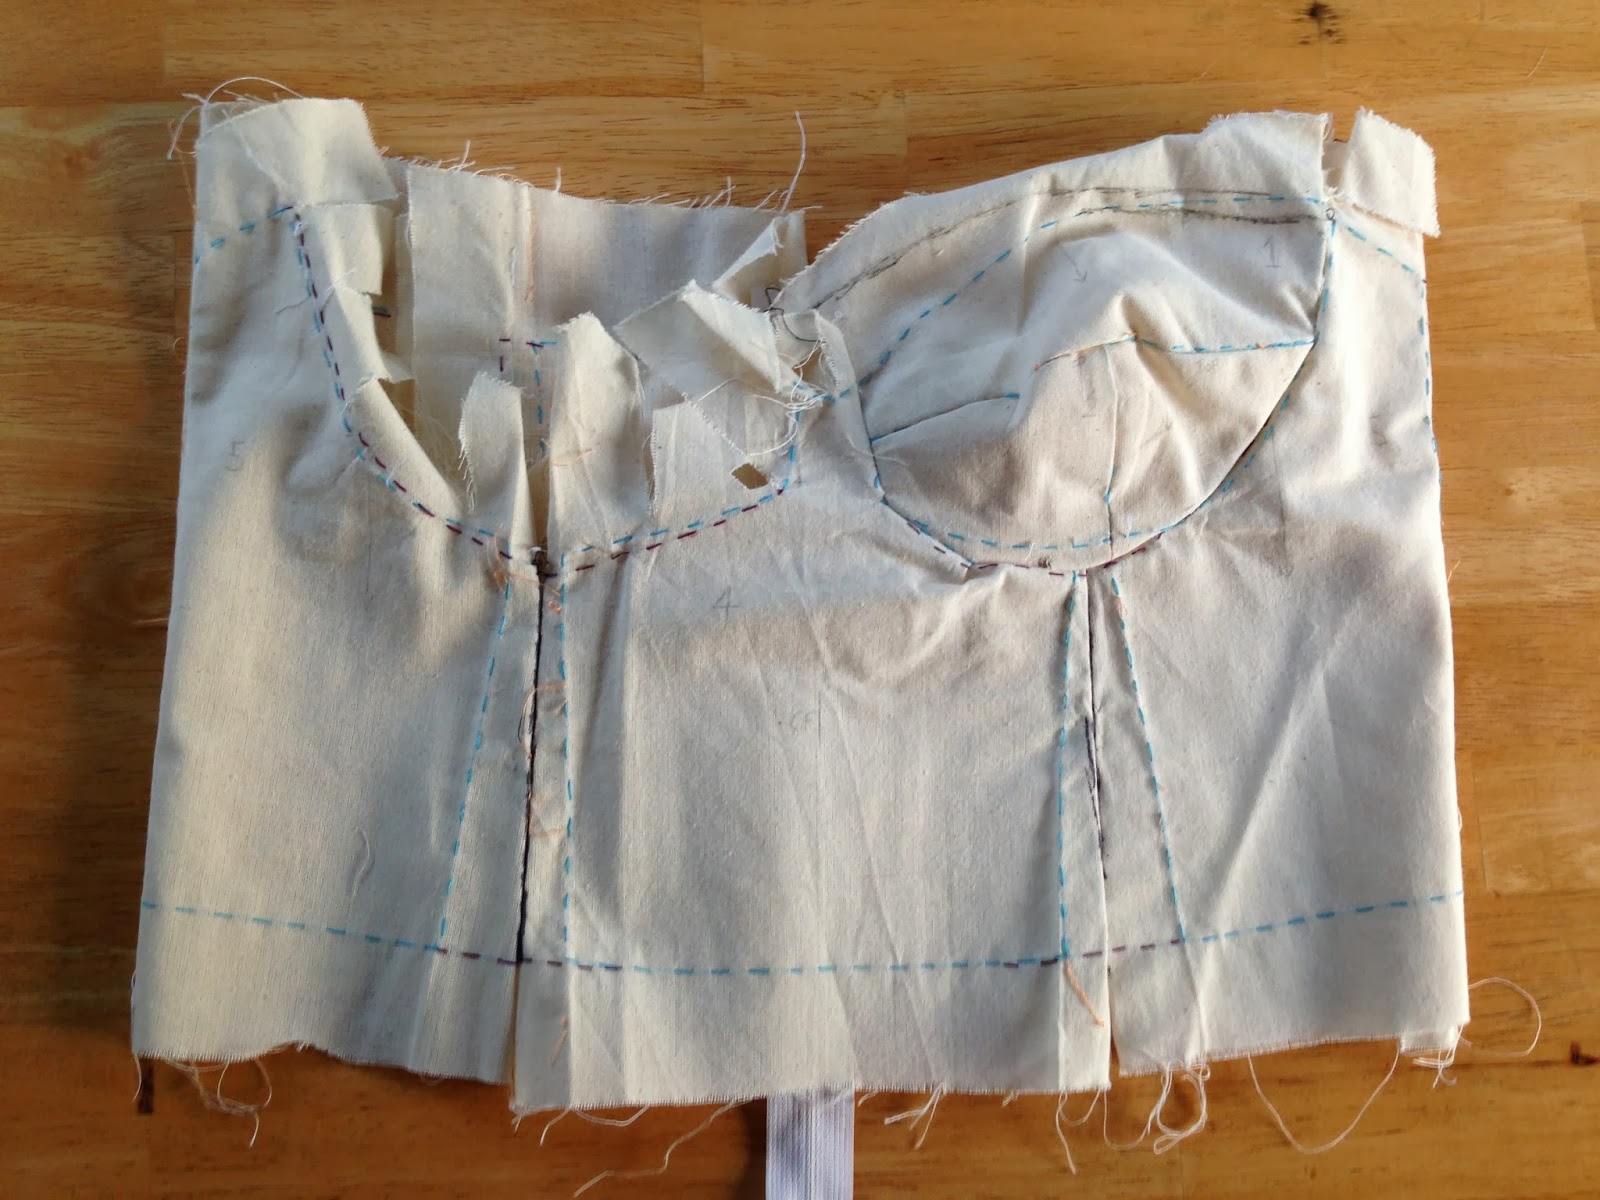
I was using Gertie's Bombshell Dress firstly because the pattern looked awesome and secondly because her course is phenomenal. I was so afraid to tackle my wedding dress prior to watching this course but she made it look SO easy. I did everything as per the instructions - I cut my muslin pieces with a 1 inch seam allowance, I thread traced all the pieces, I used a basting length stitch in an alternating colour and I took my time with every detail of this thing. And I LOVED it. I wasn't sure if I'd enjoy having such a large, long, slow project but it was liberating to sit down for an hour or two at a time and do just one detail of it and do it well without any rushing. I was so full of enthusiasm.
It became clear as I got it all together though that it wasn't quite fitting how I thought it would. The bust pieces were waaay too big and there was something that was just a bit odd about how it fit me. I kept pulling out the bust cups and adjusting them, trying them with padding, without padding, all the while not really loving what I kept looking in the mirror at. It was kind of sad to watch just how small the bust pieces had to get to fit me. It really wasn't doing a lot for my confidence.
I managed to get the bust pieces to a relatively good fit when I realised what it was that I didn't like about this pattern. The pointy boobs. They were just so pointy.
I'm sure this is a lovely pattern on other people but for someone with a small chest it just doesn't flatter. Pointy boobs aren't my thing, especially NOT on my wedding day. So my muslin stopped mid investigation with only one sad pointy boob cup left in it.

Sad muslin is sad.
Muslin #2
Determined to make this bustier bodice I resorted to a more modern bustier pattern with rounded cups and some nice seam lines on it. A Ralph Pink pattern which is actually meant to be lingerie. The intention was to see if I could get the cups to fit and then lengthen to bodice down to a drop waist.

I loved the seam lines on the pattern and I was so excited that it fit with my idea of what my dress would look like when it was finished. But again I hit the same problem. The bust cups had to be tiny to accommodate me and I realised the second time around that it was making my rib cage look really wide.
This was the point at which I had to walk away from muslin making and do a bit of summer sewing to clear my head.

As with my regular sewing journey since I started blogging, this Wedding Dress journey was teaching me a lot about myself, my shape and what I see when I look in the mirror. I assumed because I had chosen some beautifully shaped patterns that I would look beautiful in them. Not so. I'm afraid that the dress was wearing me and not the other way around.
It was time to simplify things and find a shape that would be flattering for me.
Muslin #3
I took a chance on Simplicity 5006. Although this was also classed as a lingerie pattern it had nice seam lines, it already came with a dropped waist and it would hopefully give me the illusions of some curves up top.

Since I came to this pattern after about 2-3 months break I was ready to get back into it with thread tracing and wide seam allowances, writing all over the muslin, pinning like crazy, the whole lot! I got so excited about this pattern that I managed to sew this is up, adjust the princess seams over the bust, do a sway back adjustment, rip the muslin apart, adjust the pattern pieces on my flat pattern pieces and sew it back up in one weekend. It was fitting well enough to see how the lining and the spiral steel boning was going to affect the fit and shape.

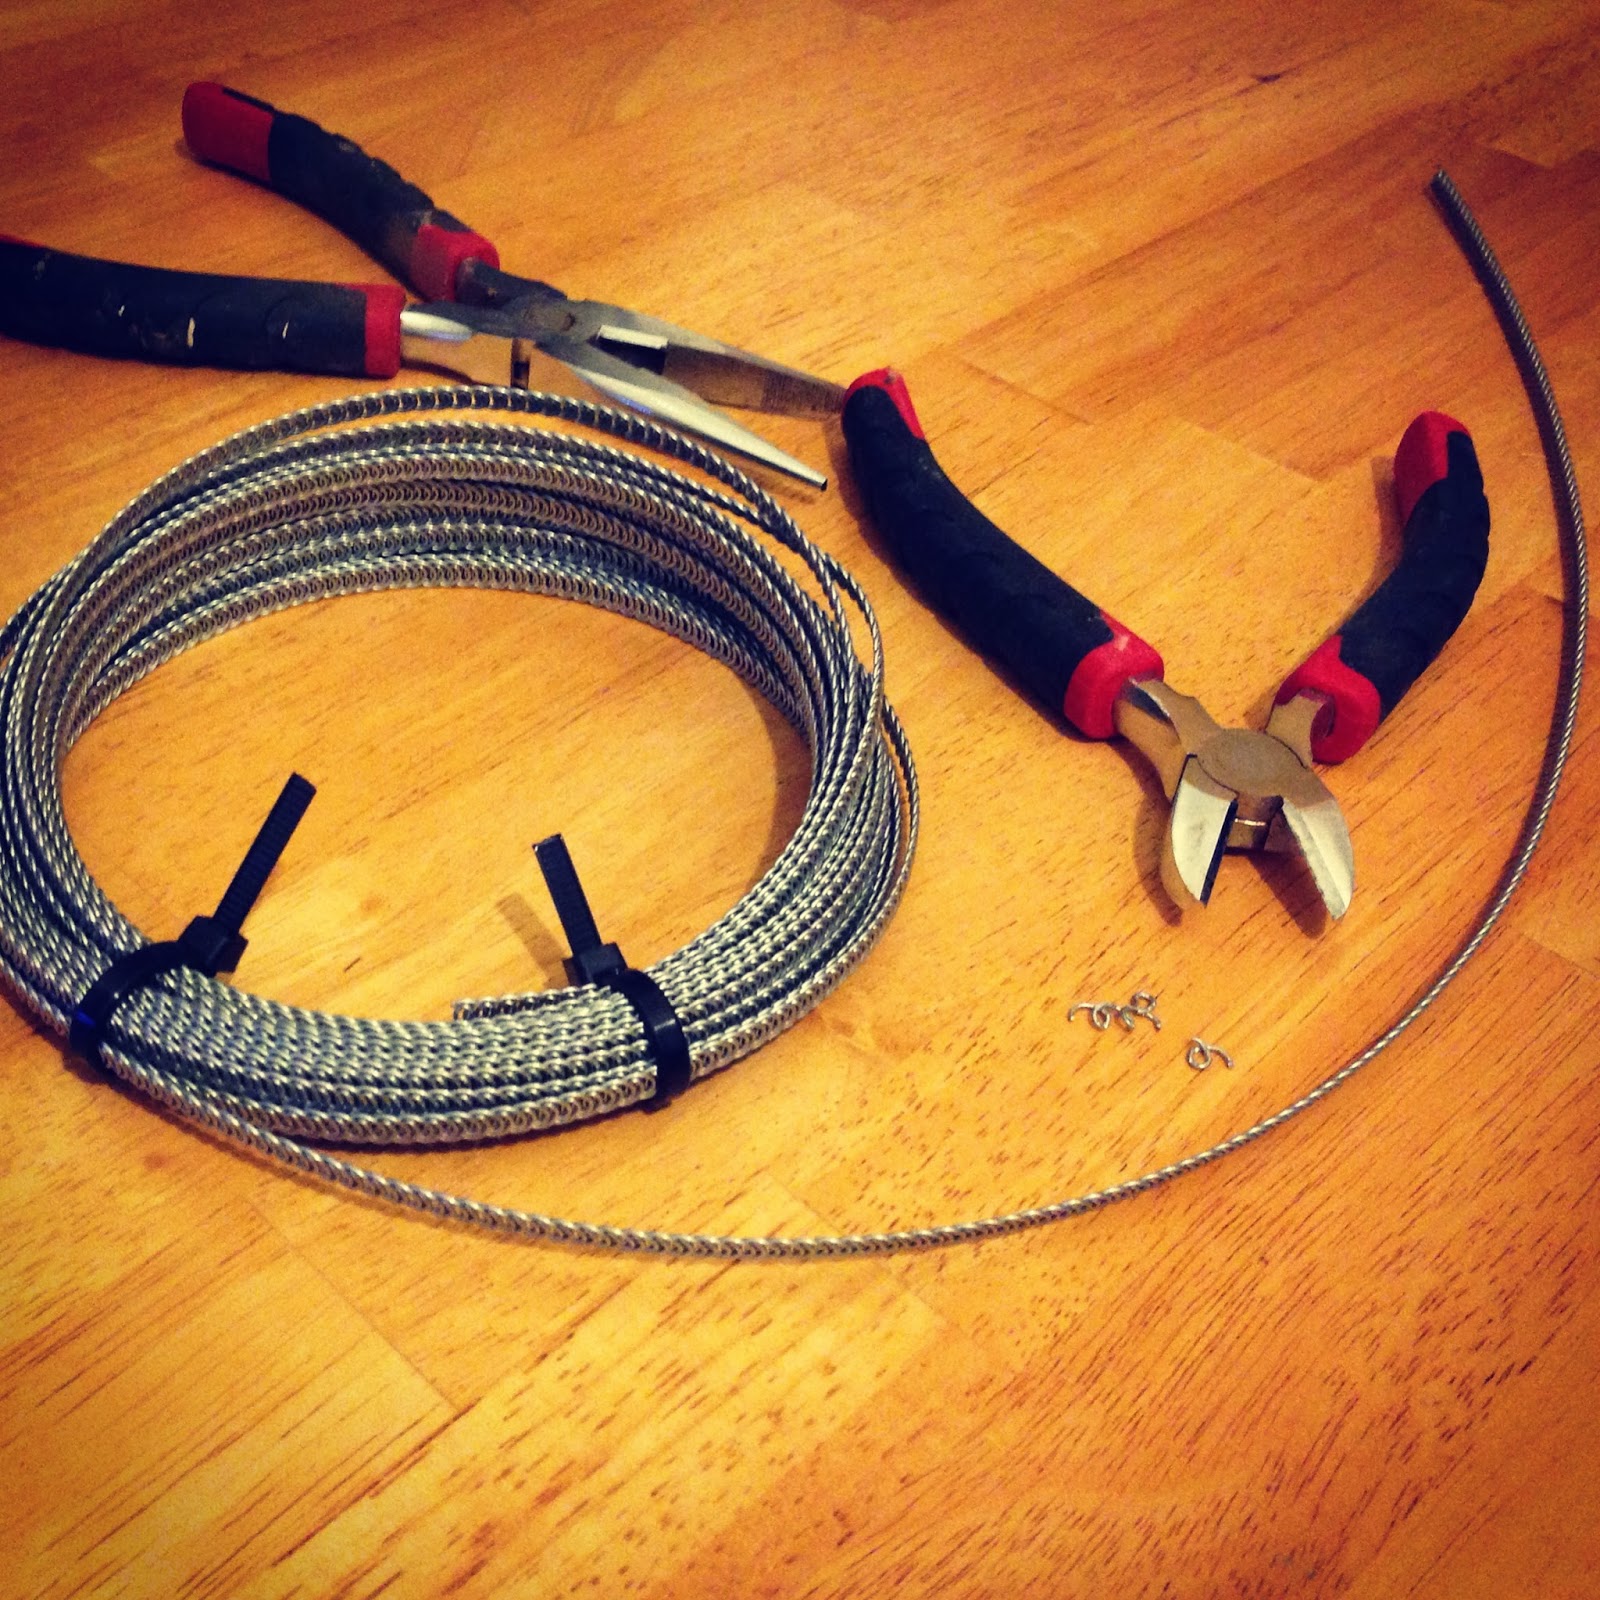
Spiral Steel Boning
If you follow me on Instagram you may have seen things getting serious in the sewing room.
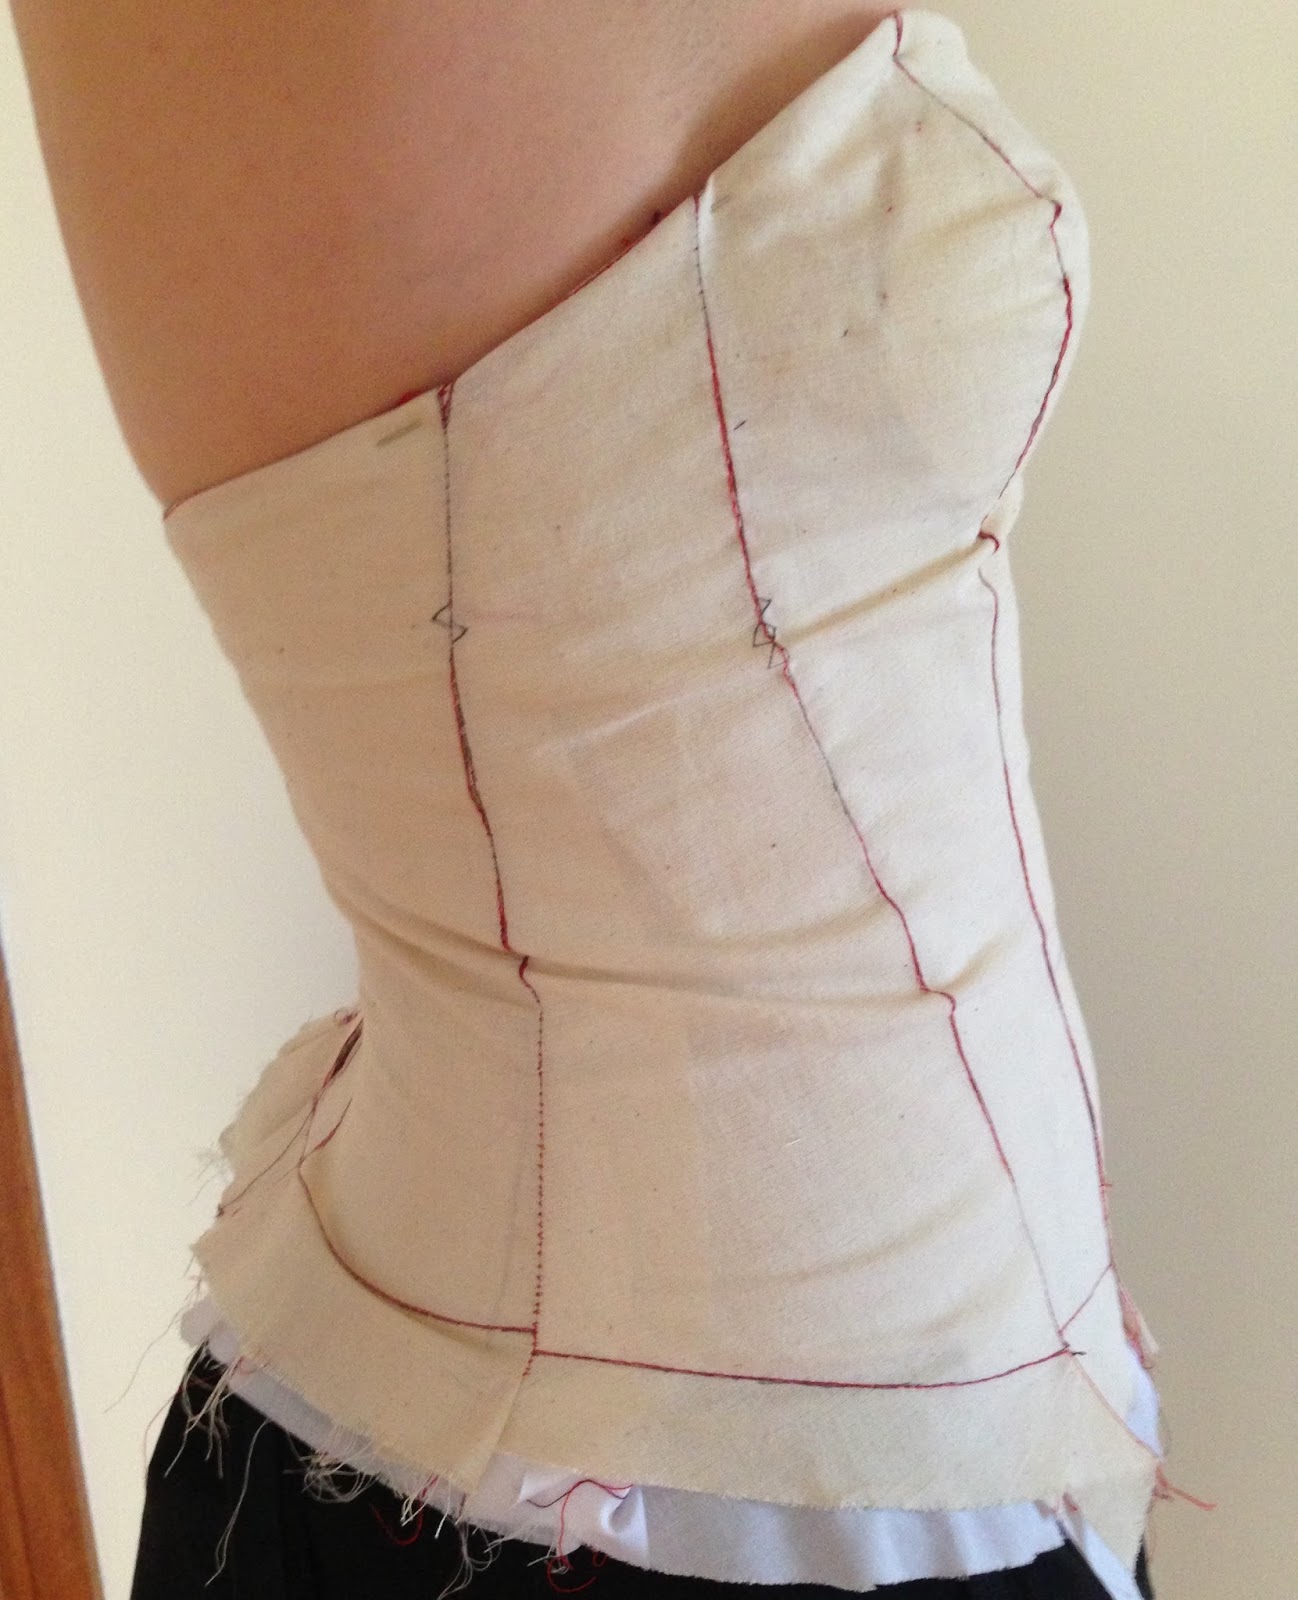
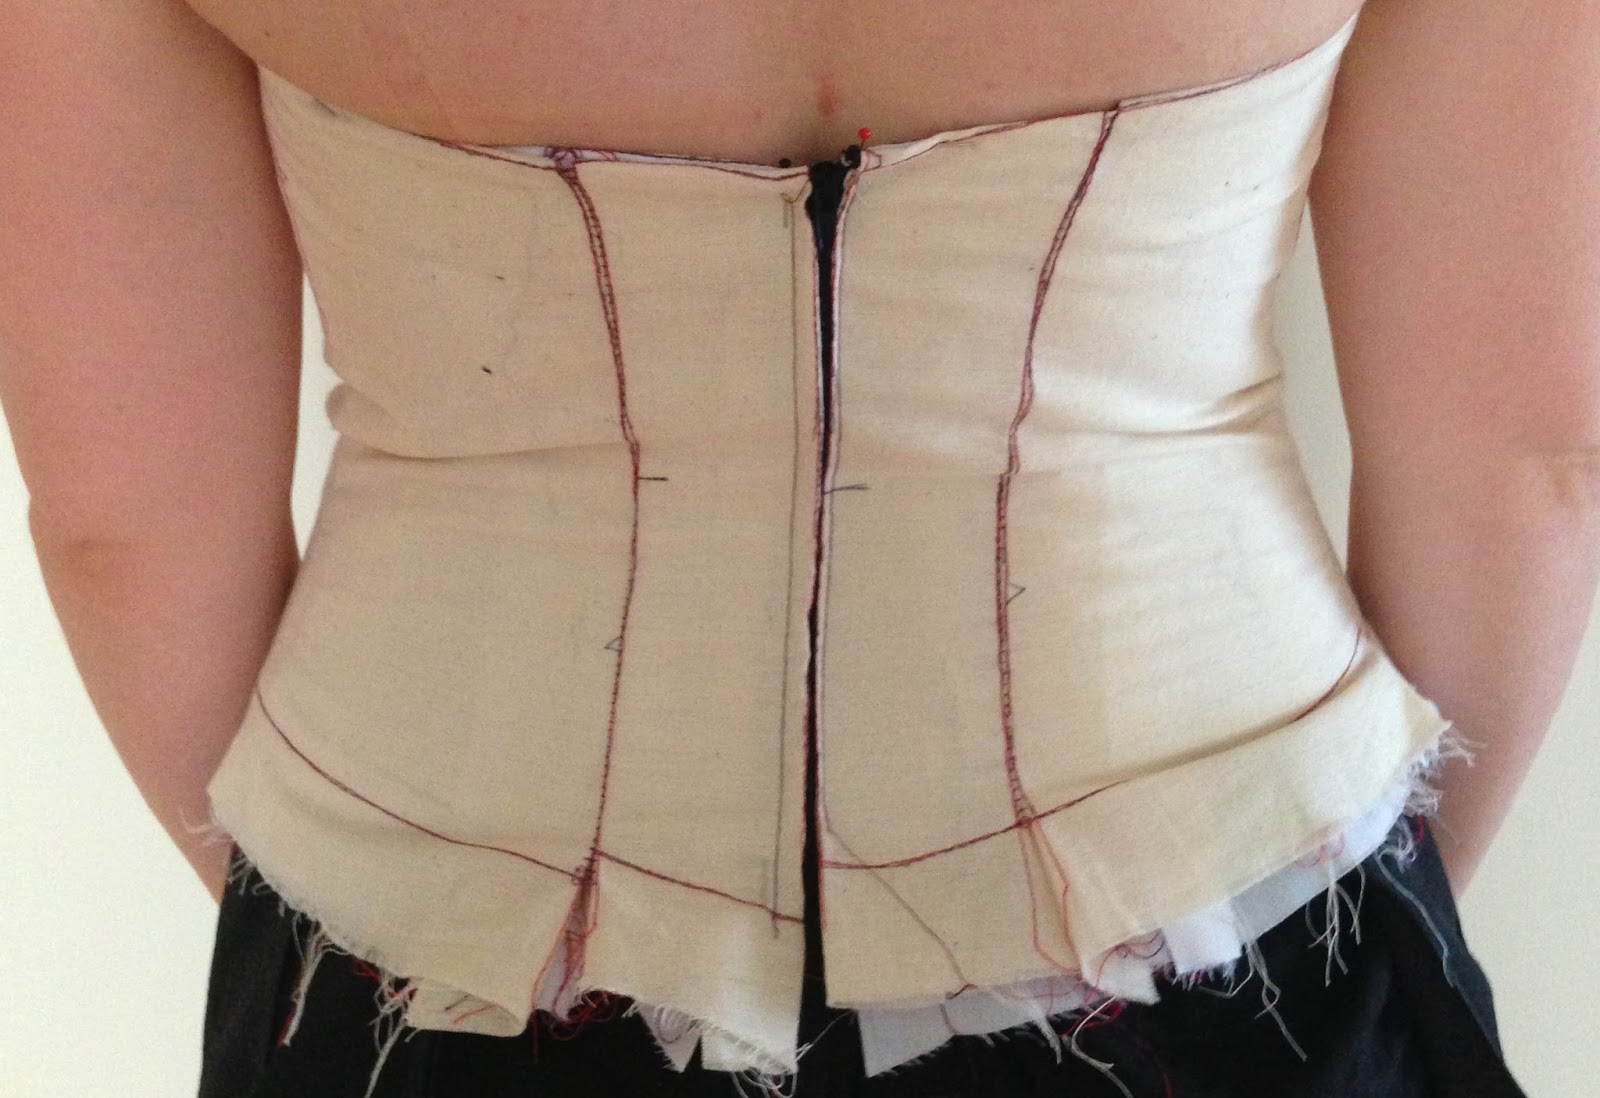
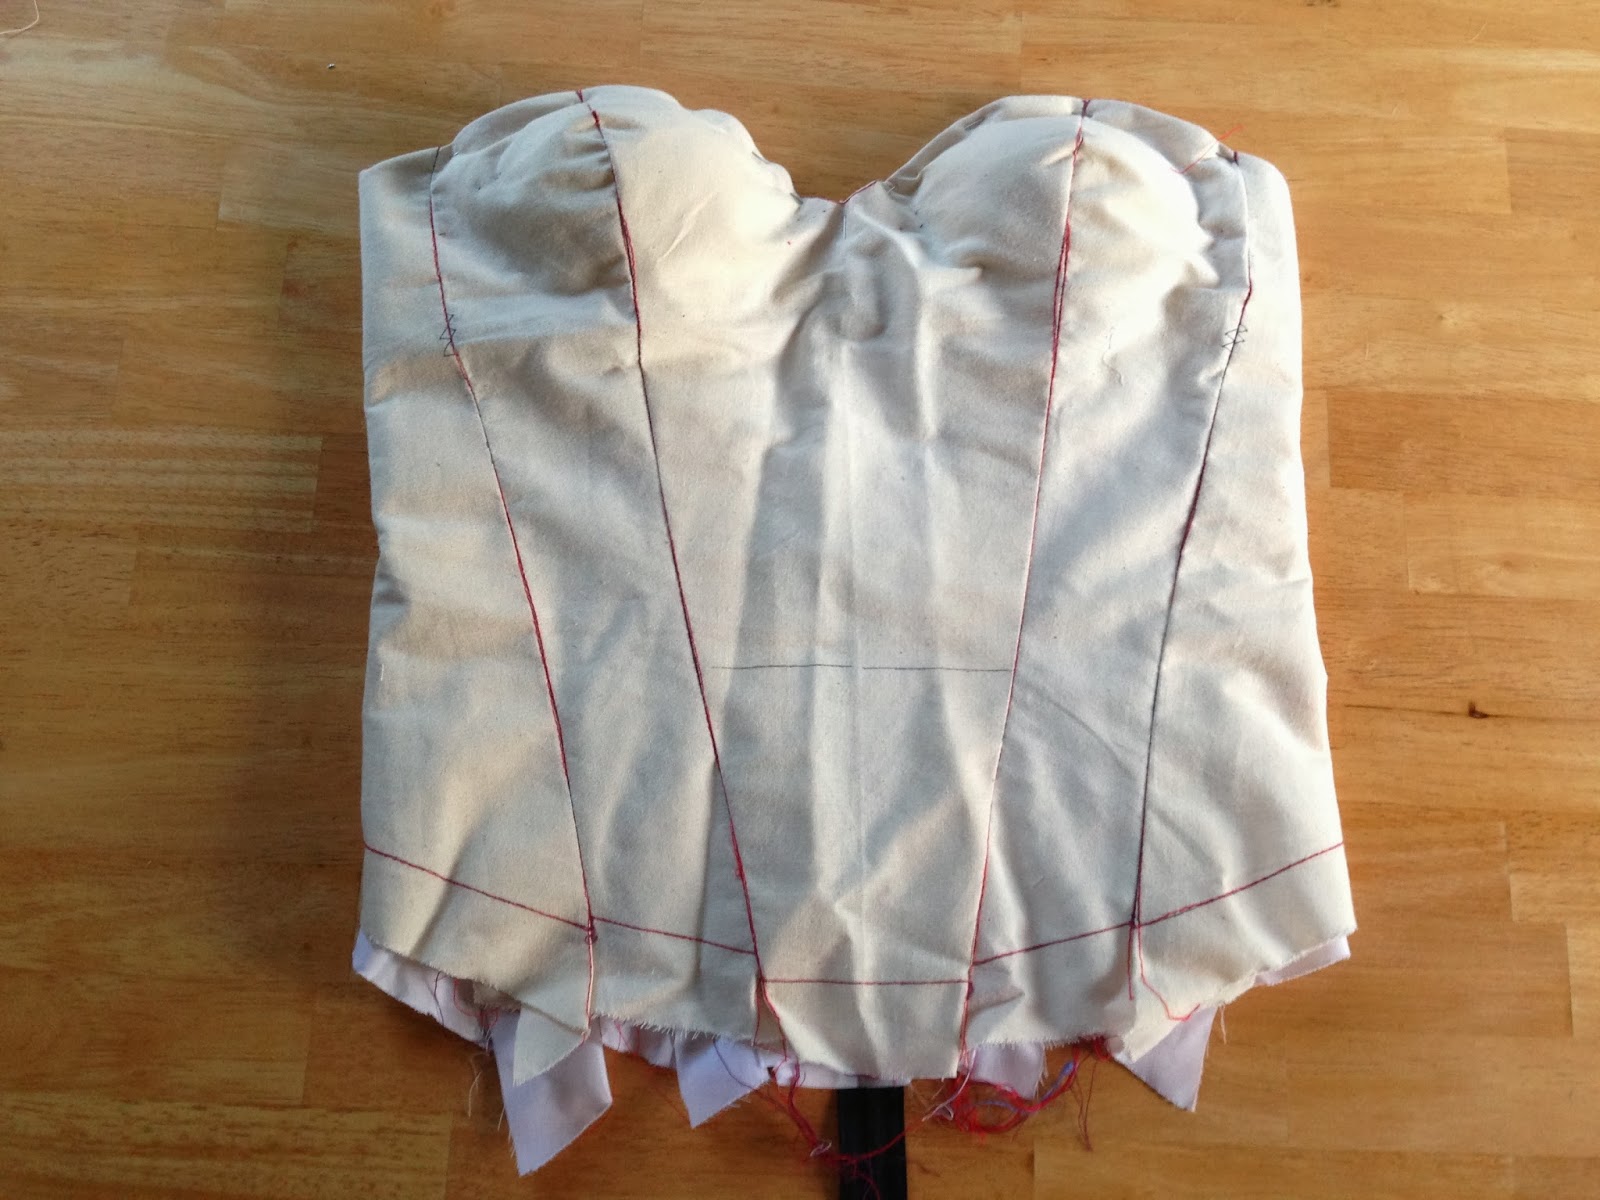
So now we're technically onto muslin number 4 which is not without some fit issues but it's making this whole process seem worthwhile. Here she is from the front. At this point I've only pinned the lining to the muslin - this will get stitched soon.

As you can see it has two main fit issues - the crinkle line directly under the bust and these diagonal wrinkles just above my waistline. I haven't got a piece of spiral steel boning running down the centre front which I think this really needs. Also this dress will have straps and if I secure some straps to the muslin that crinkle under the bust completely disappears. I don't want to ignore that it's a fitting problem but I also don't want to take that fold of fabric out and have the bodice stretch weirdly once I get the straps on. So I'm going to play around with that.

The weird diagonal crinkle is (I think) a mix between having a sway back and having oddly shaped lovehandles. This is an issue I face on most of my makes which basically consists of me choosing pattern styles that don't highlight it. The way I see it there are two ways to combat this - firstly lose the lovehandles. I've recently started this revolutionary diet called Not Snacking which was successful enough for me to lose any weight I gained from the silly season. Christmas I'm looking at you. If I can keep it up I know my lovehandles are the first thing to go. Failing that I have an idea from a pattern fitting book I bought a while ago - I might try that.

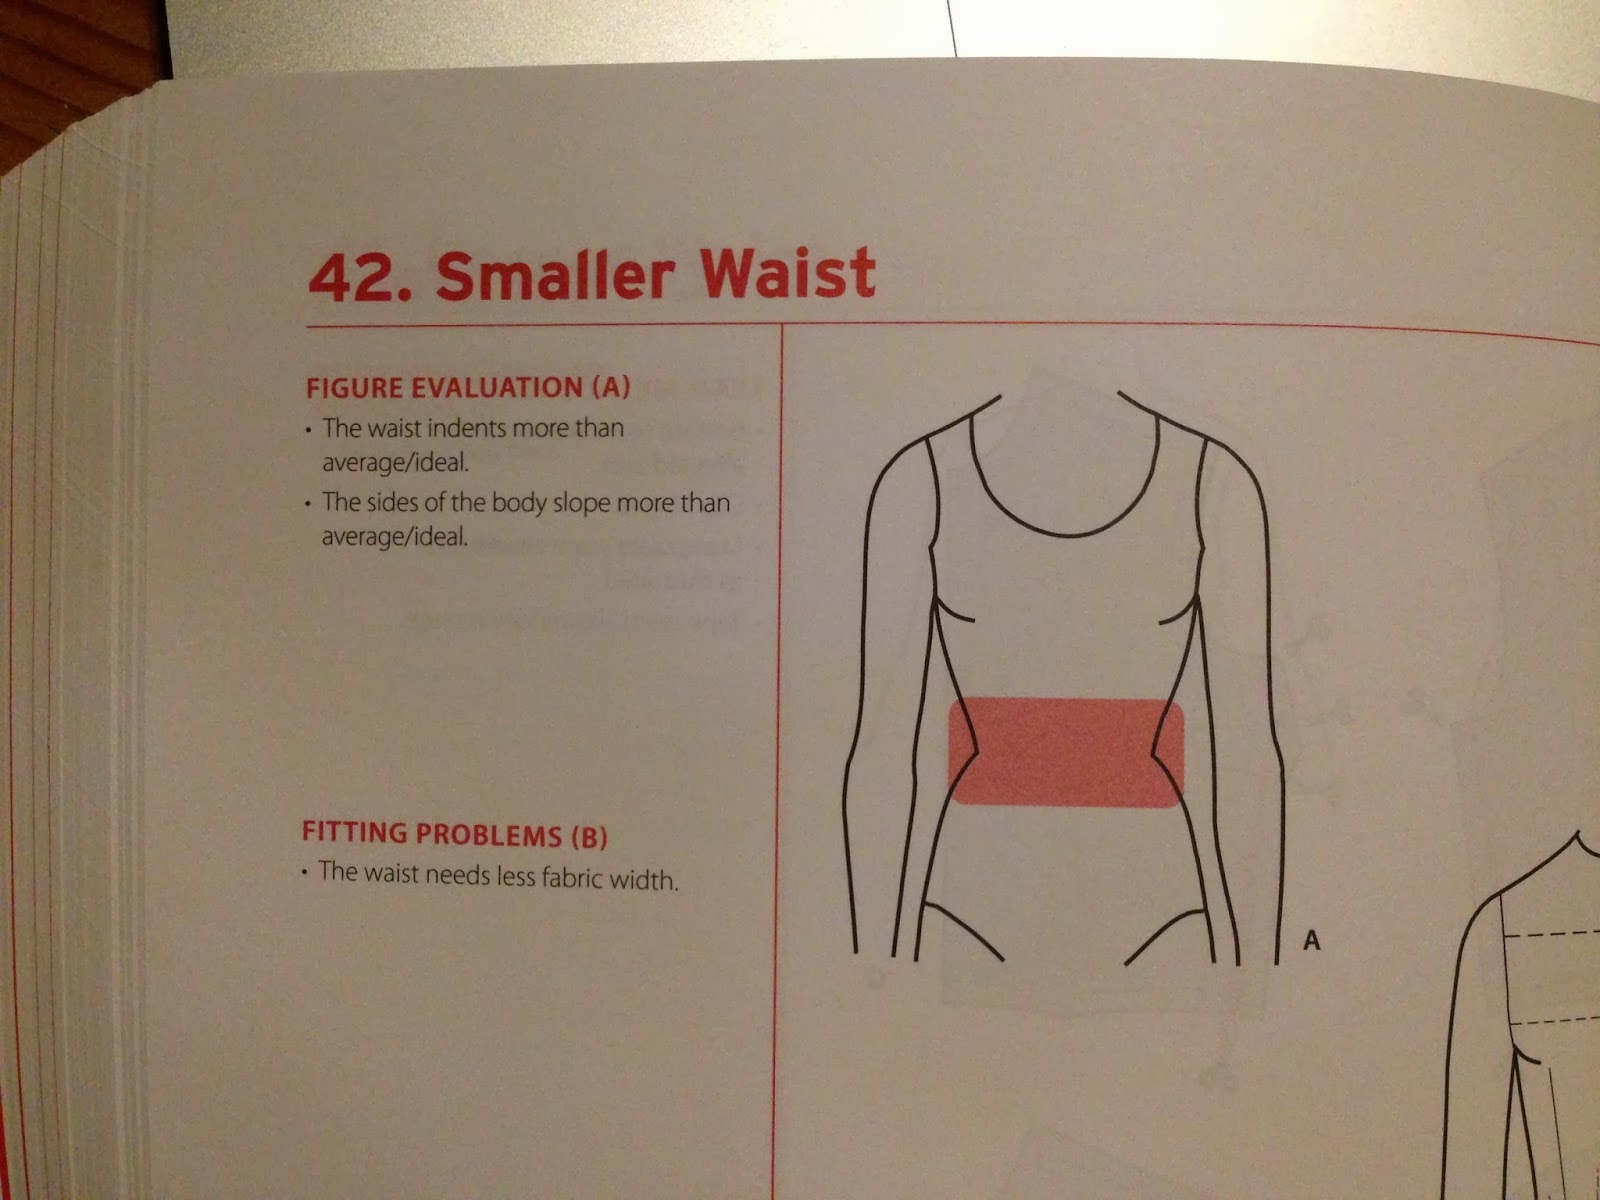
This may be a good starting point for fixing this. Also how polite is this book?
No mention of love handles - just a "smaller waist". Love it.
The other thing I'm going to work on in the next version is smoothing out that curve of the princess seam across the bust. It's puckering a bit at the moment.

I also might look at moving the zipper to the side if it doesn't look too hideous so I can create a feature on the back centre panels. Just an idea.
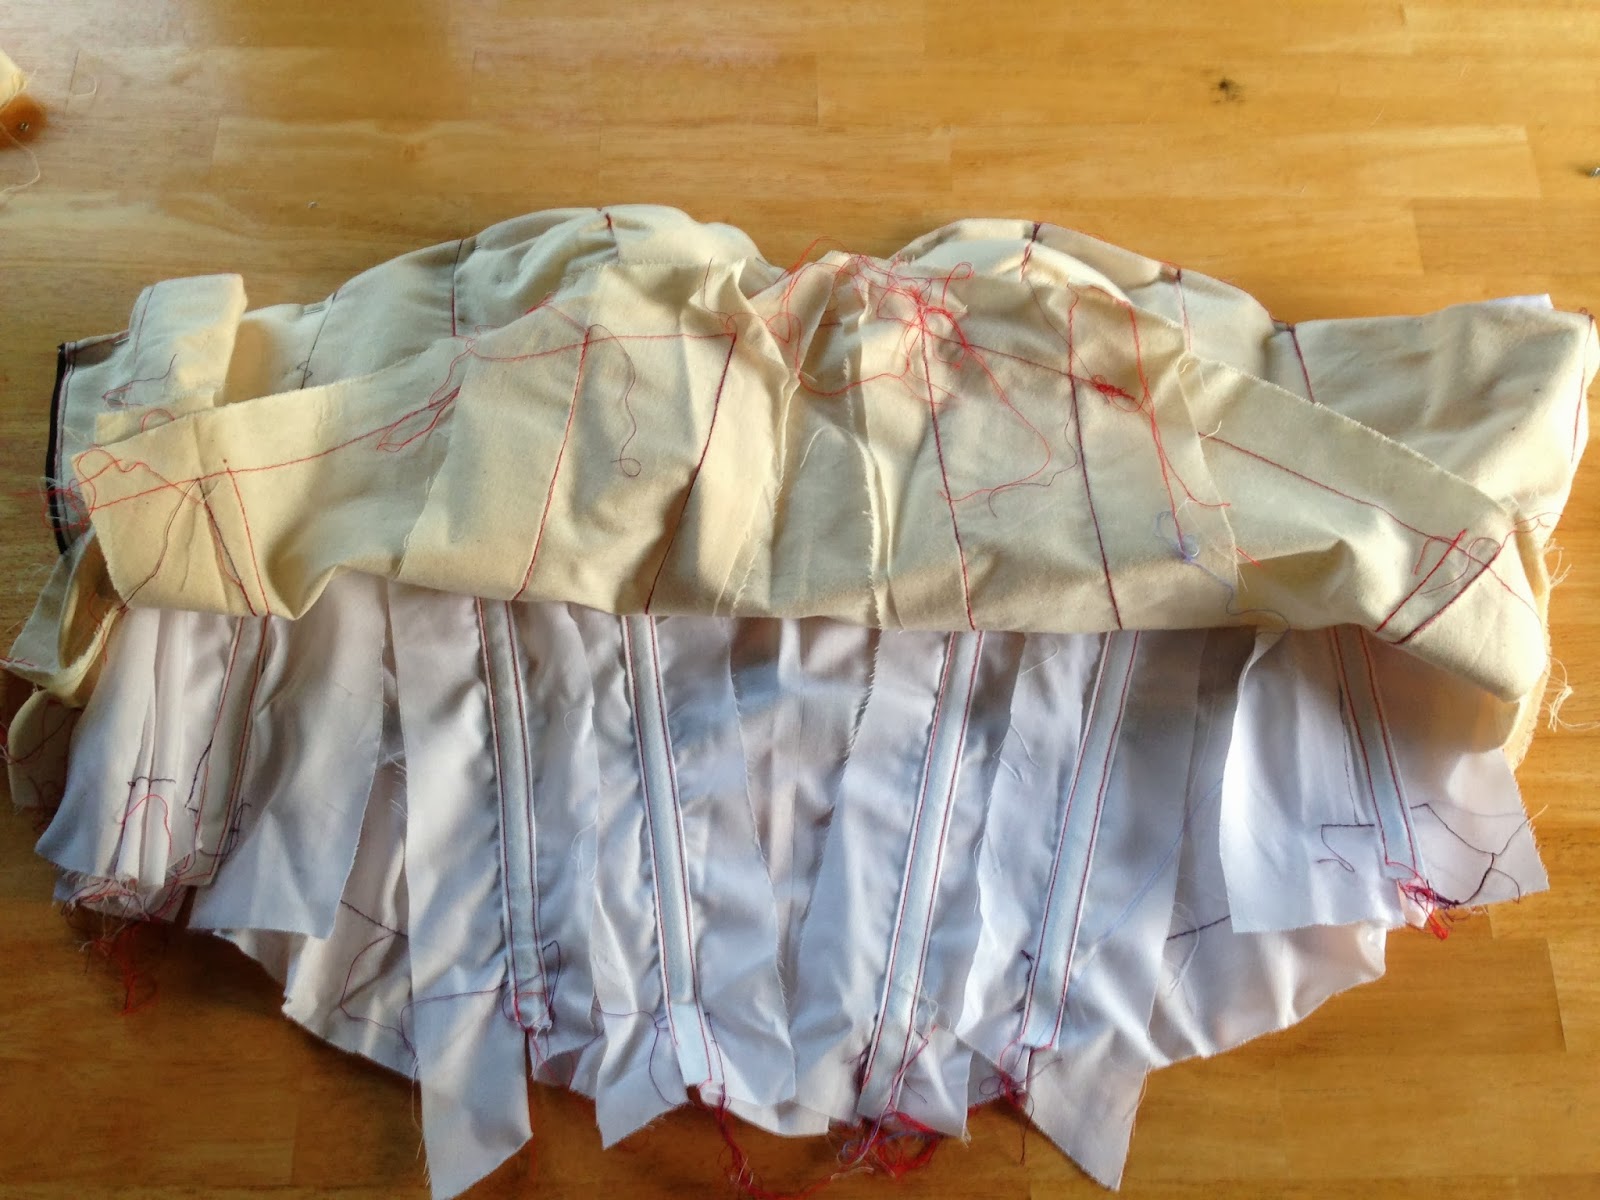
Here's an inside shot of the boning channels sewn into the batiste lining. I didn't iron or clip into the seam allowances on the muslin and I also didn't seal off the boning channels at the bottom of the bodice which I promise I'll do for the real thing! This means I can rip it apart really easily to fix things.

So there you have it. I don't feel like I have much to show for the amount of work I've put into it but I have learnt so much already and I'm still really only in the beginning!

Some thoughts on the process
I've specifically given myself more time than I need throughout this process so that it would be as stress free as possible. Perhaps this comes across as a bit too casual for someone making their wedding dress but it's exactly how I like it.
Slowing down my sewing has completely changed the way I look at my sewing projects. I know once this is over I still want to have longer, more involved projects I can work on bit by bit throughout the year just like this. I'd love to make my own sloper next year and get my fit as spot on as I can for all future projects. Maybe then I could tackle a jacket/coat/blazer or maybe even pants? This might seem a little odd to do after my wedding dress but who's got the time for anything when they're planning a wedding??
Even though I'm onto pattern number 3 and I've only made the bodice so far I don't regret having tried the other patterns. In fact I'm glad I persisted because I needed to see why it didn't work for my body type to move on to something that really would flatter me. It all seems a little obvious when you type it out like this but I have no regrets. I'm happy with where I'm at and I'm still ridiculously excited to make my own dress.
My most used resources during this process
- Gertie's Bombshell course, as I've said before, has been amazing. I've revisited it a number of times over the last couple of months and I think I'll still be referring to it as I'm making the final dress.
- Bridal Couture by Susan Khalje - I've read and reread sections of this book a number of times to get my head around the details of sewing my final fabrics together. It's helping me keep the big picture in sight.
- Fitting & Pattern Alteration Second Edition by Elizabeth Liechty, Judith Rasband and Della Pottberg-Steineckert - This is the book I took a snap from up above. It's basically an encyclopaedia of every quirk a body can have, how to identify where the fabric will pull, bunch up and how to rectify this on a flat pattern. It's really helped me to assess my fit along the way and give me a great idea of what to do when things don't sit right. It's pricey but it's been worth it.
So where to now?
The bodice needs some tweaks and I'll try moving that zipper over. I'm going to look at some fabrics in the coming weeks now that I have the exact shape of the bodice sorted out (finally).
I'm currently researching attaching a circle skirt to a U shaped basque waist. I may have to attach it to a yoke underneath the bodice and let it hang from there. But ideally I'd like to figure out how to attach the skirt directly to this shaped bodice so if you know of any resources online or in magazines or books leave me a comment.
If it all gets too hard I'm prepared to straighten off the bodice and have a circle skirt hang straight from it. We'll see how it goes.
I think this is my longest post to date so if you've made it this far thank you! I'm still loving this journey no matter how long it's taking me.
Stay tuned!
More posts from Jodie Clark