
Bild auf Holz übertragen DIY Tutorial

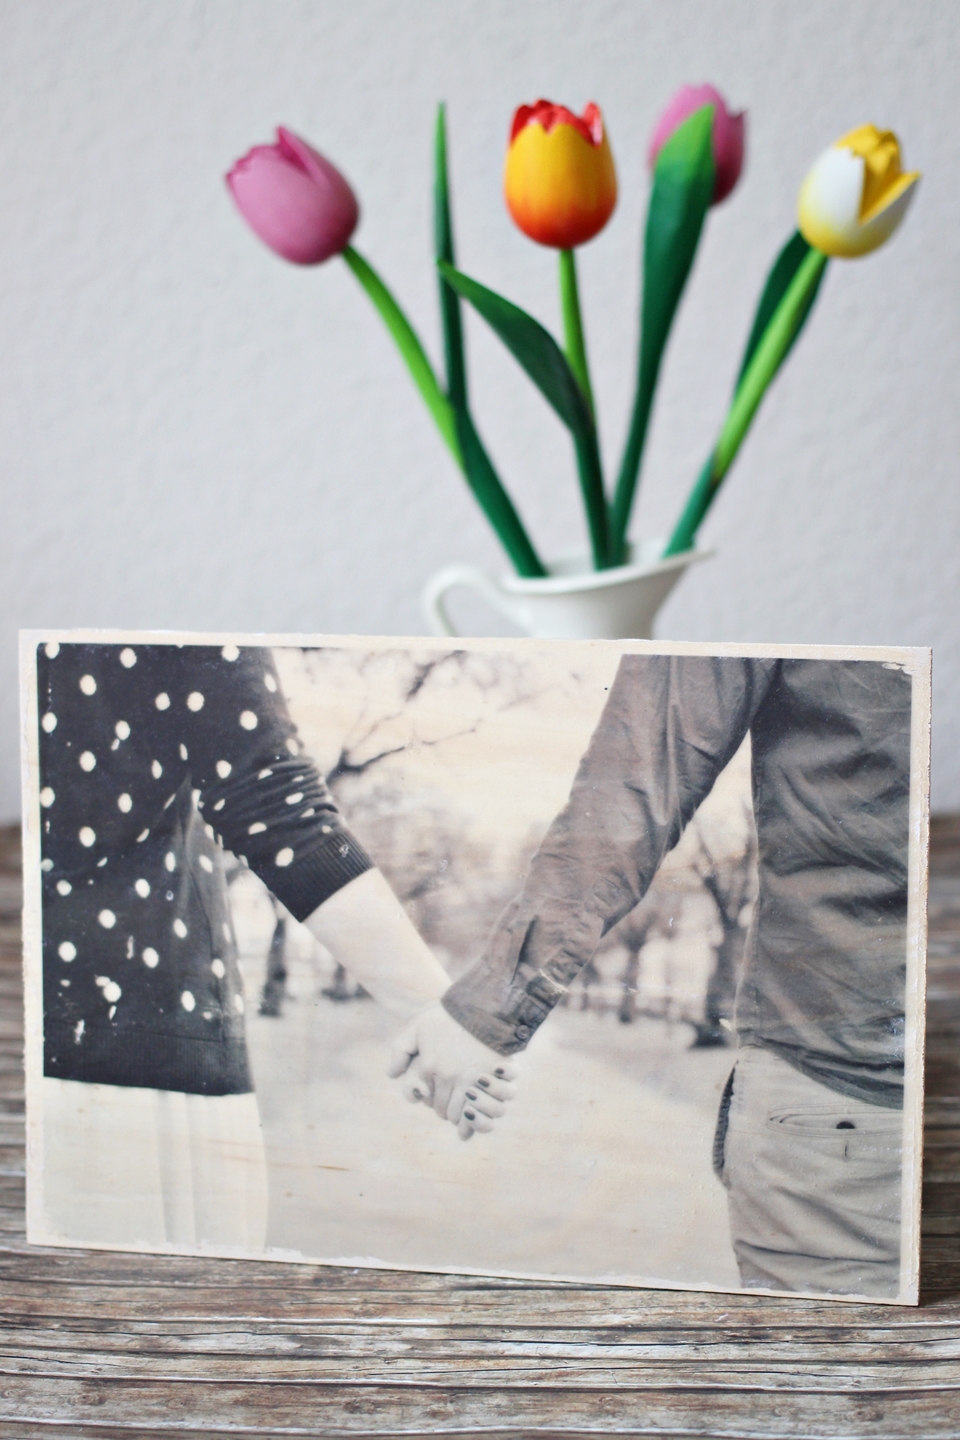
Zu Svens Geburtstag habe ich ihm unter anderem dieses Bild von uns beiden auf Holz übertragen geschenkt. Mit der gleichen Technik habe ich schon öfters Bilder auf Leinwand übertragen, aber ich wollte unbedingt auch mal probieren, wie das mit einem Holzuntergrund aussieht. Ich bin sehr glücklich mit dem Ergebnis, da werden sicherlich noch ein paar Holztransfers folgen, wenn ich geeignete Fotos finde. Für euch habe ich heute ein Schritt-für-Schritt-Tutorial, wie ihr ebenfalls ein Bild auf Holz übertragen könnt.
(Das Foto kennt ihr vielleicht von meinem "Glück ist..."-Beitrag bei Fee ist mein Name, mein zugehöriges Outfit findet ihr hier auf dem Blog.)
How to transfer a photograph to wood
For Sven’s birthday, I gave him this picture of us on wood as one of my presents. I used the same technique before to transfer photographs to canvas, but I really wanted to see what it looks like with a wooden background. I am very happy with the result and it will surely be followed by a few more wooden transfers when I find suitable photos. I made this step-by-step tutorial on how you can also transfer a photograph onto wood.
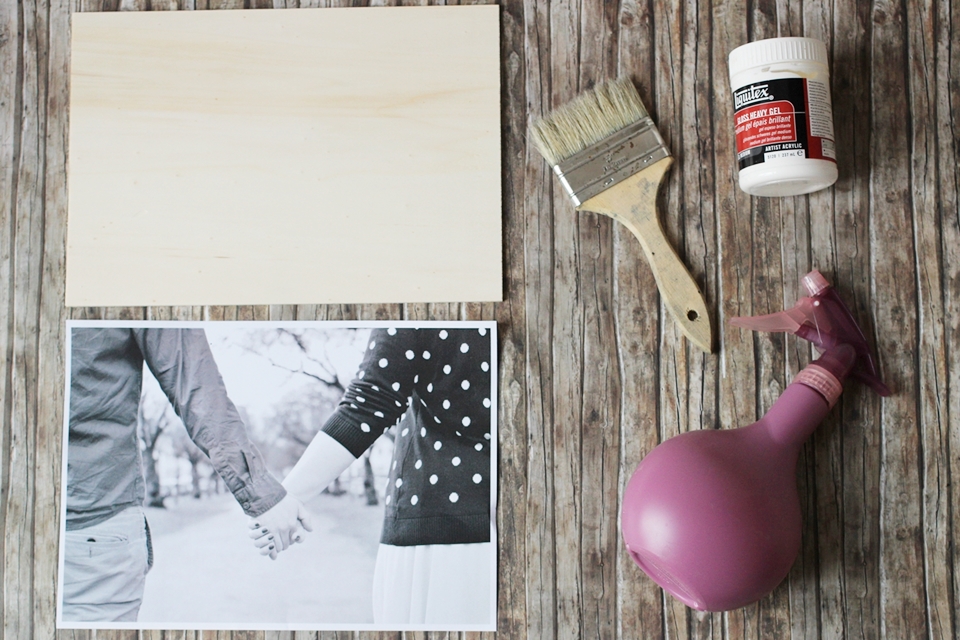
(▼Deutsch) Ihr braucht:
(▼English) You’ll need:

- ein Stück Holz (ich habe eine Sperrholzplatte*


- a piece of wood (I used a sheet of plywood*

Zunächst tragt ihr Gel Medium bzw. Serviettenkleber mit dem Pinsel auf dem Holz auf – eine richtig dicke Schicht. Nun legt ihr euer Bild mit der bedruckten Seite nach unten auf das Holzstück und drückt es fest an. Das Ganze muss nun eine Weile trocknen, am besten über Nacht.
(▼English)Firstly, coat the wood with a thick layer of gel medium using your pencil. Now put the printed side of your picture on to the wood and press firmly. Let the whole thing dry for a while, preferably overnight.

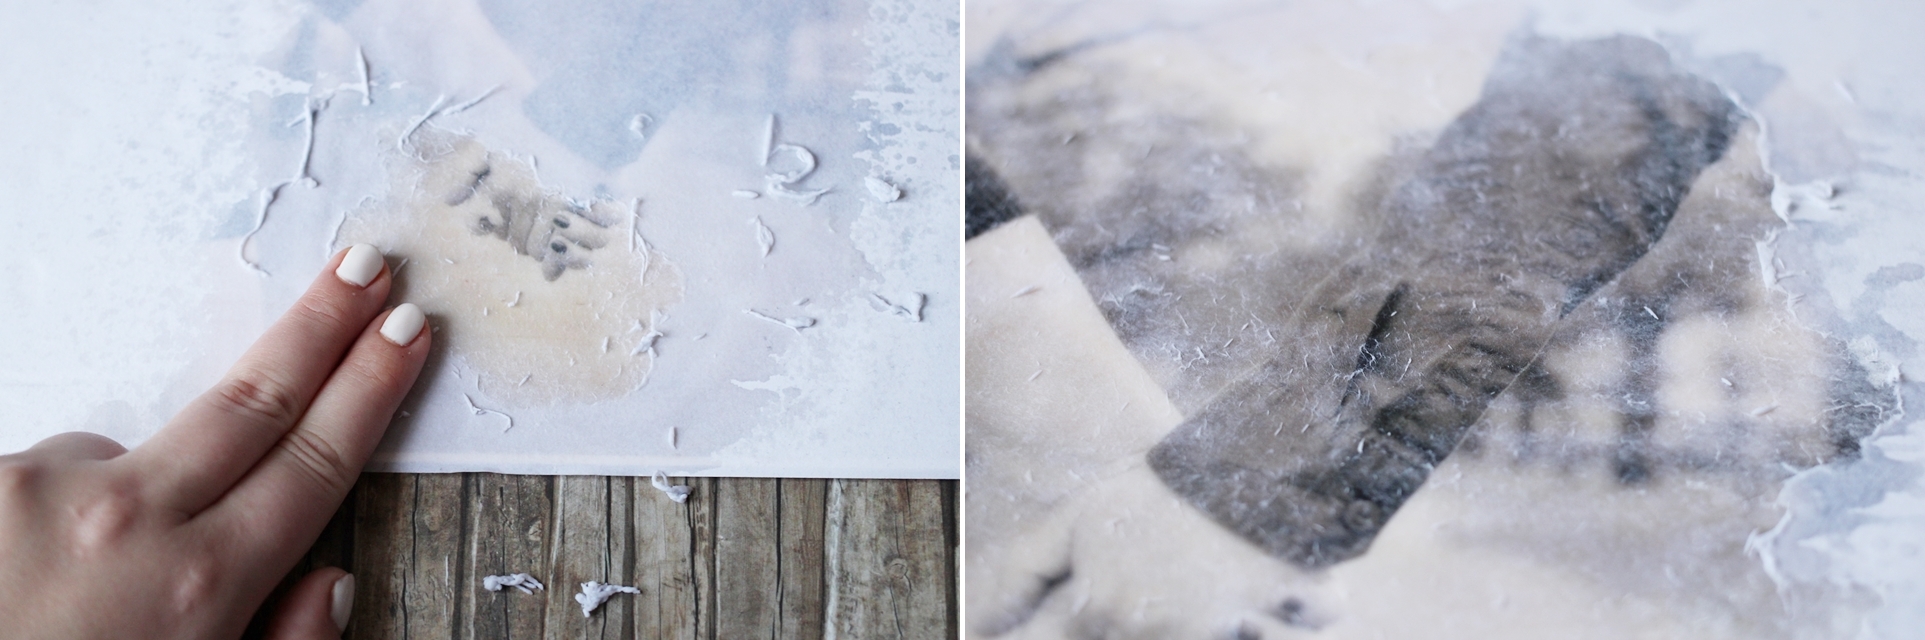
Wenn das Bild nun durchgetrocknet ist, feuchtet ihr es an. Dazu könnt ihr es mit einer Sprühflasche besprühen oder auch mit einem Schwamm etwas Wasser auftragen. Am besten macht ihr das Stück für Stück, damit ihr auch mit dem Papier entfernen nachkommt.
(▼English)When the image is completely dry, dampen it. For this purpose, you can either spray it with a spray bottle or apply some water with a sponge. Do this little by little, so that you have enough time to remove the paper.

Anschließend rubbelt ihr das Papier, das sich durch die Feuchtigkeit löst, ab. Dieser Schritt ist der zeitintensivste und muss auch mehrmals wiederholt werden, da nach dem Trocknen oft noch kleine Papierrückstände bleiben. Wenn das ganze Papier abgelöst ist, seid ihr fertig. Wer möchte, kann das Bild nun mit einer weiteren Lackschicht versiegeln.
(▼English)Then you rub the paper off. This step is the most time-consuming and needs to be repeated several times, because often after drying some small paper debris remains. When all the paper is removed, you’re done. If you want to, you can now seal the image with another coat of gel medium.

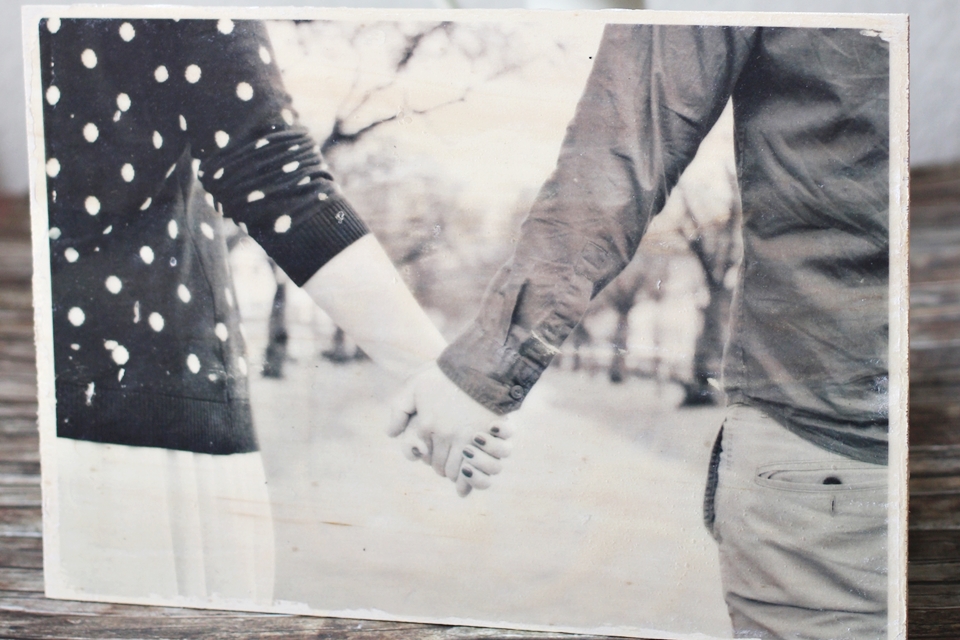
Und schon seid ihr fertig! Nun müsst ihr nur noch einen schönen Platz für euer Bild finden.
Wie ihr seht, wird der Transfer nicht unbedingt perfekt, manchmal geht leider auch ein Teil des Druckes ab – aber ich finde, genau das macht den Charme aus! Außerdem finde ich es so schön, dass man noch ein wenig die Holzoptik durchsieht.
And you’re done! Now you just need to find a nice place for your finished image. As you can see, the transfer is not necessarily perfect – but I think that’s what makes it so charming! Also, I think it’s so beautiful that you can still see the structure of the wood.
(▼Deutsch) Ganz viel Spaß mit euren Bildern! (▼English) Have fun with your image transfers!

* = Affiliate-Link
18 comment(s) on Bild auf Holz übertragen DIY TutorialFind me on Facebook | Twitter | Instagram ♥
The post Bild auf Holz übertragen DIY Tutorial appeared first on kathastrophal.