
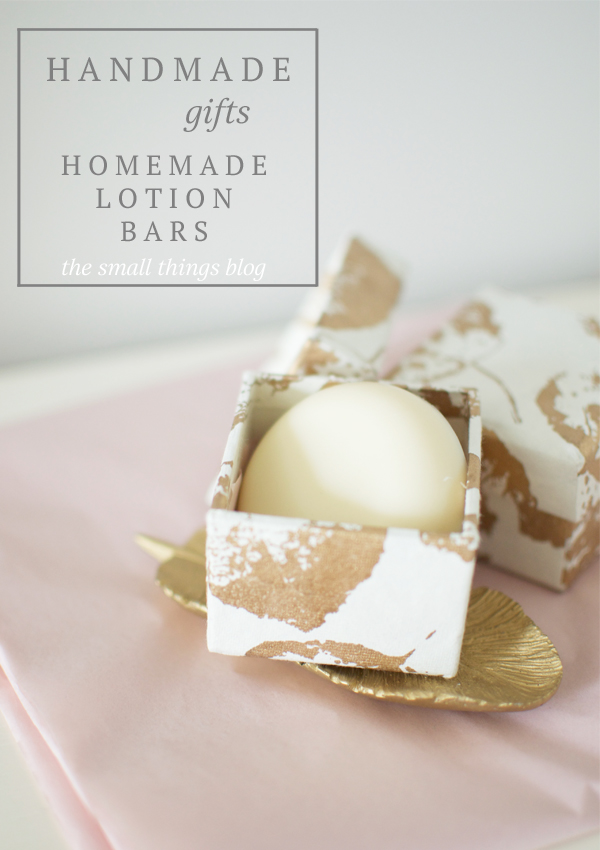
Handmade Gifts: Lotion Bars

I’ve made a few other beauty products from home, but I’ve never tried lotion bars! It looked a little complicated for some reason (it isn’t at all), so I always avoided it. My handmade gift series compelled me to give it a shot, and I’m so glad I did!

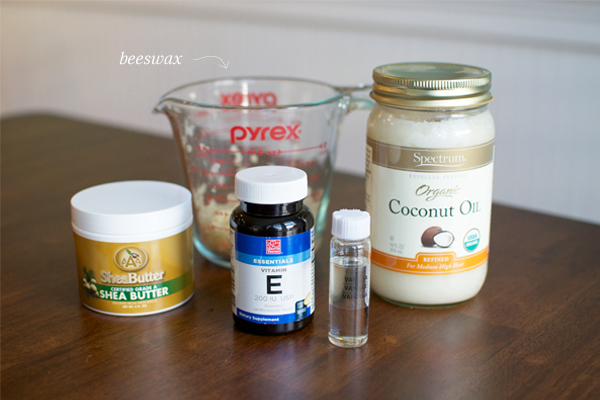
Ingredients: (you’ll use about equal parts of shea butter, beeswax and coconut oil)
shea butter, I got mine here
beeswax pellets, I got mine here
Coconut oil, you can find at your grocery store
Vitamin E, also at a grocery store or Whole Foods
Essential Oil, I grabbed the vanilla scent from Michaels, but any essential oil you like will work!
Tools:
a mason jar for dedicated use for lotion making (Or one you want to throw away. It’s not worth the hassle of cleaning)
a spoon dedicate for lotion making, or one you want to throw away
hot pads
pot
soap mold, I got mine at Michaels
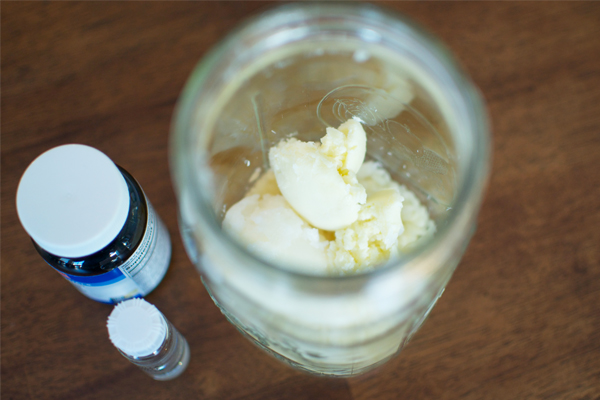
I’ve found that you can be a little flexible with the ingredients based on all the other recipes I’ve compared online. It seems most common to mix equal parts of shea butter, beeswax pellets and coconut oil, so depending on the amount of lotion bars you are making, you can go from there. I used 2 oz portions of each of the items I just listed, and that was enough to make 3 lotion bars of approximately the same size (a little smaller than the palm of my hand).
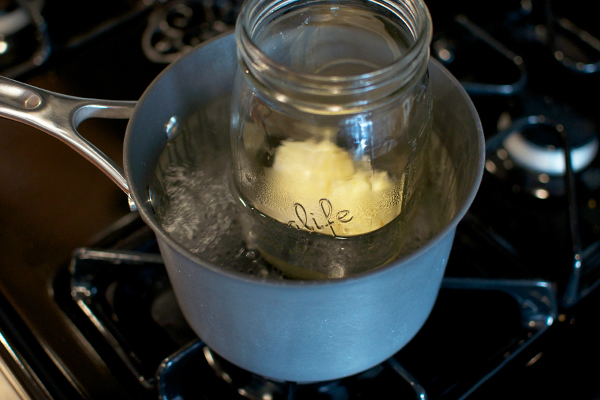
1. Bring a medium sized pot of water to a gentle boil.
2. Drop equal parts shea butter, coconut oil, and beeswax pellets into a mason jar.

3. Place mason jar in boiling water, and allow the ingredients to melt (should take about 8-12 minutes). It will be 100% liquid one it’s fully melted.

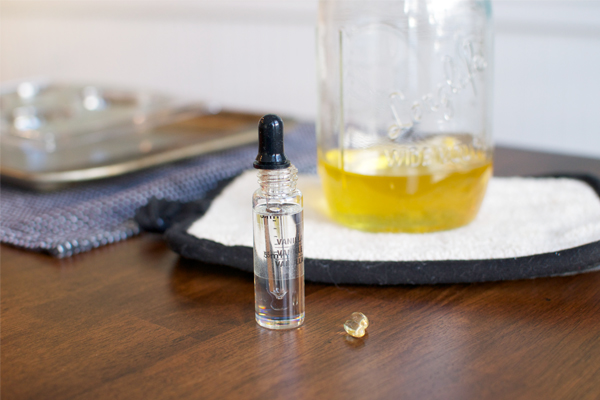
4. Very carefully, remove hot mason jar from the pot with pot holders, and place in a safe place in order to add the last ingredients.
5. Drop in anywhere from 10-15 drop of essential oil, or fragrance of choice. At this time you’ll also pierce 2 Vitamin E capsules with a knife and squeeze the contents into the mason jar as well. Swirl together.

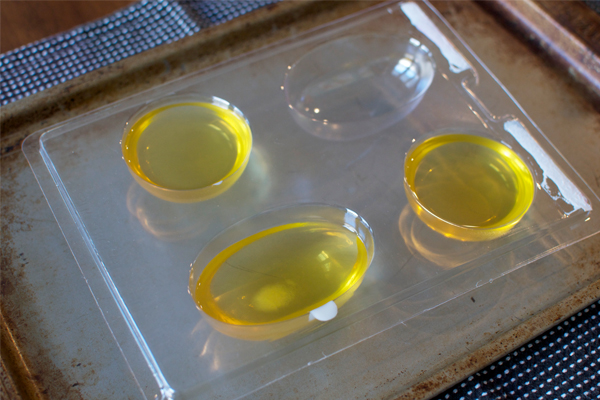

7. Allow to set until completely cool, and then pop them out and wrap them up! I was a bit distracted while these were cooling, so I’m not exactly sure how long it takes for them to cool. I’d say anywhere from 45 minutes to 1.5 hours. You’ll know they are cool when they turn white in color and are solid.

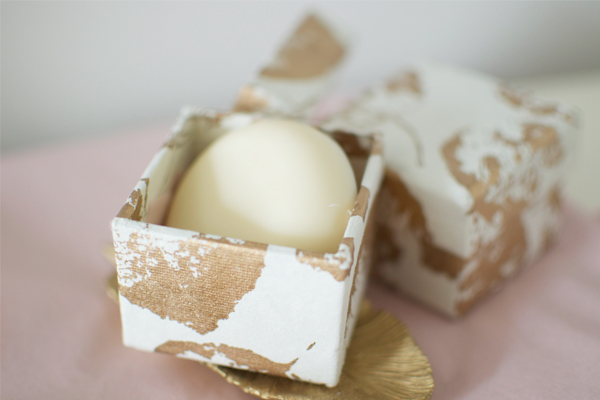
I found this perfect packaging at World Market (that seems to be a theme thus far in the handmade gift series!) and the lotion bars fit in the boxes perfectly! I also think it would be beautiful (and in hindsight I wish I did this) to put some pressed flowers in the mold before you pour in the liquid so the tops of the bars have a little decoration!
Another packaging option is to tie 2-3 lotion bars that are stacked together with some string, and stick some flowers on top of the stack.
These really are simple to make, and the personal touch of fragrance and packaging would make this a perfect gift!