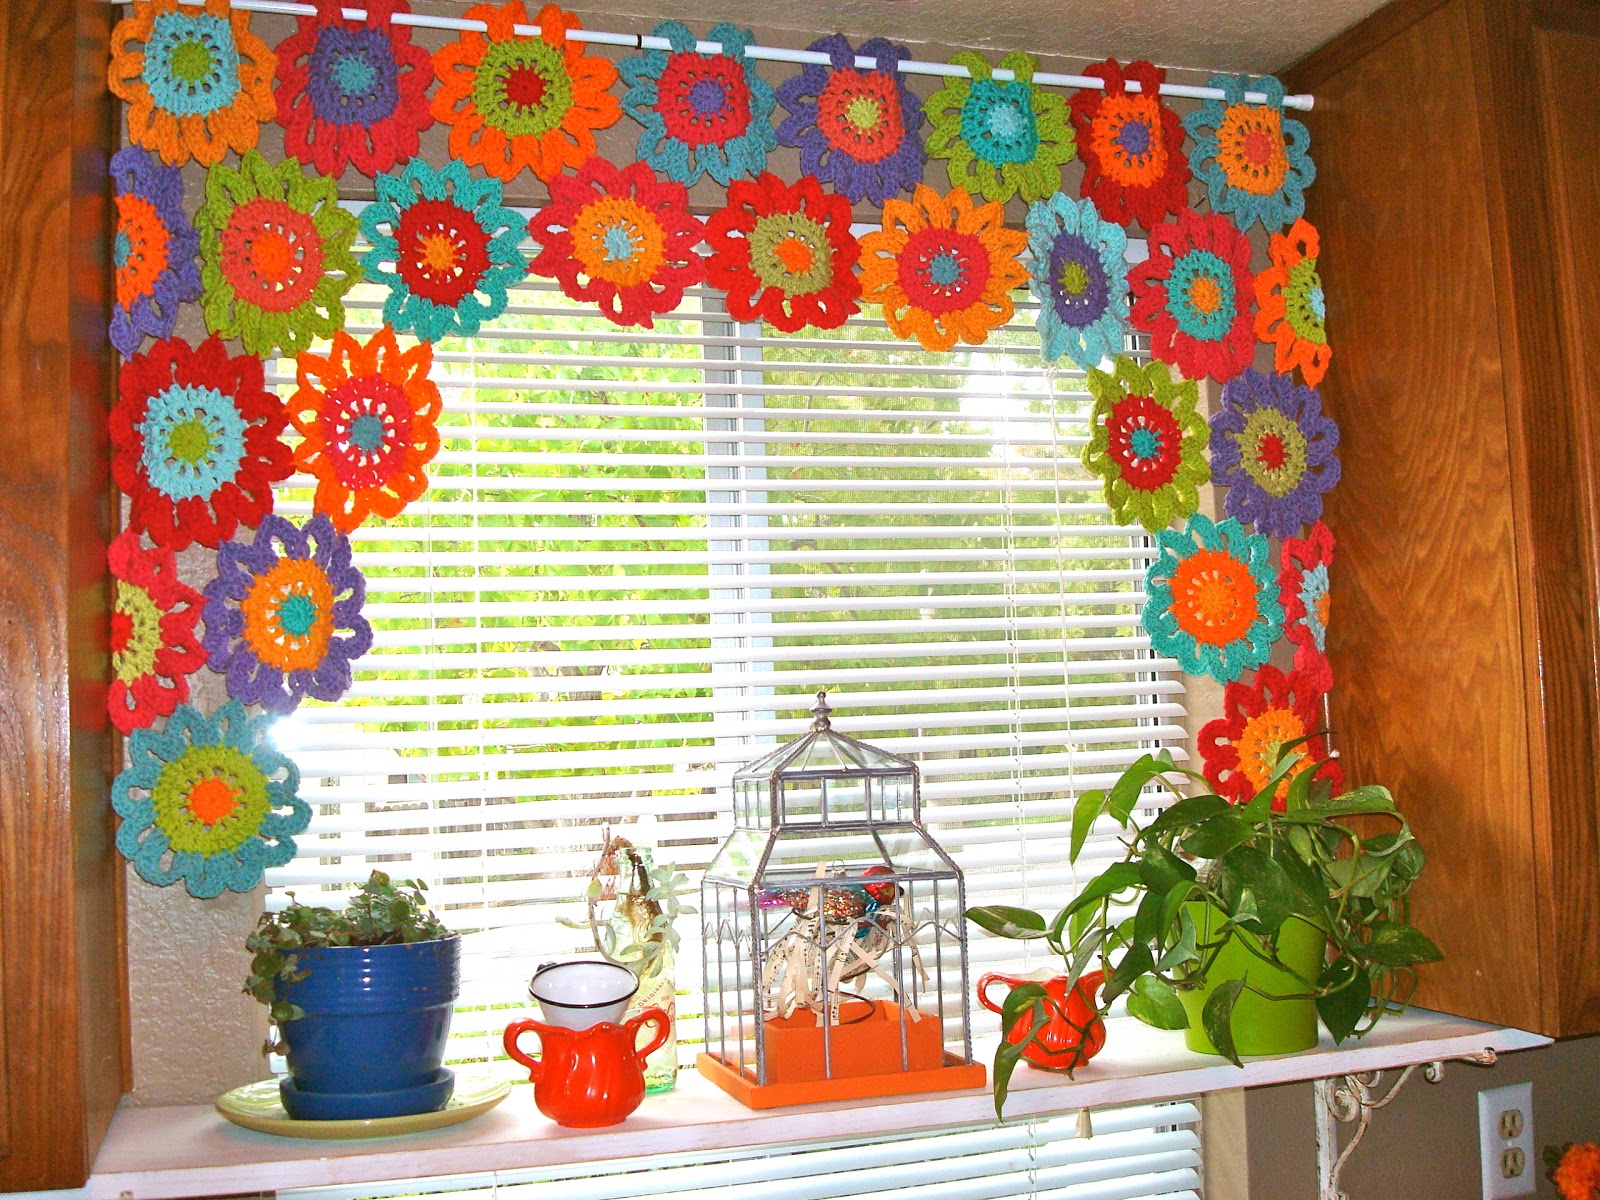
Flower Power Valance Tutorial
Flower Power Valance
I have been asked a lot for this pattern so I have decided to write out the directions for you on how I made it

This is only the second crochet pattern I have written so let me know if there is something that I need to write a little better


You can find the half flower tutorial here Have a look at it if you are unsure on how to do any of this full flower There are lots of pictures that may help you You will also need this tutorial to make the half flowers for the valance

Flower Power Valance
Crochet hook US size H
I used Sugar & Cream and Peaches & Creme yarn in various colors in addition to other various brand cotton yarns that I had. Unfortunately I cant tell you how much yarn I used because I already had a lot of different colors in my stash.
DC = Double Crochet CH = Chain
ST = Stitch
SL ST = Slip Stitch
Magic Ring = If you are not sure how to do this Google How to Crochet a Magic Ring
Join as you go = If you are not sure how to do this Google Join as you go Crochet Method
There are lots of tutorials on the internet for these methods
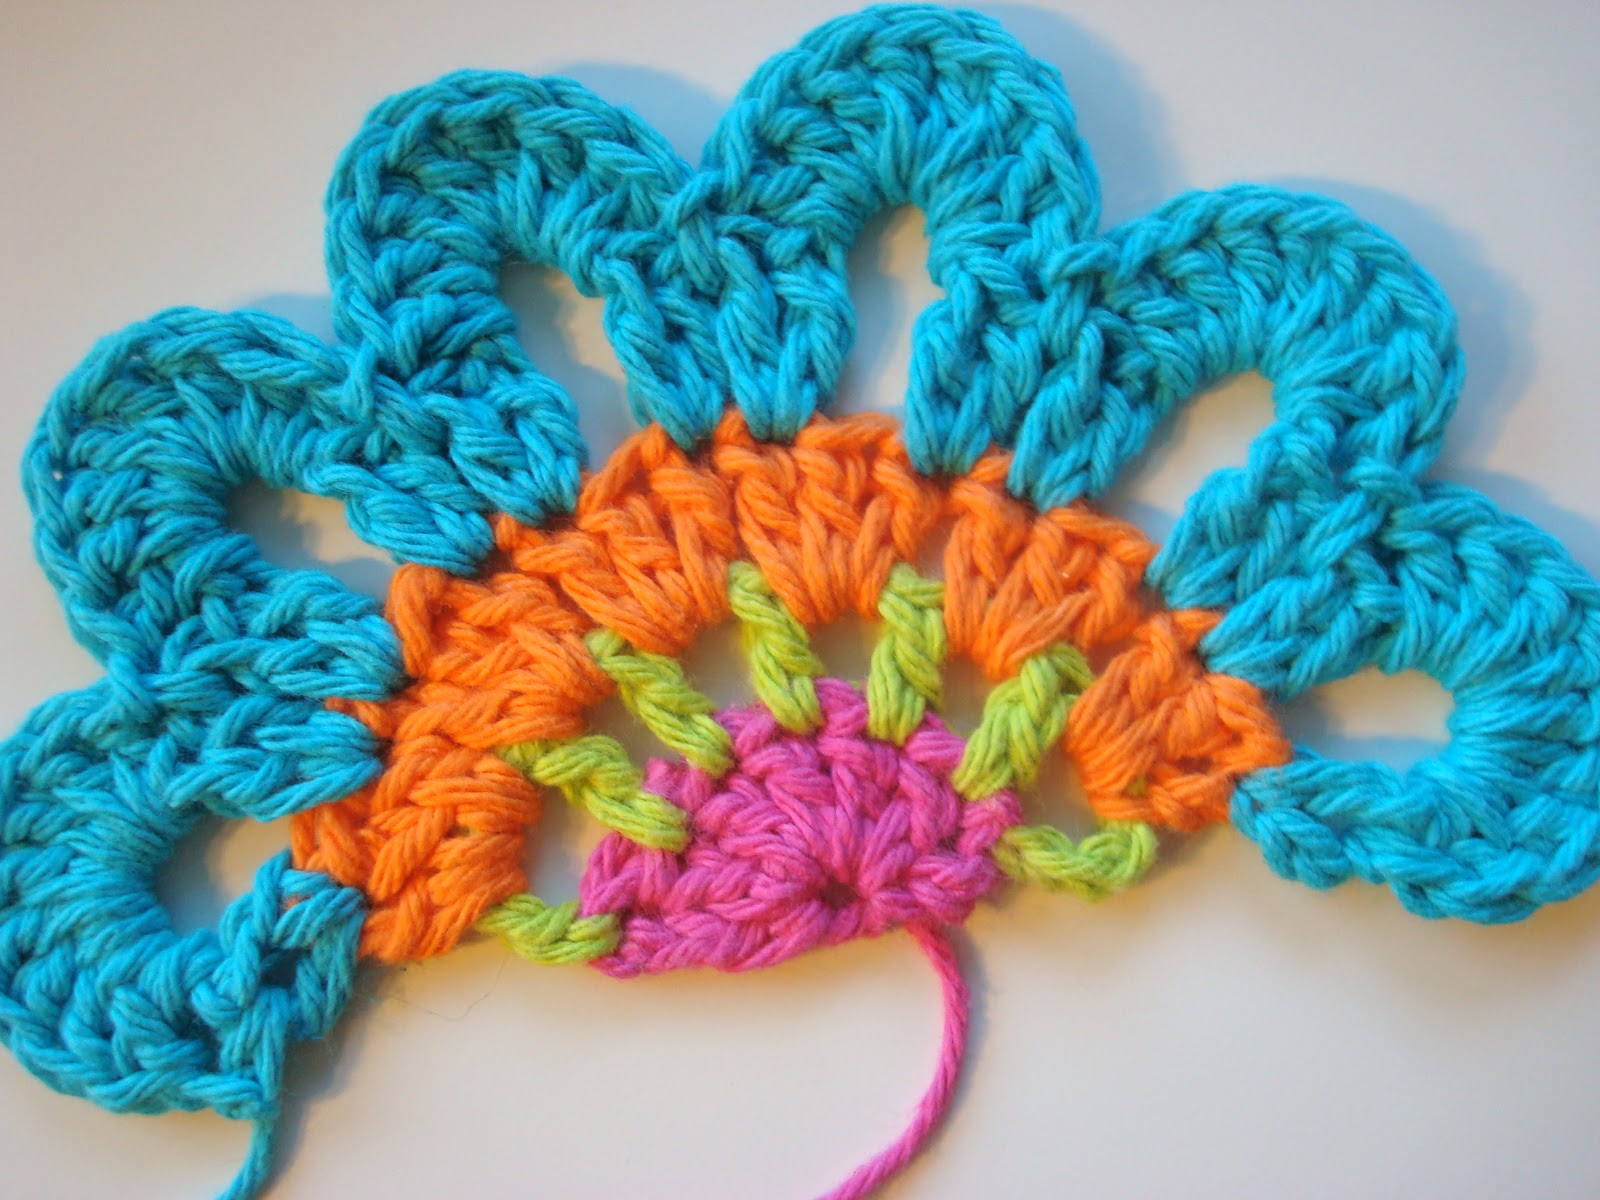
Full flower
Row 1: Make a magic loop. CH 3 (counts as first DC) 11 DC in magic loop. Join with SL ST to 3rd CH of beginning CH 3. 12 stitches. Fasten off if you are changing colors.
Row 2: Join the next color in any DC. Ch4 (counts as your first DC & CH 1). DC CH 1 around in each ST. Join with SL ST in the 3rd ch of the beginning CH 4 to close round. Do not fasten off. 12 DC with a ch 1 space in between.
Row 3: SL ST into the first CH 1 space. CH 3, 2 DC in the same CH 1 space. 3 DC in each CH 1 space around. SL ST to the 3rdCH of the beginning CH 3 to close round. Fasten off if you are changing colors. 36 DC (3 in each space).
Row 4: Join next color in any DC. CH 3 DC in same stitch CH 4, *skip over one DC, 2 DC in next ST, 2DC in next ST chain 4*. Repeat from * to * around until last 2 ST, SK 1 ST, 2DC in last ST. Join with SL ST to 3rd CH of beginning CH 3. Your ending join will be between the 2 sets of DC. 12 CH 4 spaces. Do not fasten off.
Row 5: Make 8 DC in chain 4 SP. Skip 2 DC, SL ST in between the 2 sets of DC. SK 2DC, 8 DC in next CH 4 SP. Repeat around. To end round SL ST in beginning ST and fasten off.
I used the join as you go method when making this curtain. The join was in made in between stitch 4 and 5 of the 8 DC on the last row. See the picture on where to join each flower.
Assemble as follows
Row 1: 8 full flowers
Row 2: Half flower, 7 full flowers, half flower.
Note: I added the full 7 flowers first, then went back and added the half flower on each end with the join as you go method into the space. See the picture for where to start your first full flower on the 2nd row. It will not be directly under the 1stflower. You will be joining the flowers on the bottom of the 1st row and on the sides of the 2ndrow as you go.
Row 3: 2 full flowers on each side
Row 4: 1 half flower and 1 full flower on each side. See row 2 for the order in which they were added.
Row 5: 1 Full flower on each side.
So there you go! If you want to make your valance bigger or smaller just add or take away flowers I would love to see your Flower Power Valance! Robin
More posts from