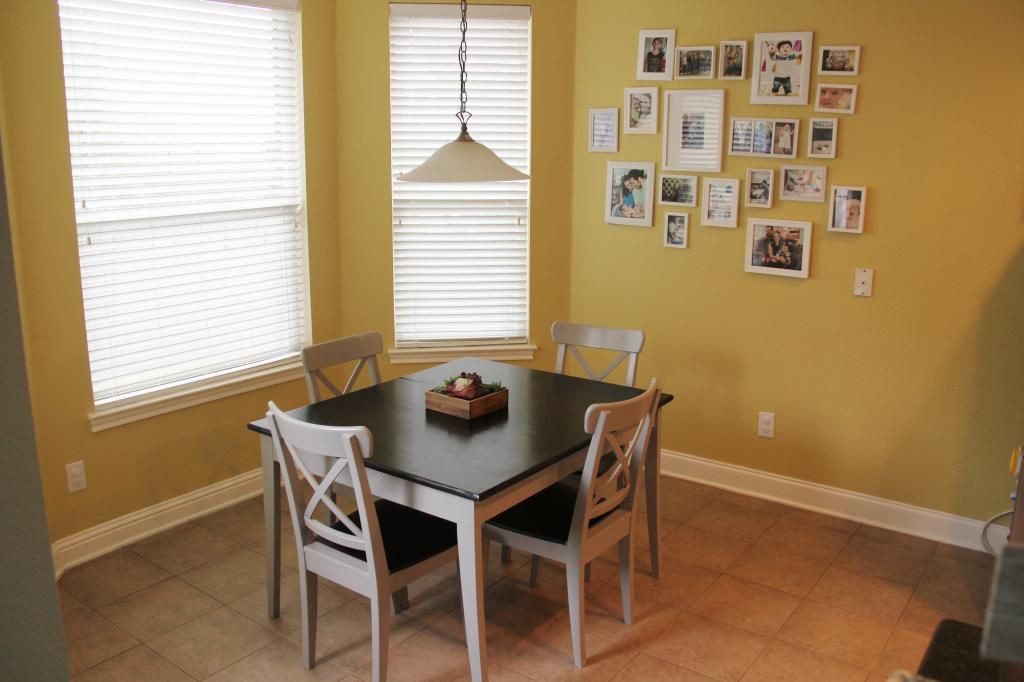
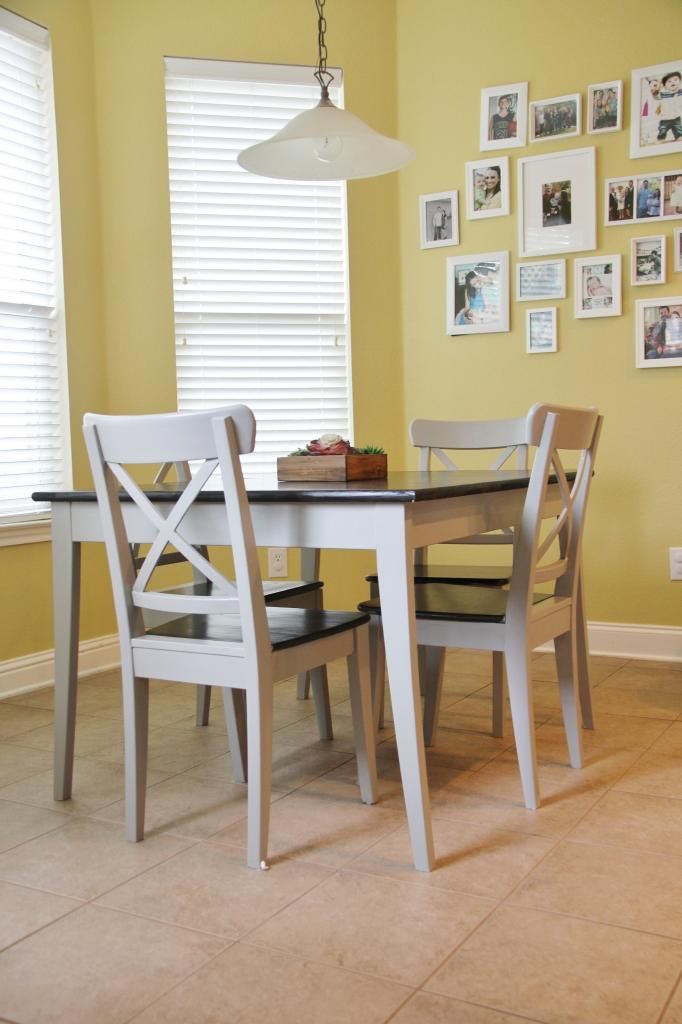
IKEA Hack: table makeover with chalk paint
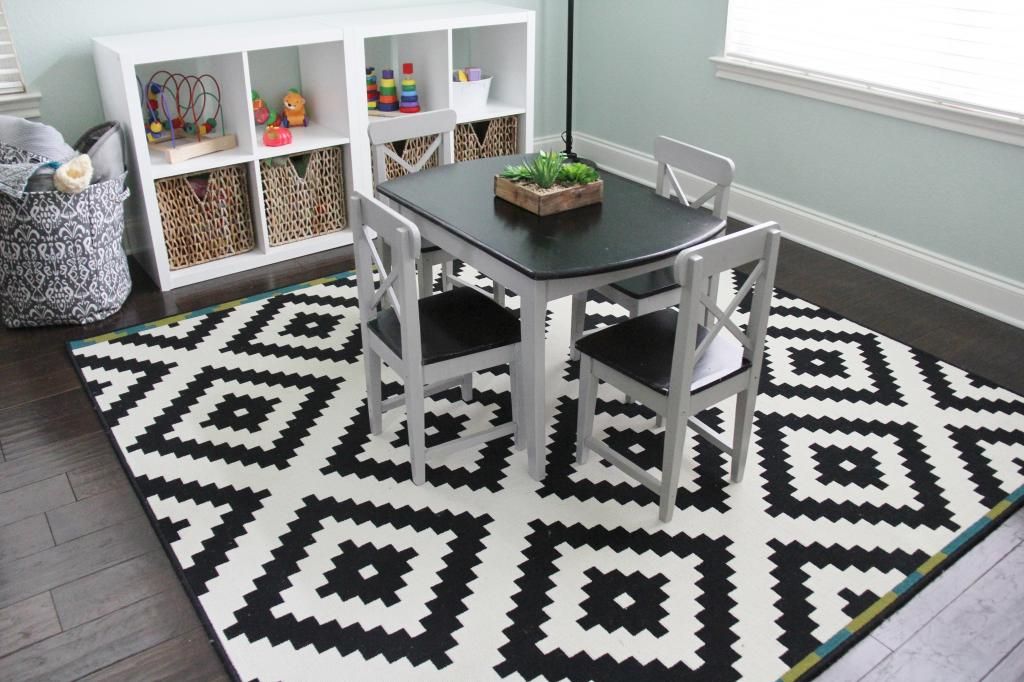
Jon came into our relationship with an IKEA kitchen table and 4 chairs. I love the shape of the table, it is nice and sturdy, and I've always loved the style of the chairs. I am just not crazy about the color or the cheap looking IKEA finish on top. My original plan was to keep this table for a few years and then upgrade to a nice big round table when our family got bigger but I finally got sick of looking at the table. I should also mention, my mom bought Ford the exact same table but miniature size, I am obsessed. I've seen a recent obsession with Annie Sloan chalk paint all over the internet and when a friend posted a picture of the exact same IKEA table I have but restained and painted with AS chalk paint, I knew I found my solution.
I did lots of research, planning, and talking to friends who were familiar with chalk paint because it is in no way similar to regular paint. I have redone a few pieces of furniture using thick and sticky primer, thin paint, and sealer. Too many steps. With chalk paint, no sanding or priming is required.. I am sold! When it came to a color, I wanted to restain the top of our table to match our dark wood floors but keep the legs light and bright so that it flowed with our new kitchen.

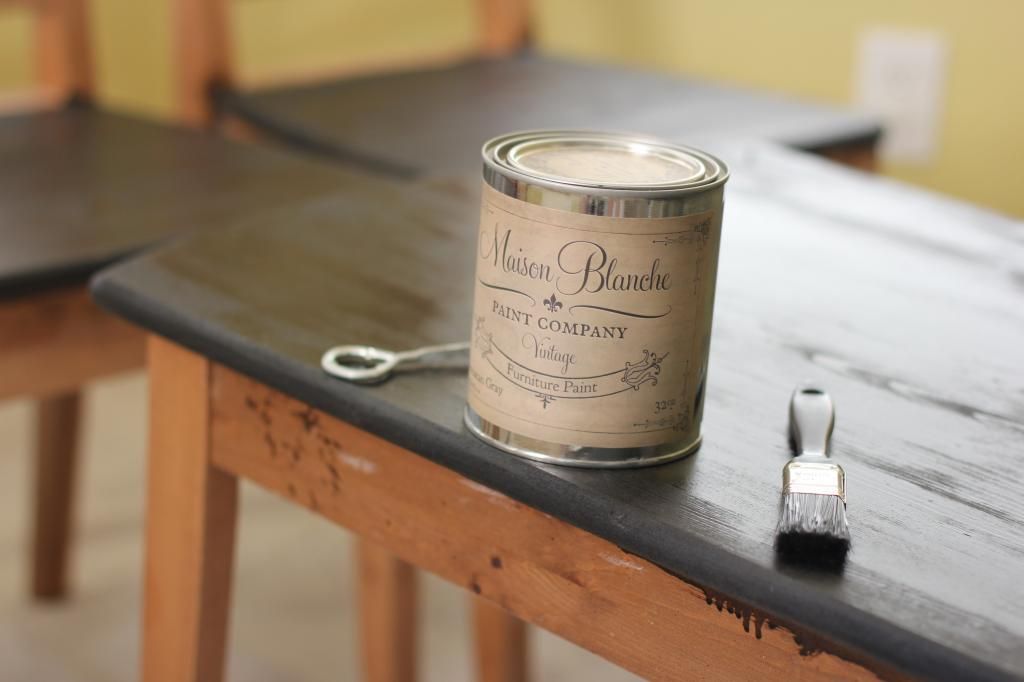
I decided I would paint the legs gray and was bummed when looking at the color selections Annie Sloan offered. The only 2 gray colors looked purple and blue and if I was going to spend $50 on a quart of paint, I wanted it to be perfect. A friend told me about another brand of chalk paint called Maison Blanche and a cutesy junk/gypsy store in my area carried it! It's basically the same price, $42 for a quart, but there are so many more color and wax options. Now I live in a pretty big town and there is only 1 place in all of Austin and it's suburbs that carry Annie Sloan and only 1 place that carries Maison Blanche. If you live in a small town, you may have to drive a bit to find some, but it is worth it!
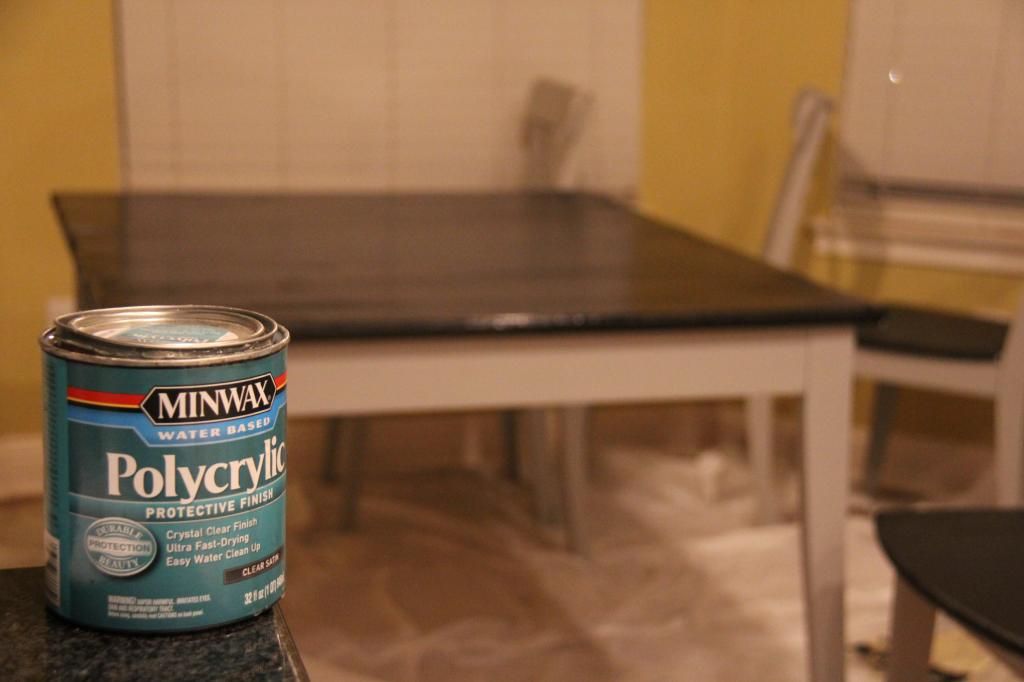
I followed directions from a friend of mine but also kind of winged it. I decided against using the tedious and messy wax specifically for chalk paint and improvised with using a water based Polyacrylic seal. I am incredibly pleased with the results of my first chalk paint project and wanted to share with you the easy steps. I refinished our large kitchen table, 4 full sized chairs, Ford's mini table, and 4 mini chairs. It was work....but fun! Considering I can't do much when Ford is awake, I spent almost every naptime and evening working on the table and it was done in 5 days.
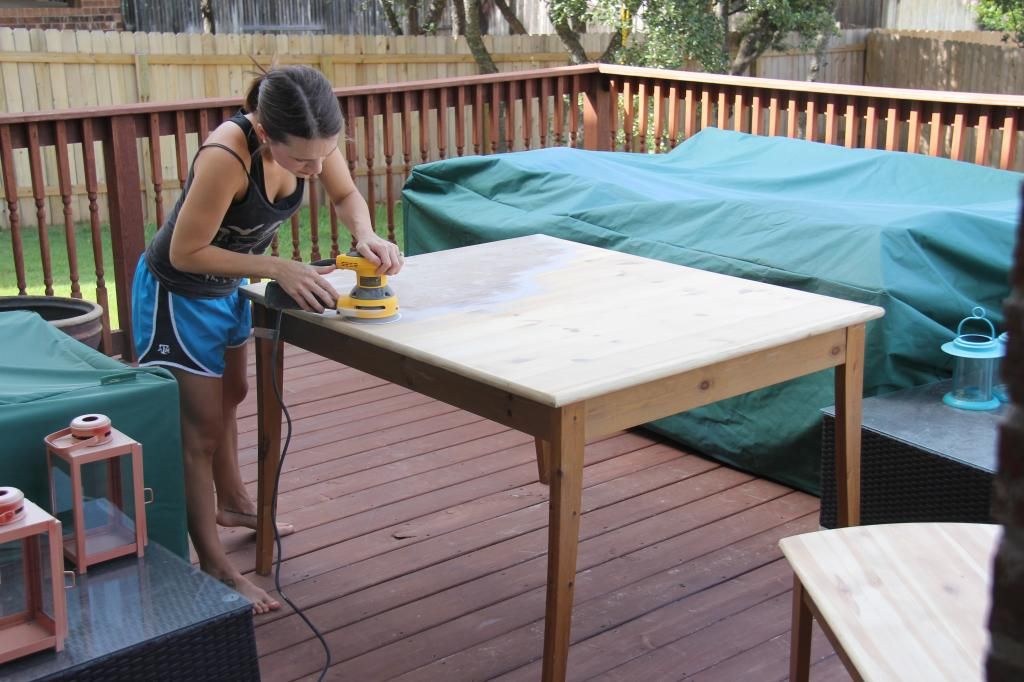
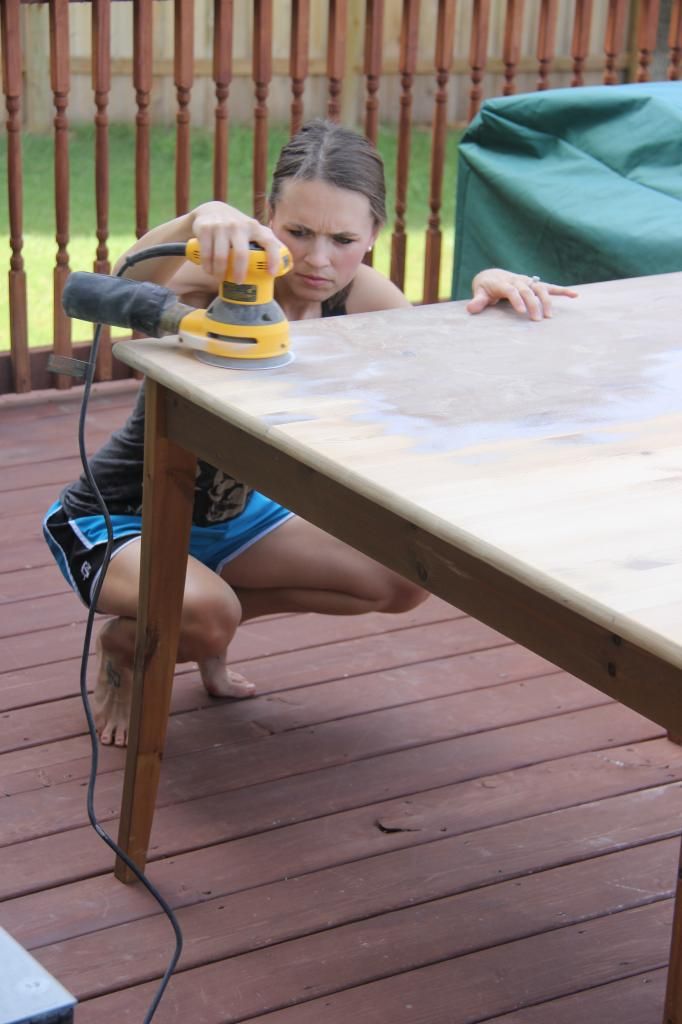
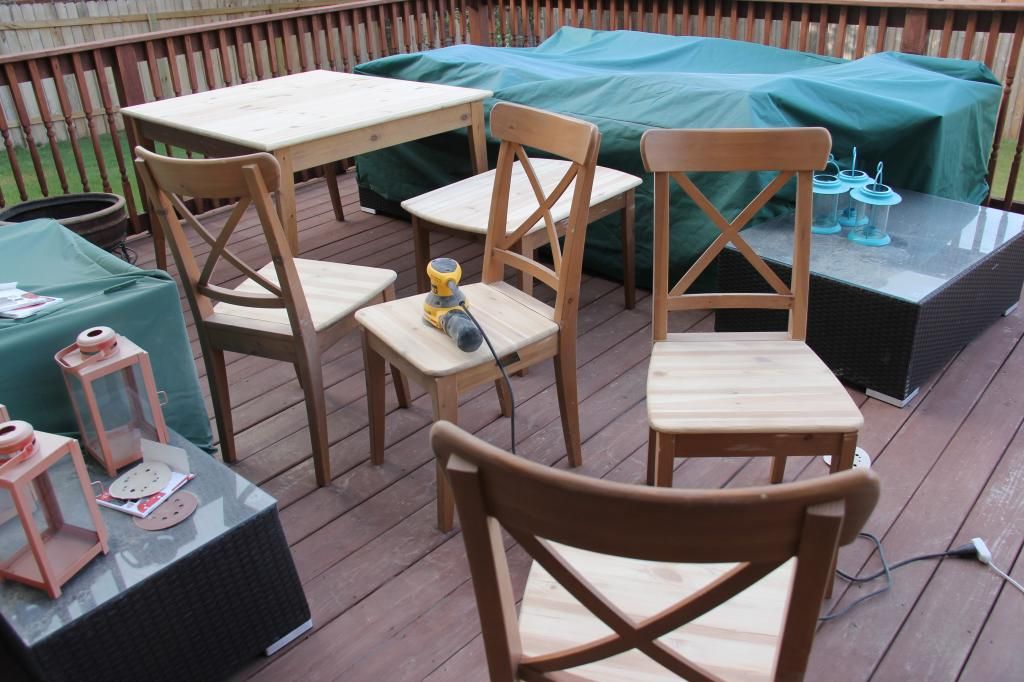
Step 1: Sanding
I chose to restain the top of the table and chairs rather than painting it with chalk paint. I borrowed a power sander and sanded the tops of the tables and chairs using 60 grit to get the varnish off, then 100 grit to smooth down, and finished with 150 grit. This was the most tedious part of the project but it was also the most invigorating for me ha! It took about 1.5 hours all together and I woke up sore the next morning.
We covered our patio furniture which was key because the deck was caked in dust.


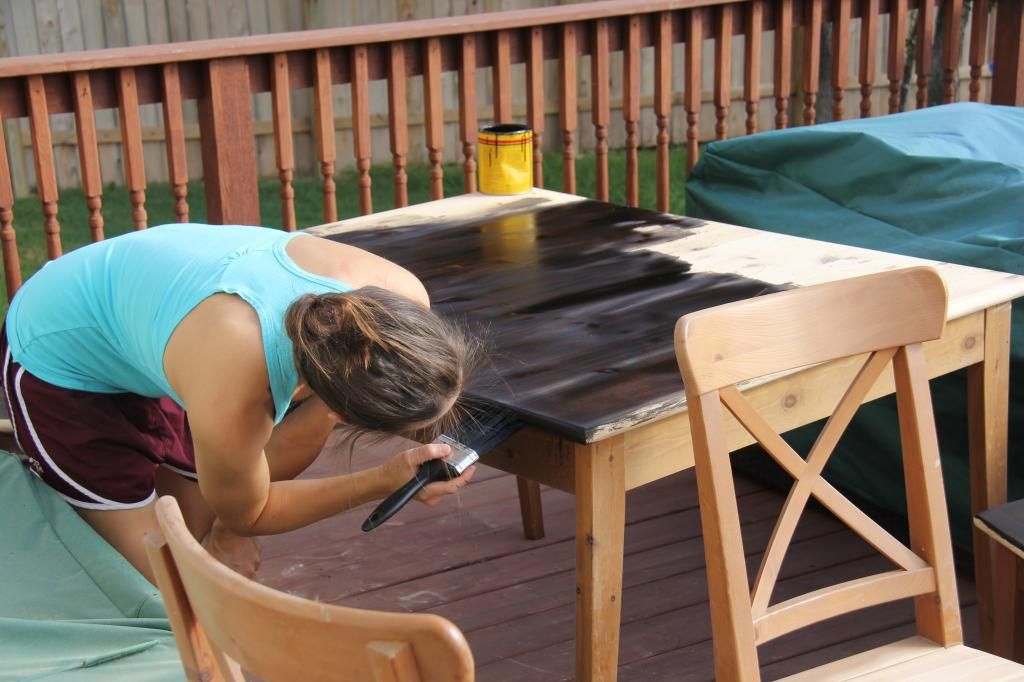
Step 2: Staining
Next up I used a cheap economy grade paint brush and Minwax wood finish in Dark Walnut (2716)to stain the tops of the tables and chairs. The stain came out darker than I expected but we actually like it better because it ties in our black granite in the kitchen. I didn't worry when I dripped stain on the legs of the chairs because I was able to easily paint over. I did 2 coats of stain (24 hours apart) and let it dry for another 24 hours before starting to paint.


Step 3: Painting
I brought the tables and chairs inside and painted on top of a drop cloth in our kitchen. Again, I used a cheap, economy grade brush (which was recommended by the sales woman who uses chalk paint professionally for a living) and Franciscan Gray Maison Blanche chalk paint. I love using chalk paint because it is so thick and goes on so well (chalk paint is basically paint mixed with dry chalk, not to be confused with chalkboard paint). It also dries really fast which is nice because I was able to do a second coat quickly.


*One of the draws of chalk paint is it is easy to distress if you want that antique look but I didn't feel like that look would go with the rest of my house. To distress, you can use a 100 grit piece of sandpaper and gently sand down a few areas on each piece, depending on how much distress you want. If you don't like it, you can easily paint over. Just be sure to distress before you wax or seal because once you wax or seal, you are done.
Step 4: Sealing
Most people use Annie Sloan or Maison Blanche soft wax to seal their furniture projects. I have heard from many people that it is time consuming, tedious, and messy so I did some quick research to find an alternative. I had already purchased some Minwax Water Cased Polyacrylic Protective Finsih to seal the stained portions and decided to use that on the chair legs as well. It's easy and goes on clear with a cheap foam brush. I did 3 coats on the table and chair tops and 2 coats on the chair legs and backs. I let each coat dry for a few hours with the final coat drying for 24 hours before setting stuff on top. Another benefit for using this sealer as opposed to wax is that if I decide I want a different color, I can paint right over it. With wax, you would need to remove it before painting on top.


More posts from