
DIY leather bag (and leather hide store giveaway!)

I am SO psyched to share this project with you all today! I was contacted by the Leather Hide Store about sending me a hide to work with, and of course I was in.
I love using leather! (for moccs, shoes, phone cases, accents…)
They sent me a few samples and I chose my hide color from those. (Dark Gold Rush.)
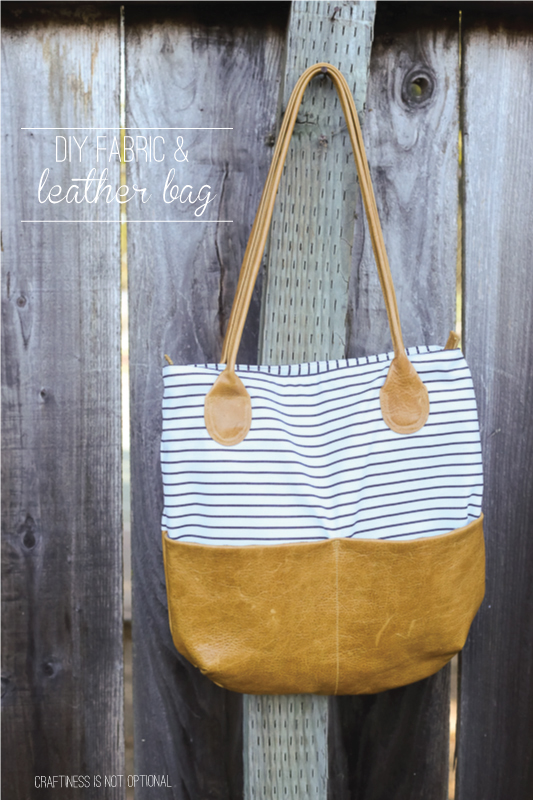
I wanted to make a bag with it-but I wasn’t too sure about constructing the whole thing from leather, so I went with a leather bottom and handles.

I spent HOURS poring over Pinterest looking for ideas.
In the end, I did my own spin on Anna’s new pattern!


A few notes first about sewing with leather:
I don’t know if it was just this leather color or not, but if I dragged it hard against something sharp-ish, it made a mark.
those two marks on the front right side weren’t there until after I sewed on the handles and accidentally dragged it against my machine somewhere.
eek! but I’m telling myself it’s part of the “worn in” look.
I didn’t have a leather needle on hand so I just used the highest number needle I had on hand. I practiced on scraps to find the best stitch length and tension.
more of my thoughts as we go on!

So I kept the shape of the bag pattern…I liked the curved bottom and darts. those things were SO thick for the leather layer!!!
It took some hand cranking through the machine. and I did another row close to that one to strengthen the seam)
To color block it I just chopped the pattern in half and added seam allowance, then sewed together (the back at least)


So I sewed the leather bottom piece to the lining (essex yarn dyed linen), under stitched, then flipped right side out, and basted it to the striped outer bag piece.
fabric from Joanns, leftover from this dress! It works ok. If I were to do it again I’d use stiffer interfacing.
Then I sewed the pocket divider up the middle, forming the two separate pockets, reinforcing it at the top with some stitched triangles.
I used jean top-stitching thread since it matched my leather.


the handles are strips of 2″ wide leather, with the ends curved. I measured from the curved edges, then tucked both long edges in 3/8″, then in half, and topstitched.
Then I stitched them to the bag around the curved U shaped edge. (double rows)
Pretty sturdy! (I hope! lol)
I cut a matching short piece of curved leather for each of the handles, to sandwich the fabric layers for stability. (see below)
It’s not pretty. but it works.

On the inside, I added a zipper pocket-followed the pattern for this!
I wish I’d made it lower so it didn’t end up interfering with those leather reinforcing pieces, but I didn’t think about that til I was putting the handles on (last step).
I like to sew by the seat of my pants!
Anyways, it’s functional, so there’s that.

Also a fun thing-I added a little zipper to the top of the bag instead of a magnetic snap-a valiant attempt to keep Ava out of my snack stash.
(won’t work but look! pretty turquoise zipper!)

It was pretty simple to put together but alas I didn’t get pictures for a tute. I wonder if there’s one out there for this?

My favorite part is the little leather tab on each end!
I am so excited about my new bag! and the rest of my hide! I can’t wait to make some more moccs, bows, etc! hope I don’t get sick of mustard yellow.
(Not a chance)

Are you thinking about sewing with some leather?
Do you want to win some free leather?
If you answered yes to either question, CONGRATS. You’re in the right place.
Enter below to win a $50 gift certificate to the Leather Hide Store!