How To Create A Calendar In Microsoft Word

Since I posted my printable 2014 calendar I've had a few emails from readers asking how they can make their own calendars for various purposes. I love responding to my readers' questions, but since I am busy and writing personalized tutorials is time consuming I thought that I would publish a post that should answer most peoples' questions on the subject.
How To Make A Calendar Using Word
Most people have Microsoft Word, but a lot of people don't realize that it comes with its own handy templates for creating printables. It has some really great calendars, which are pretty easy to tailor to your exact needs and tastes.

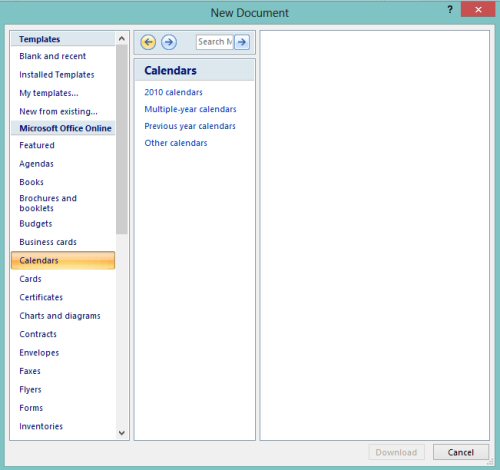
Step One. Go to 'New' on the menu, then under 'Microsoft Office Online' choose 'Calendars'. Look at the templates under 'Other' until you find a calendar to suit your needs.
There are class schedules (easily adapted for work/blogging purposes), birthday/anniversary calendars, financial planning based calendars... you don't need one which is exactly what you need, just one that can be adapted.

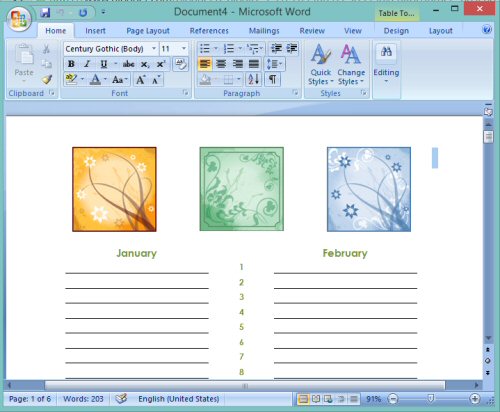
Step Two. I am going with the 'Birthday and anniversary calendar' template, because most of my readers' questions have been based around calendars for that type of use.

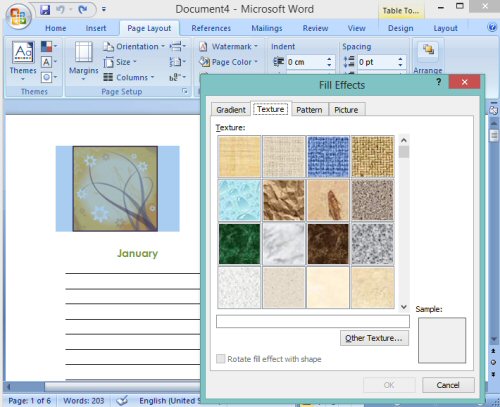
Step Three. I'm going to start by changing the plain background on the calendar to something more exciting. You can choose between using a colour, pattern, texture or even your own photos. To change the background of a document in Word go to 'Page Layout' then ' Page Color', followed by 'Fill Effects' if you want a pattern or texture. I've uploaded a chalkboard texture as my background.

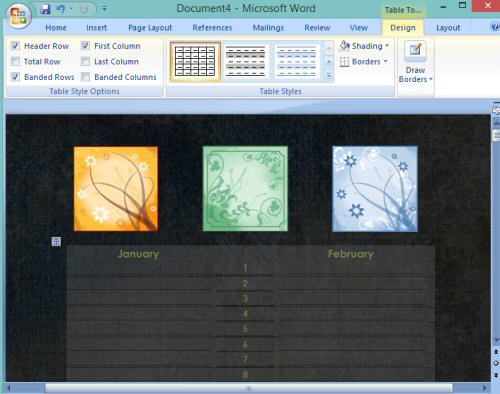
Step Four. The chalkboard background looks great, but it isn't very practical for writing things on the calendar! So the next thing I did was change the colour of the table (where the lines are for writing on).
If you hover your mouse over the top left corner near where the month is written, a box will appear to show you where the table is. Click on this so that your table is highlighted, then go to 'Design' on the top menu. You can change the background colour of the table under 'Shading'.

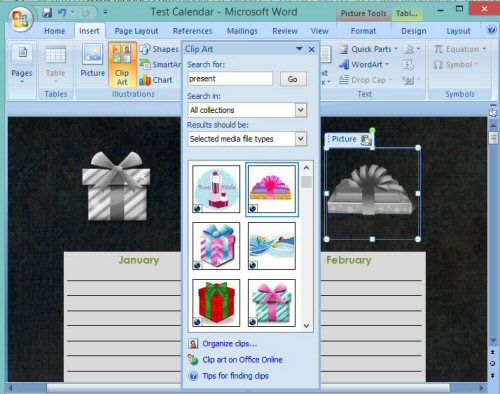
Step Five. There are two options if you want to change the images at the top. First of all, you could delete the existing images and add some clip art. To do this go to 'Insert' followed by 'Clip Art', then browse through the image library until you find something you want. You can add borders or re-colour the images under the 'Design' tab on the top menu.

Alternatively, you can add your own photo(s) to the top of the calender. If you want to keep the same layout as the template, simply click on the image you want to change and then on the 'change picture' icon in the corner of the box. This will bring up the option to upload your own photos and pictures from your computer.

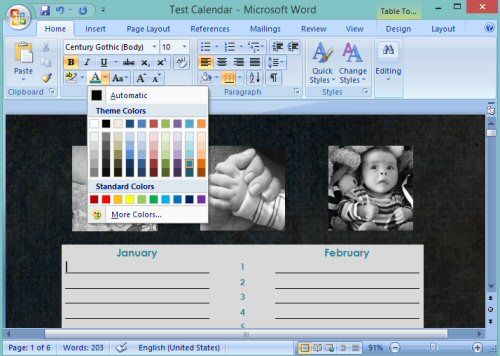
Step Six. The last thing I have done with my calendar is change the text. This can be done under the 'Home' tab on the menu. You can alter the font, size and colour.

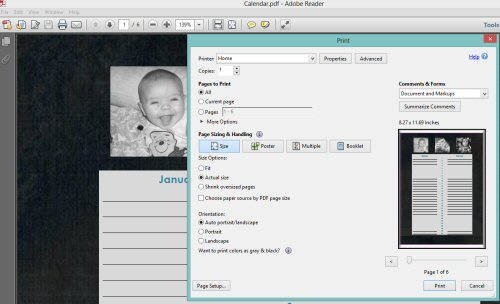
Step Seven. Save and print your work! I prefer to save any printable created in Word as a PDF file - I find the image resolution is better when it prints.
If you've ever thought it might be nice to create your own calendar but didn't think you had the skills or the tools, I hope that this post has made you reconsider. Get in touch or leave me a comment if you need anything clarified, and I will do my best to give you an answer. :-)


Chalkboard Art Tutorial
More posts from