
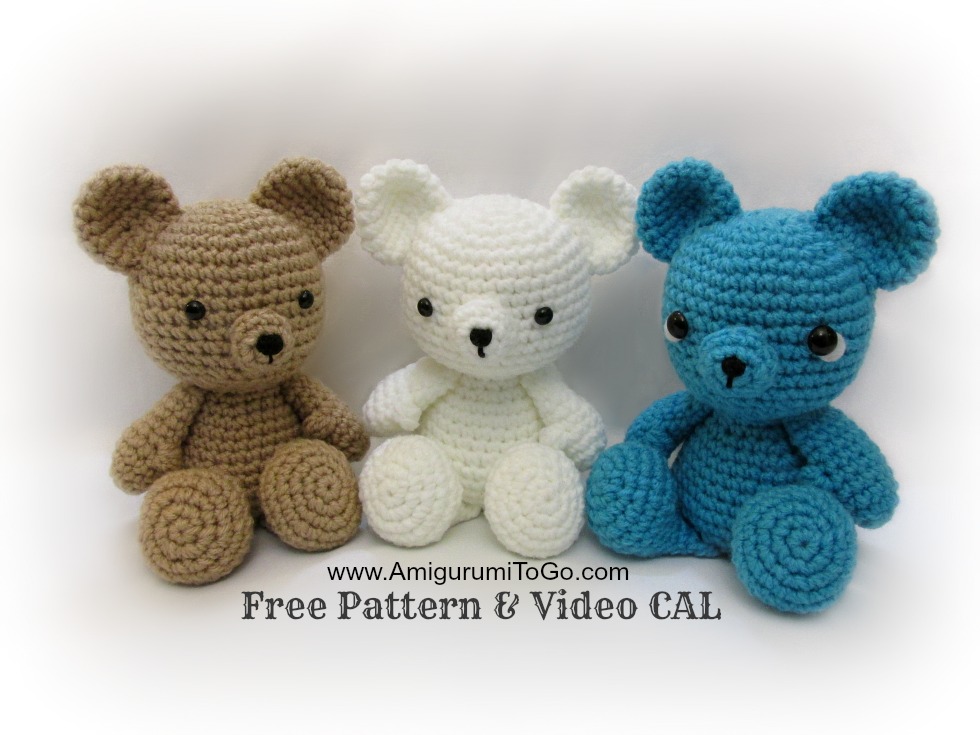
Crochet Teddy Bear Youtube Tutorial

Hello Friends!
If you'd like the written pattern for the bear please scroll down this page. And also look for the green print friendly button at the bottom of this page.
The video is
If you'd like the written pattern for the bear please scroll down this page. And also look for the green print friendly button at the bottom of this page.
The video is
here and follows along with the written pattern and is a full video tutorial geared towards the beginner that will take you through every row explaining
each new stitch and also includes how to sew the bear together. I hope you enjoy and don't forget to post pictures of your finished bear on my facebook page Amigurumi Freely. The bear is apr 6-8 inches tall in a sitting position depending what on yarn weight and hook size.
Copyright 2014 Author: Sharon Ojala - Amigurumi To Go, All rights reserved
Attention members of all cross stitch and DIY sites
Read this copyright notice.
Taking whole or parts of this pattern and/or photos away from Amigurumi To Go for any purpose is theft. Using one photo with a link back to the pattern is permitted.
1)
each new stitch and also includes how to sew the bear together. I hope you enjoy and don't forget to post pictures of your finished bear on my facebook page Amigurumi Freely. The bear is apr 6-8 inches tall in a sitting position depending what on yarn weight and hook size.
Copyright 2014 Author: Sharon Ojala - Amigurumi To Go, All rights reserved
Attention members of all cross stitch and DIY sites
Read this copyright notice.
Taking whole or parts of this pattern and/or photos away from Amigurumi To Go for any purpose is theft. Using one photo with a link back to the pattern is permitted.
Read me ~> Work in continuous rounds, do not join. I used Red Heart Super Saver yarn with a 4.0 mm hook. If you crochet more on the loose side then use a smaller hook so you don't get gaps and stuffing showing through the stitches. Have any questions or if you come across a mistake in the pattern please leave a message in the comment section below.
Read me ~> How to read the rows: Each row has a sequence as given below. Example: 1sc then 2sc in next st means repeat that sequence 1sc then 2sc in next st followed by 1sc then 2sc in next st over and over to the end of that particular row. The number inside the parentheses ( ~ ) is the number of stitches you should have at the end of that particular row.
Read me ~> Add in a marker at the end of row 2 and move that marker at the end of every row. I just use a short length of yarn and pull it through the last stitch I put in at the end of every row.
Supplies:
Red Heart worsted weight acrylic yarn
4.0 mm hook *use a smaller hook if you see gaps in your stitches
blunt end yarn needle for sewing
scissors
100% polyester stuffing
fabric glue
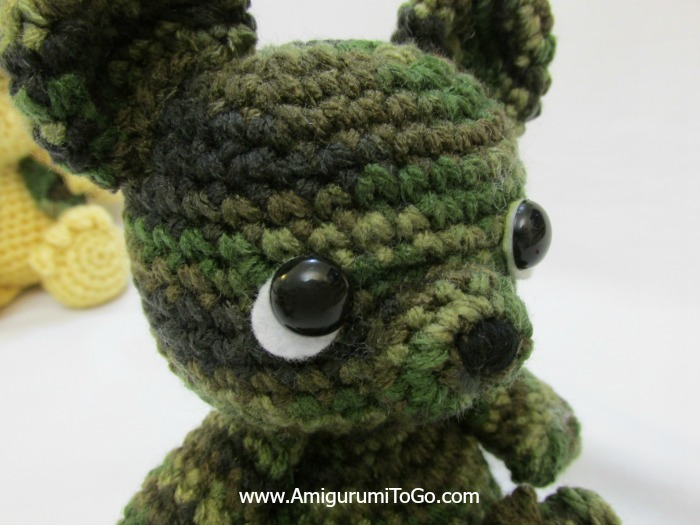
optional ~ felt for behind the eyes
you can use buttons, a french knot or paint eyes on. I used safety eyes that I glued in place.
Abbreviations:
st = stitch
sc = single crochet
2tog = crochet 2 stitches together
f/o = finish off
dc = double crochet (used only for toes and thumbs and is optional)
*For the video tutorial click hereStarting at the top of the head working down to bottom of body:
1)
magic circle or
adjustable loop with 6st (6)
2) 2sc in each (12)
3) 1sc then 2sc in next st (18)
4) 1sc in next 2st then 2sc in next st (24)
5) 1sc in next 3st then 2sc in next st (30)
6) 1sc in next 4st then 2sc in next st (36)
7-14) 1sc in each st for 8 rows
15) 1sc in next 4st then 2tog (30)
16) 1sc in next 3st then 2tog (24)
17) 1sc in next 2st then 2tog (18)
18) 1sc in next 4st then 2tog (15)
19) 1sc in each st for 1 row
20) 1sc in next 4st then 2sc in next st (18) *stuff and shape head. You can add more stuffing into the head over the next few rows
21) 1sc in next 2st then 2sc in next st (24)
22) 1sc in next 3st then 2sc in next st (30)
23-25) 1sc in each st for 3 rows
26) 1sc in next 4st then 2sc in next st (36)
27) 1sc in next 5st then 2sc in next st (42)
28) 1sc in each st for 1 row
29) 1sc in next 5st then 2tog (36)
30) 1sc in next 4st then 2tog (30)
31) 1sc in next 3st then 2tog (24)
32) 1sc in next 2st then 2tog (18) *stuff and shape body. Make sure to add stuffing into the neck area if needed. You can stuff more into the body over the next 2 rows.
33) 1sc then 2tog (12)
34) 1sc then 2tog (8)
35) 2tog twice then f/o and use yarn tail to weave in and out of the remaining stitches, pull tight to close the gap, knot off and hide yarn tail inside the body.
Ears:
1) magic circle or adjustable loop with 6st (6)
2) 2sc in each (12)
3) 1sc then 2sc in next st (18)
4) 1sc in next 5st then 2sc in next st (21)
5) 1sc in next 5st then 2tog (18)
6) 1sc in next 4st then 2tog (15)
7) 1sc in each st for 1 row
sl st next st and f/o leaving a long tail for sewing. Do not stuff the ears. Fold flat and shape. Pin to the top of the head then sew in place.
Muzzle:
1) magic circle or adjustable loop with 6st (6)
2) 2sc in each (12)
3) 1sc in each st for 1 row
sl st next st and f/o leaving a long tail for sewing. Add a nose with black embroidery thread. Do not stuff the muzzle.
Arms:
1) magic circle or adjustable loop with 6st (6)
2) 2sc in each (12)
3) 1sc in next 5st then 2sc in next st (14)
4-5) 1sc in each st for 2 rows
6) 1sc in next 5st then 2tog (12)
7-9) 1sc in each st for 3 rows
10) 1sc in next 4st then 2tog (10)
f/o leaving a long tail for sewing. Stuff hand and lightly stuff arm.
You can add a thumb by inserting yarn in between the 5th and 6th row and making 2dc then f/o, shape and hide yarn tails inside arm.
Legs:
1) magic circle or adjustable loop with 6st (6)
2) 2sc in each (12)
3) 1sc then 2sc in next st (18)
4) 1sc in next 2st then 2sc in next st (24)
5-6) 1sc in each st for 2 rows
7) 1sc in next 2st then 2tog (18)
8) 2tog 4 times then 1sc in next 10st (14)
9) 2tog twice then 1sc in next 10st (12)
10-12) 1sc in each st for 3 rows
stuff and shape the foot, stuff the bottom of the leg lightly, leave the top of the leg free of stuffing. Squish the top of the leg together and sc through both sides of the leg across the top for one row. f/o leaving a tail for sewing.
Optional: add 4 toes the same way you made the thumbs. I made the toes on the 5th row with a small space between each toe.
Tail:
1) magic circle or adjustable loop with 6st (6)
2) 2sc in each (12)
3) 1sc then 2sc in next st (18)
4) 1sc then 2tog (12)
Assembly:
I placed the eyes in between the 10th and 11th row with about 6-7 stitches between them.
The top of the muzzle is just above the 11th row
Pin the ears on and play around with placement before sewing them in place
The arms are sewn directly under the head. Add a stitch or 2 from under the arm to the body to tack the arm down if they are flaring out too far.
Sew the legs flat to the underside of the body so that the bear sits.
2) 2sc in each (12)
3) 1sc then 2sc in next st (18)
4) 1sc in next 2st then 2sc in next st (24)
5) 1sc in next 3st then 2sc in next st (30)
6) 1sc in next 4st then 2sc in next st (36)
7-14) 1sc in each st for 8 rows
15) 1sc in next 4st then 2tog (30)
16) 1sc in next 3st then 2tog (24)
17) 1sc in next 2st then 2tog (18)
18) 1sc in next 4st then 2tog (15)
19) 1sc in each st for 1 row
20) 1sc in next 4st then 2sc in next st (18) *stuff and shape head. You can add more stuffing into the head over the next few rows
21) 1sc in next 2st then 2sc in next st (24)
22) 1sc in next 3st then 2sc in next st (30)
23-25) 1sc in each st for 3 rows
26) 1sc in next 4st then 2sc in next st (36)
27) 1sc in next 5st then 2sc in next st (42)
28) 1sc in each st for 1 row
29) 1sc in next 5st then 2tog (36)
30) 1sc in next 4st then 2tog (30)
31) 1sc in next 3st then 2tog (24)
32) 1sc in next 2st then 2tog (18) *stuff and shape body. Make sure to add stuffing into the neck area if needed. You can stuff more into the body over the next 2 rows.
33) 1sc then 2tog (12)
34) 1sc then 2tog (8)
35) 2tog twice then f/o and use yarn tail to weave in and out of the remaining stitches, pull tight to close the gap, knot off and hide yarn tail inside the body.
Ears:
1) magic circle or adjustable loop with 6st (6)
2) 2sc in each (12)
3) 1sc then 2sc in next st (18)
4) 1sc in next 5st then 2sc in next st (21)
5) 1sc in next 5st then 2tog (18)
6) 1sc in next 4st then 2tog (15)
7) 1sc in each st for 1 row
sl st next st and f/o leaving a long tail for sewing. Do not stuff the ears. Fold flat and shape. Pin to the top of the head then sew in place.
Muzzle:
1) magic circle or adjustable loop with 6st (6)
2) 2sc in each (12)
3) 1sc in each st for 1 row
sl st next st and f/o leaving a long tail for sewing. Add a nose with black embroidery thread. Do not stuff the muzzle.
Arms:
1) magic circle or adjustable loop with 6st (6)
2) 2sc in each (12)
3) 1sc in next 5st then 2sc in next st (14)
4-5) 1sc in each st for 2 rows
6) 1sc in next 5st then 2tog (12)
7-9) 1sc in each st for 3 rows
10) 1sc in next 4st then 2tog (10)
f/o leaving a long tail for sewing. Stuff hand and lightly stuff arm.
You can add a thumb by inserting yarn in between the 5th and 6th row and making 2dc then f/o, shape and hide yarn tails inside arm.
Legs:
1) magic circle or adjustable loop with 6st (6)
2) 2sc in each (12)
3) 1sc then 2sc in next st (18)
4) 1sc in next 2st then 2sc in next st (24)
5-6) 1sc in each st for 2 rows
7) 1sc in next 2st then 2tog (18)
8) 2tog 4 times then 1sc in next 10st (14)
9) 2tog twice then 1sc in next 10st (12)
10-12) 1sc in each st for 3 rows
stuff and shape the foot, stuff the bottom of the leg lightly, leave the top of the leg free of stuffing. Squish the top of the leg together and sc through both sides of the leg across the top for one row. f/o leaving a tail for sewing.
Optional: add 4 toes the same way you made the thumbs. I made the toes on the 5th row with a small space between each toe.
Tail:
1) magic circle or adjustable loop with 6st (6)
2) 2sc in each (12)
3) 1sc then 2sc in next st (18)
4) 1sc then 2tog (12)
Assembly:
I placed the eyes in between the 10th and 11th row with about 6-7 stitches between them.
The top of the muzzle is just above the 11th row
Pin the ears on and play around with placement before sewing them in place
The arms are sewn directly under the head. Add a stitch or 2 from under the arm to the body to tack the arm down if they are flaring out too far.
Sew the legs flat to the underside of the body so that the bear sits.


And you're done! I hope you enjoyed the pattern. Post pictures on my facebook page if you'd like to show off your finished bear :)
This pattern was courtesy of Sharon Ojala of Amigurumi To Go. Free for all to enjoy! You may sell finished products. Donations of any size are greatly appreciated and will help keep the patterns free. So far over 83 free patterns & video tutorials and many more to come. Happy Crafting everyone!

More posts from Sharon Ojala