Elsie Larson

Simple Winter Village DIY

One of my favorite childhood Christmas memories is setting up our holiday village every year. My mom had collected several ceramic buildings with electric lights inside, including houses, a church, a school, and a general store. I loved setting up the little people and trees, then watching when the houses lit up, glowing in the early dark of evening. Such warm fuzzies!

I wanted to create my own winter village to capture the nostalgia of my childhood, but decided to tailor the idea a bit for my taste and decor. My village consists of simple set-like facades, backlit by a strip of LED lights and accessorized with wintery bottle brush trees. Check out how simple it is to make your own winter village!

Supplies:
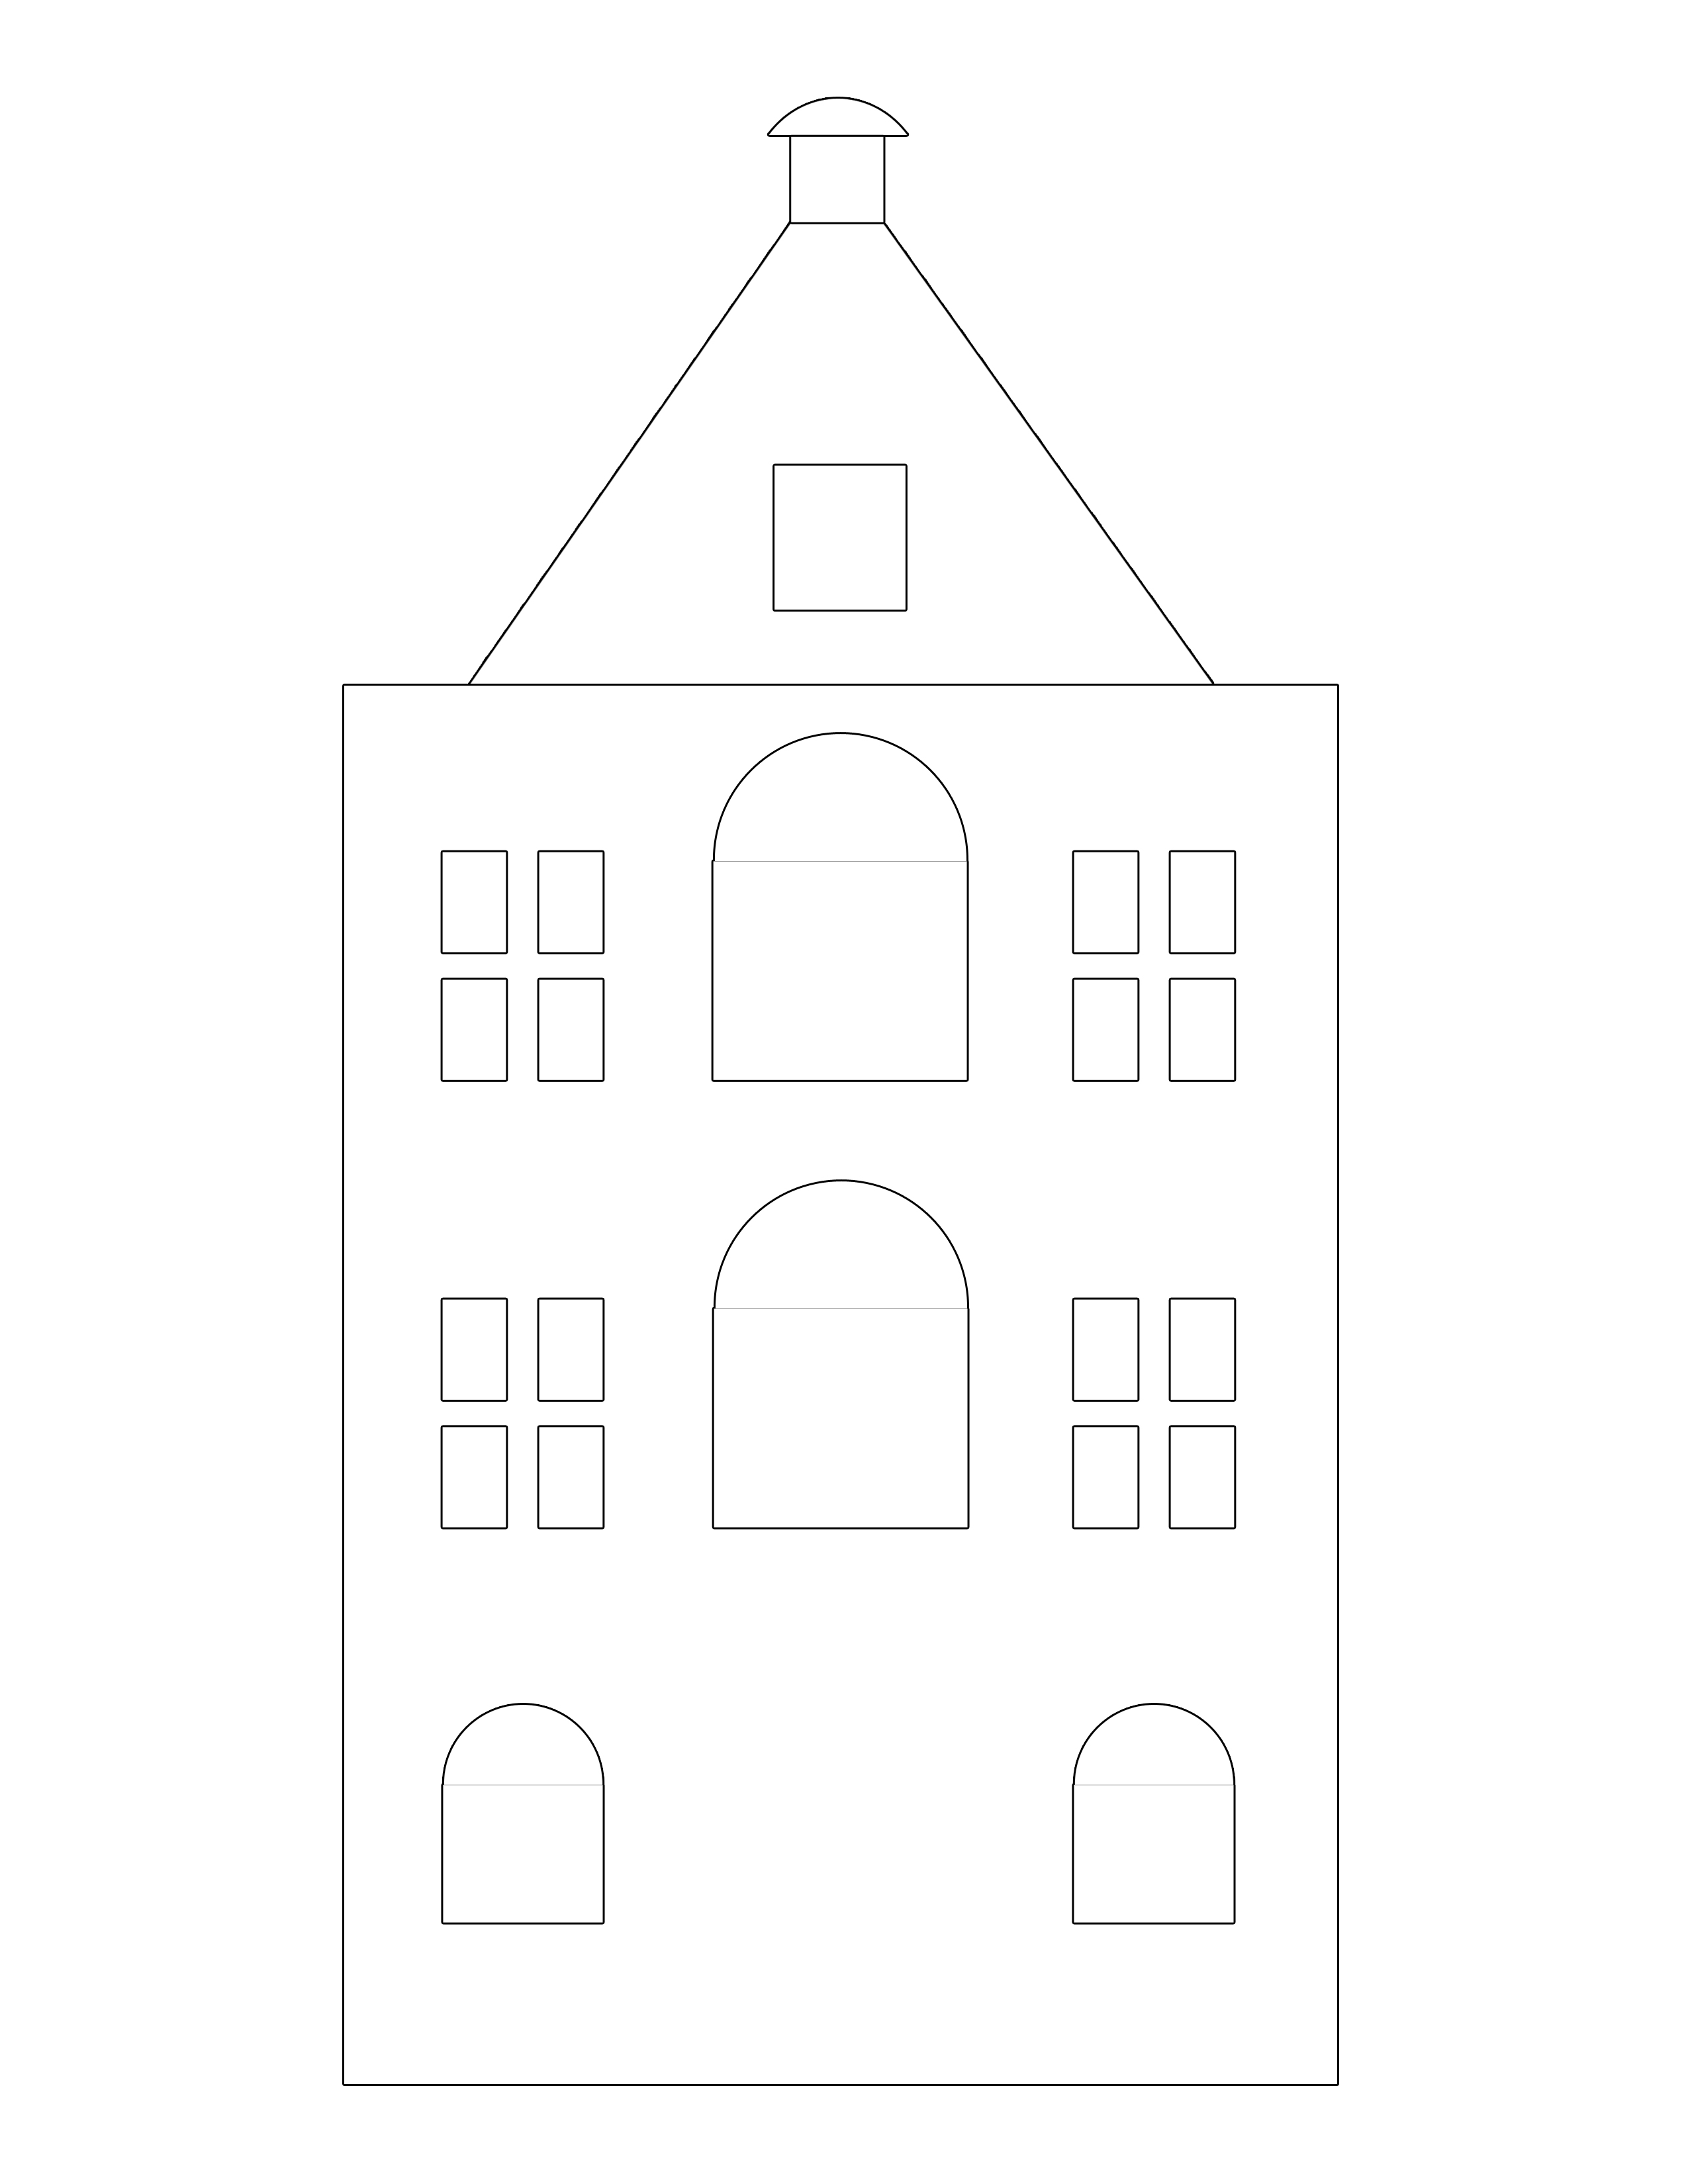
-building templates (see below to download)
-colored foam board (or you can paint or spray mount colored paper to foamboard)
-gold or white vellum
-small L-brackets
-X-Acto blade (with plenty of refill blades)
-drafting tape or painter's tape
-hot glue gun (or glue of your choice)
-puffy paint
-LED spotlights (optional)

To begin, click any or all of the above templates and print onto 8.5" x 11" sheets of paper. You should not need to scale the image to fit because printer margins have been factored in.

Step One: Use drafting tape (or painter's tape) to fasten the template to your foam board. Use an X-Acto blade to cut out the windows and shape of each building. It will take a few passes of the blade to cut all the way through. Be patient! If you push too hard on the blade, you will break the tip.

Note: I also used artist's board (like a mat board material) for this project, and it was very difficult to cut through compared to foam board. Foam board is stiff and easy to cut through— the perfect material for this project, in my opinion.

Step Two: Trim the windows and doors with puffy paint. You can add any interest that you want during this time too, such as shingles, bricks, or even a little wreath.

Step Three: When the puffy paint has completely dried and hardened, flip the building facade upside-down and glue vellum to the windowed areas. Then glue one or two brackets onto the back, making sure not to glue a bracket onto any window or door openings.

I used this strip of LED spotlights to backlight my little village. I chose this set because it was the perfect size (each light lines up with each building), has two settings, and is also battery powered. I'm a big fan of no cords!

This set of buildings was inspired by the city of Amsterdam, but the puffy paint sort of adds the effect of a gingerbread house, doesn't it? I think it's quite charming. Maybe next year I will add a cathedral or a school! -Mandi

Credits // Author and Photography: Mandi Johnson. Photos edited with Stella from the Signature Collection.

  • Love
  • Save
    361 loves 37 saves
    Add a blog to Bloglovin’
    Enter the full blog address (e.g. https://www.fashionsquad.com)
    We're working on your request. This will take just a minute...