
sewing 101 // Parts of a Dress form + Shop Company review

I’m SO excited to share about my new dress form today! I’ve been holding out for a dress form since college, saving up for a professional one. My professors were always saying horrible things about the adjustable forms, which seem to be the cheapest option. (I think they said they weren’t stable or accurate etc.) So I was thrilled to have this opportunity to review a professional form for The Shop Company. I received this dress form in exchange for review, but if I hadn’t they are so affordable! I’d probably ask for one for my birthday!
This is the Professional Female Dress Form. I’m really impressed with it! It’s set on wheels and has all the features and markings necessary. So far I’ve used this to make sure my Garden Party Collection fits, drapes and darts right. I’m so excited to start draping on it!
(Pictured above is the Emaline Knit dress. )

Parts of a Dress Form //
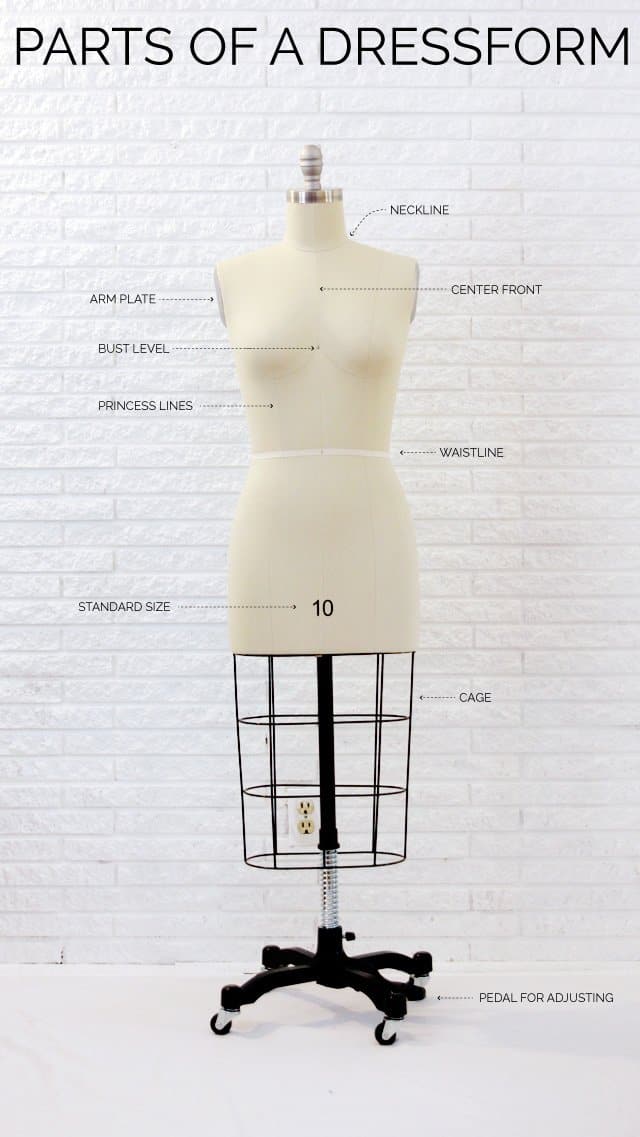
The best part about a professional dress form is all the useful markings that aid in designing. This dress form has most of the essential marks plus a few awesome features.
1. Neckline // This line helps you design your neckline. This is where the body meets the neck, so I always lower the neckline it at least a little bit from this line. It’s so nice to have it marked for you so you can get an even neckline.
2. Center Front Line // Also center back line on the back.
3. Armplate // The armplate is a metal plate that creates the armscye. This is useful when designing around the arm, for both sleeved and sleeveless garments. The metal makes it easy to feel if there is fabric on top, so you can be precise without pulling your hair out.
4. Bust Level // The little dot at the breastbone indicates the level of the bust.
5. Princess Seam Lines // Allows you to design using princess seam panels. These markings are on the back also.
6. Waistline // The waistline is the smallest part of the torso.
7. Size // Professional dress forms typically come in straight sizes. The Shop Company offers sizes 0 to 20.
8. Cage // The cage is a must for designing skirts and dresses with skirts, especially for form-fitting styles.
9. Foot Pedal // Allows you to raise the form for different heights.

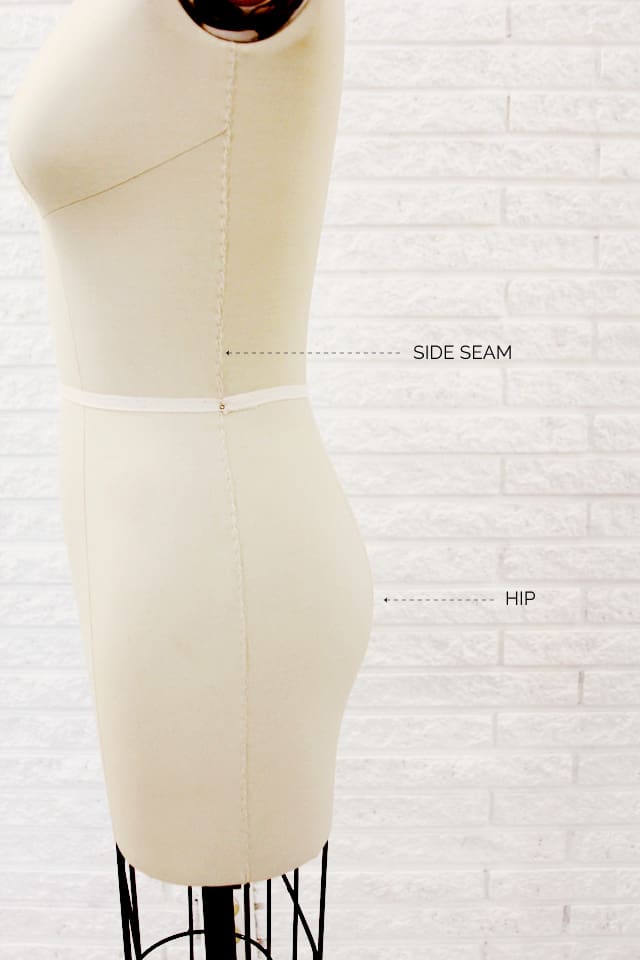
10. Side Seams // These are raised on the form so you can feel it through your garment. This is probably my favorite marking because making sure your garment drapes correctly is essential.
11. Hip // eerr..bum..however you want to say that. Not all dress forms have a hip, this one does, but it’s not too big. The hip is technically 9 inches down from the waistline. I plan to mark my own with twill tape where my actual hip is so I can reference when designing for myself.
This form also has a really heavy metal base (so it won’t fall over when you pin it) and wheels for convenience. The canvas material is really heavy duty so you can pin it, though you can’t pin straight in. Pins go in just fine at an angle.
I will probably add a hip line and bustline that goes all the way around, but otherwise, this dress form is ready to rock! In school we had to mark a lot of these ourselves. I’m sure it was to teach us something but it sure is nice that this one has everything ready to go.
If you’re in the market for a dress form , this is an awesome option!
Check out all of The Shop Company’s professional dress forms here.
Related Posts


