
DIY LACE BRALETTE
I have to admit to being seriously into lace bralettes, it’s like as I get older I’m regressing from grown up, scaffolding-esque underwear back to underwire free, super comfortable slips of lace. Perhaps not as ergonomically (or gravitationally) correct but comfortable, which has turned out the be the most important factor. Recently we put our hands to creating a few lace bralettes in the studio – not the easiest thing that’s been attempted around these parts but by far the most satisfying. Tell me, why does lace please the eye so?

DIY bralette, SJ Lingerie silk top, Zulu & Zephyr shorts

You need:
- Lace fabric (we’ve been sourcing fabrics for designers and crafters over at the store, so get in touch if you love this lace as much as we do and we can work our magic!)
- Thick smooth elastic (2.5cm or 1 inch wide)
- Thin smooth elastic (1cm or half inch)
- Bra Clasp
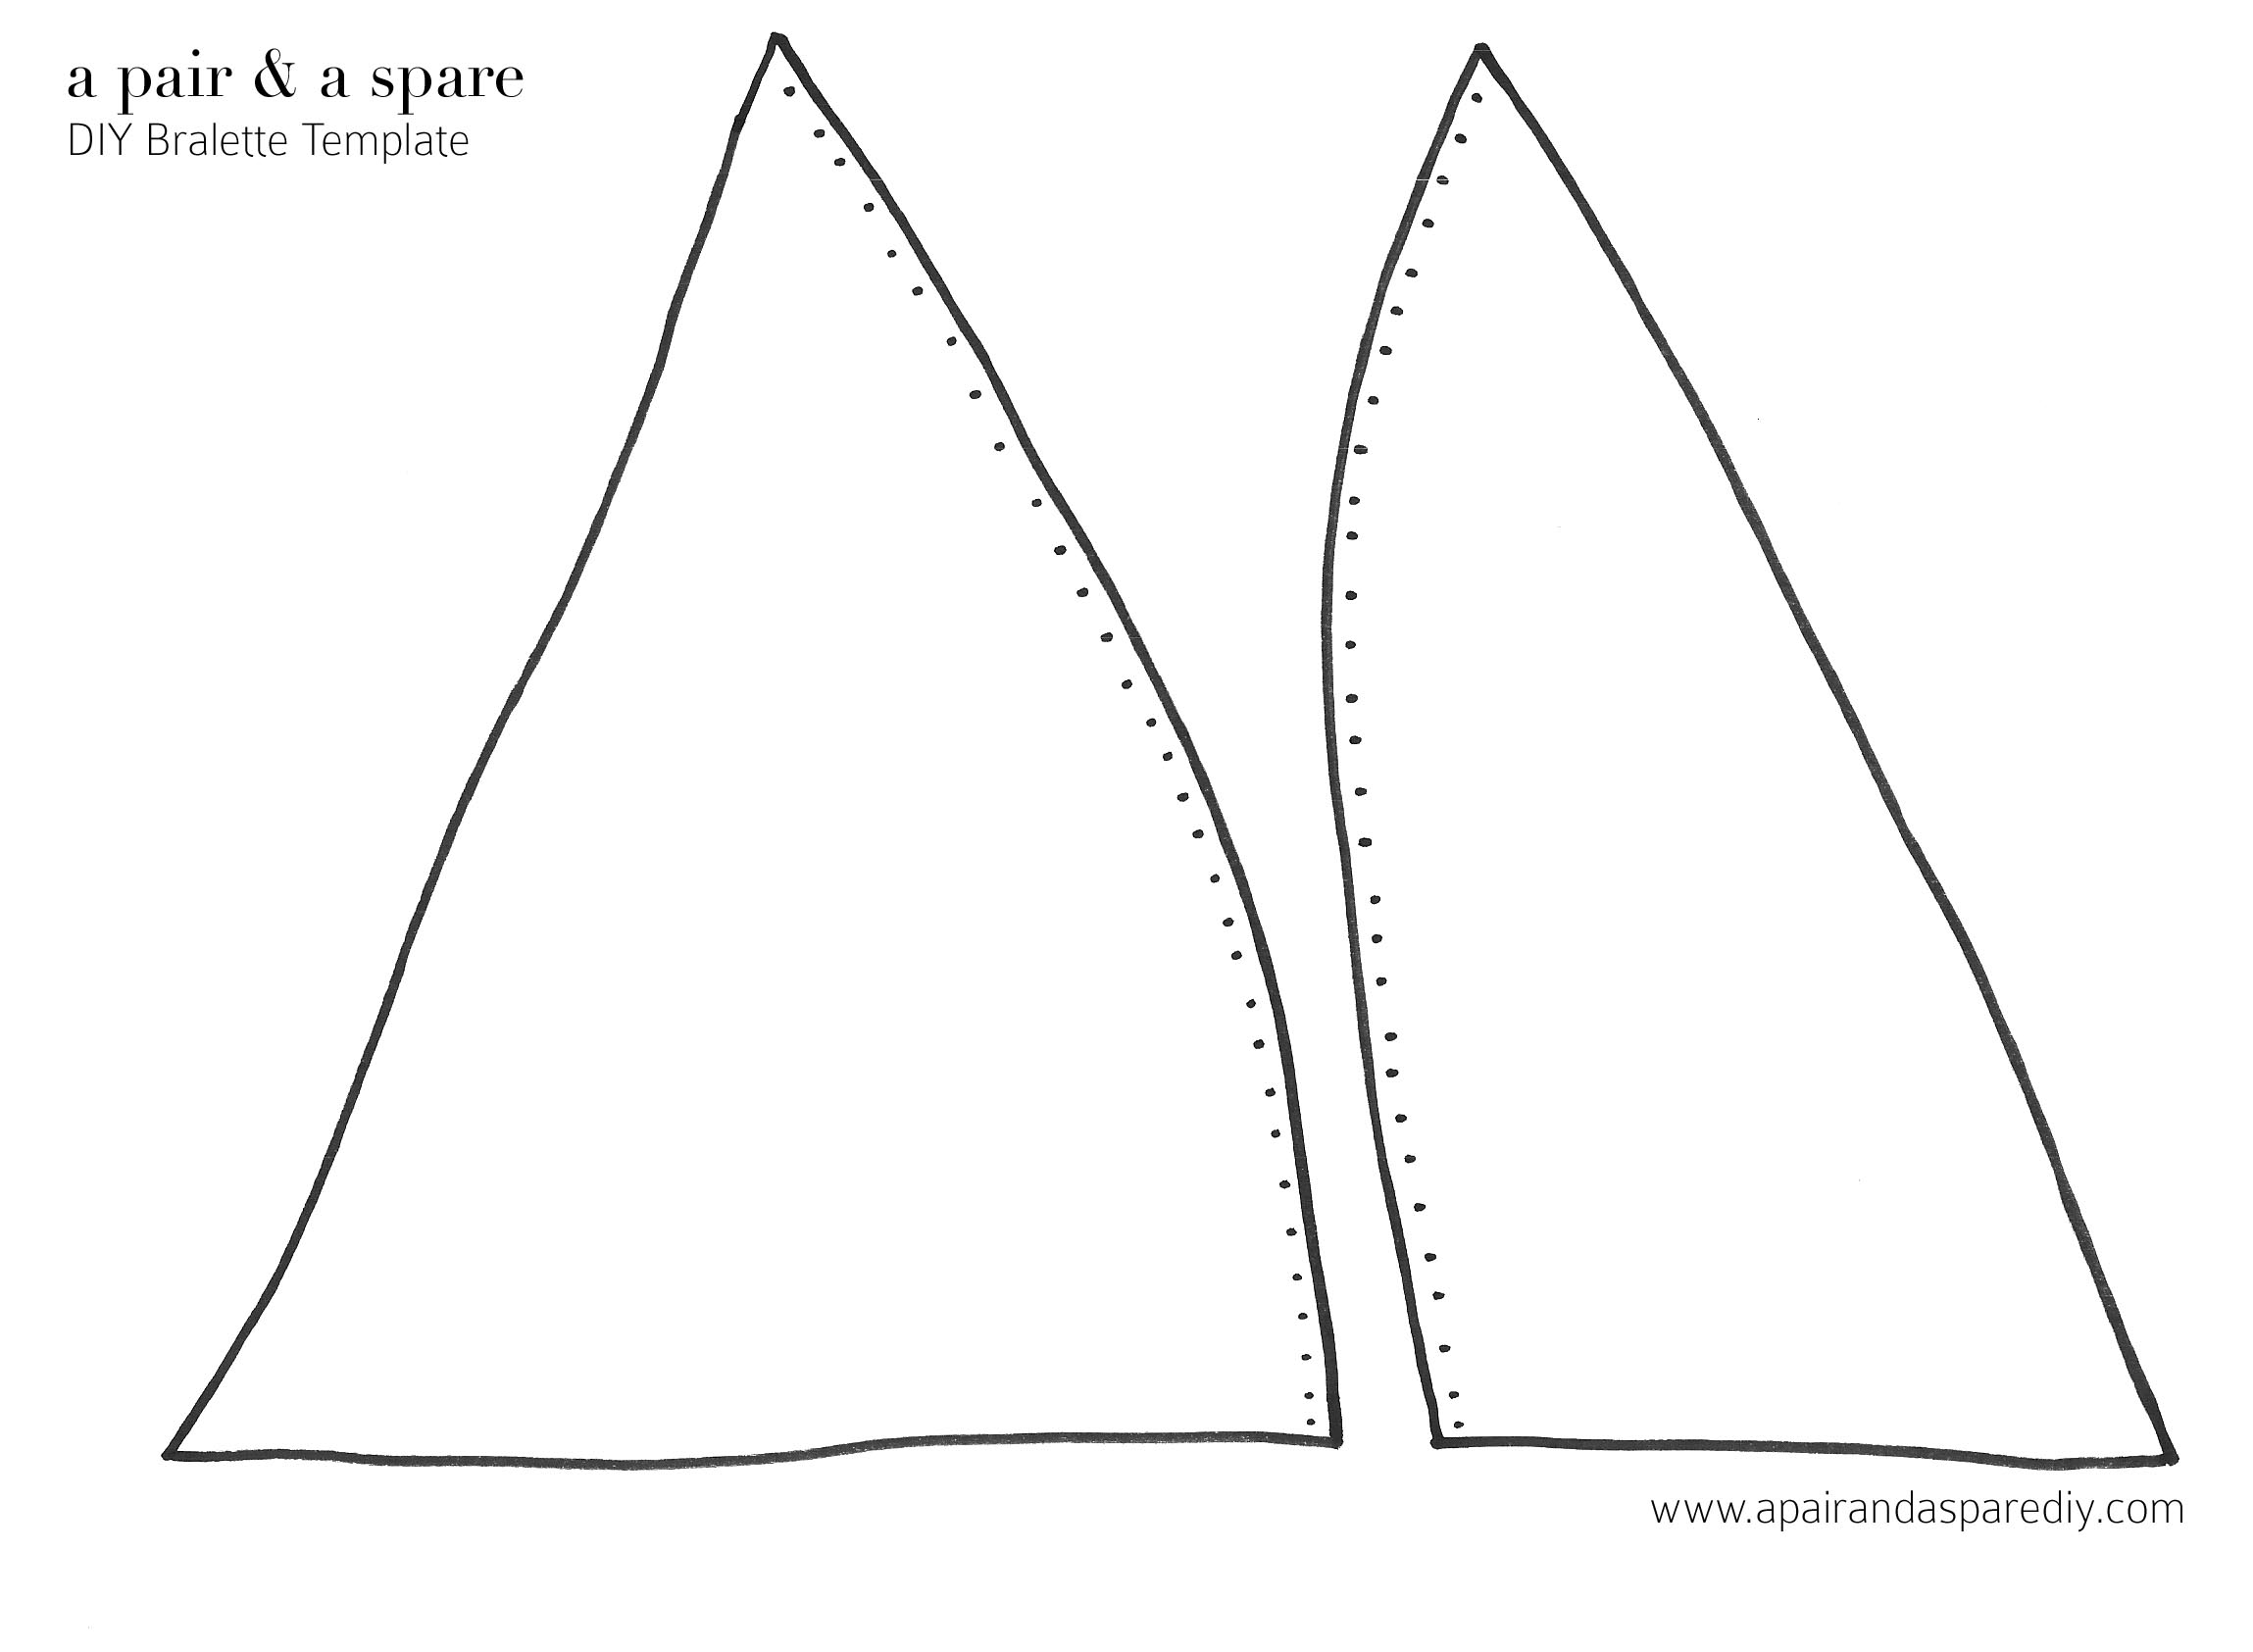
- Pattern Template
- Scissors
- Pins
- Sewing Machine


How to:
1. Print the above pattern (same one I used for this project) on A4 paper and cut out your pattern pieces and pin them to your lace. Place the straight edge of the pattern along the edge of your scalloped lace. Cut out the pieces along the curved side and along the bottom but not along the straight edge as you want to keep your scalloped lace edge.

2. Cut out 2 pairs (4 piece of lace in total) It’s important to try to make the lace patterns to be identical on both sides so that it looks symmetrical once it is made.

3. Pin the curved edges of the patterns together

4. Sew along the curved edge leaving a seam allowance.

5. Repeat for both sides

6. Measure how much elastic you will need by taking your thick elastic and wrapping it around yourself under your bust. Stretch the elastic as you do this. Don’t make it too long as it need it to be slightly tighter for support.

7. Take your thick elastic and line it up with the edge of your scalloped edge. Measure the width of the elastic (2cm) and measure double that amount from the edge of the scalloped edge (i.e.. 4cm.) When you cut out the bottom piece, make sure it is the same length as the top piece and that the lace scalloped edge is centred and symmetrical.

8. Place the bottom half of the lace on the thick elastic with equal lengths of elastic on either side. Wrap the lace around the thick elastic and pin it in place.

9. Then pin the top half of the bralette to the thick elastic on the same side.

10. Sew along the elastic and lace with a 1cm seam from the edge of the elastic.

11. Take your claps and slide them onto the ends of your elastic. Make sure they are both facing the right direction so that they will match up. Wrap the elastic around the back of the clasp and pin in place. Sew along the elastic to secure the clasp. Repeat for both sides.

13. Try the bralette on and measure how much thin elastic you will need for the straps. Pin and sew the straps to the inside of the top of the bralette and to where the strap meets around the back on the thick elastic.

Voila! Probably not the sort of bra you’ll be going jogging in but something nice for a bit of weekend lounging with your Valentine to be, or perhaps with your cat (no judgement). Hope you enjoy your weekend!


If you’re loving all things bralette related, make sure to check out this DIY Alexander Wang one I created.