
DIY Toy Camera

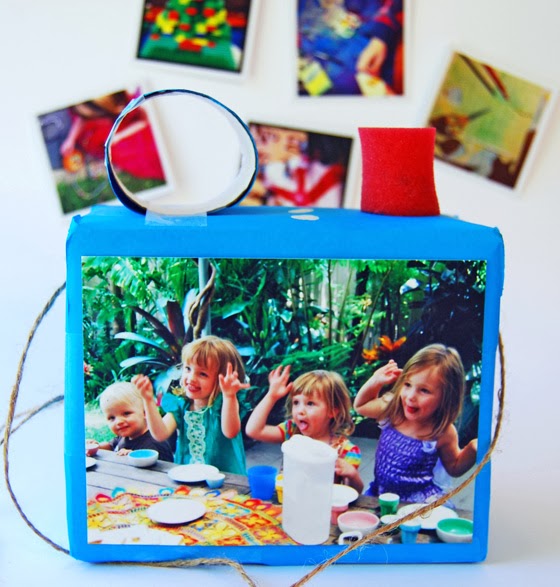
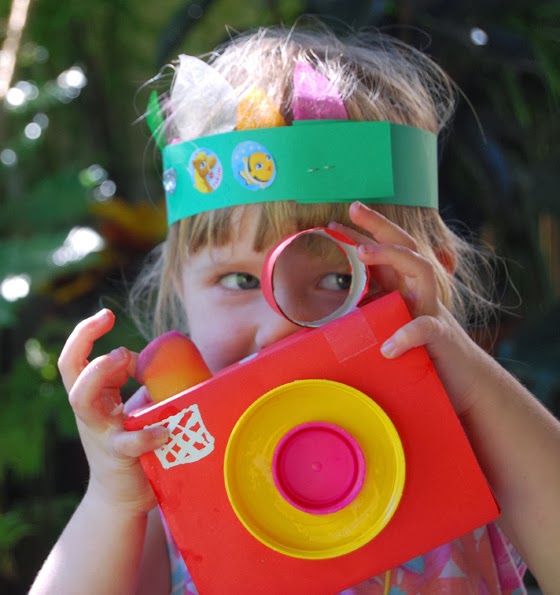
I have been having some crafty, make it yourself fun. That's what happens when there is nothing worth watching on tv! Anyway the kids own toy cameras and real cameras but that did not stop me from making cardboard cameras.... and the kids like them. They are big and colourful but the best bit is the squishy sponge button they press down to take an imaginary picture. And yes.... they always check the back of the camera to have a look at their shot!

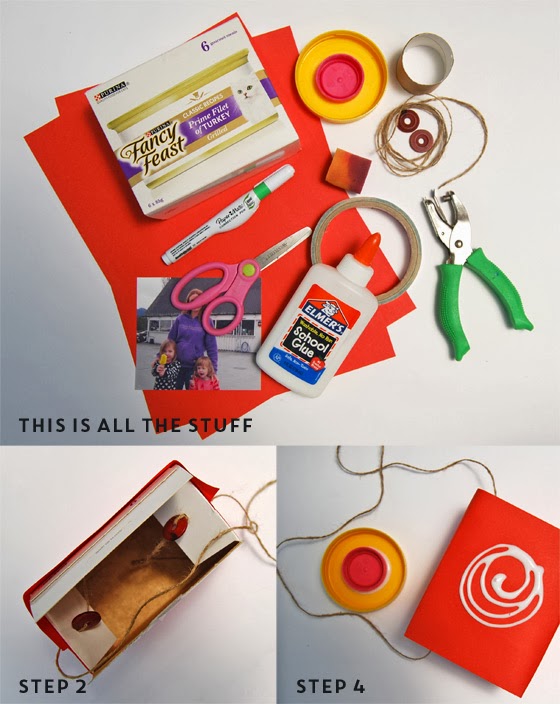
Materials:
- Empty rectangular cardboard box – approximate camera size give or take
- 2 sheets of A4 coloured paper
- 2 bottle tops (one big, one small) – I used a vegemite lid and a milk bottle lid
- String and 2 large buttons
- A family photo
- Toilet roll
- Squishy sponge circle/cylinder – I found one in a package of kids' painting sponges but you can always cut a larger sponge down to size.
Tools:
- Holepunch
- Scissors
- PVA glue or a hot glue gun
- Sticky tape
Step 1: Cover your box in coloured paper while still leaving the top of the box open.
Step 2: Punch holes on either side of your box and thread through the string. Anchor the string on the inside of the box by tying large buttons to each end of your string.
Step 3: Tape the lid closed and cover it with a piece of coloured paper cut to fit.
Step 4: Make the lens – glue the largest bottle top to one of the large sides of the box (the face of your camera). Glue the smaller lid inside the larger one. If you use PVA glue you will need to let the glue completely dry (overnight preferably) before you can move onto the next step.
Step 5: Make the view finder – cut approximately one third off a cardboard toilet roll. Cover it with coloured paper. Sticky tape the toilet roll to one side of the top of your camera.
Step 6: Make the 'take a photo' button – glue the circular sponge onto the other side of the top of you camera. If you use PVA glue you will need to wait until the glue dries before giving it to a kid.
Step 7: Draw on some extra features using a coloured marker or a white-out pen. I drew a flash and some extra buttons just for fun.
Step 8: Stick on a happy snap on the back of your camera.
Step 9: Snap away!

If this is your first visit to At home with Ali – welcome. If you like it, you can follow along via email, RSS, google or facebook. You can also find me on Pinterest and Instagram. Cheers Ali

More posts from Ali