
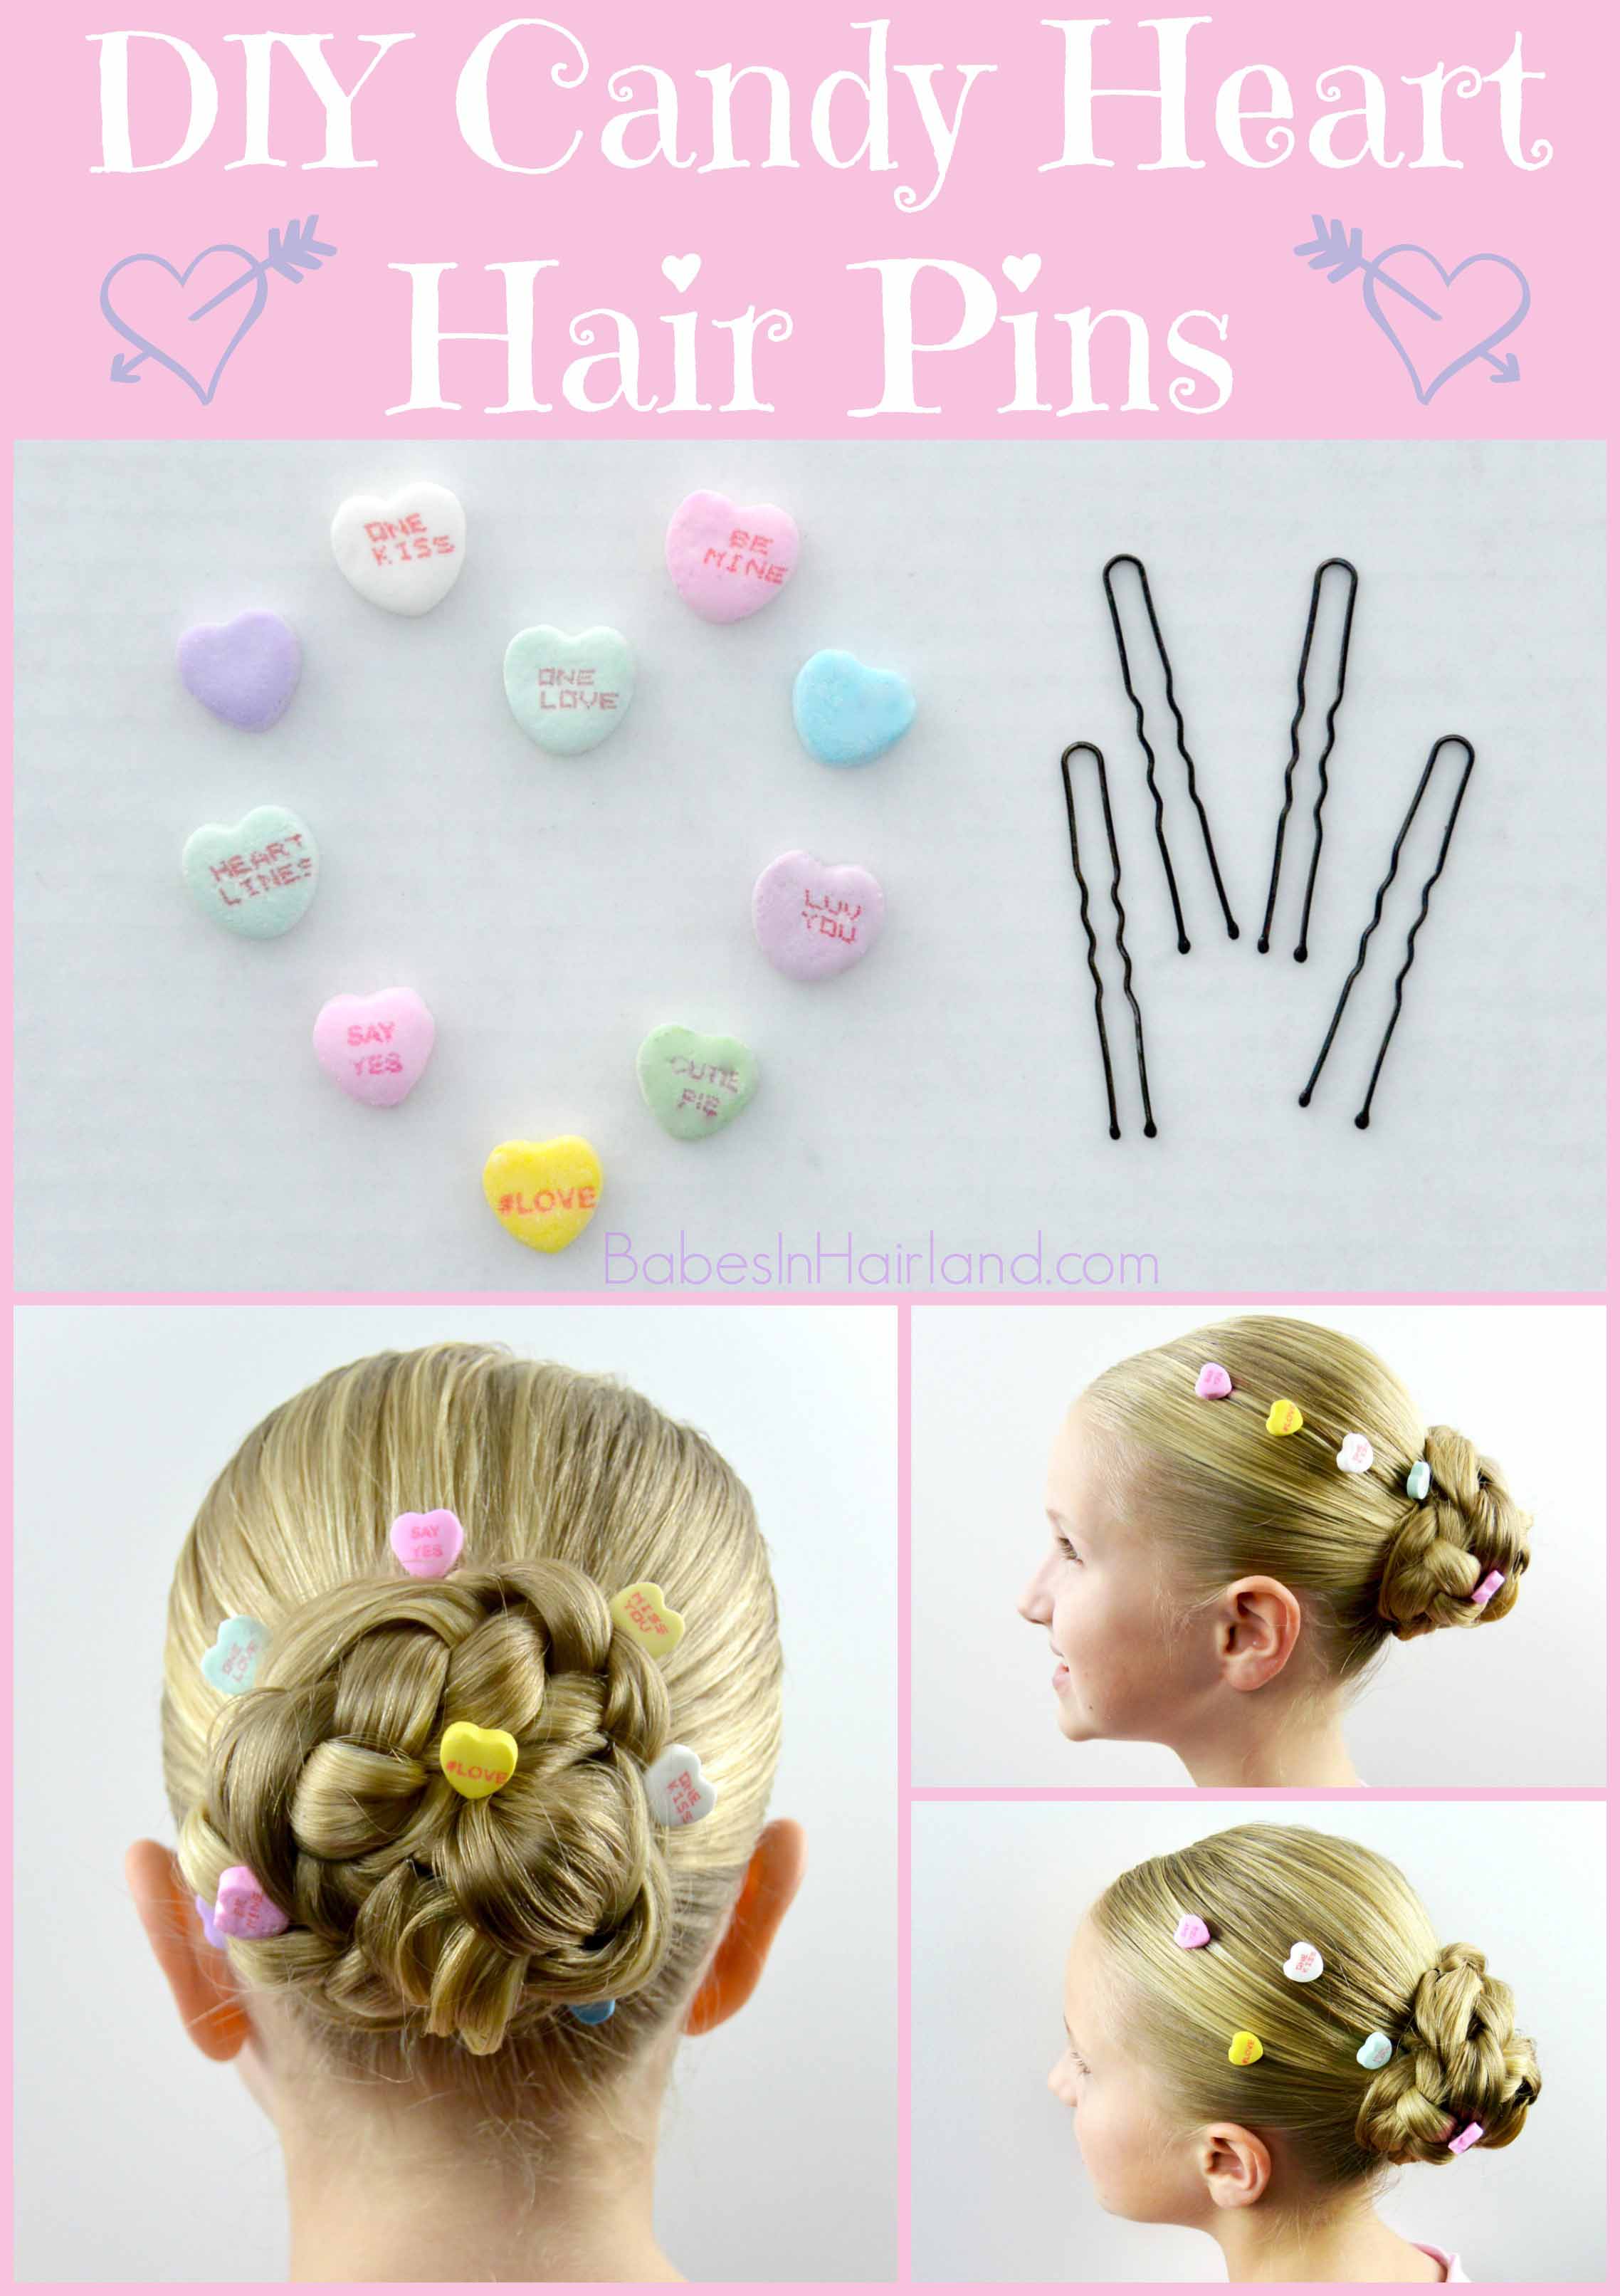
DIY Candy Heart Hair Accessories for Valentine’s Day
There are quite a few Valentine’s Day and heart hairstyles we’ve done over the years, but I realized that, outside of using ribbon in those styles, we’ve not done much else to accessorize for Valentine’s Day. I’ve actually thought about this a couple times in years past, but until this year that I hadn’t had time to try it out.
We tried a couple things and I loved that the process was easy and took no time at all. It also was totally cheap, so that’s even better!

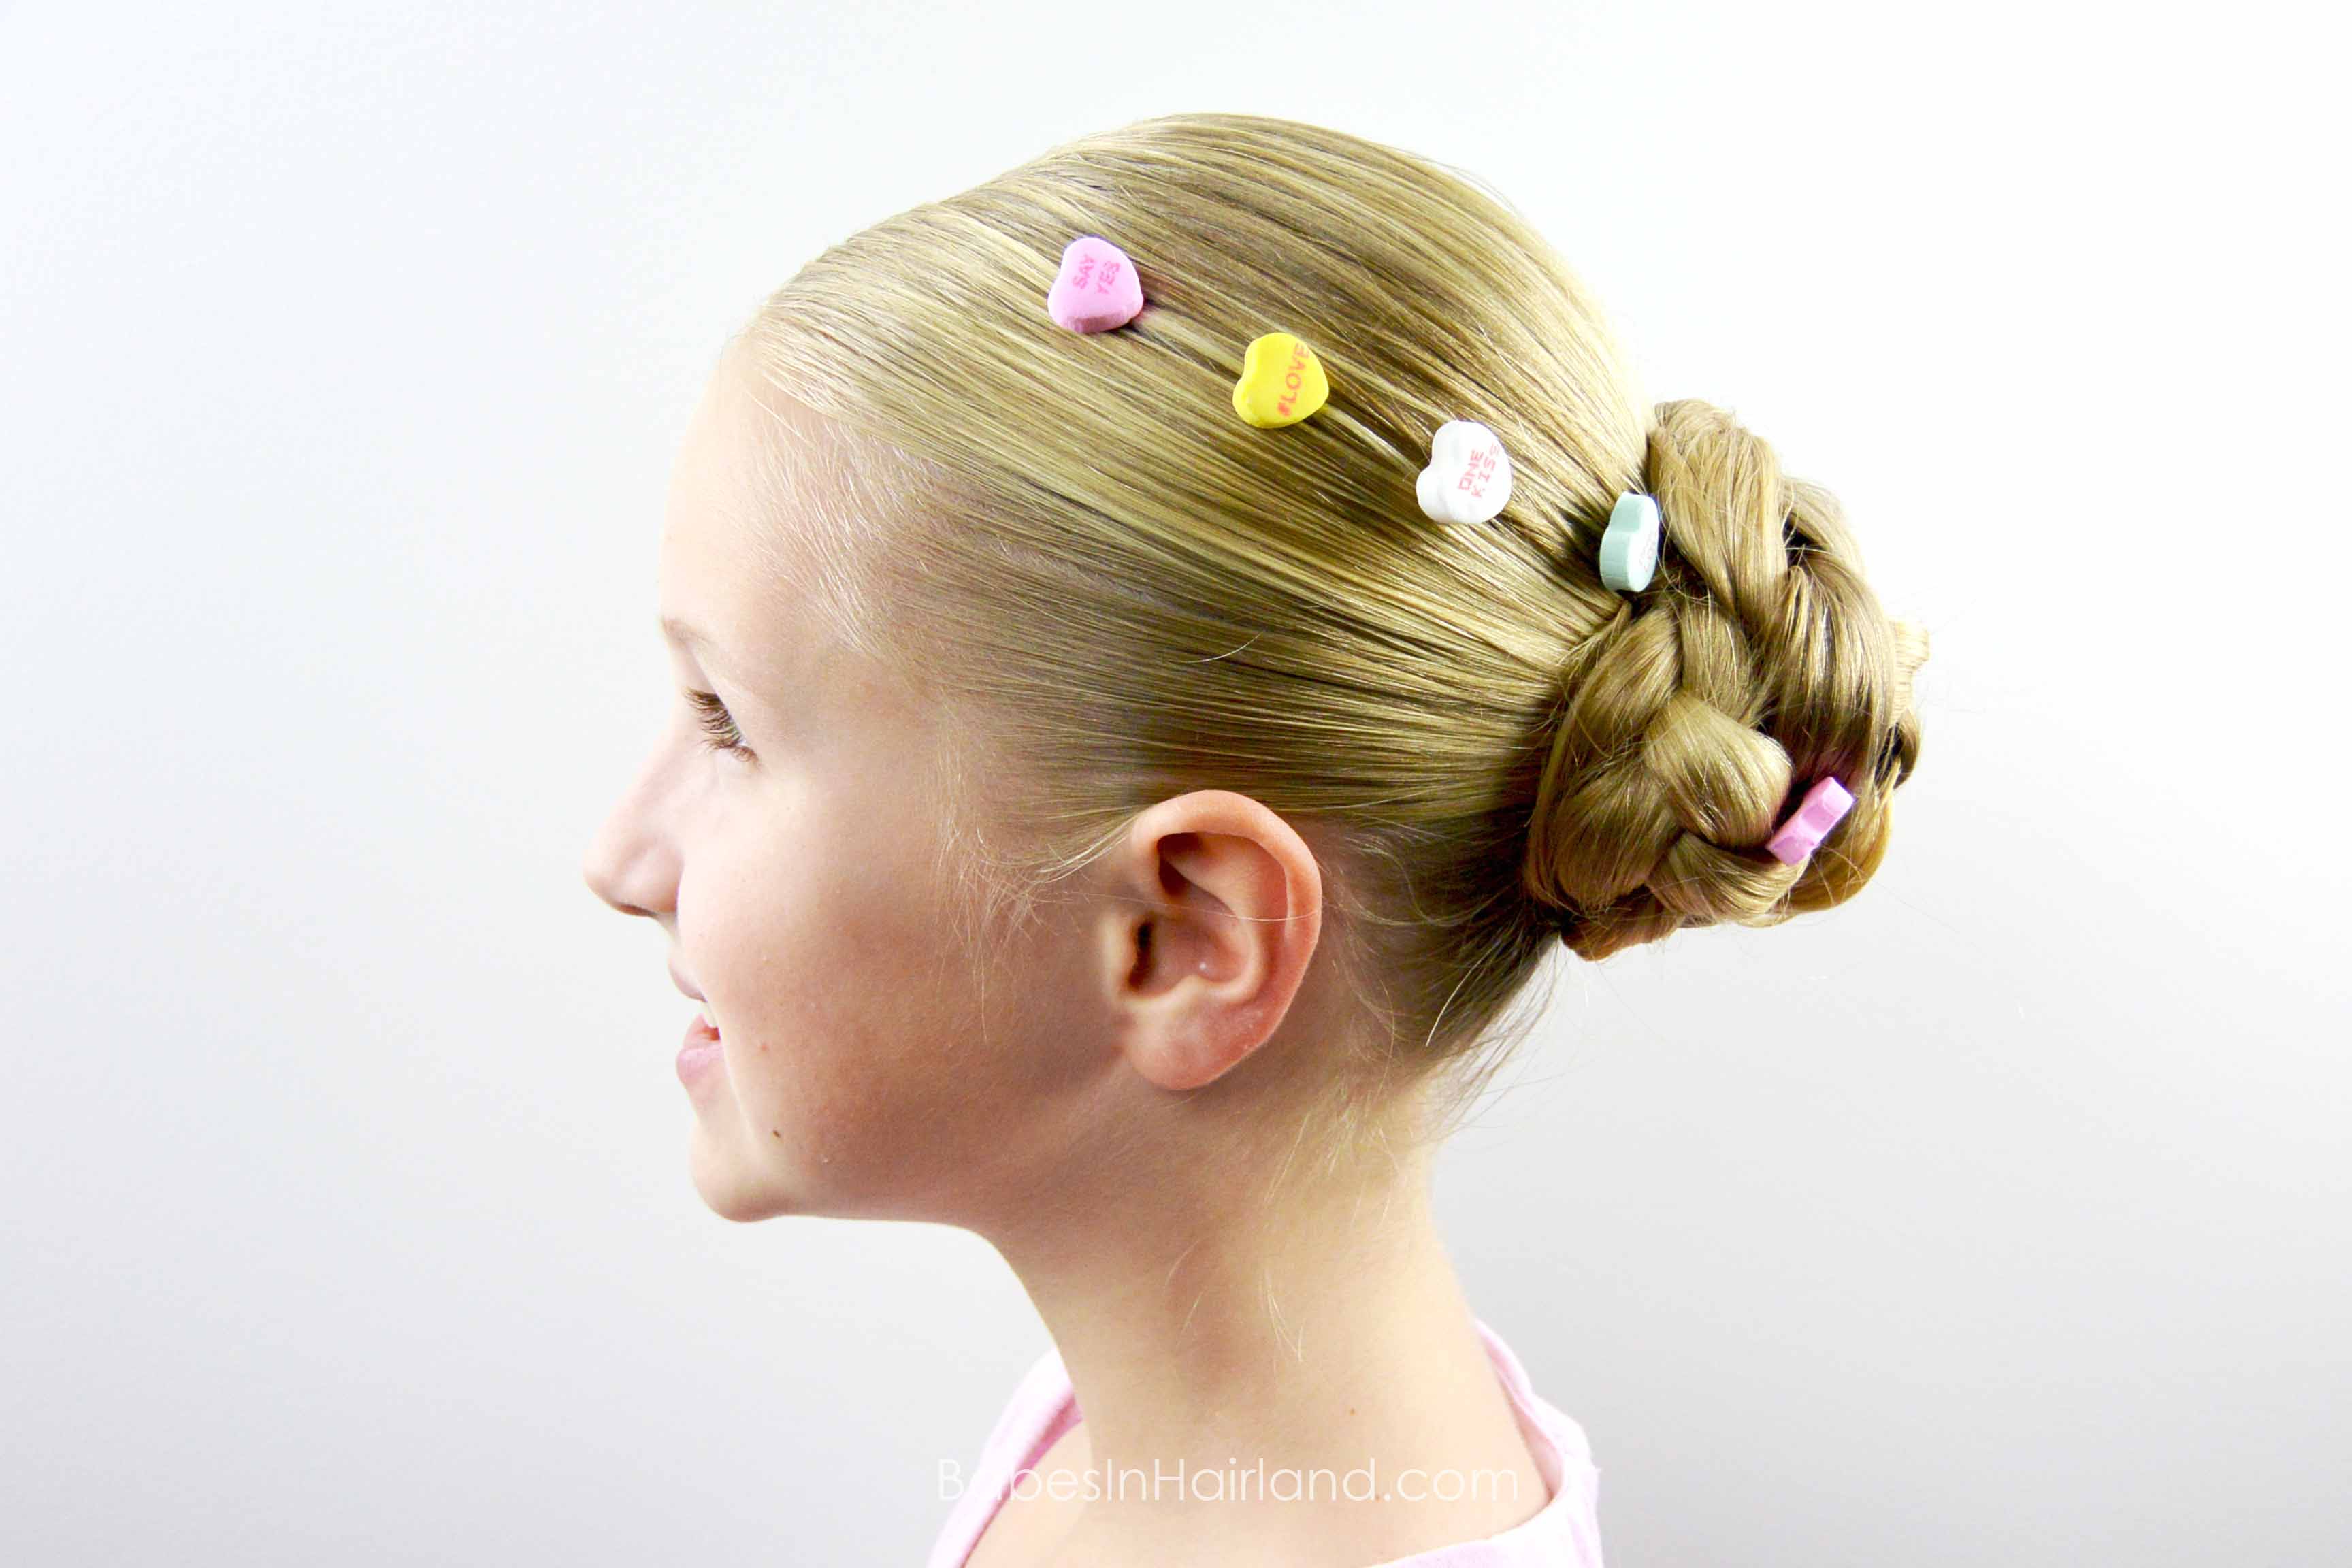
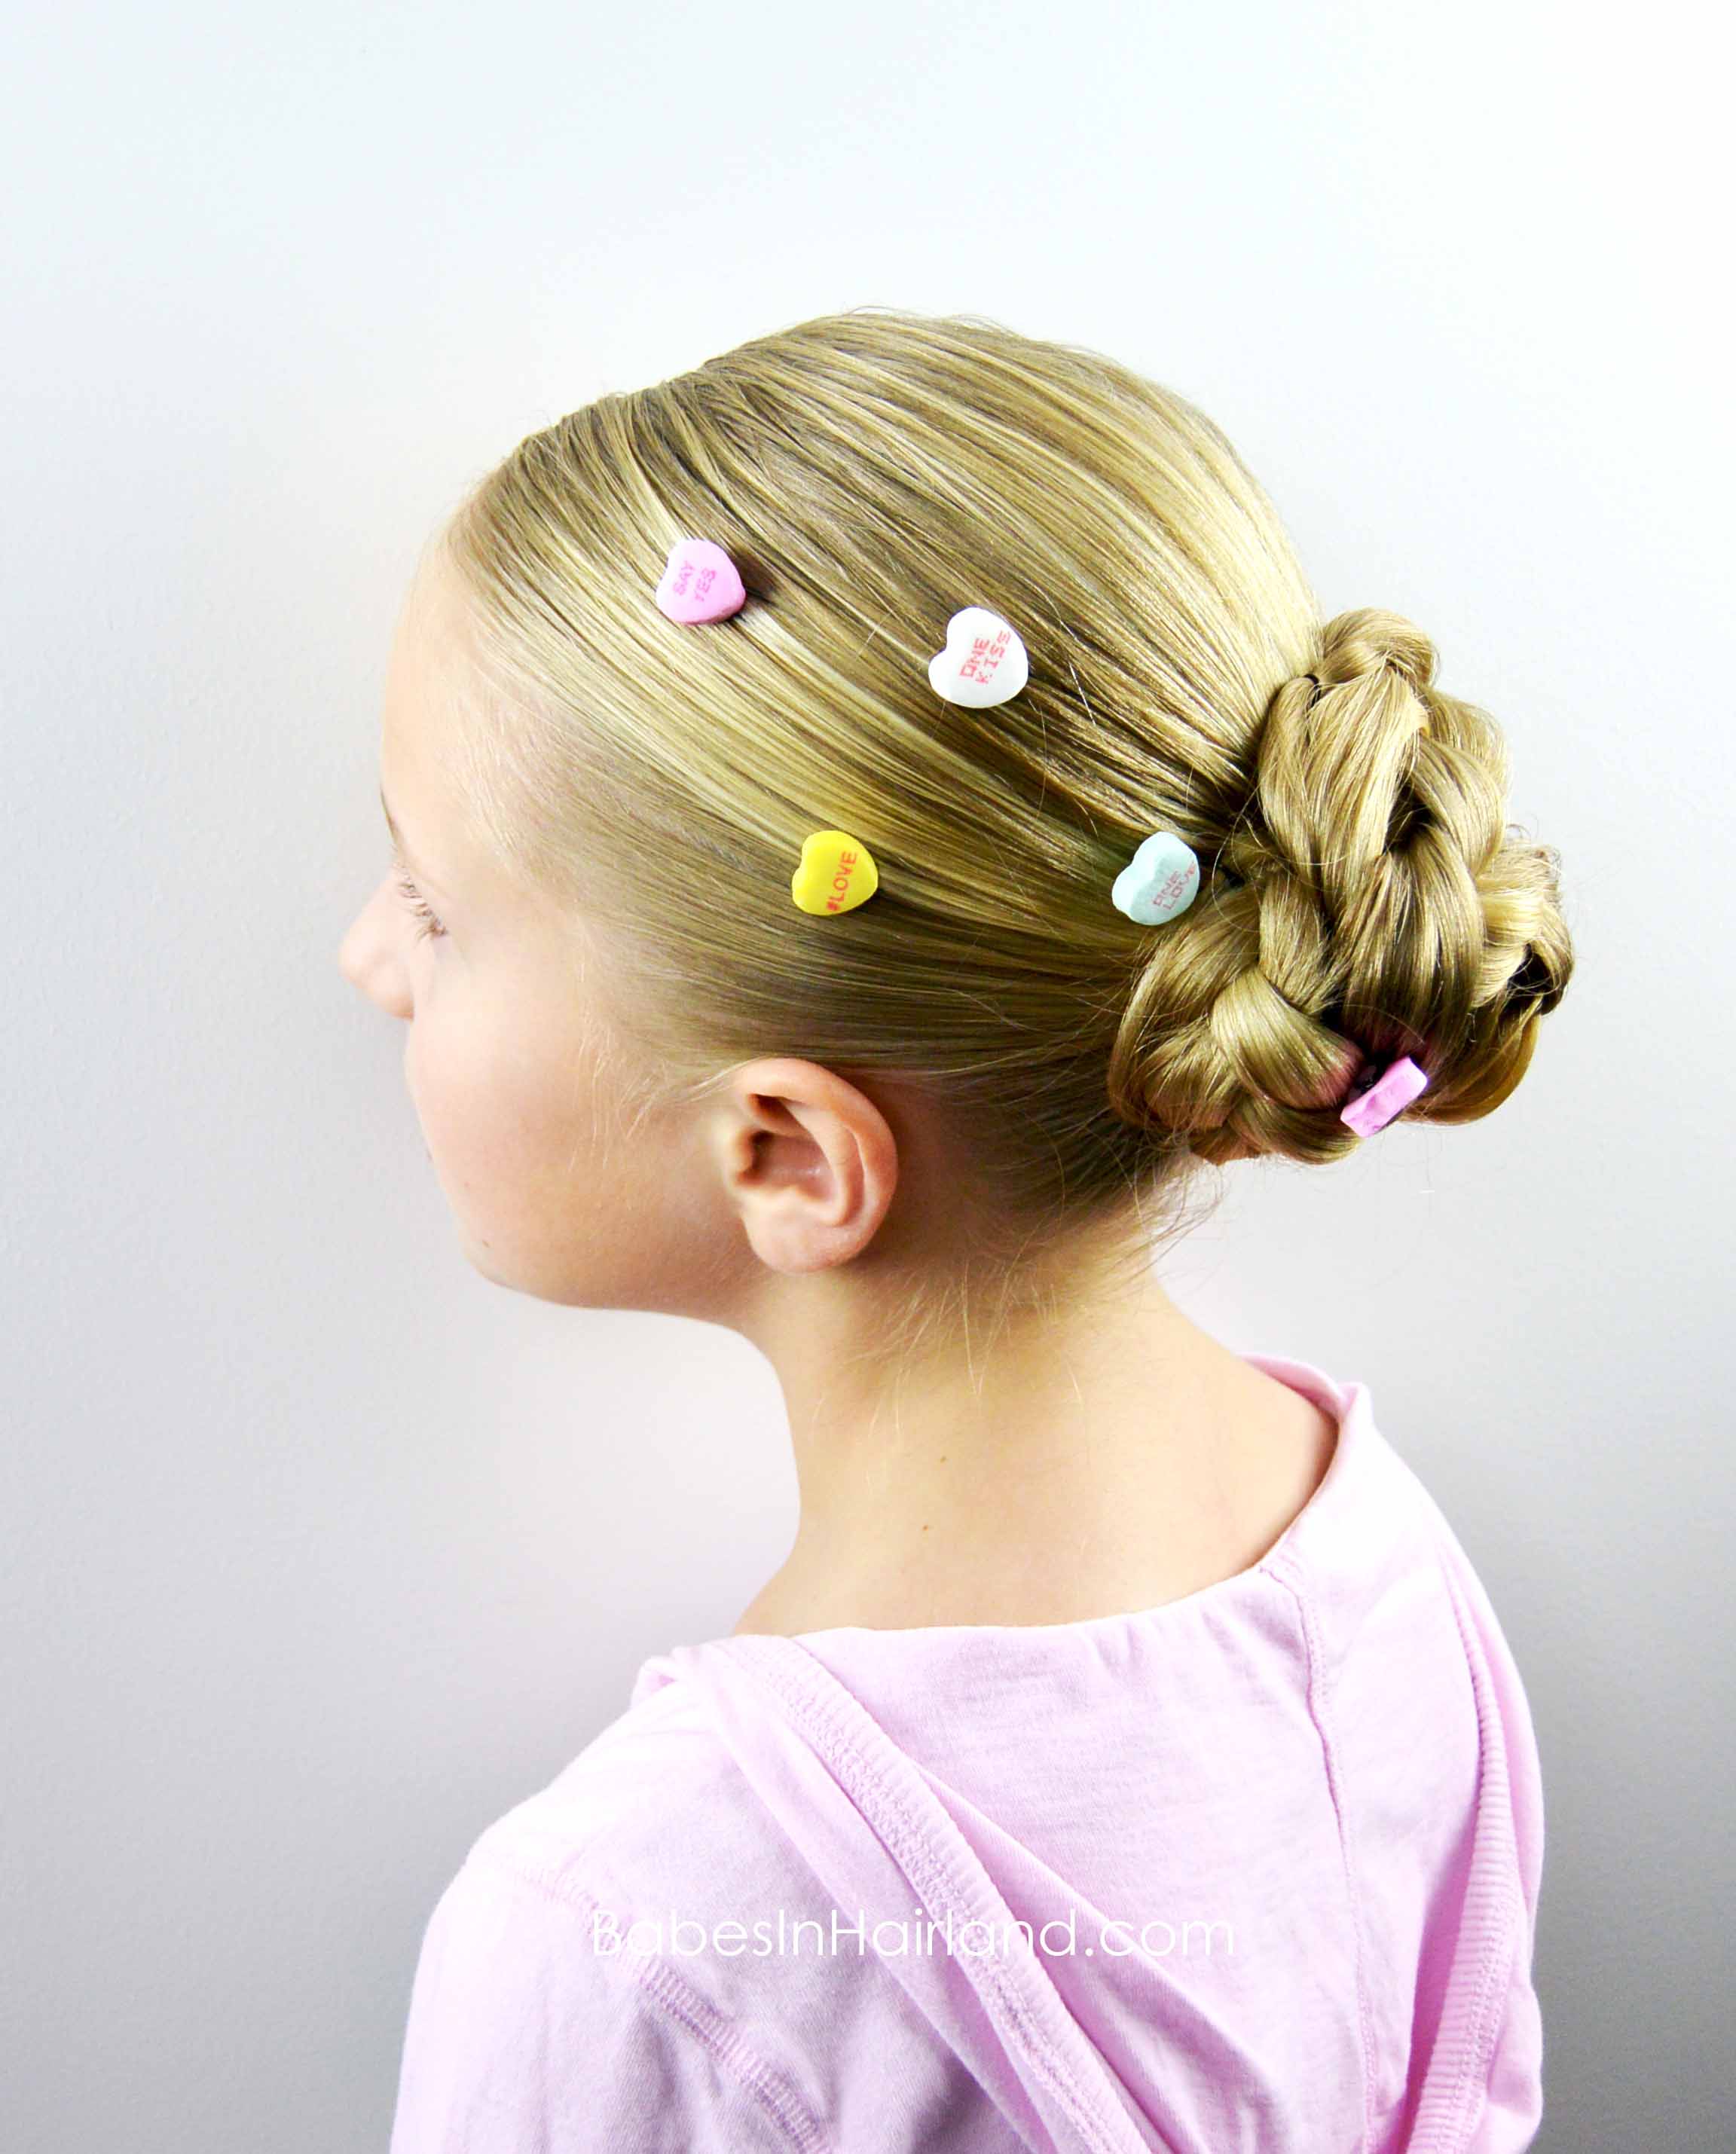
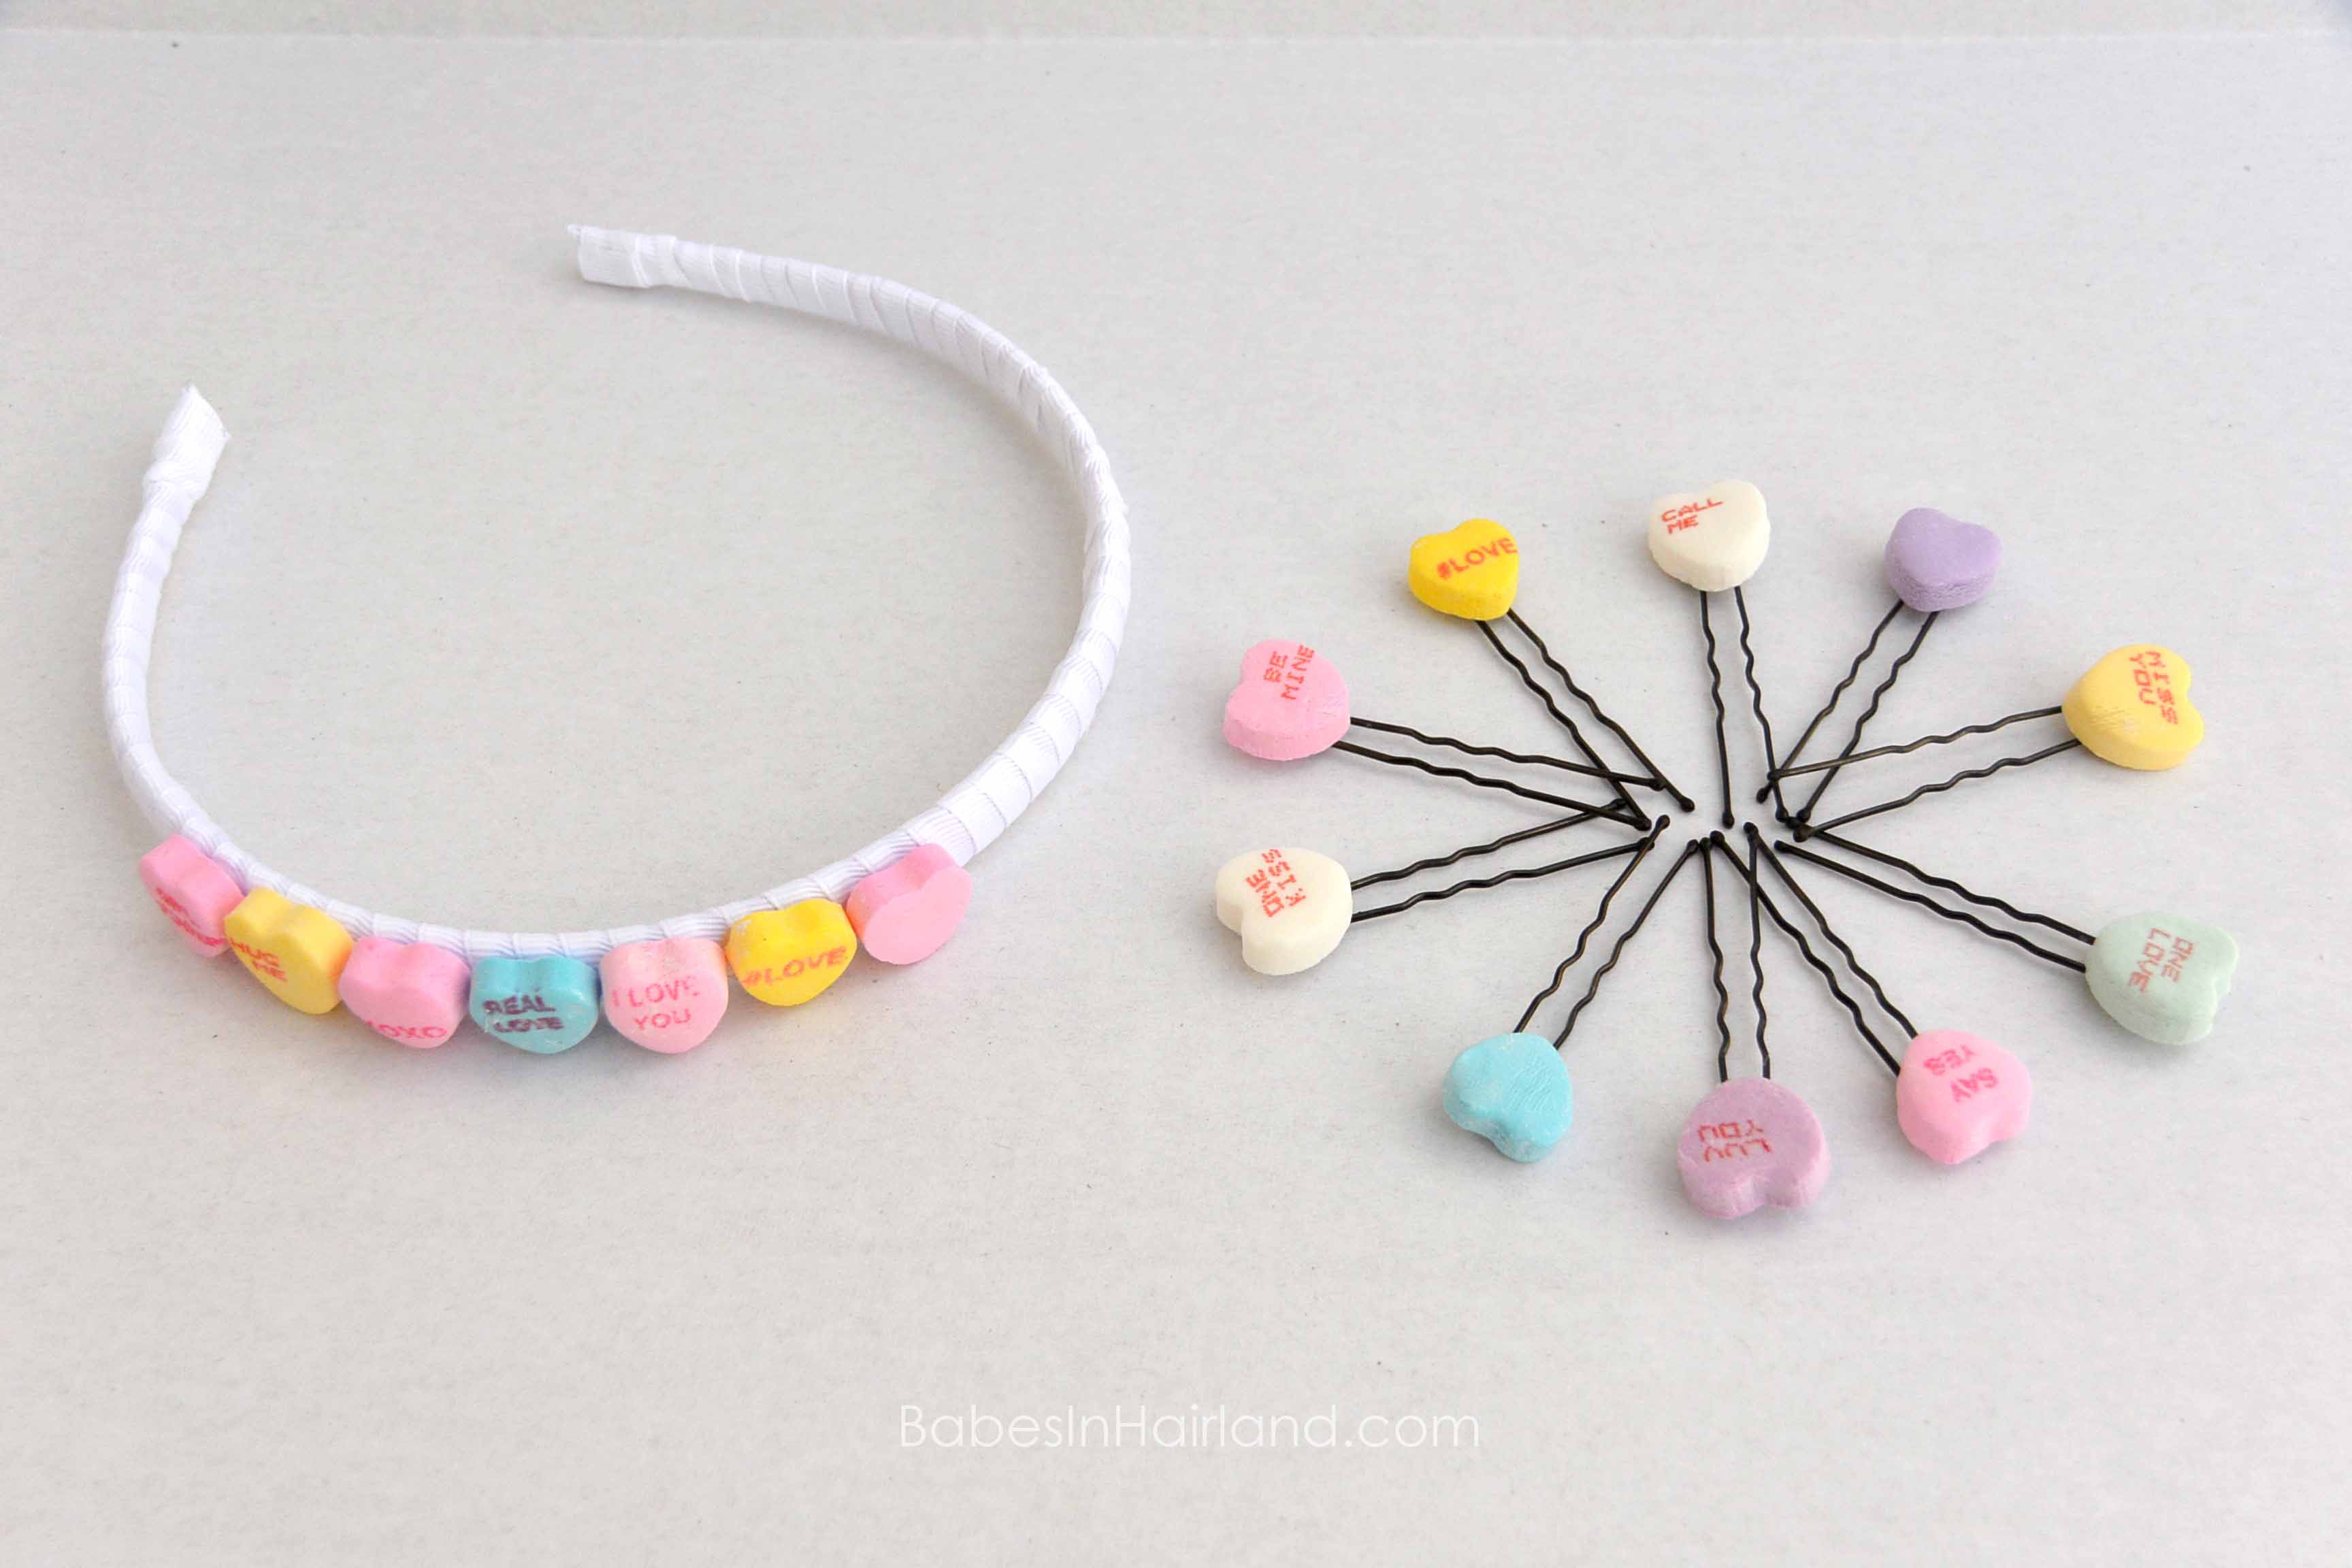
We’ll start with our DIY Candy Heart Hair Pins
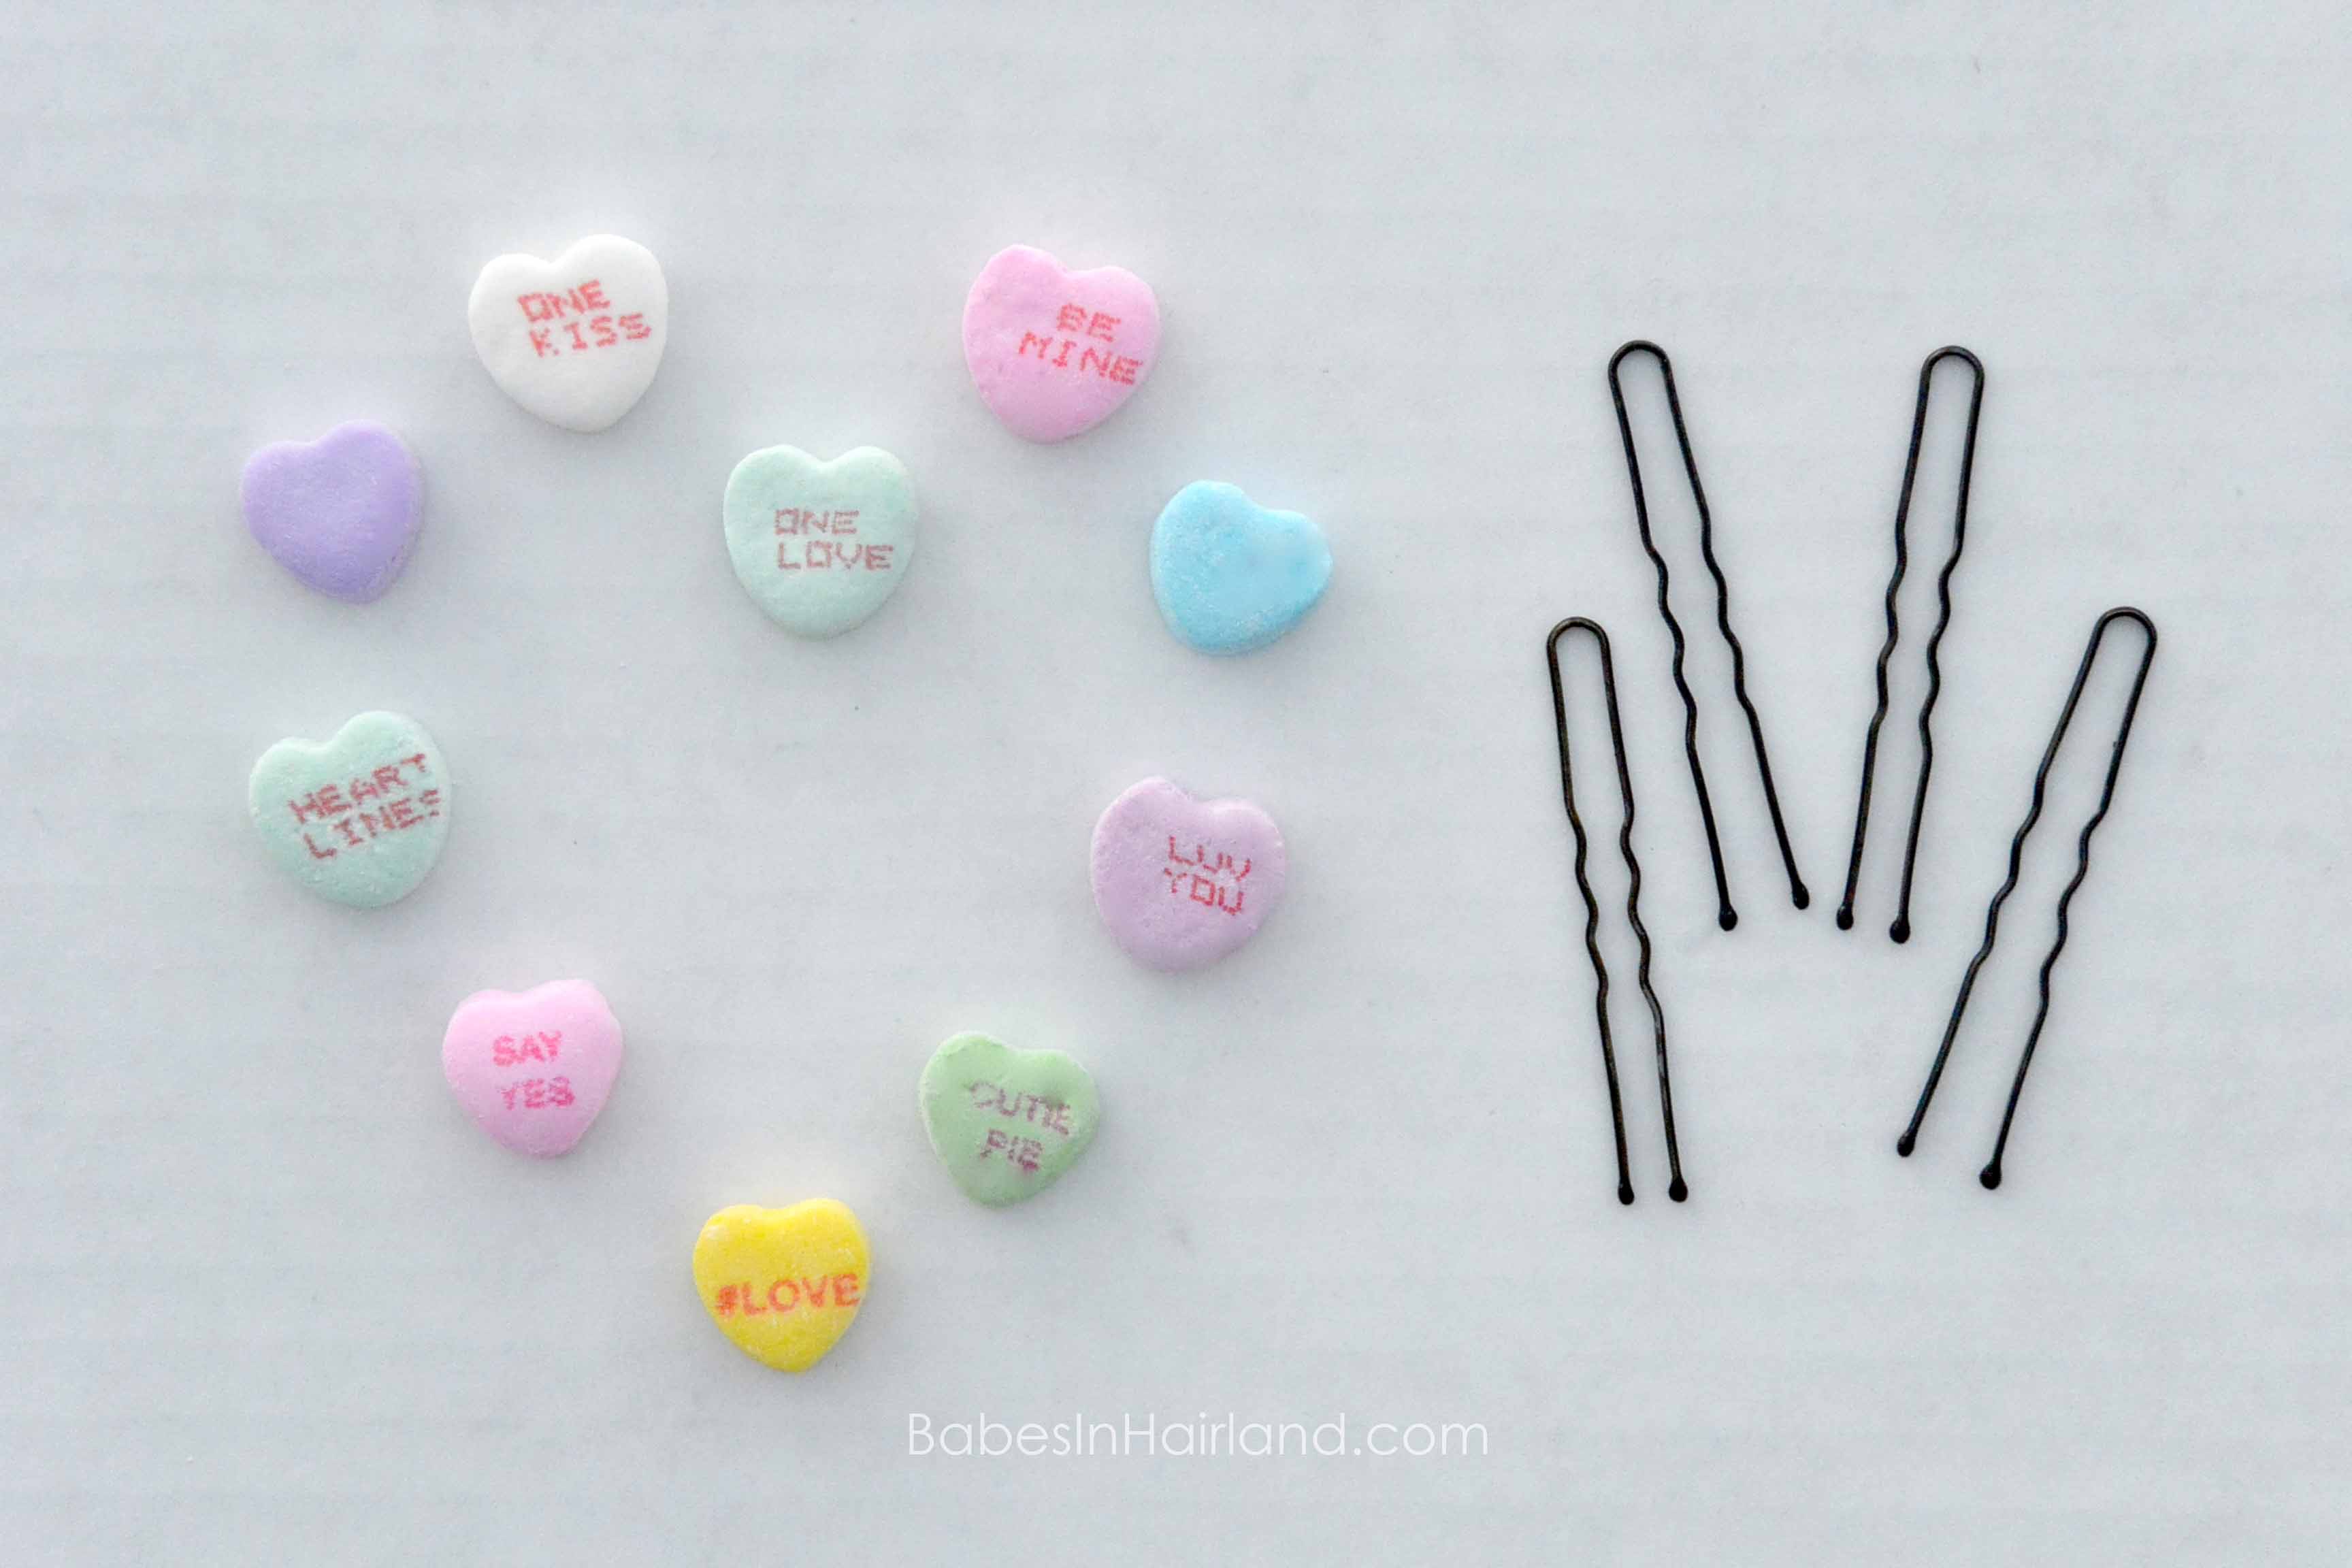
You will need:
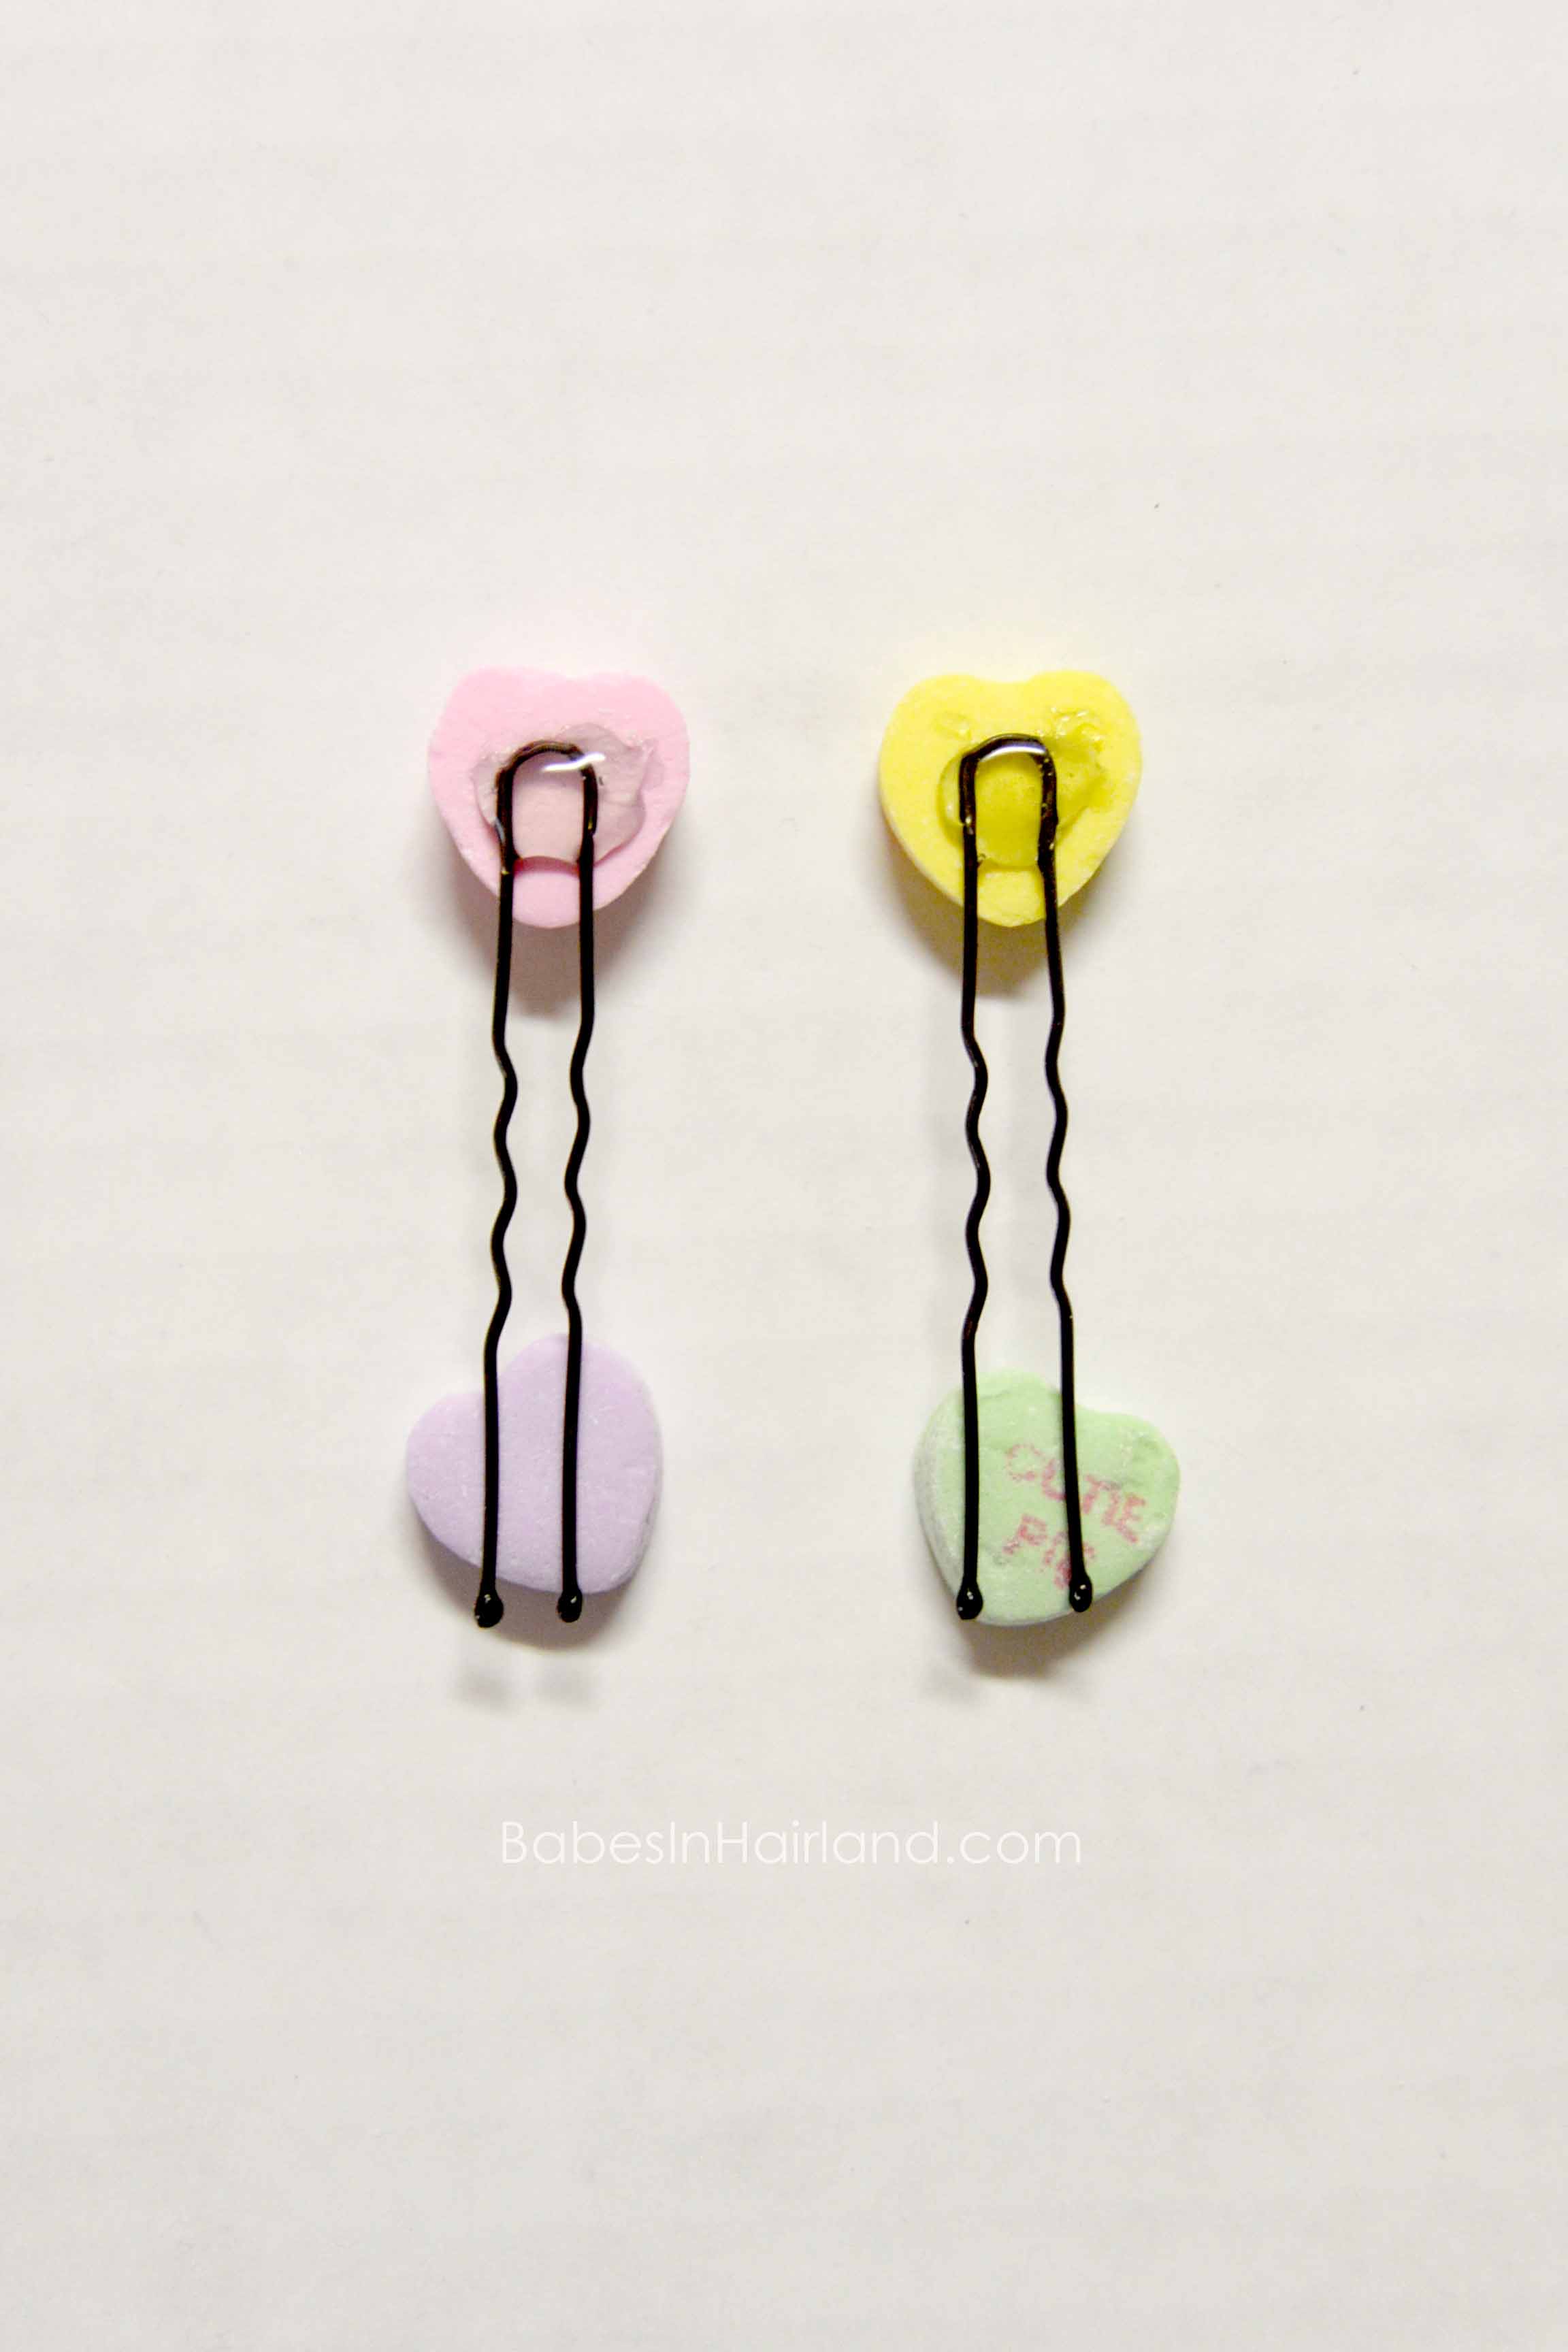
* hot glue gun
* hair pins (or bobby pins) – I prefer hair pins because they are easier to glue things onto – but use what you have on hand.
* candy/conversation hearts – and here is my advice (that I sadly discovered after I’d done this) – buy the candy hearts in a bag – NOT in the little boxes. The candies aren’t as beat up, the words are printed nicer and brighter, and there is obviously a bigger selection of colors and sayings.
(And side note for all you crafty ladies out there — I did try putting Modge Podge on these, but it does erase the writing on the hearts. It, of course, made them nice and shiny, but I wanted the words on the hearts, so I opted to skip that step.)


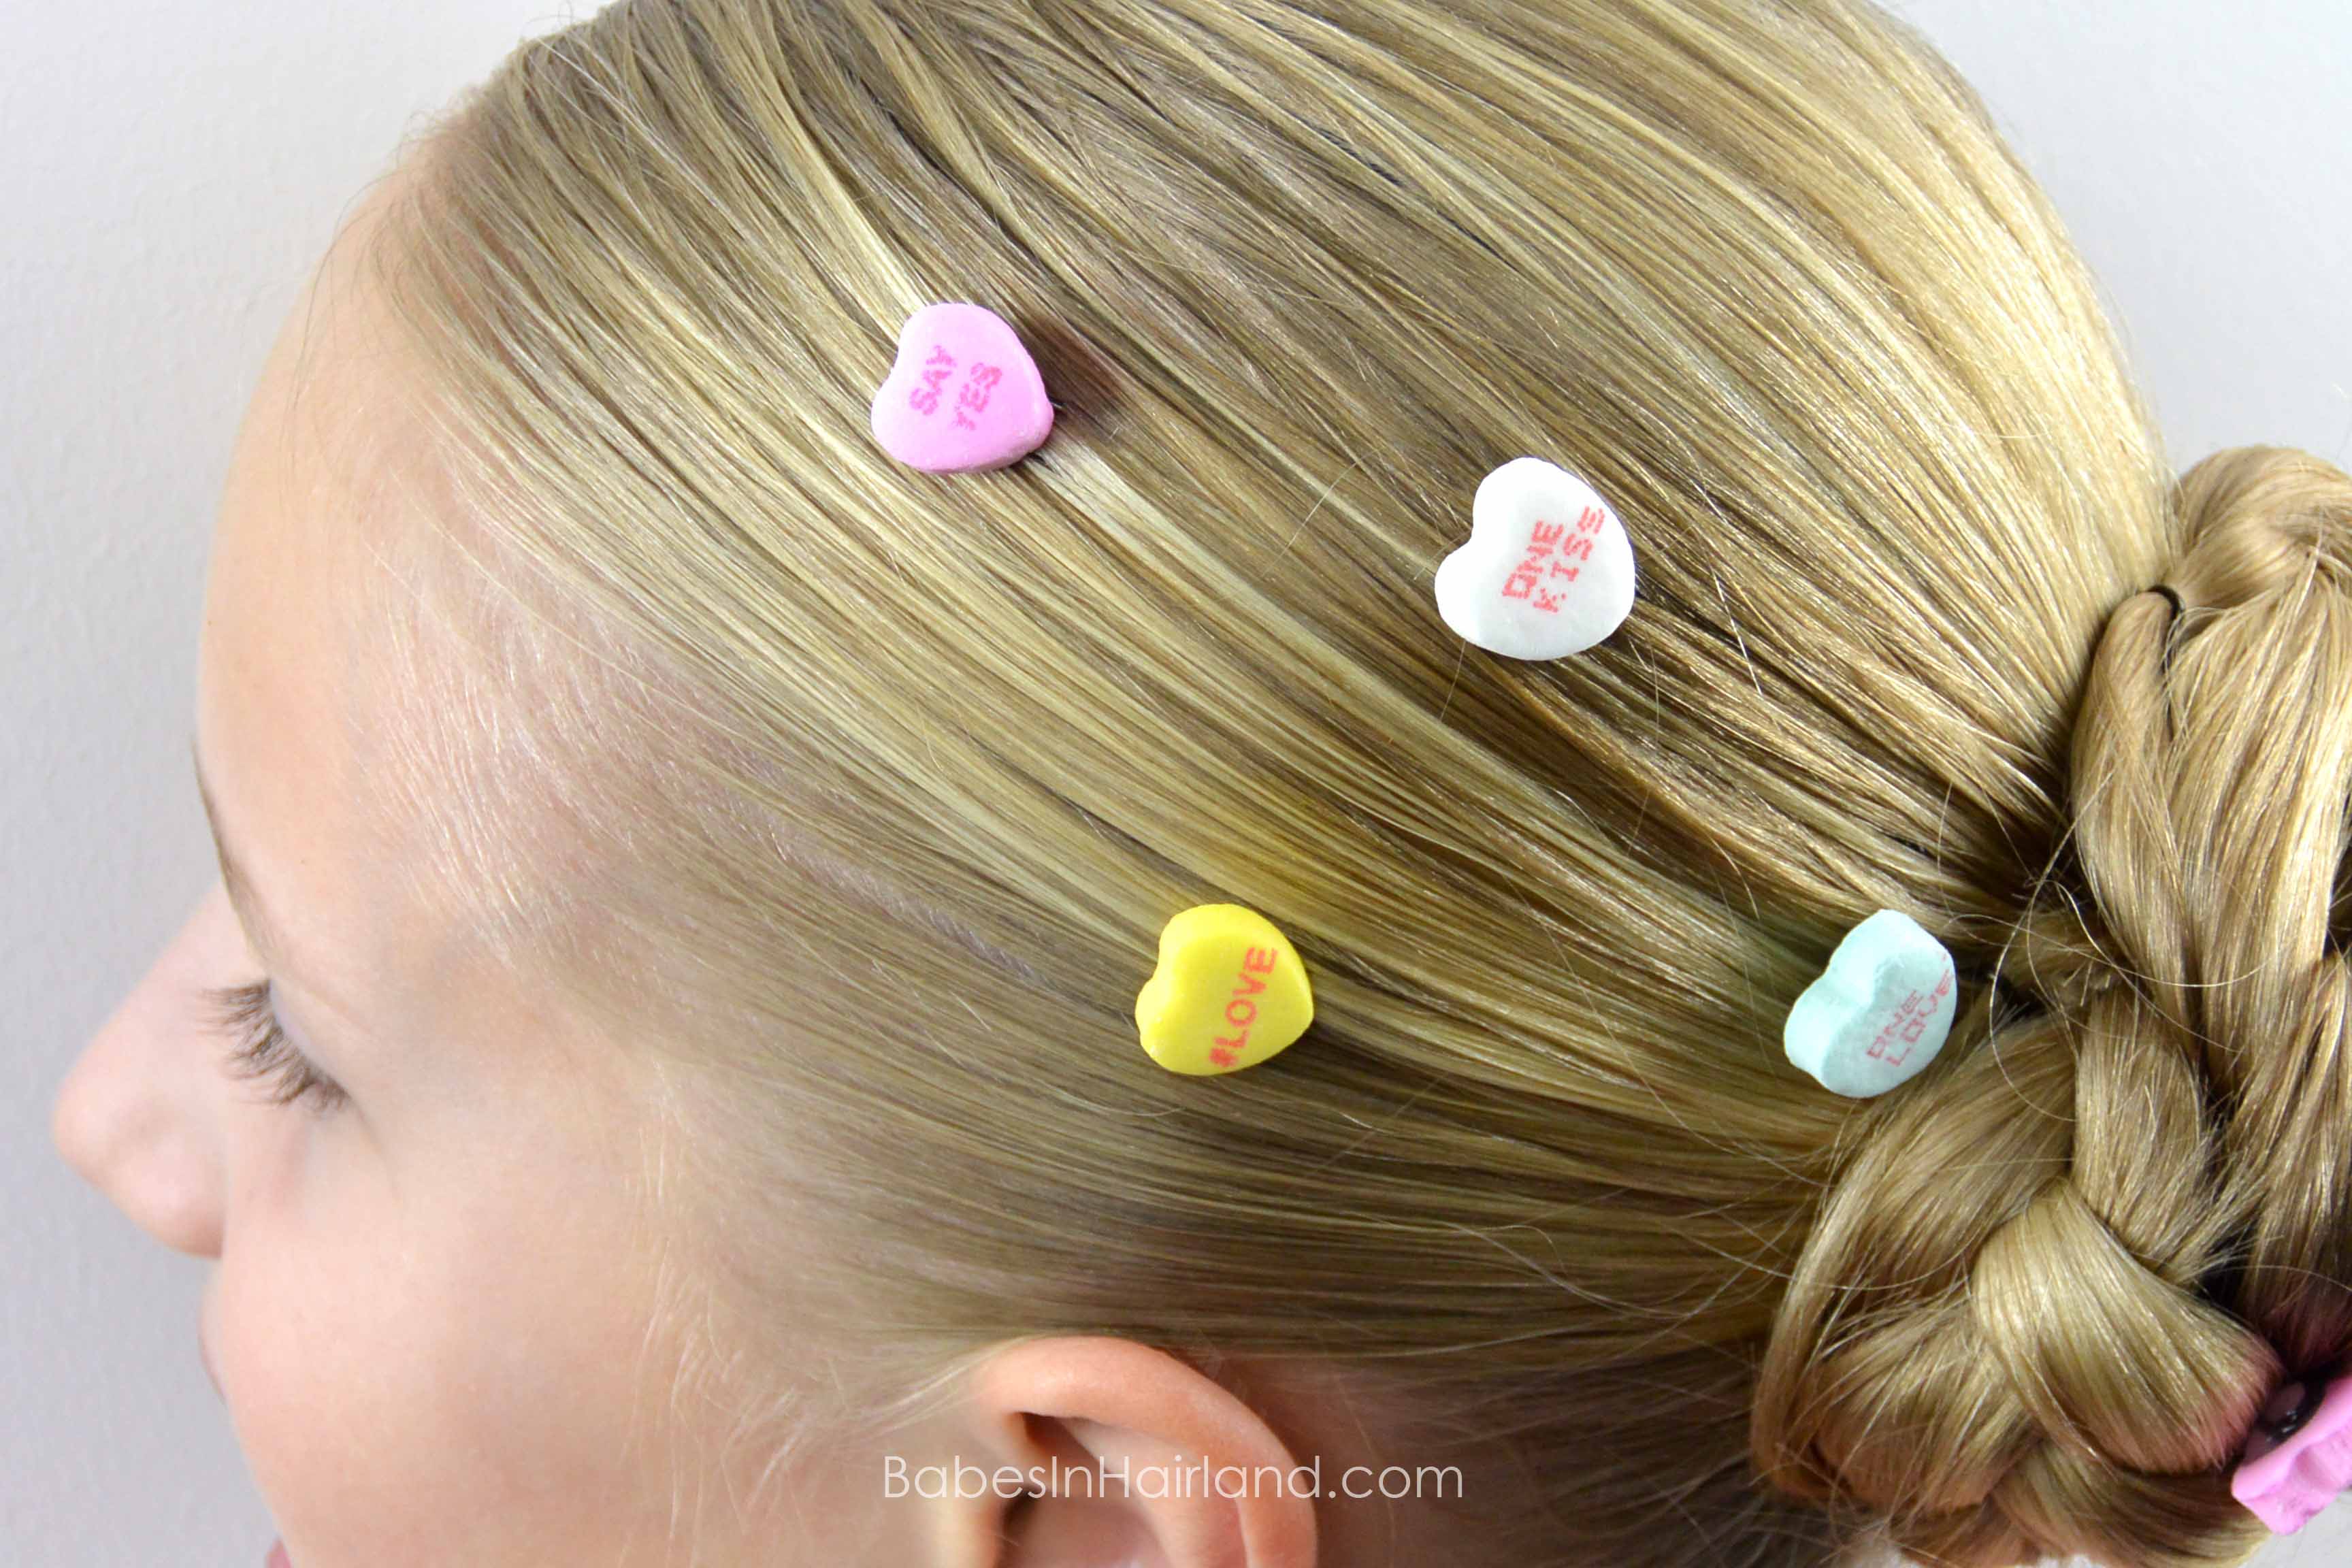
There are so many fun things you could do with these, but those are just a few examples. Now onto our next cute candy heart headband.
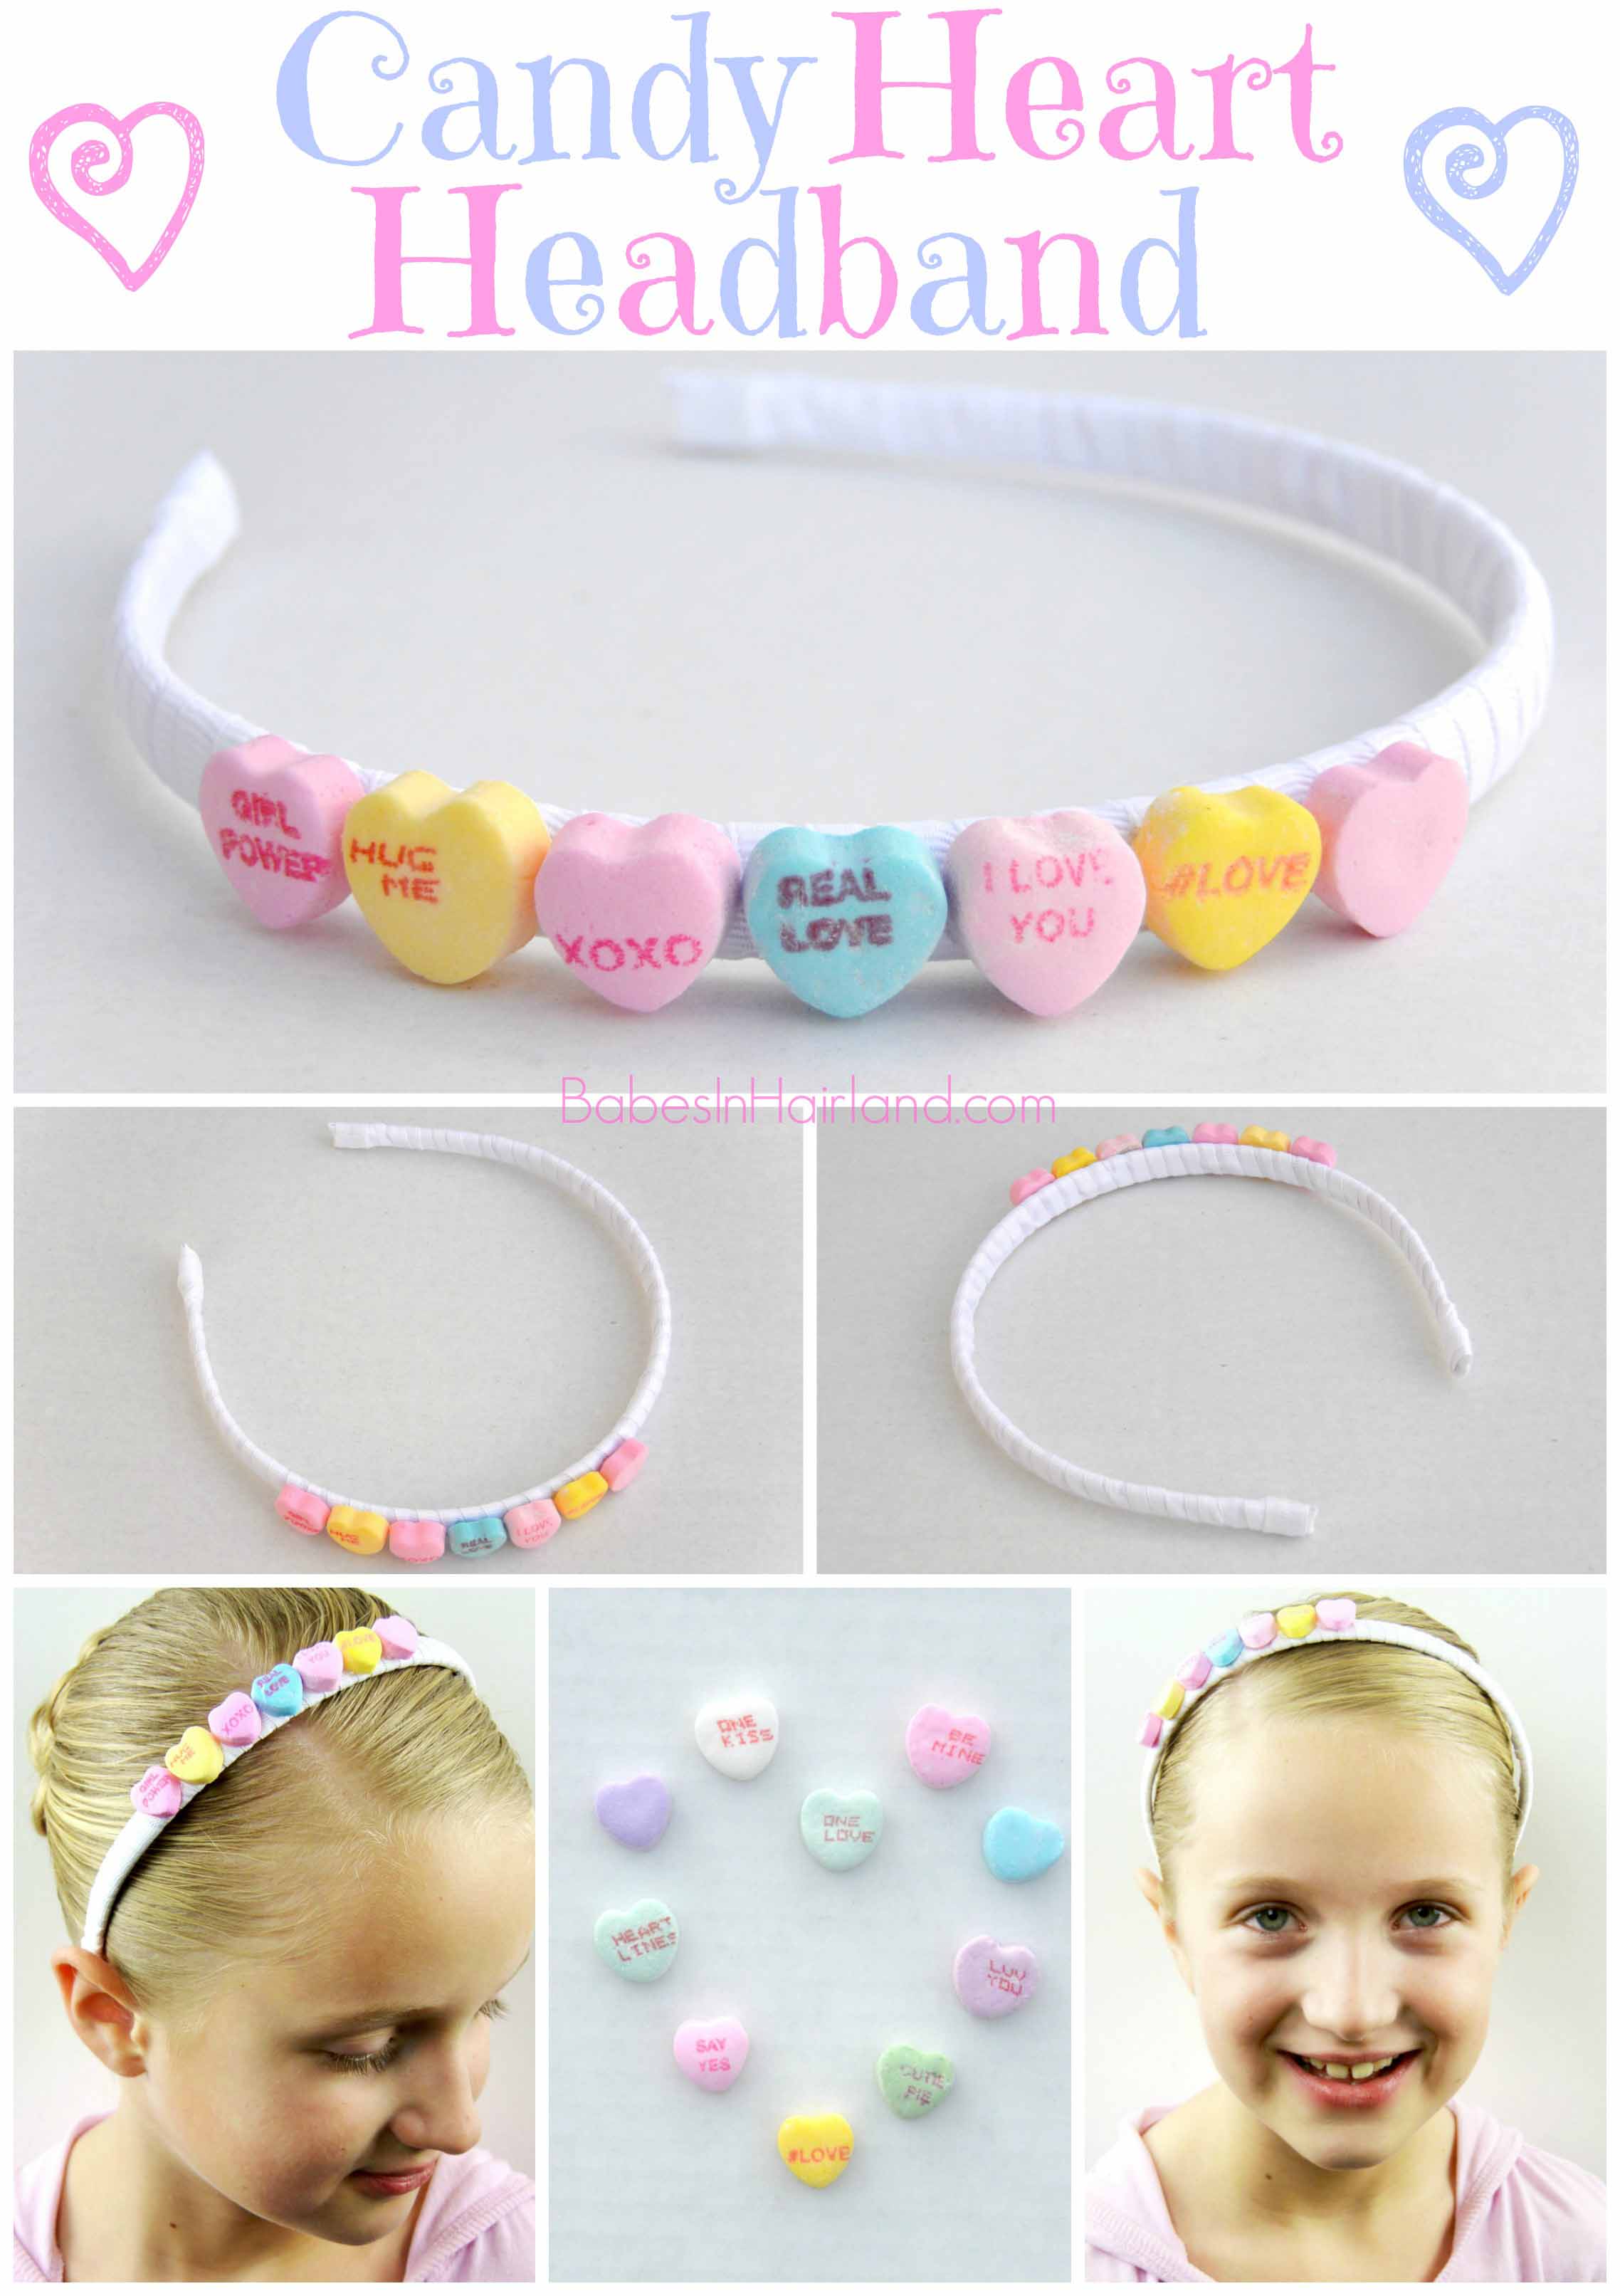

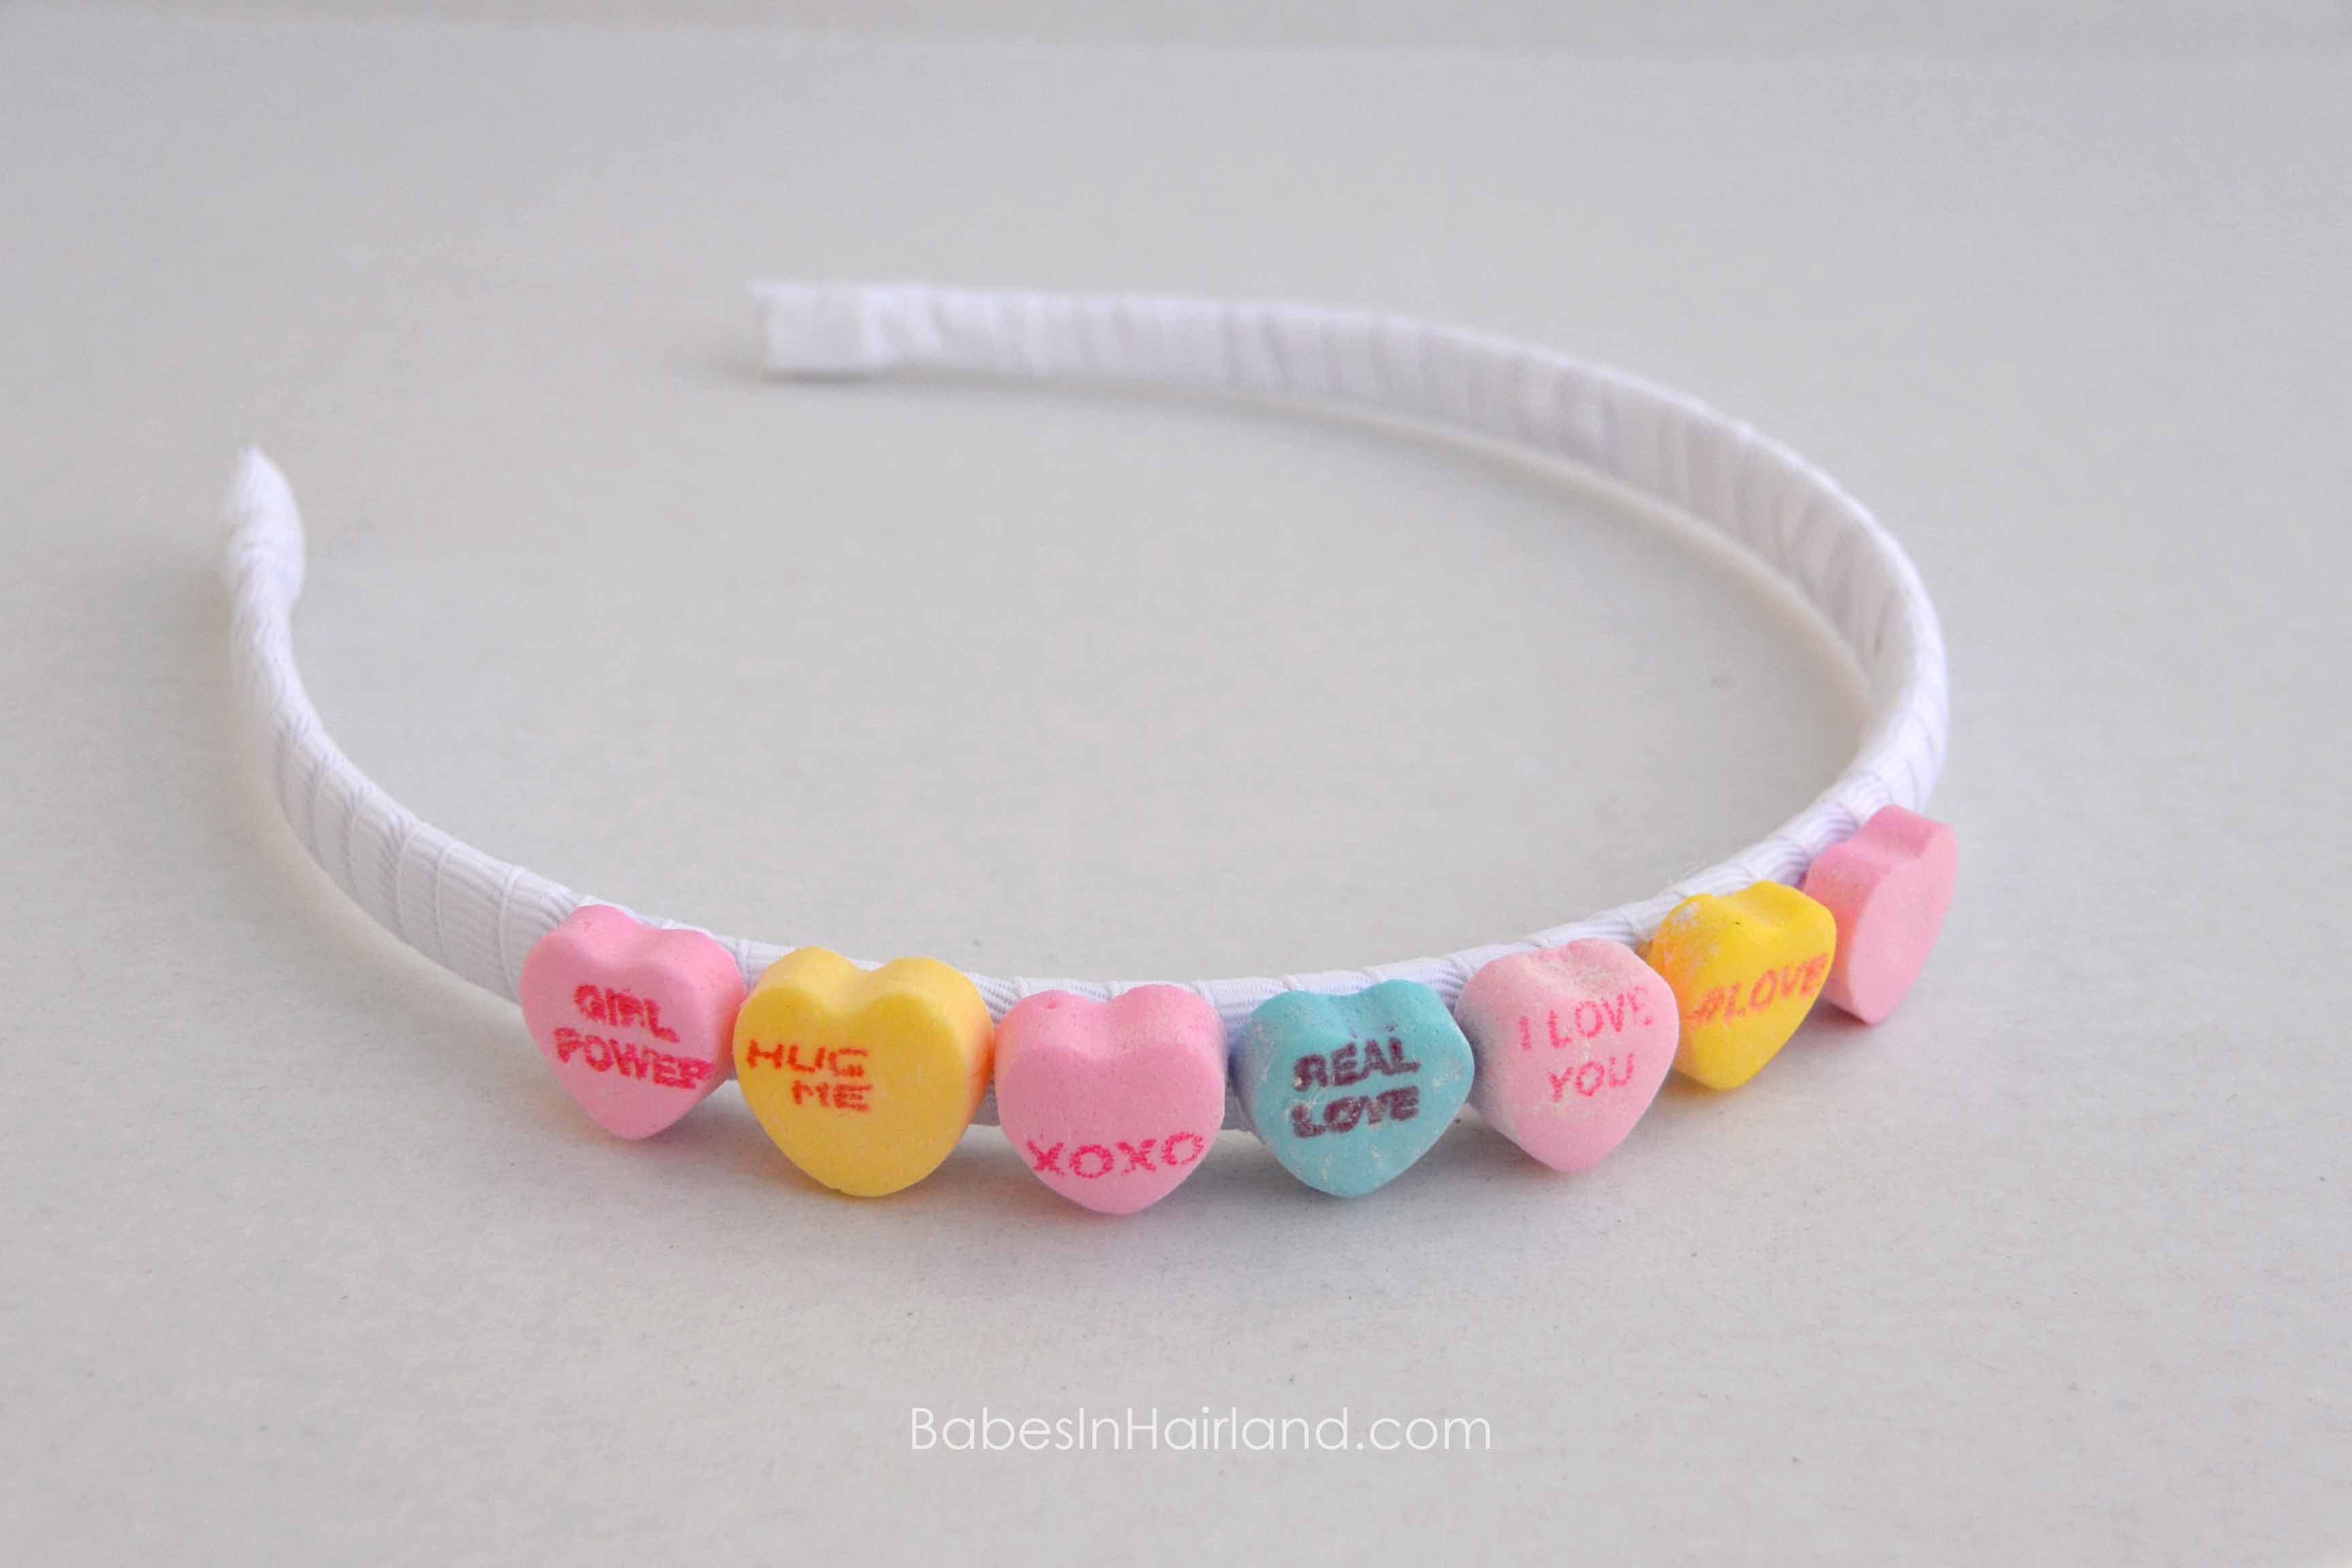
You will need:
* a headband (I wrapped ours with ribbon because I didn’t like the color for this project. You can see how to wrap a headband with ribbon in THIS post.)
* hot glue gun
* candy hearts (they make bigger conversation hearts which would also look totally cute)
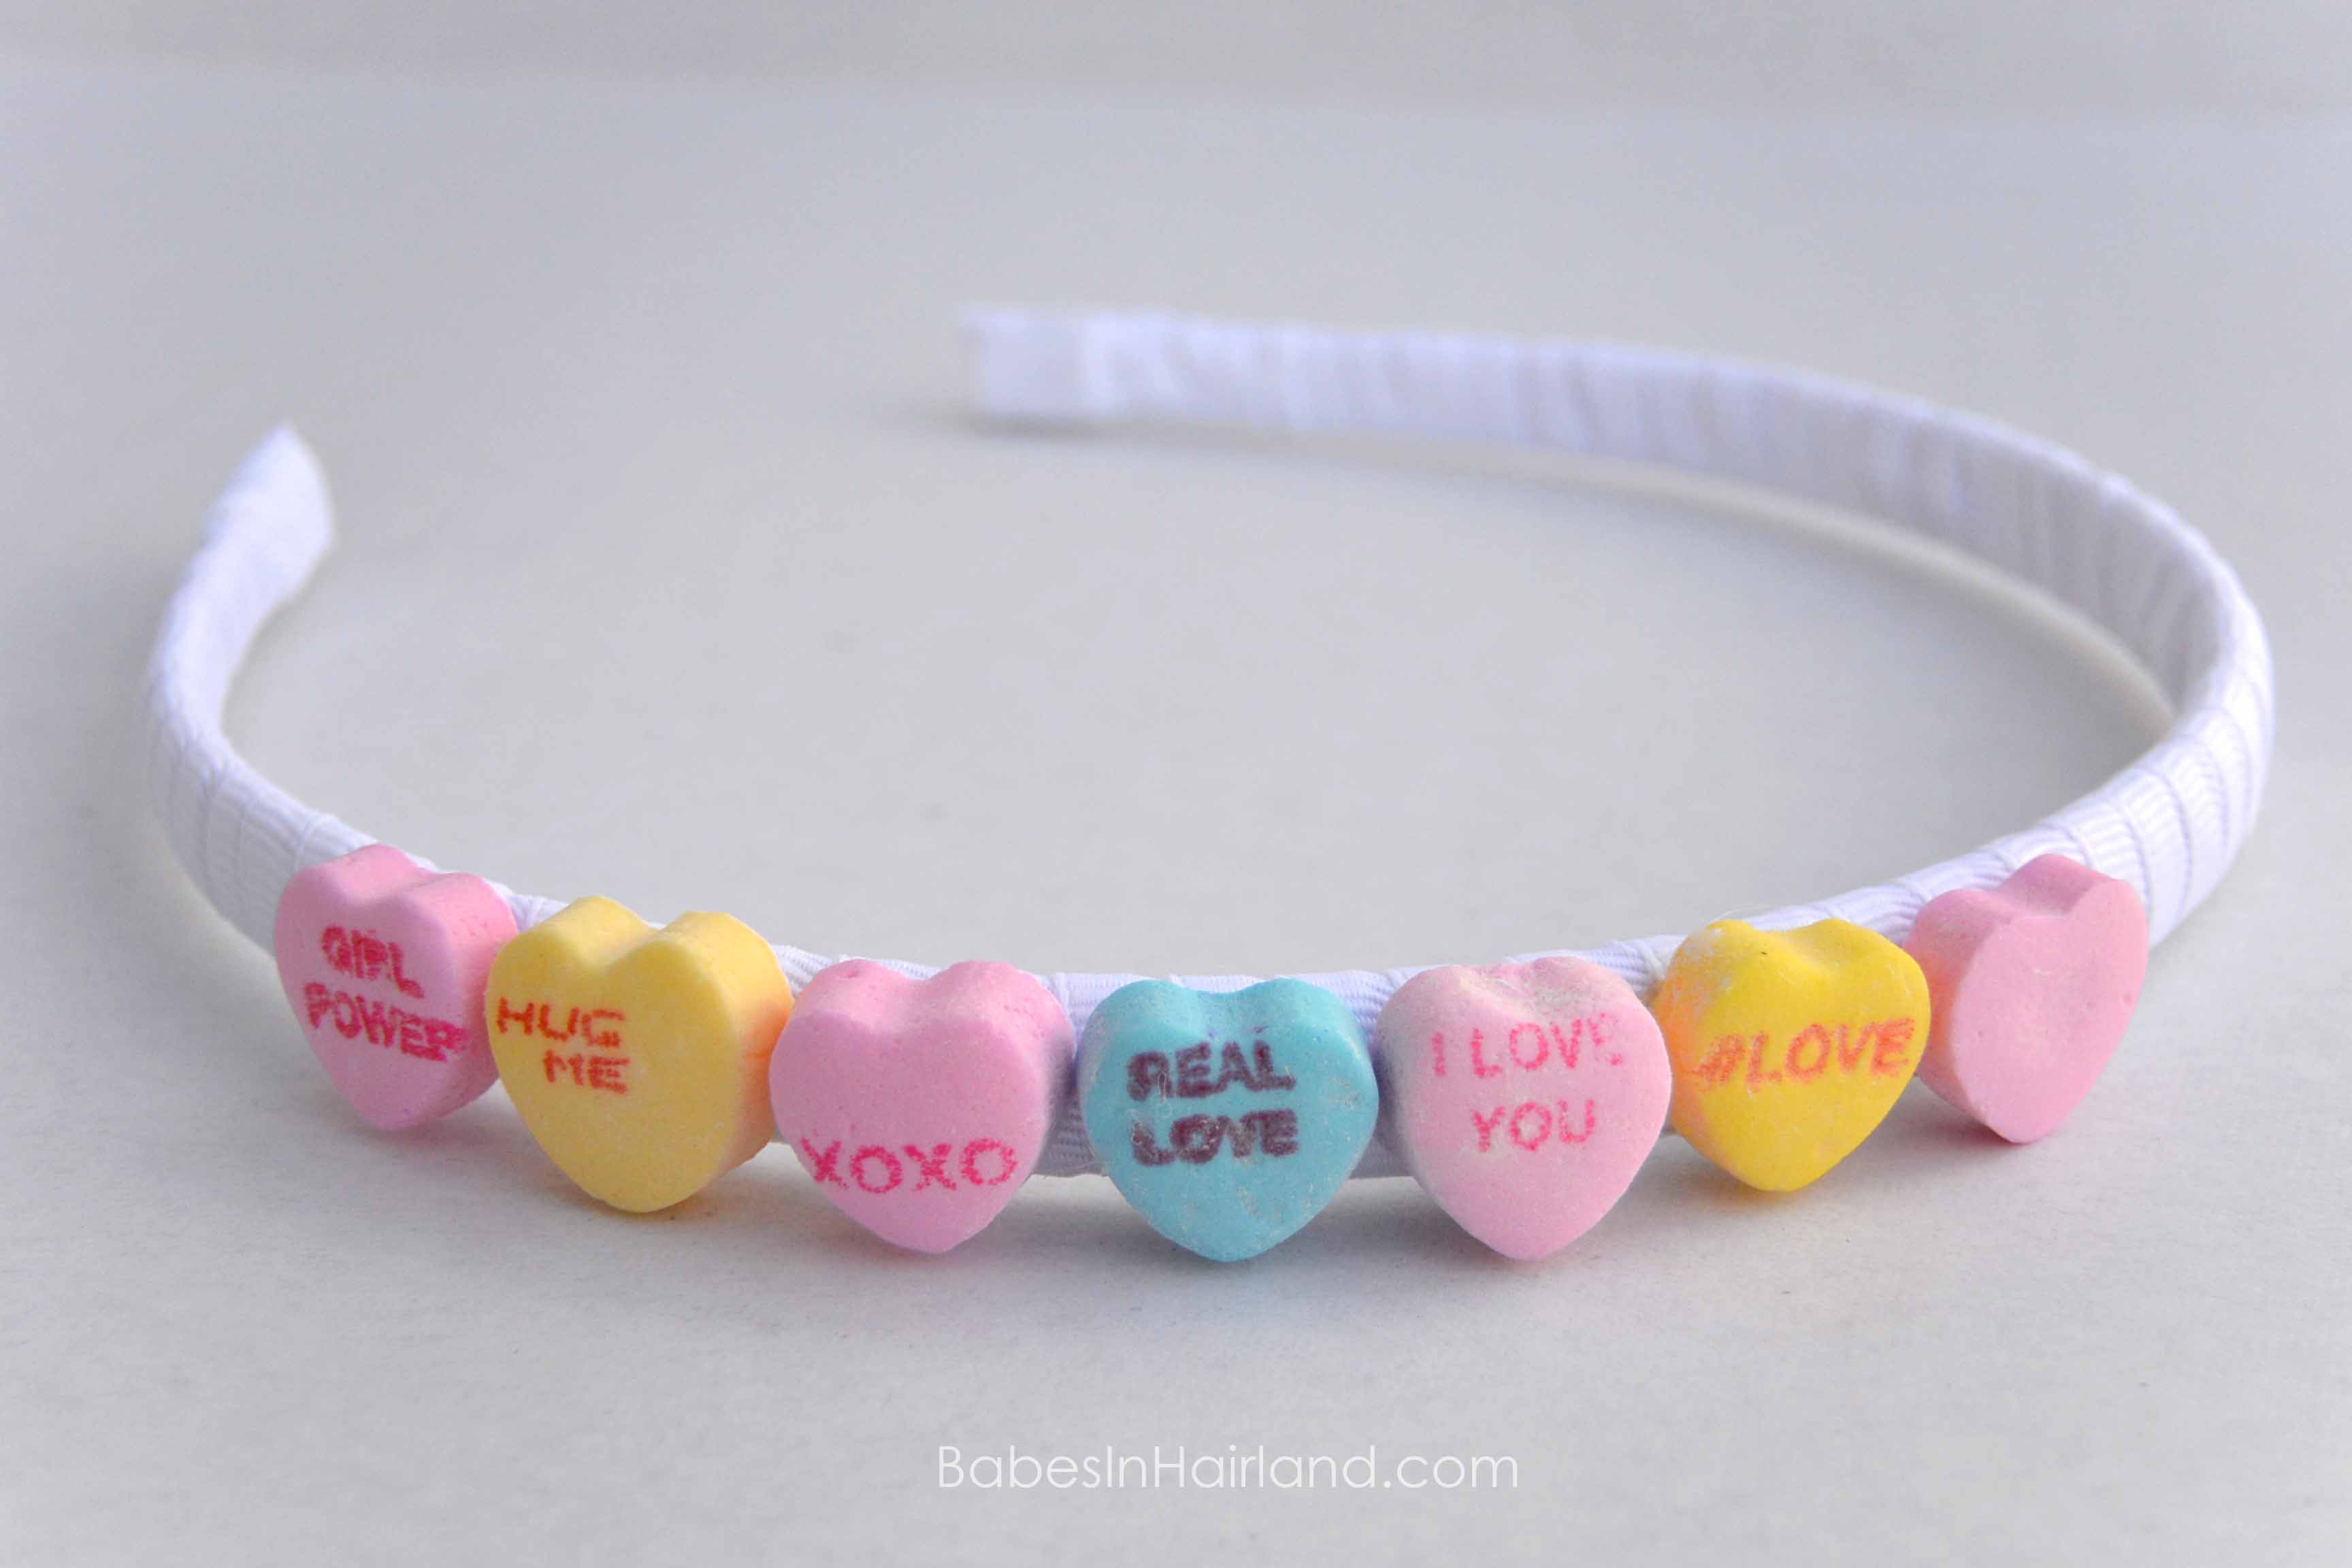
First, choose out which hearts look best, and how many you’re going to glue to your headband. You could cover the entire headband from ear to ear, but we wanted them off center and more on the one side of the headband. As I mentioned above in the hair pin instructions, buy candy hearts in a bag and not the little boxes. You’ll have a better selection and end up with a cuter look!
Next, dab a little bit of glue on the back of the candy heart and press onto headband. Add as few or as many as you like for your desired look. You can use all the same color, place them in different directions, and even make it say a cute lovey-dovey sentence! The possibilities are endless!
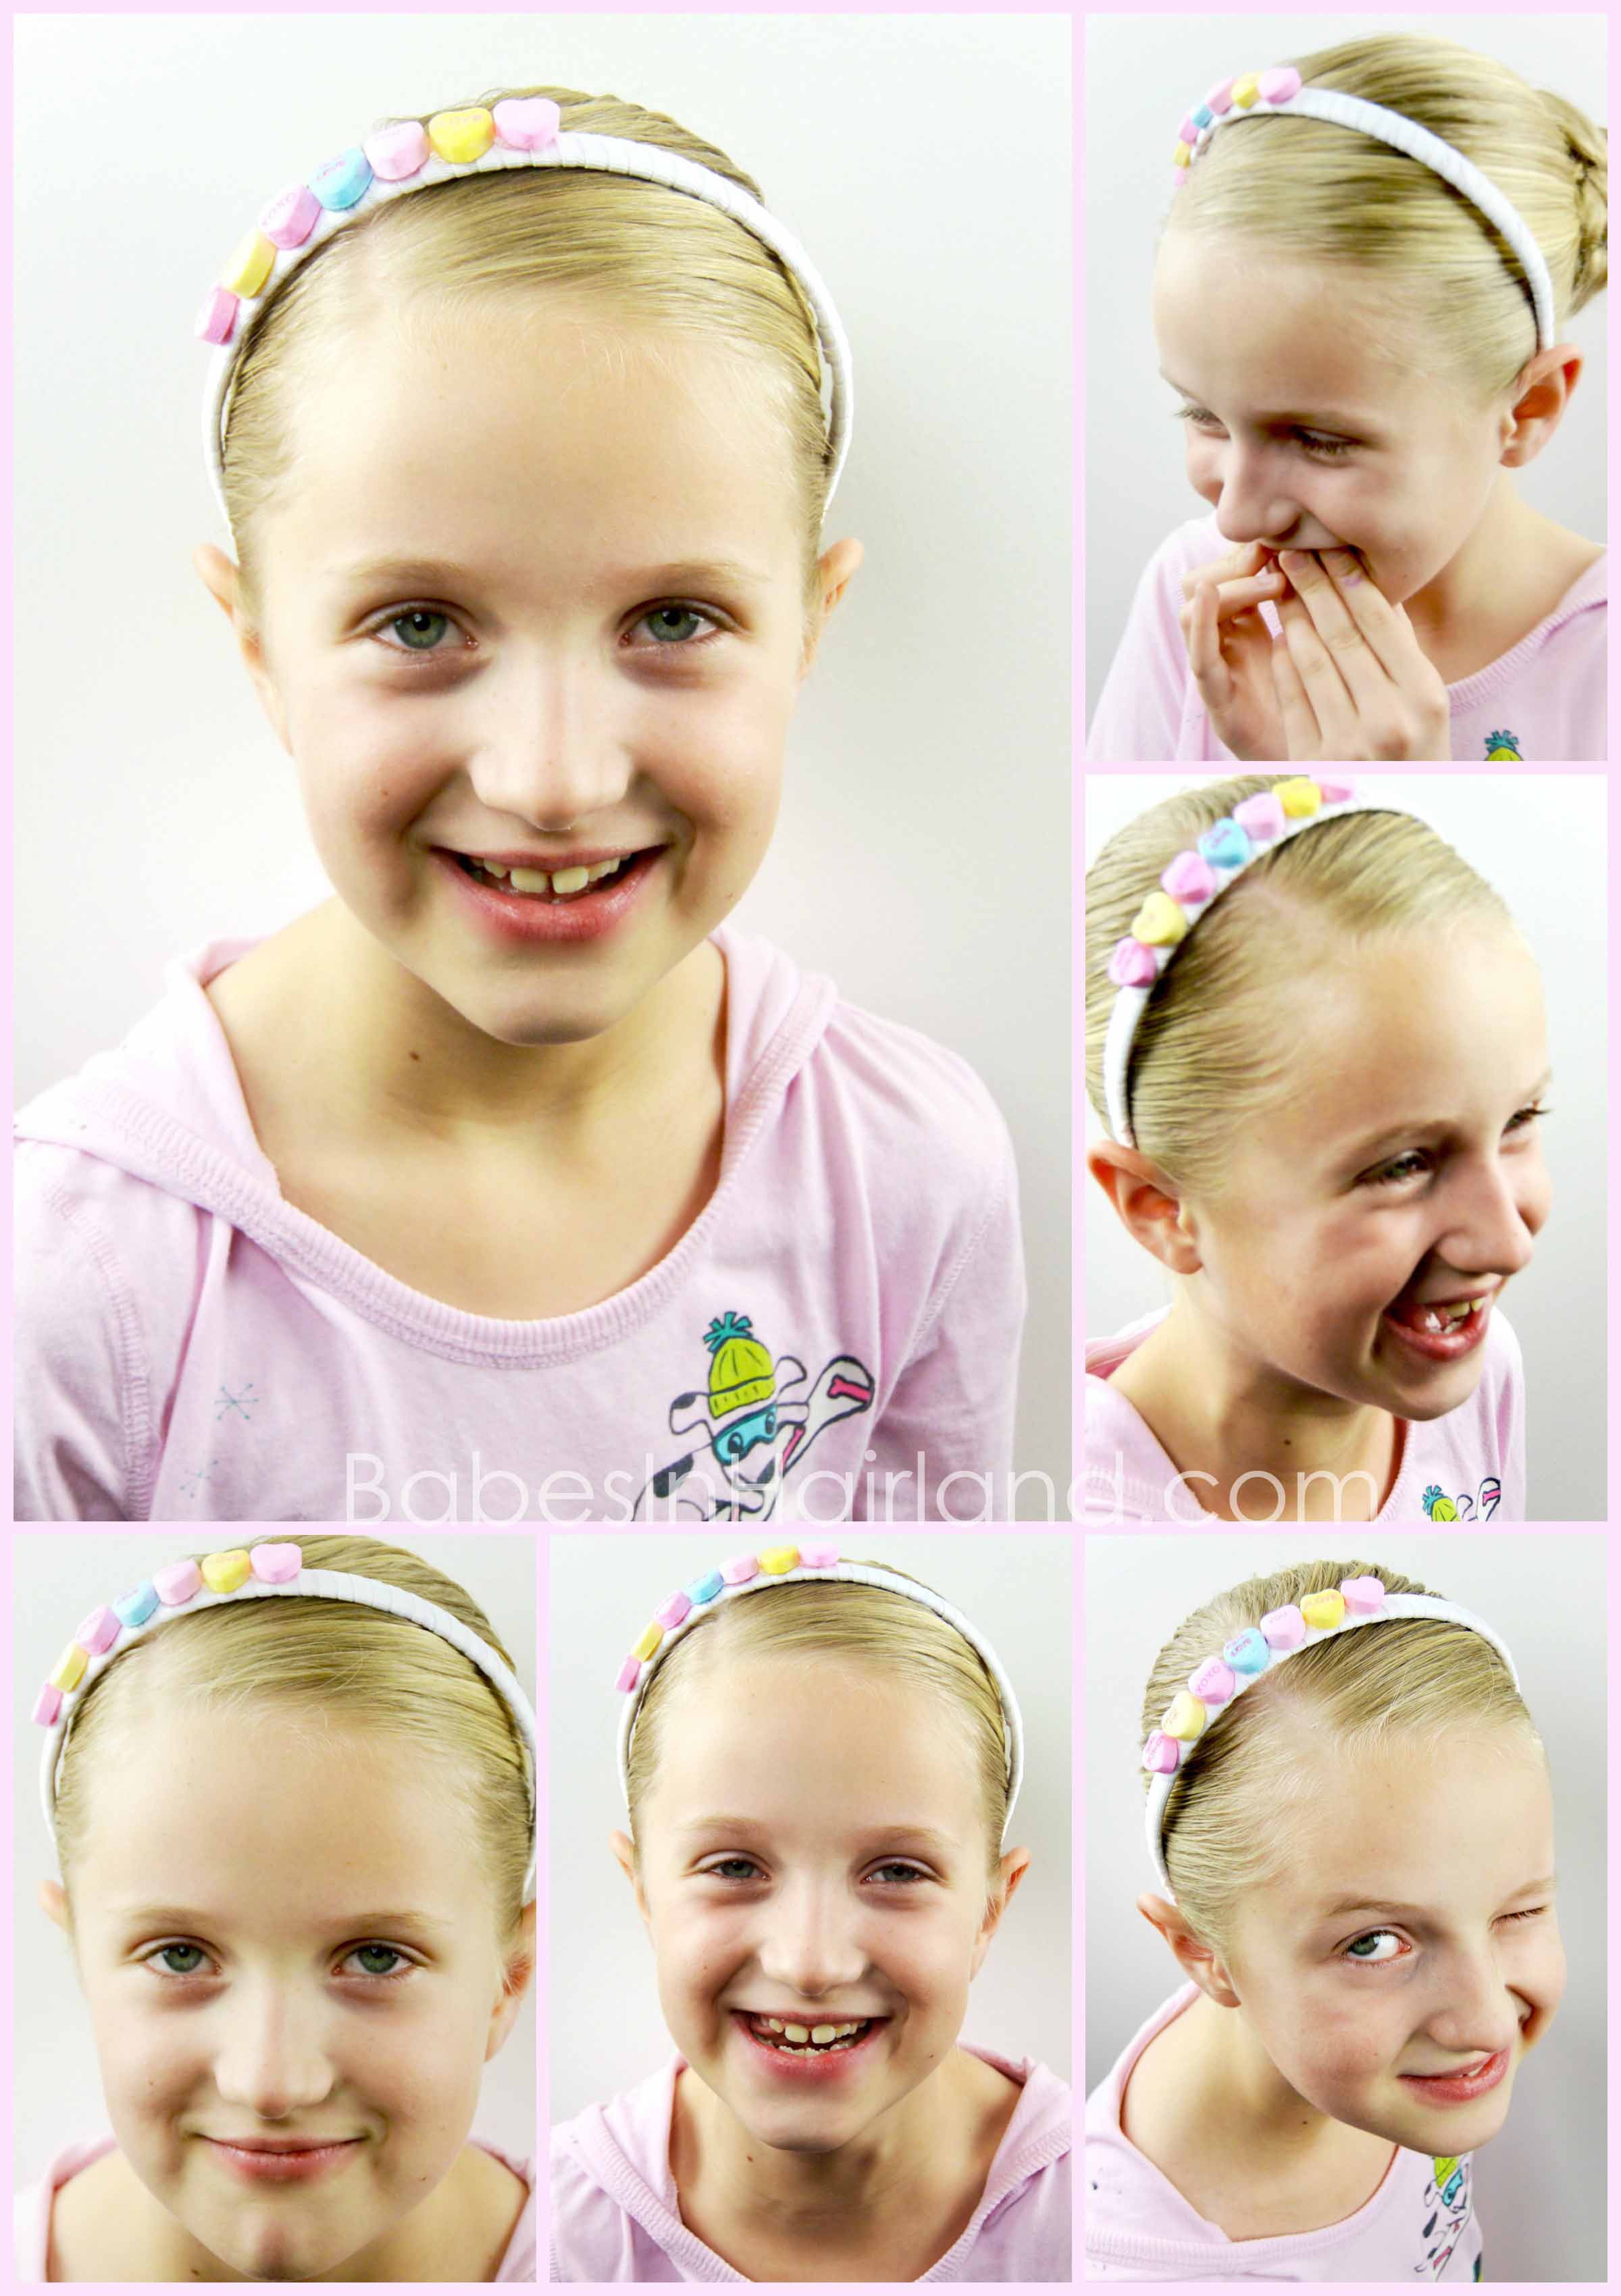
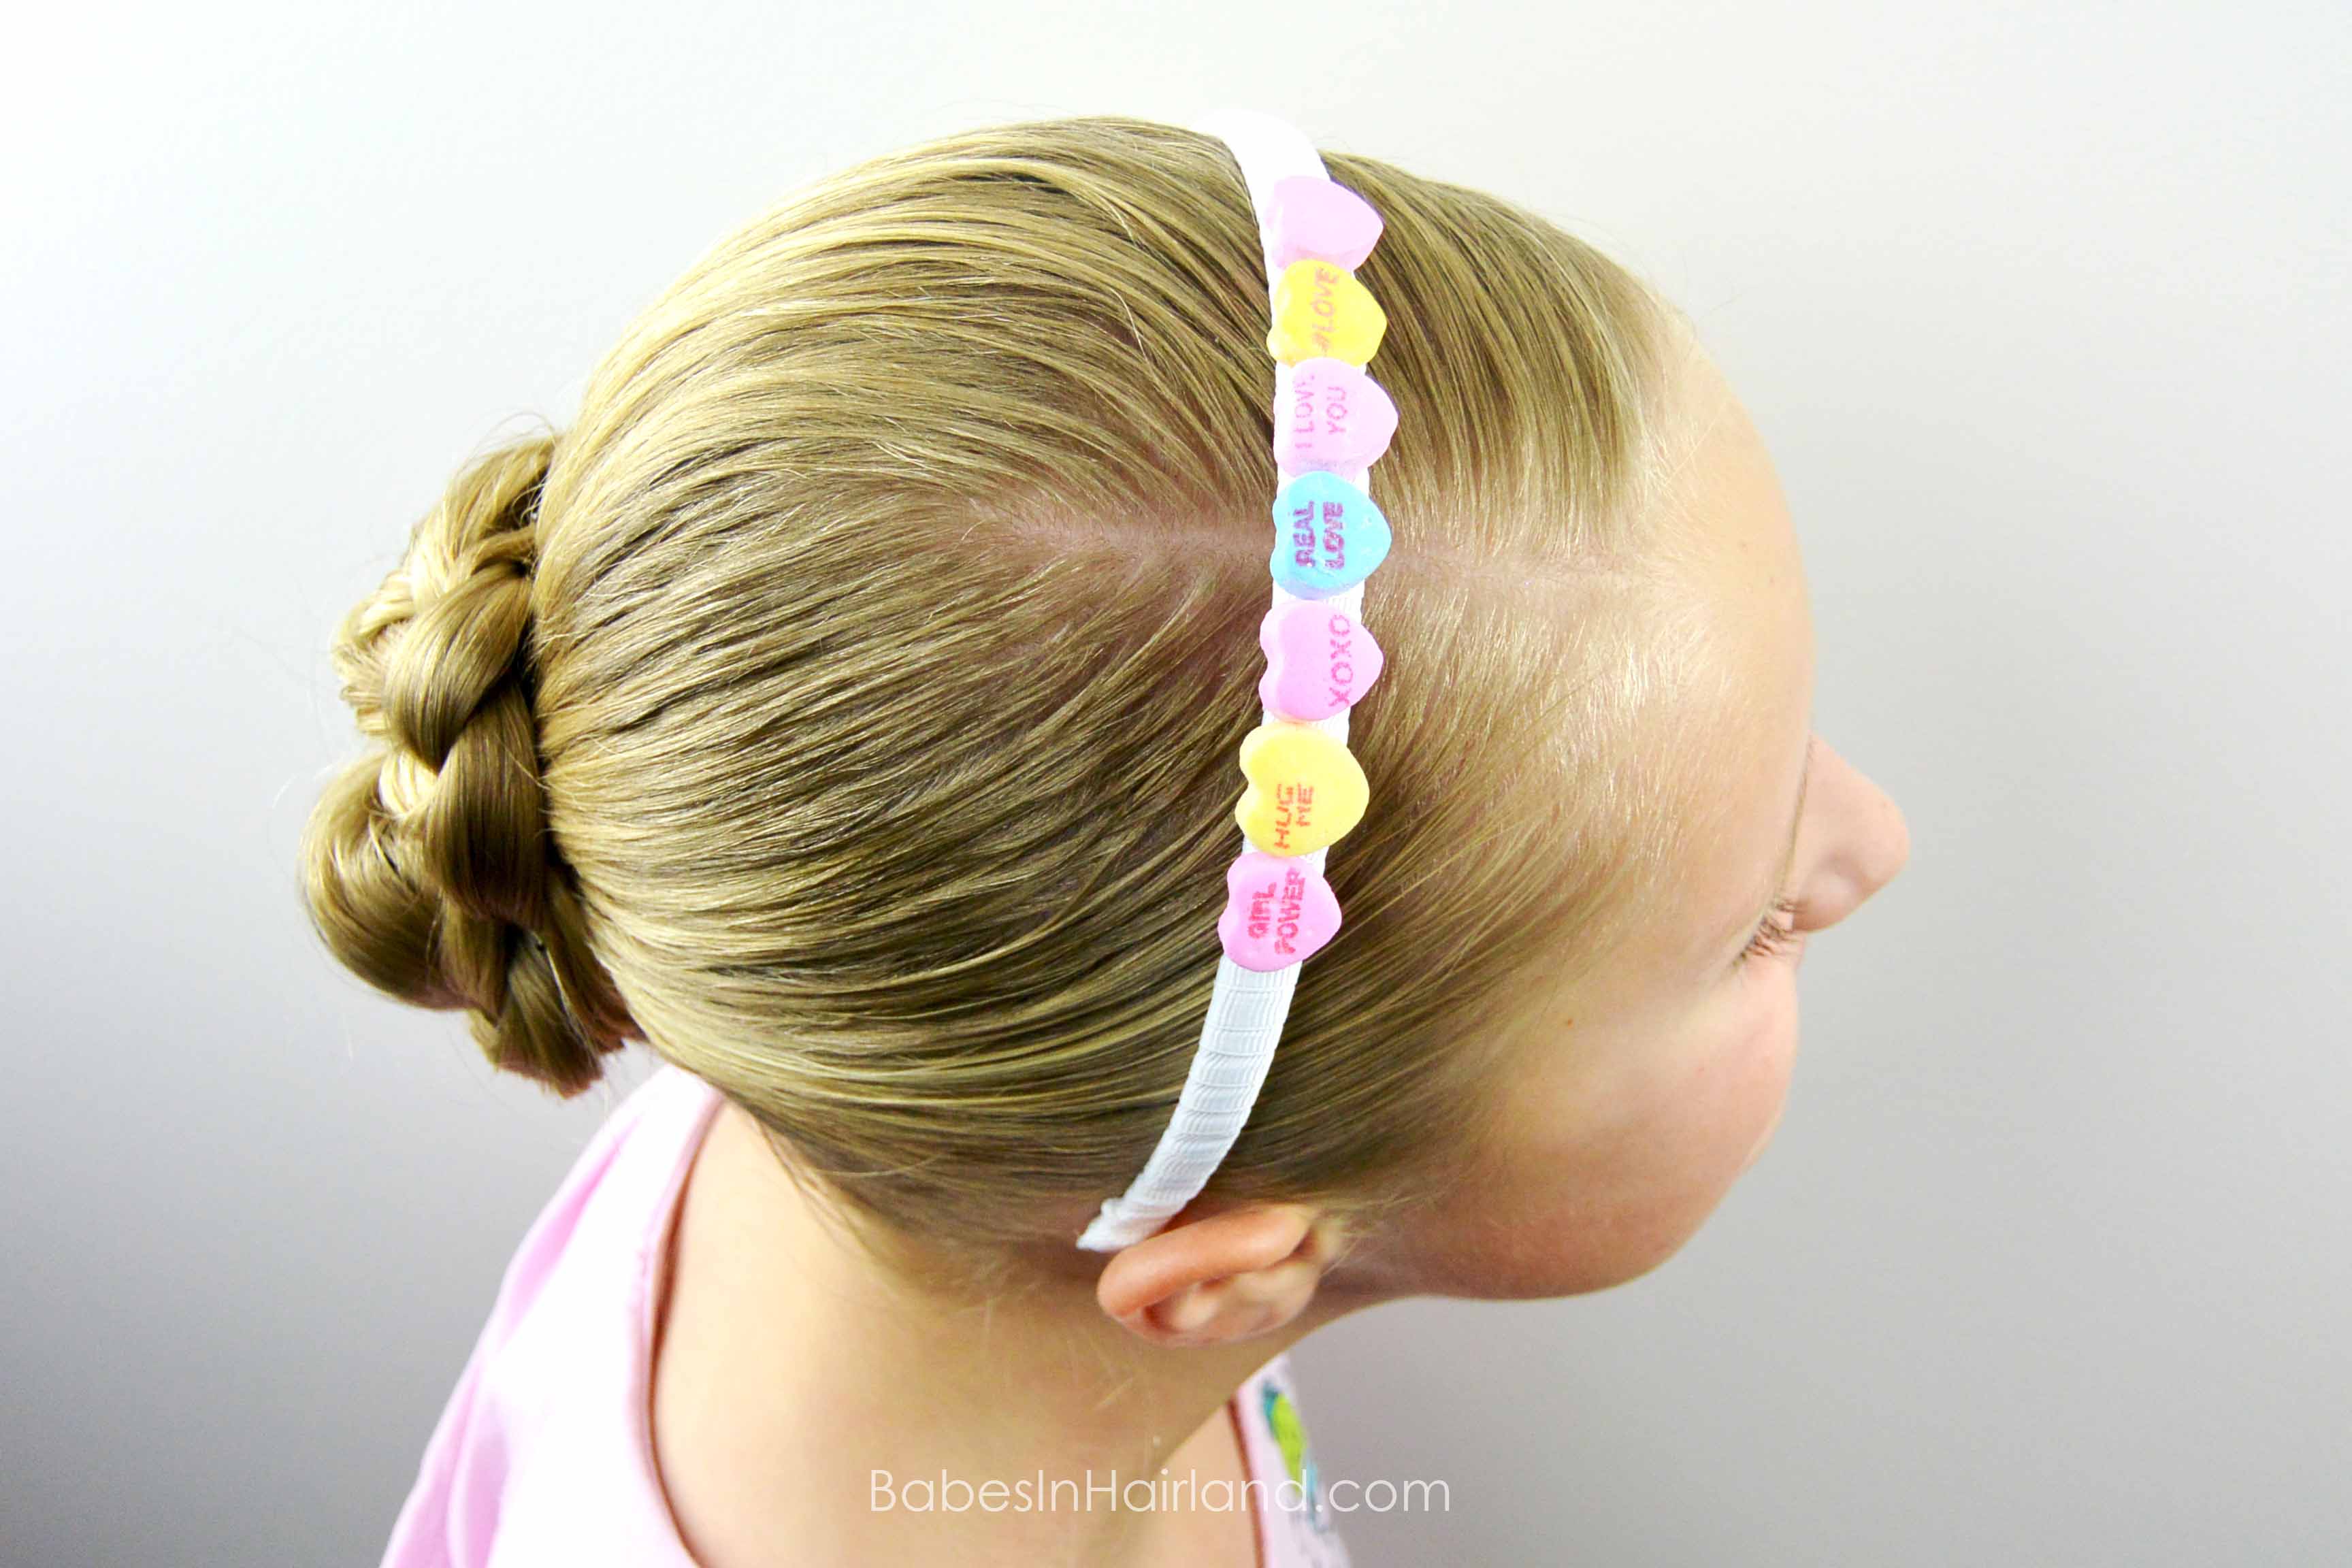
Then, put the headband on your cutie, and watch her turn into one silly girl! I thought eating candy made her hyper, but apparently, just putting a candy headband on her made her go crazy! I honestly took over 70 pictures of her because she wouldn’t be serious and 95% of them were completely silly. We had so much fun together! Case in point:

But in all seriousness, she loved these accessories, and so do I. Despite the selection from the little boxes not being as great as I’d hoped, these still turned out darling if I do say so myself! Just remember they are NOT edible once they’ve been glued, and use hairspray and water before slipping on the headband.


And don’t forget you can
find all our fun Valentine’s Day/Heart Hairstyles HERE.
Happy Valentine’s Day!