
Two new ways to try the gradient nail
Hello! I'm back from a quick trip to Portland just in time to sneak in a post before the week is out! If you've wanted to try mixing up your standard smooth sponge gradient, this is the post for you. I tested out two different methods that put a new twist on the gradient nail, and used the same colours for ease of comparison.

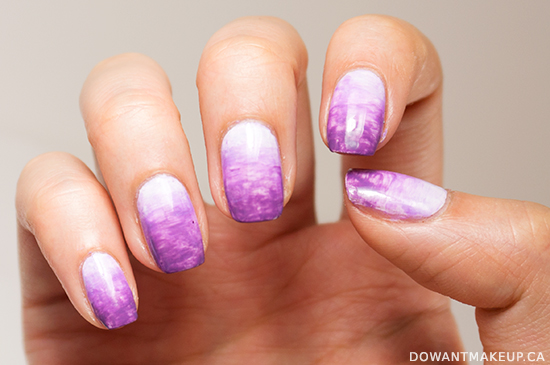
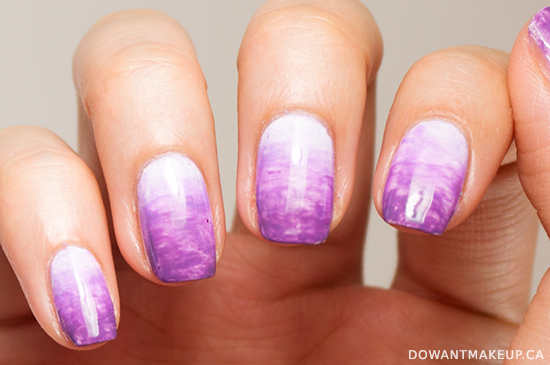
First up is the "watercolour gradient" look. I absolutely loved this look when I saw it on The Nailasaurus and had to try it for myself! I have to say that Sammy makes it look so easy but I struggled a little bit with it (this is attempt #2). I don't want to be that person that blames it on the brush, but I swear it's because my one flat art brush (I mostly have fine detail brushes) sucks. It seemed to just drag the colour around unevenly a lot.

Crappy brush aside, there's still something about this look that I couldn't stop staring at. I love the painterly effect. It takes a lot of patience to do though, because you need to give each layer time to dry before starting the next one. If you accidentally load up your brush with too much polish, just lightly dip your brush in acetone-free remover and swipe back and forth a bit to take some of it off. I used OPI Alpine Snow as the base, and layered on China Glaze Lotus Begin, Essie Sittin' Pretty, and Sally Hansen Complete Salon Manicure in Good to Grape.

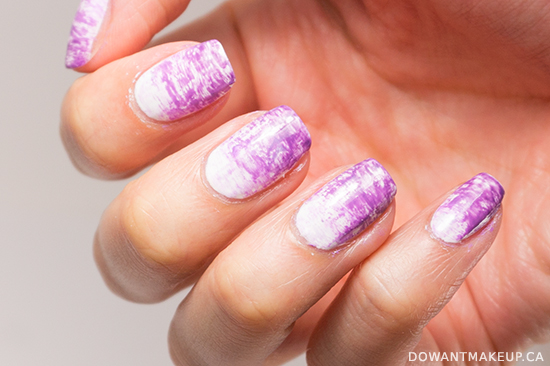
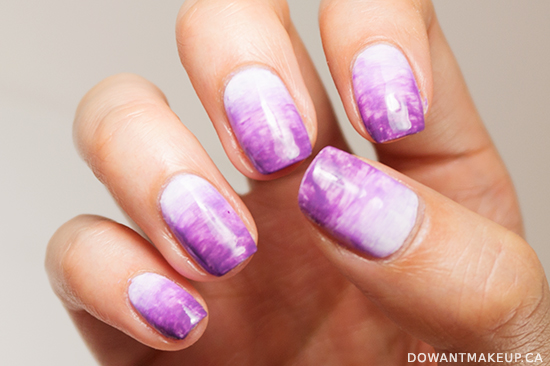
Method 2 is a distressed-look gradient using the dry brush technique--all you need to do is wipe almost all the polish off the brush and lightly swipe it across the nail, repeating for each shade. The finished look is much less smooth-looking than the watercolour gradient but still interesting to look at. Bonus: it doesn't require a separate brush since you're using the brushes from the nail polishes.

I always gave my brushes a quick swipe on some scrap paper to make sure I had juuust enough polish clinging to the bristles before applying it to the nail. But again, if you accidentally glob on too much, you can take it down a notch with a little acetone-free remover. This one is a little less time-intensive compared to the watercolour gradient: if you layer too much, you risk losing the distressed effect from the white base polish peeking through, so fewer layers is best. I used the same polishes as the watercolour gradient, except I swapped out Sittin' Pretty for Revlon Colorstay Gel Envy in Winning Streak.

Which look do you prefer? Personally I dig the watercolour gradient more, but both methods are a pain to clean up after! Nail polish all over my fingers and cuticles, and you can still see traces of it in the photos if you look close enough D: I've picked up a bottle of white school glue since then so that I don't have to scrub down my poor fingers with acetone again (a post about this to come!)
More posts from Angela