The Best Homemade Sandwich Bread


But I thought that would be wordy and my luck someone’s yeast would be bad and their bread would flop and they would feel like a fool. And I’m not in the position to make anyone feel bad. Especially over sandwich bread.
Plus, I’ve had bad yeast before and it’s so depressing when your hard work is a big dud.

Anyway, this bread is freaking fantastic.
We haven’t purchased sandwich bread in over 9 months. Even then I bought it purposefully to make a recipe and prior to that it had been months since our last sandwich bread purchase.


There were a few reasons fro this. One- we weren’t using it enough. Two- as we weren’t using it enough we would then freeze it & forget about it and then it would get all freezer burned and gross. Lastly- it started to bug me that something so simple had so many damn ingredients to it. Most of which I couldn’t pronounce. No Bueno.


So, in an effort to skip all those fun things that allow bread to hang out on the shelf for weeks on end. I began searching for the best sandwich bread I could make. It had to be easy and delicious… and this bread is a winner!! Check & check!


I used to be so afraid to work with yeast, but I’ve, thankfully, gotten over it. I used to be afraid that I would use water that was too hot or too cold (even with a thermometer!) or I’d store it incorrectly and kill it. Or I’d use the wrong kind of yeast. Actually, I’m still really afraid of that which is why I google it 10x before I start a recipe.
But this sandwich bread is perfect for the first time bread baker or for master. It produces a great light texture that is sturdy for thin (1/4″ slices) and thick slices. We’ve enjoyed it toasted with some butter and raspberry jam, Autumn has had plenty with lots of peanut butter, it was great as French Toast, and great lightly toasted for BLT’s.


The Best Homemade Sandwich Bread
Makes 2 9″x 5″ loaves
Ingredients
- 2 cups warm water
- 2 Tablespoons sugar
- 1 Tablespoon dry active yeast (I use Red Star Active Dry Yeast)
- 1 teaspoon salt
- 5 1/2 Cups all purpose flour
- 3 Tablespoons butter, softened & cut into small pieces.
Process
- In a bowl or measuring cup, combine the water and the sugar. Mix until dissolved. Add the yeast. Again, mix until dissolved. Set it aside for 10 minutes to allow the yeast to ‘wake up’ and create bubbles on the top the water.
- In a large mixing bowl or in the bowl of a stand mixer, combine the flour, salt, and butter pieces.
- Add the water mixture to the bowl and then knead together for about 10 minutes by hand, or about 5 minutes with a mixer. At this point it will feel slightly elastic, smooth, and it is no longer sticking to the bowl or your hands/hook.
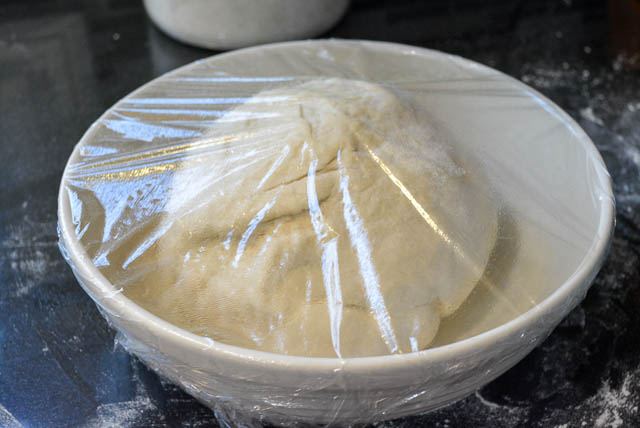
- Smooth the dough into a ball and place in an oiled bowl. Cover the bowl with plastic wrap that has been rubbed with oil or sprayed with non-stick cooking spray. Place in a warm spot to allow the dough to rise for 1 hour. (If your kitchen is cool, then cover the bowl with 2 kitchen towels.)
- At this point the dough should be poofy and have roughly doubled in size. Remove the plastic wrap and punch the dough down once or twice to knock the air out.
- Knead the dough in the bowl for about a minute to form it into a ball.
- Sprinkle some flour onto your work surface. Put the ball in the middle of the work surface and cut in half to create two equal pieces. Set one dough ball aside.
- Knead the dough a bit by gently folding it over and over again, rotating it every few folds. Work the dough into an ovalish shape. Place it into your lightly greased 9″ x 5″ metal loaf pan. Repeat everything with the second portion of dough.
- Set both pans aside where the dough rose the first time, but leave them uncovered, for 1 hour.
- When the dough as risen and doubled in size, preheat oven to 350 degrees.
- Bake for 20 minutes and then rotate in the oven, and bake for another 15-20 minutes (for a total of 35-40 minutes), or until the top of the loaves is golden.
- Remove from the oven and let sit for 5 minutes prior to removing from the pans to completely cool on a cooling rack and allow them to cool the rest of the way. (if you cut it when it’s too warm it will be crumbly). Once cooled, wrap, and store at room temperature or in the refrigerator for up to 4 days. Slice at desired thickness as needed.
Slightly adapted from Daily Dish Recipes
Filed under: Baking, Food and Drink Tagged: bread, homemade bread, homemade sandwich bread, loaves of bread, sandwich bread, yeasted bread