
Contouring and highlighting…with Sephora

I’ve wanted to do this photo-tutorial for a while….and here it is, finally!
I feel like there are a lot of misconceptions when it comes to contouring and highlighting. First of all, contouring doesn’t mean wearing way more makeup than usual. Also, it is not a one-size makeup technique. Forget about the generic Kardashian tutorials you have seen all over the web… you must take into consideration your face shape and nose shape, and contour accordingly.
Let’s start by understanding that contouring and highlighting are the placement of light and dark colors to mimic shadows and light reflection. These shadows help define and enhance certain areas. For example: contouring the hollow of your cheeks creates a natural shadow for a more prominent cheekbone. On the contrary; highlighting mimics light reflection and help specific features to stand out.
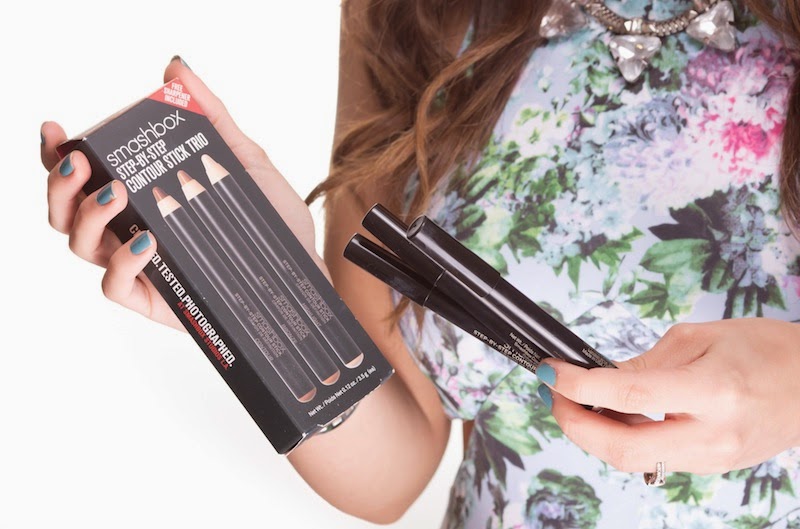
Nowadays, there are hundreds of products designed specifically for contouring; they can come in powders, creams, or even liquid. In this photo-tutorial, I’m going to be using Smashbox Step-by-Step Contour Stick trio. These three creamy sticks blend easily; and the pen shape gives a precise application.
__________
Llevo tiempo queriendo hacer este foto-tutorial…y aquí está…finalmente!!
Siento que la gente tiene el concepto erróneo cuando se trata de contornear el rostro. Primero que nada, contornear no significa aplicar muchísimo maquillaje. Segundo, es una étnica que debe varias dependiendo de tu tipo de rostro, la forma de tu nariz, etc…olvida todos esos tutoriales que has visto a la' Kardashian con cientos de kilos de maquillaje.
Primero debemos enterner que es contornear e iluminar. Estos términos se refieren a utilizar colores claros y oscuros para replicar sombras y el reflejo de la luz. Estas luces nos ayudan a resaltar ciertas areas. Por ejemplo, al crear sombra en tus pómulos da la ilusión de una cara más delgada.
Hoy en día hay cientos de productos diseñados para el contorno de nuestro rostro; vienen en polvo, crema, líquidos. En este tutorial, voy a usar el Smashbox Step-by-Step Contour Stick trio. Son 3 lapices cremosos que se difuminan facilmente, y al tener forma de lapiz, dan una aplicación precisa.

Let’s start contouring…it’s easier than you think, I promise!
1. Prep your face by applying your favorite moisturizer and primer. Then, apply foundation. When you apply foundation to your entire face, you now have a blank canvas. That’s why it’s important to contour and highlight in order to add dimension back to your face!
______
Empecemos…les prometo que es más fácil de lo que parece.
1. Antes que nada hidrata tu cara con una crema hidratante y un primer. Luego aplica tu base favorita. Al aplicar la base, perdemos muchas de las sombras naturales de nuestro rostro…por lo que el contorno le da dimensión de nuevo a tu carita.

2. CONTOUR: use the dark stick to emphasize the natural hollows of your face. Apply it on: a. Cheekbones: suck in your cheeks (make the infamous fishy face) and apply a thin line across the hollow of your cheeks b. Temples c. Along your jawline.
d. Sides of your nose
3. BRONZE: apply the bronze shade (doing little strokes instead of a full line) just above the contour shade on the cheekbones, this will add warmth and help blend the contour shade correctly.
_____
2. CONTORNO: usa el lapiz más oscuro para crear profundidad. Aplicalo en tus pómulos (haz la famosa carita de pez para ver exactamente donde aplicarlo), la sien, a los lados de tu nariz, y en la mándibula.
3. BRONCEA: utiliza el color medio justo encima de la línea que acabas de hacer para el contorno (pero en vez de hacer una línea, haz pequeños trazos). Esto va a ayudar que el color más oscuro se difumine correctamente y se vea natura.

4. HIGHLIGHT: a. To elongate my face, I apply the highlighter as a V-shaped underneath my eyes. b. I also applied it on the bridge of my nose c. In the middle of my forehead. d. And finally on my Cupid’s bow
______
4. ILUMINA: yo personalmente lo apliqué en V justo debajo de mis ojos, en mi nariz, en la mitad de la frente, y en el arco de cupido.

5. BLEND: using pressing or patting motions, soften the areas with a brush, sponge, or your fingers.
_____
5. DIFUMINA: difumina los 3 colores con una brocha, una esponja, o tus dedos.

6. BLUSH: smile and apply blush to the apple of your cheeks. I’m using Sephora Collection Colorful Blush in Rose Sorbet 16.
______
6. RUBOR: sonrie y aplica un rubor en tus cachetitos. Yo utilicé el Rubo de Sephora Colorful Blush en el tono Rose Sorbet 16.

7. FINISH: since these sticks are creamy, set with loose translucent powder.
That’s it! Easy quick…and oh-so-flattering!!
________
7. LISTO! Como este trio de Smashbox es cremoso, sella el maquillaje con un polvo translucido

Do you have any tips when contouring and highlighting? Share them with us! Do you want to learn more on how to do it for your specific face shape? Head over to Sephora for a FREE Contour Mini Makeover.
_____
¿Tienes algún tip cuando se trata de iluminar y contornear? Comparte tus tips con nosotras.
SI quieres aprender más tips sobre como debes aplicar el maquillaje depende de tu tipo de rostro, pasa por Sephora y te darán un Makeover gratis.
This post was sponsored by Sephora and Style Coalition. Thanks for supporting the brands that keep Nany’s Klozet going.
More posts from Daniela Ramirez Nouel