
Neon POP - Tropical Punch Bracelets

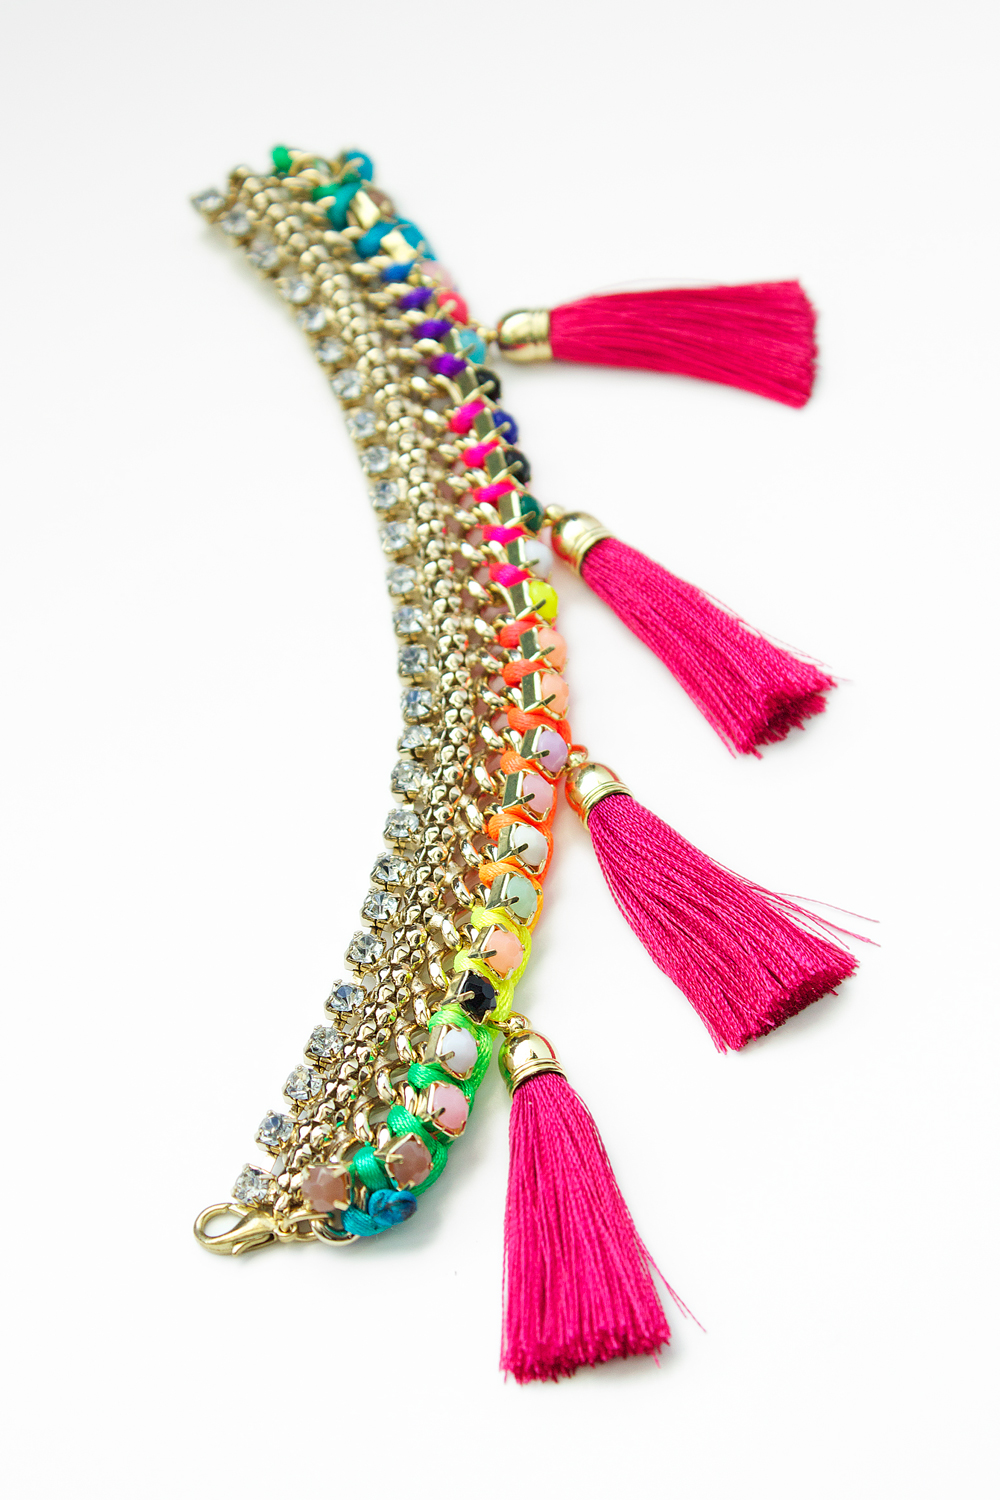
ROYGBIV at its best here - mixed with chunky chain and gems. Cousin Corporation's new Neon Pop line is hard to miss; filled with insane color and major wow factor, these jewelry components are a must-buy. I'll be using all products from this line I'm my tutorials below. You've got a two-for-one here, a simple macrame bracelet (dressed up with a gem focal connector) and a luxe braided chain bracelet. You can wear these together or separately for different looks.

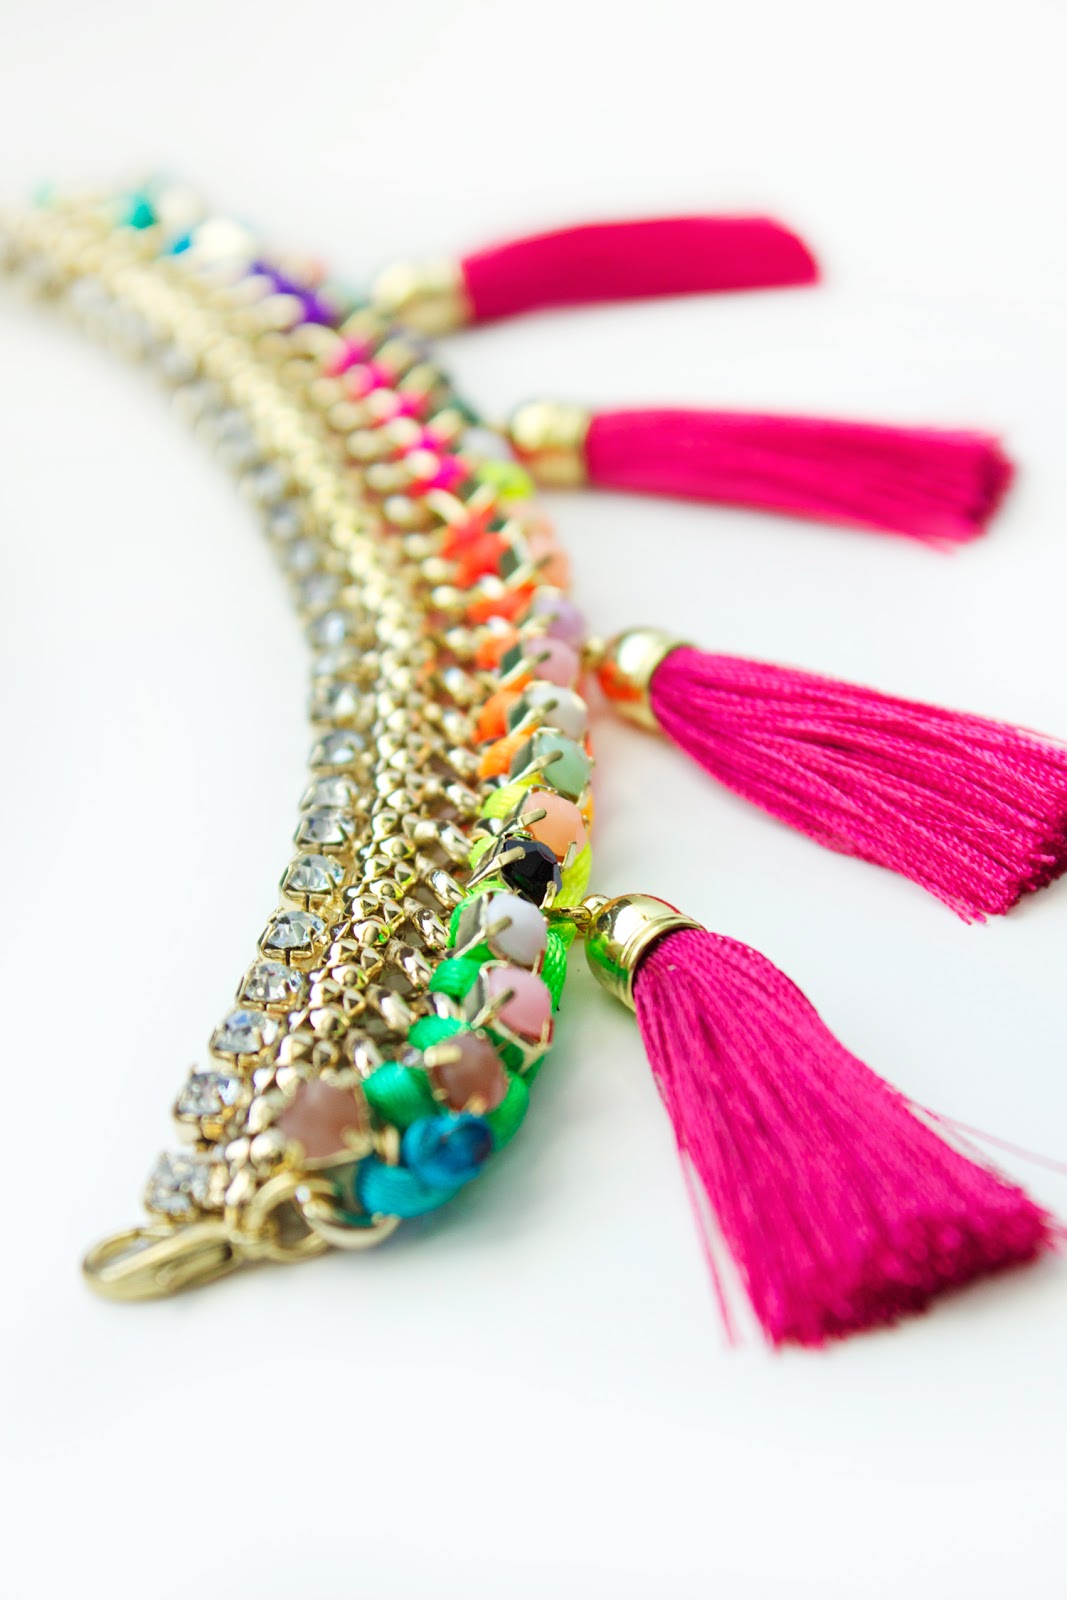
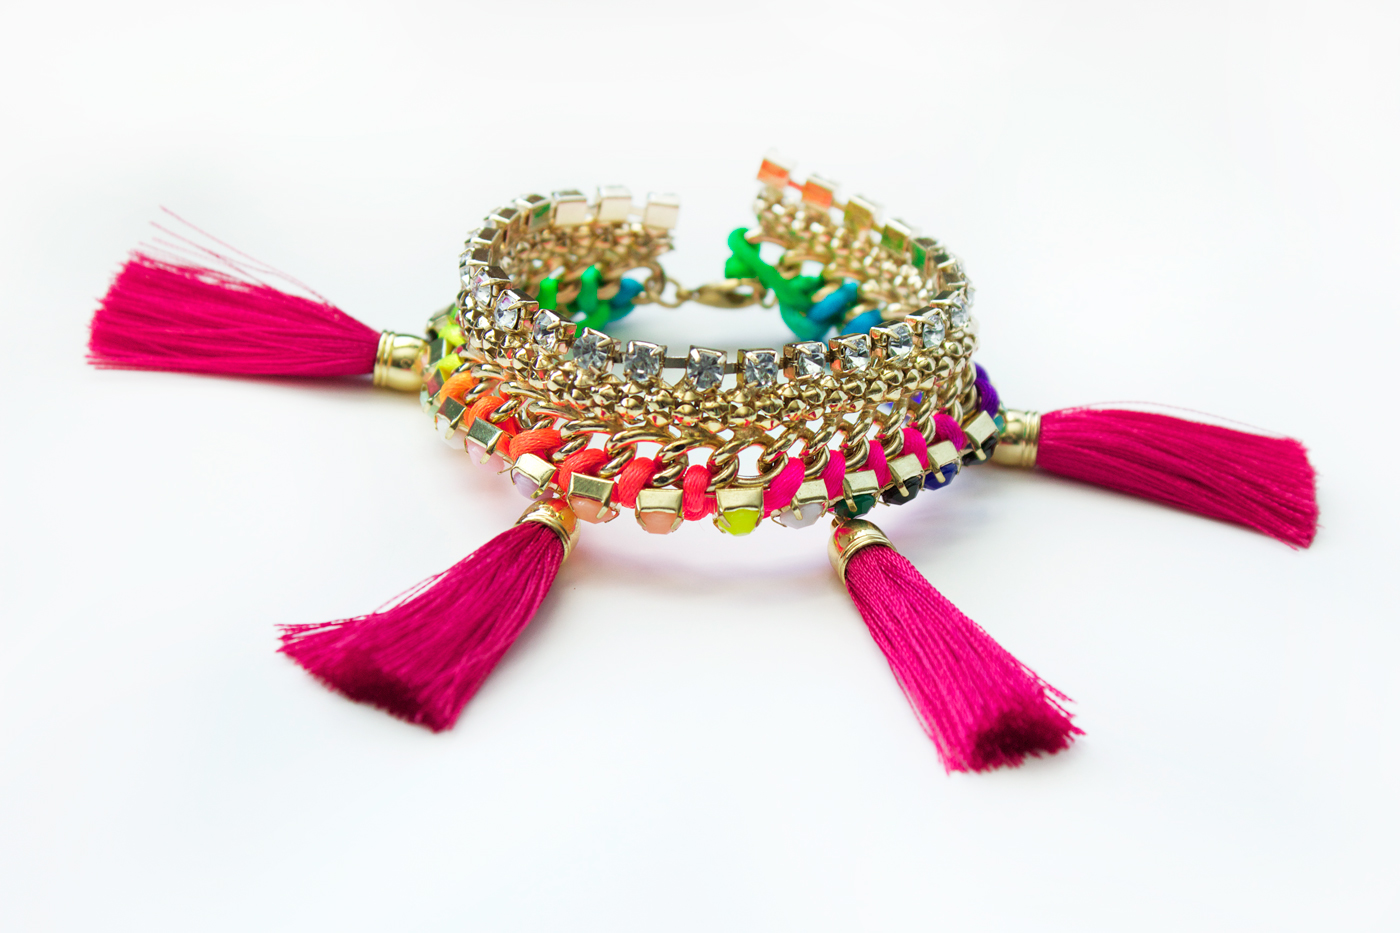
I was inspired by the tropical spectrum of color within the components. I decided to go all out and mix Cousin's rainbow satin cord with their gold chain panel, and add their tassels for a slightly bohemian vibe (which don't most of my tutorials have?!).


This chunky bracelet incorporates a technique similar to my Woven Chain Bracelets, wherein cord is would around the open links in cable chain. I'll be catching the rhinestone chain within these wraps to add more color and another dimension.


This macrame bracelet is quick and simple, but I'll show you exactly how to knot it, for beginners. Adding on an adjustable knot clasp also makes it easy to wear.
Let's begin.ivider

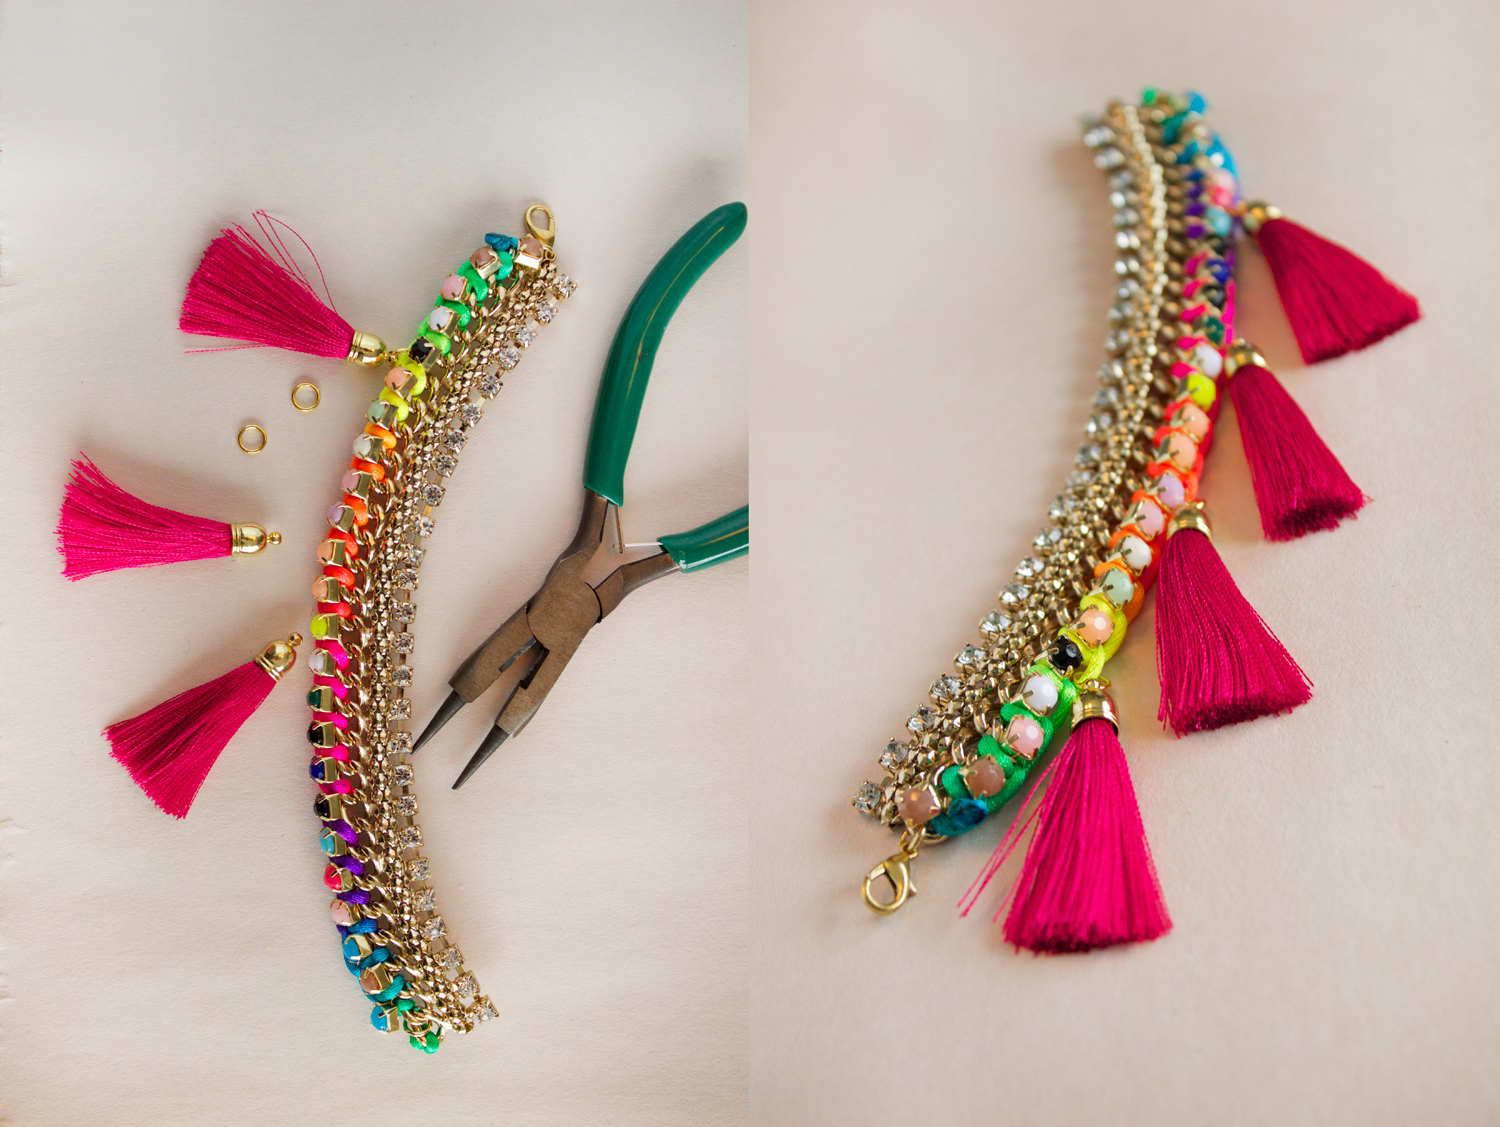
Step 1: Gather materials. I've linked you up, so if you want to buy online it's easy- or shop any AC Moore store!
I am using:
Neon POP - Multicolor rhinestone chain (SKU #30214576), Gold chain with rhinestones (SKU #30214512), pink tassels (SKU #30214561), rainbow satin cord (SKU #30214581), and orange gem connector (SKU #30214524). You will also need pliers, jump rings and scissors.

To begin making the chain bracelet, lay your colored rhinestone chain over the open cable links of the gold rhinestone chain. (Leave a good 3" or so excess at the top of the bracelet, so we can knot later.) Cut a 2 foot length of satin cord. Bring the end of the cord from the back (or underneath, table), through the top link towards the front (aka you). Catching the last colored rhinestone, bring the cord towards the right, behind the golden chain, then up through the second link. Pull tight, and your last rhinestone should be secured on top of the chain panel. Repeat again, pulling towards the right (catching the rhinestone within), down through the loop then back up through the next one. Keep repeating.

This is how is should be looking. Keep on until you reach the end of the chain panel. Cut the excess rhinestones off. Tie knots at both ends of the cord, and burn with a thread burner (or be lazy like me and use a metal knife and gas stove flame) to secure.

Add your tassels evenly on the loops of the satin cord with jump rings. The clasp on the gold chain panel is already attached - no-fuss!

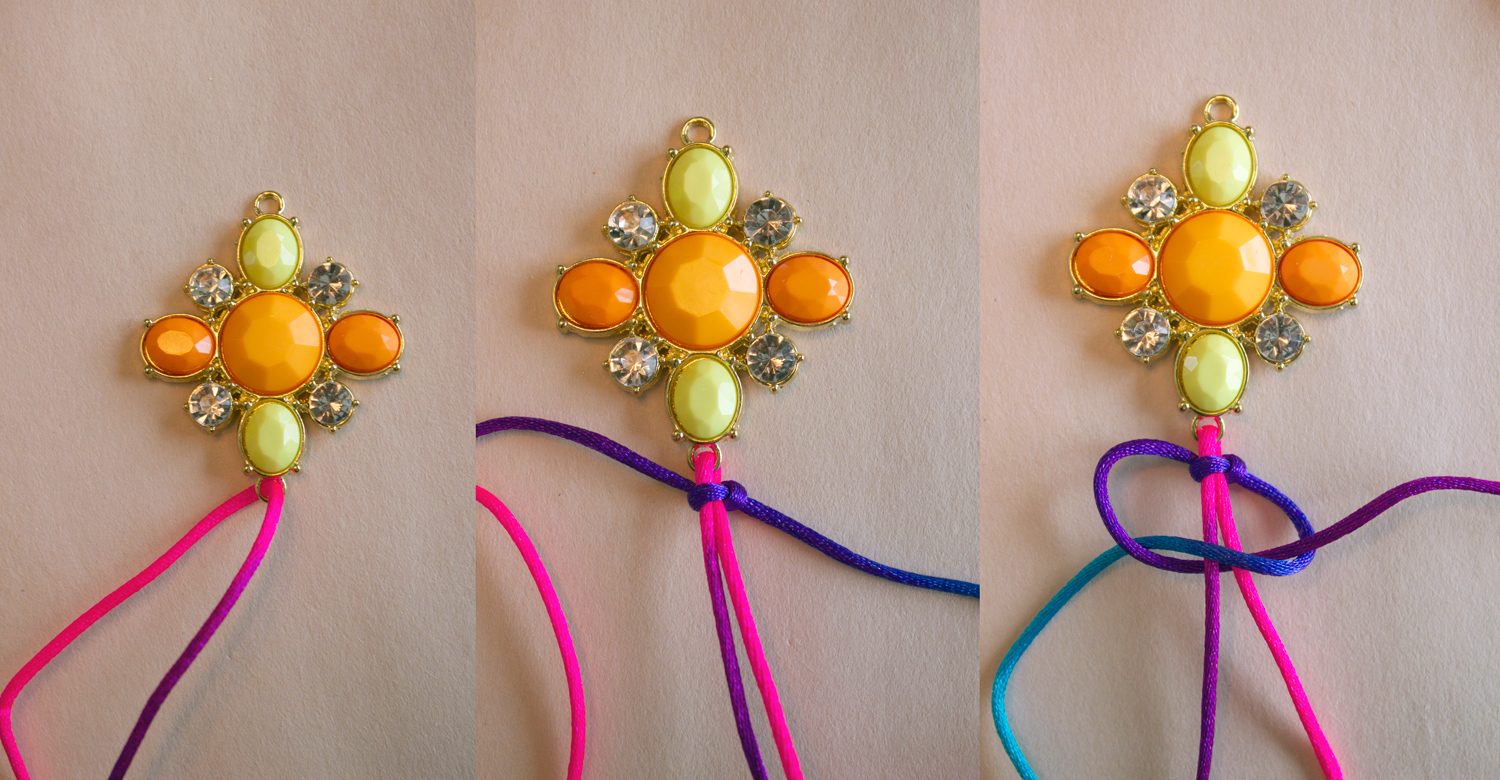
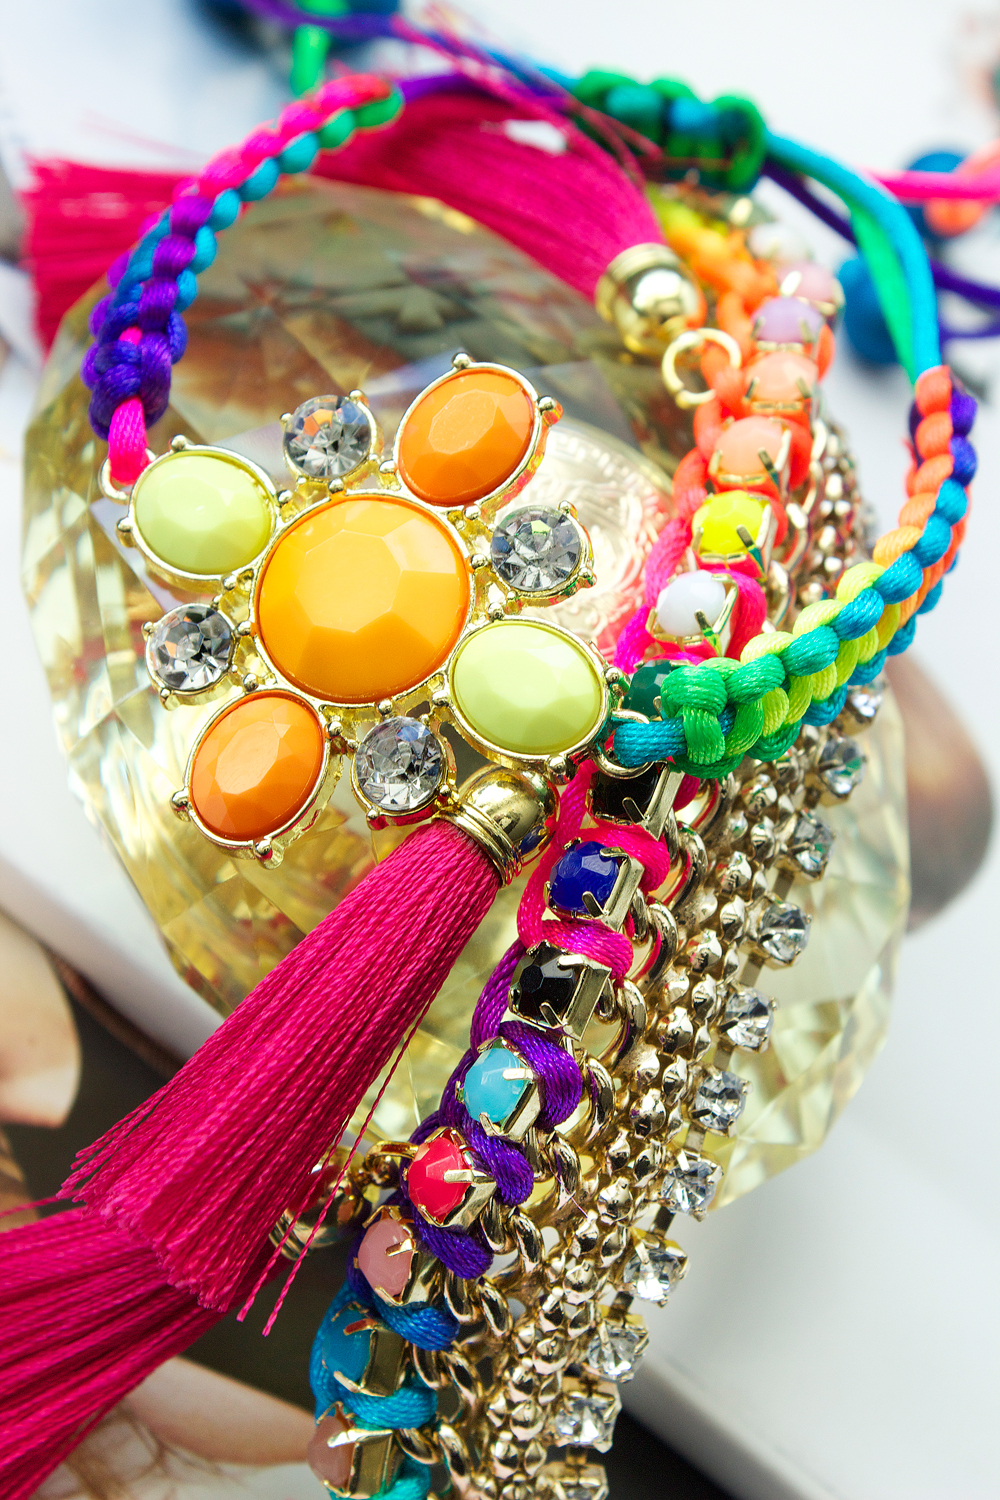
To begin the macrame bracelet, cut about 1.5 feet of satin cord, threading through the loop in the connector and making sure it falls at the middle of this piece of cord. Now, cut a 2' piece and tie on right after the connector's loop, grouping the two strings. Take your righthand cord, threading over the middle strings. Take your lefthand cord, threading below the middle strings and up above the righthand string. Look at the picture for tips! Pull this knot evenly tight.

You've made your first square knot. Now, reverse directions for the next knot. Take lefthand string and thread above middle strings, then righthand string below middles and up, over lefthand string. Pull tight (arrows show direction). Pull evenly. Repeat this, reversing which string you bring above the middle each time to create a flat panel of square knots. Do this to the other side of the connector. To make the adjustable clasp, simply take the two inner cords from each side (the ones you've been knotting around, circled in white on the picture) and with another short piece of cord, knot about 10 knots or so around these four strings, grouping them together. To secure ends, cut off all excess (except these four inner strings, leave them long for now) and burn again to melt and seal. You can then knot on beads to these inner strings to finish.


All photos copyright Allison Beth Cooling for Quiet Lion Creations. DO NOT POST OR REUSE without linking and crediting me.
More posts from Allison Beth Cooling