
BOY SEWING // cotton + steel hooded vest with fur

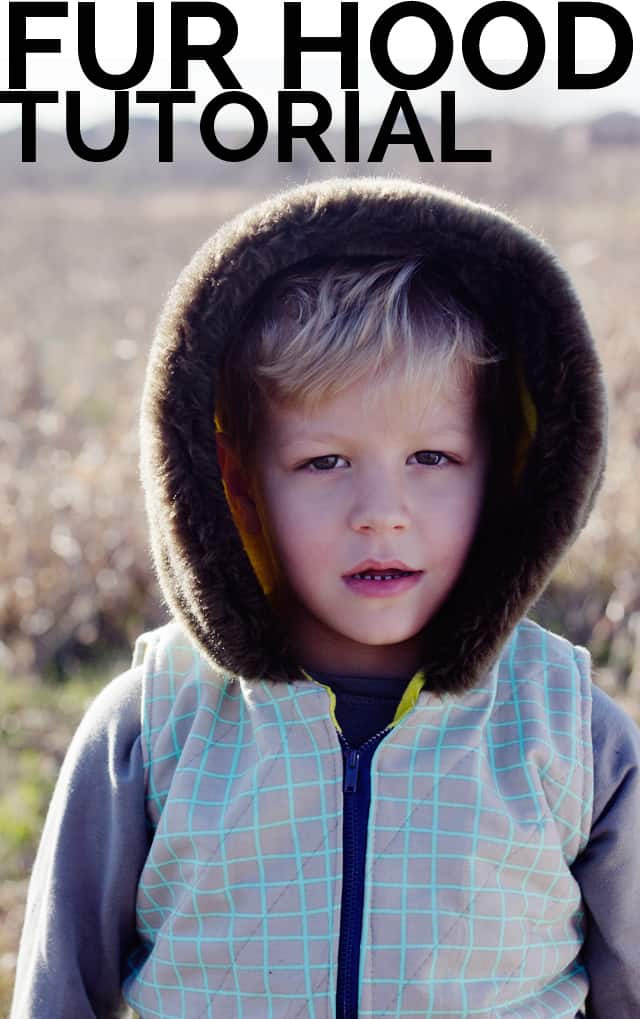
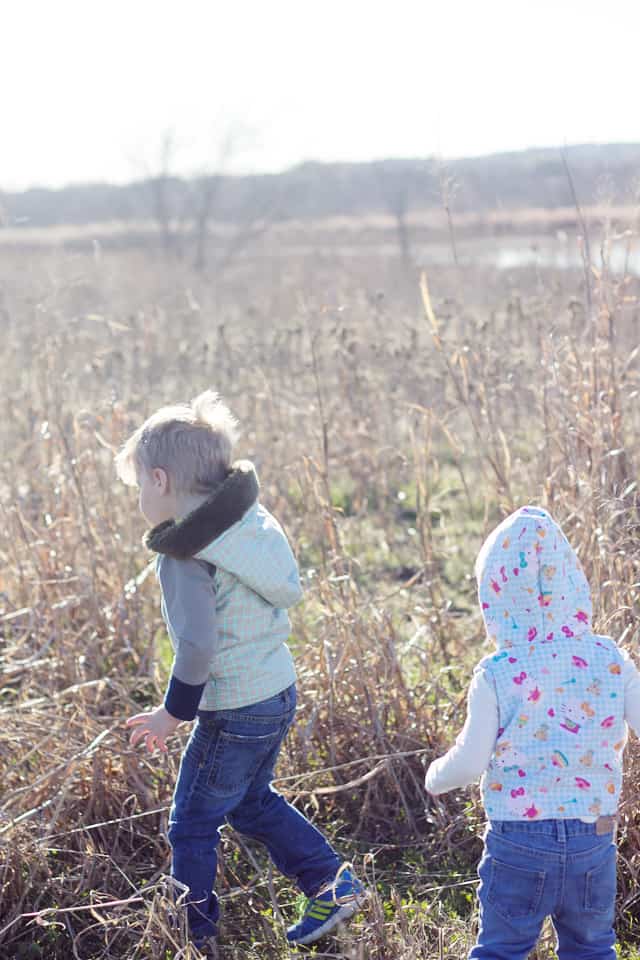
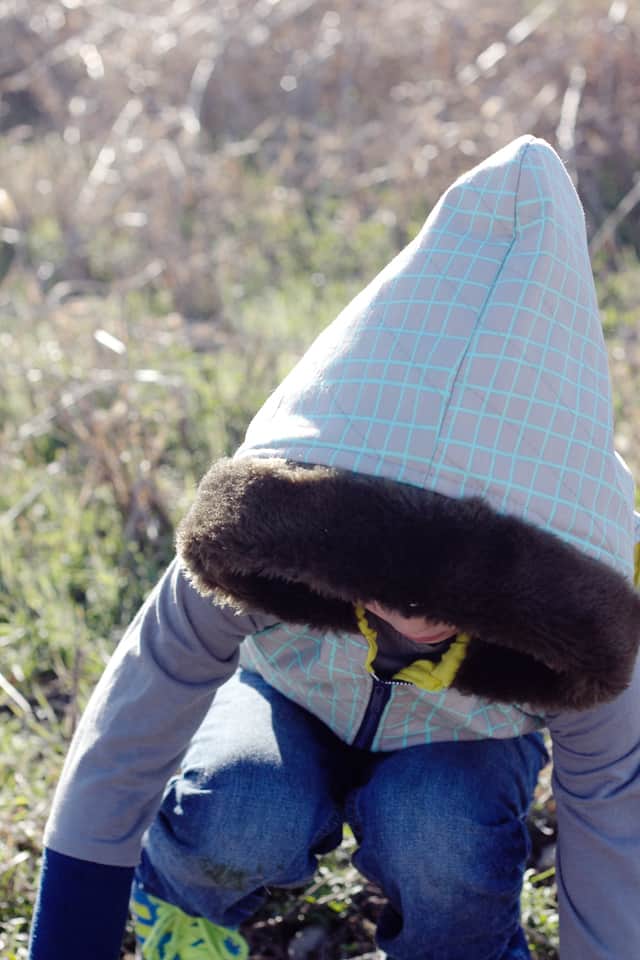
This is a hack of my Aztec Hooded Vest pattern! I’m showing you how to add an amazing faux fur trim to the hood. It’s fairly simple but there are a few things you have to do to adjust the pattern to make this method work!
The Aztec Hooded Vest pattern for sizes 18M to 8 is a part of the Ultimate DIY Bundle, which is over 75 awesome creative resources for all types of makers. The bundle includes 8 high quality sewing patterns that I know you’ll want! Grab the bundle here for 97% off, ends in a few days! See all the eBooks and patterns that are included HERE. (And don’t forget when you purchase from my link, you get an EXTRA free pattern of your choice from the kids section of my shop. Just forward your confirmation email to me with your selection!)


I lined this vest with a bright yellow knit fabric, from a Target sheet set. The open welt pockets are lined with a similar color of cotton.

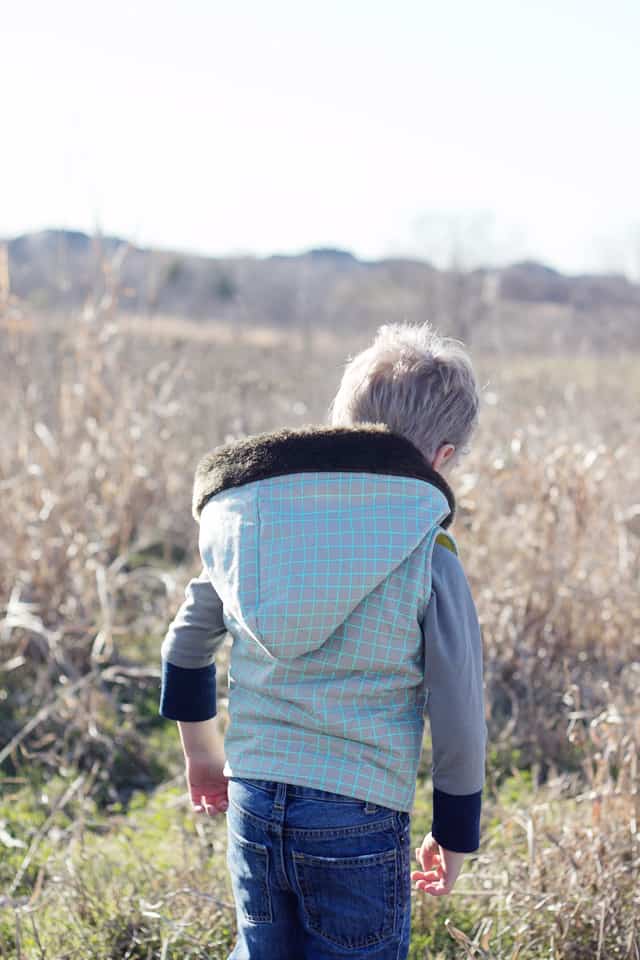
I added quilt batting to the middle of this vest, for warmth. And then I quilted the top layer to the batting with a diagonal stitch pattern. I think that boy sewing can be so fun, you just have to think of ways beyond a ruffle to make your items more interesting. And stitching lines is one of those things!

I made one for my daughter, too. I will show you that tomorrow! Her’s doesn’t have fur, but it is reversible!


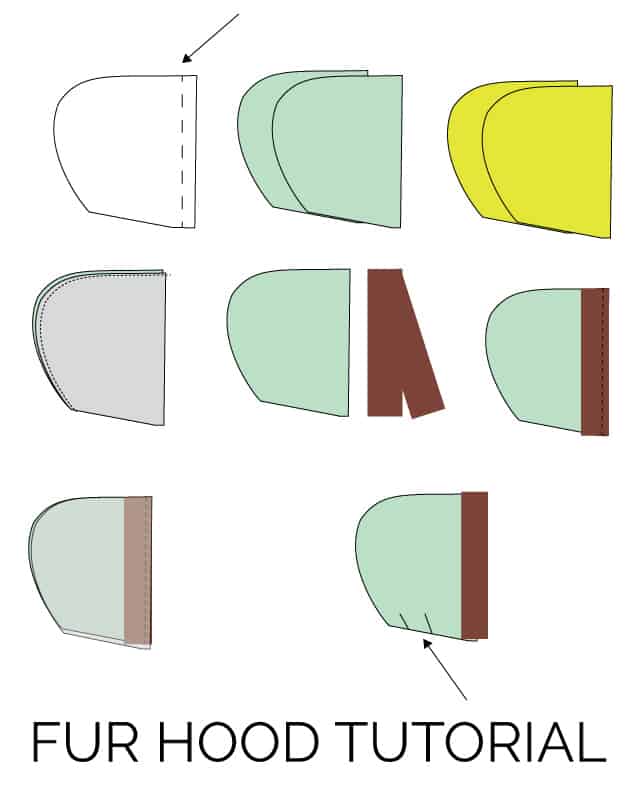
Hooded Vest with Fur Trim Tutorial
Materials:
-Aztec Vest Pattern, or other hooded item
-Faux Fur
-Walking Foot for sewing machine (optional but very handy)
To add the faux fur, cut out both the hood main and hood lining pieces on the LINING piece line.
Sew the hood main together around the curve with right sides together. I recommend a walking foot when sewing the faux fur since the layers will get very thick. The walking foot will help your machine “walk” over them with ease.
Repeat with lining.
Measure fur fabric against the length of the hood opening and cut a piece as long as the opening and 4″ wide.
Sandwich the folded fur in between the hood main and hood lining with the right sides together.
Sew it up.

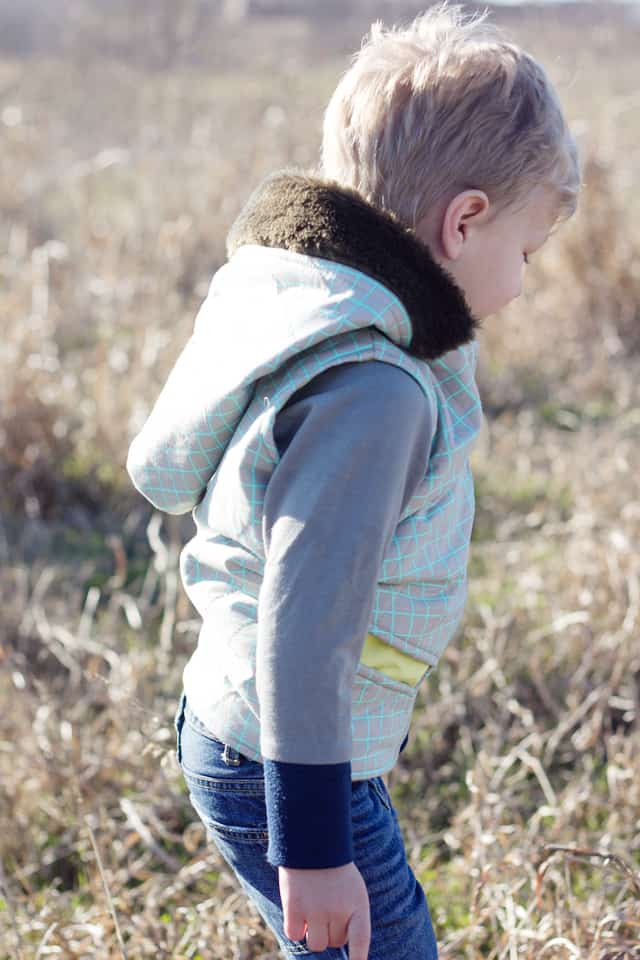
The only other modification you need to do is to add two small pleats to each side of the hood so that it matches up with the neckline correctly. Since you added a bunch of fur, the pleats will take in some of the excess fabric without reducing the hood size. This pattern is all about the oversized hood!

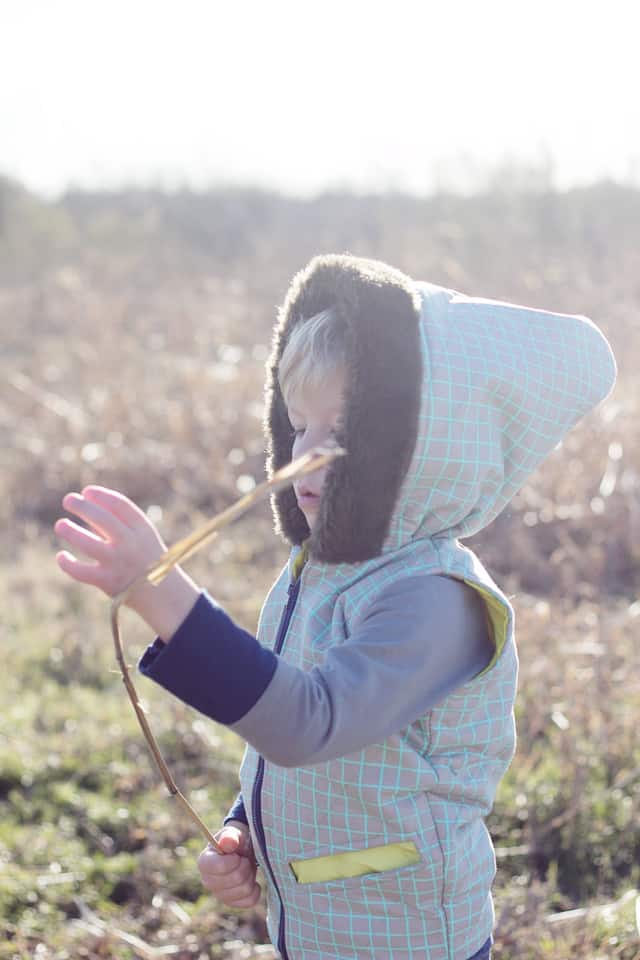
And you’re done! All ready for a freezing cold winter!
Purchase this pattern in the DIY bundle and get a second see kate sew pattern free! You can choose the Recess Raglan, which is what my son is wearing underneath the vest, or any of my other kid patterns! Just use this link and forward me your confirmation!
Related Posts


The post BOY SEWING // cotton steel hooded vest with fur appeared first on see kate sew.