
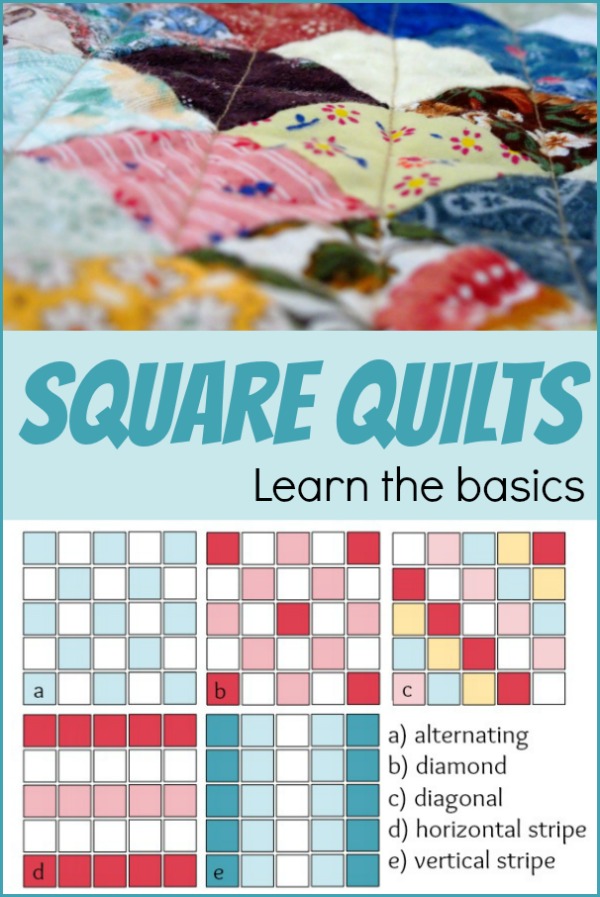
Square Quilt Shapes
If you’re ready to start quilting, the easiest and most basic form of a quilt shape to make is the simple patchwork square pattern. With patchwork squares, you can make a random pattern or one with a graphic design to it, like these:
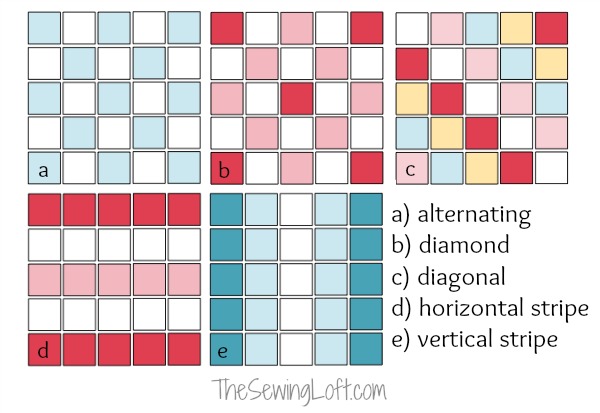

In order to make the most professional-looking patchwork quilt, the key is to cut squares that are perfectly square in shape, and then to sew them into a quilt top with even seams. We’ve assembled a tutorial to help you do that – this is a great way to make your first quilt, so if you’re a beginner with a desire to learn how to make a quilt, follow along!
Quilt Shapes: Squares
Always start by squaring up your fabric pieces.
1. Take your fabric – whether it’s a fat quarter, a yard, or any other cut – and lay it out on your cutting mat.
2. Fold your fabric in half so that the selvedge edges line up on either side and you bring the cut ends to meet one another. When you do this, you may notice that the cut ends don’t line up perfectly well; that’s okay – the big key is to make sure that the selvedge edges align properly, and let the cut edges differ.
3. Fold the fabric in the other direction now, so that the selvedge edges come to meet one another; press it with your hands to make sure everything is flat.
4. Position your fabric on your cutting mat so that both folds line up with the straight lines on the mat.
5. Cut across the raw edges of your fabric along a straight line on your mat, using your quilting ruler and rotary cutter. This will make sure that your fabric is now a perfect square (or rectangle).
Make some calculations to get the most out of your yardage.
1. Measure the sides of your full piece of fabric – if you have several pieces in different sizes, measure them all. Write down the measurements in your quilting notebook or on a piece of scrap paper.
2. Determine the common denominator of the dimensions of your fabric. For instance – if your fabric measures 16 inches by 45 inches, you can cut squares that are 5 inches on each side and you’ll just have one left-over inch of fabric when you’re finished. If your fabric is 36 inches by 44 inches, you may want to cut your squares to be 4 inches in size so you won’t have any left-over fabric when you’re finished. A fat quarter measures 18 by 21, so you can make 3-inch squares for no left-overs.
Tip: If your fabric pieces are all different sizes, try to figure out which block size you can cut from all of the fabrics to make sure you don’t have too much wasted fabric from any one piece.

Cut your squares.
1. Begin by cutting your fabric into strips. Line it up flat on your cutting mat, folding it onto itself to make the most of your time and your space. In general, it’s safe to cut through 3-4 layers of fabric at one time in this process, so fold your yardage to double it once or twice. Use your quilting ruler and mat with your rotary cutter to cut strips across the width of the fabric in the height you determined from your block size in the last step (so for 5” blocks you’ll cut strips that are 5” high by the width of the fabric).
2. Once all of your strips are cut, stack 3-4 strips neatly on top of one another, lining up each piece with the grid lines on your cutting mat to make sure they’re straight.
3. Cut these strips into blocks so that the width you cut matches the height of the strips.
4. Repeat this process with all of your remaining fabric.

Determine the layout of your quilt top.
1. Use a sheet of graph paper and some crayons or colored pencils to plan out your quilt top. Each square on the graph paper will represent one square of fabric.
2. Count the number of squares you have from each of your fabrics, and choose one colored pencil to represent each fabric.
3. Determine how many blocks you have total, and how that will work into a quilt top (42 blocks, for instance, can be a quilt with 6 columns and 7 rows; 120 blocks can have 10 columns and 12 rows).
4. Draw the outline of your quilt top onto your graph paper, measuring the number of squares your completed top will include.
5. Fill in the blocks with the colors you have in the order you want to use them in your quilt, making sure to only fill in the number of squares on the grid to match the number of squares you have cut from that fabric.
*Click here to download & print graph paper.
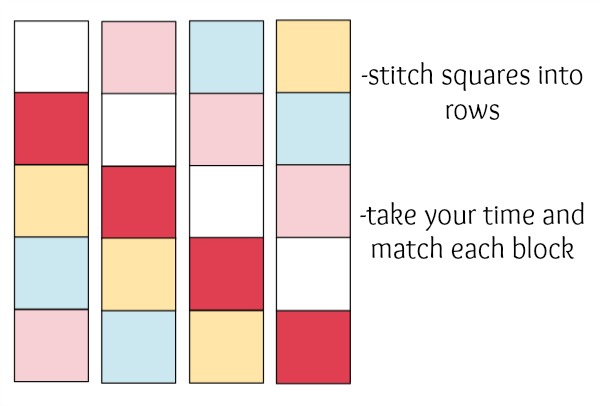
Sew the squares into rows.
1. Use your graph paper quilt chart as a guide, and work your way through it one square at a time.
2. Take your first and second squares (the top left corner of your grid) and put them together with the right sides facing. Sew along one edge, using a ¼” seam allowance.
3. Grab the third color from your pile and attach it to the second block, using the same process. Repeat this over and over until you have used up all of the blocks in one row.
4. Continue to piece your remaining blocks into rows, following your grid for the proper color order.
5. Press all of your seams in your finished rows, alternating so that you press row 1’s seams to the right and row 2’s seams to the left, and so on.
6. Trim all of your threads from each seam.

Sew the rows into a quilt top.
1. Take your top row and your second row and place them together with right sides facing. Pin at every seam, making sure to line up the seams so that the rows will be even when you sew them.
2. Sew the rows together, again using a ¼” seam allowance, to make sure that the finished quilt will be an even grid of squares, not oddly shaped and uneven rectangles.
3. Repeat this process until you have pieced all of the rows together.
4. Press the seams on the quilt top and trim all of the excess threads.

And there you have it – a perfectly square patchwork quilt. Join us next time as we explore another shape!

Hello! Are you new to The Sewing Loft?
If so, I’m glad you stopped by and hope that something has inspired you to keep your needle moving! Don’t miss a single project and subscribe via email HERE! Bonus- free download with newsletter sign up. Another great way to connect with me is via Facebook, Pinterest, Google or Follow along with Bloglovin. I’m looking forward to getting to know you and creating together!
This post Square Quilt Shapes appeared first on The Sewing Loft.