
DIY Wooden Bead Keychain

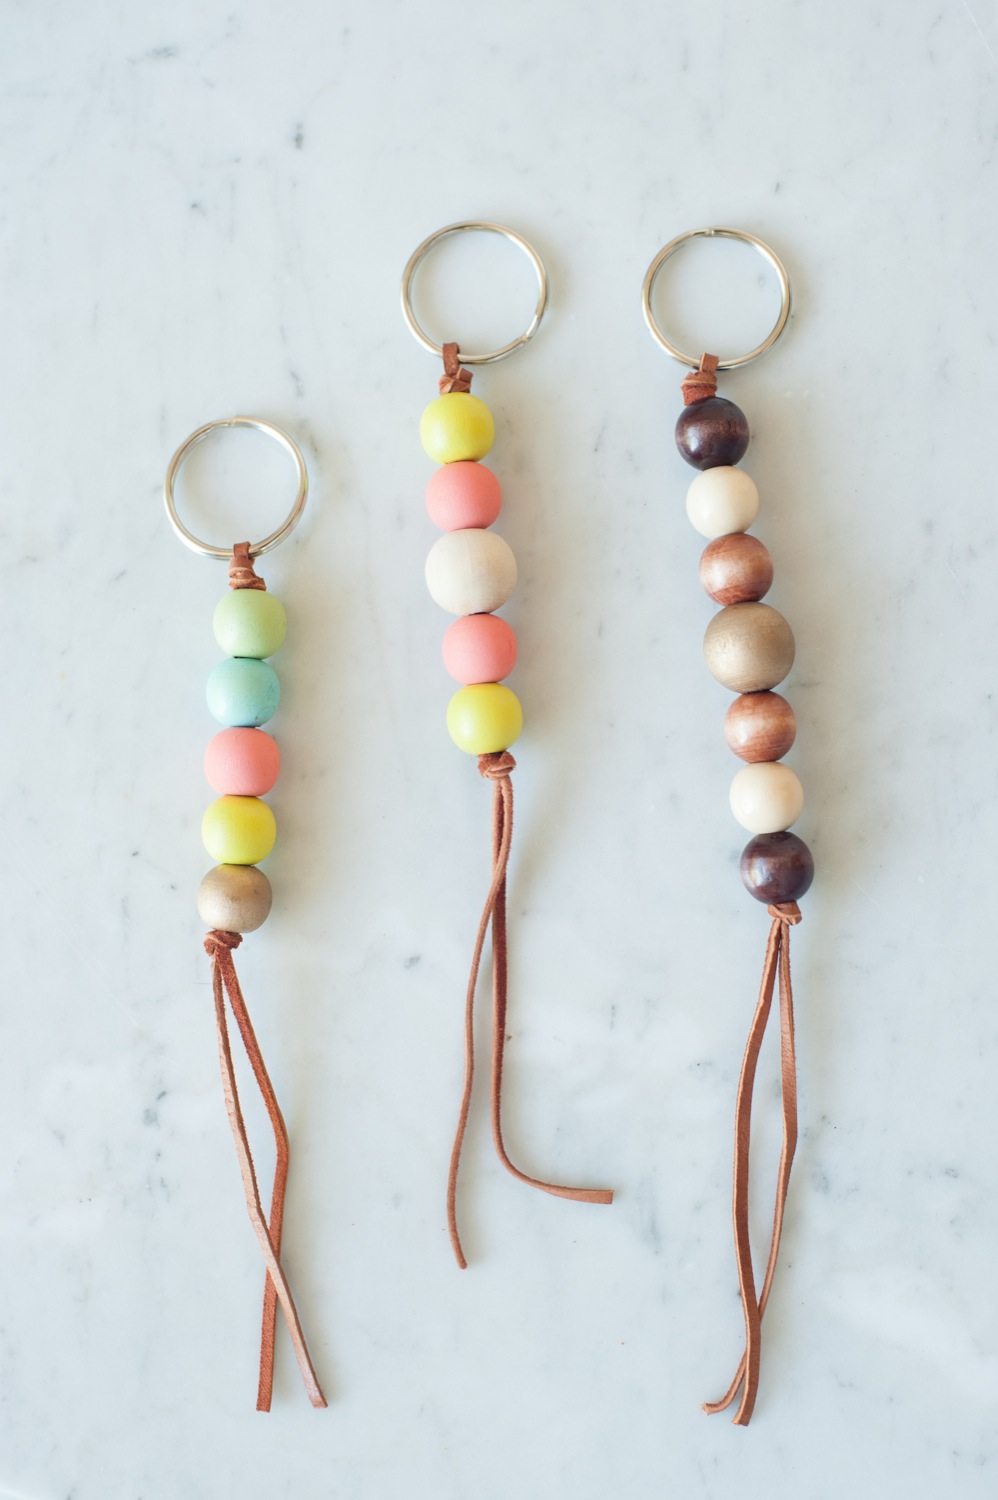
Last week on Instagram I shared a little peek of today’s DIY project so I’m excited to share it with you! This is one of those DIY ideas that I love best. Simple, fun, easy to do and seriously so cute when it’s all done. Somewhere along the way I amassed a whole bunch of wooden beads, intending to come up with something fun to do with them and behold, today I bring you these adorable wooden bead keychains! These are a cinch to make and kind of remind me of an updated version of a classic summer camp craft. Make one for yourself and for all of your BFFs!


- Leather or suede cording (the faux stuff is fine)
- Wooden beads
- Scissors or jewelry snips
- Paint and/or stain
- Key rings


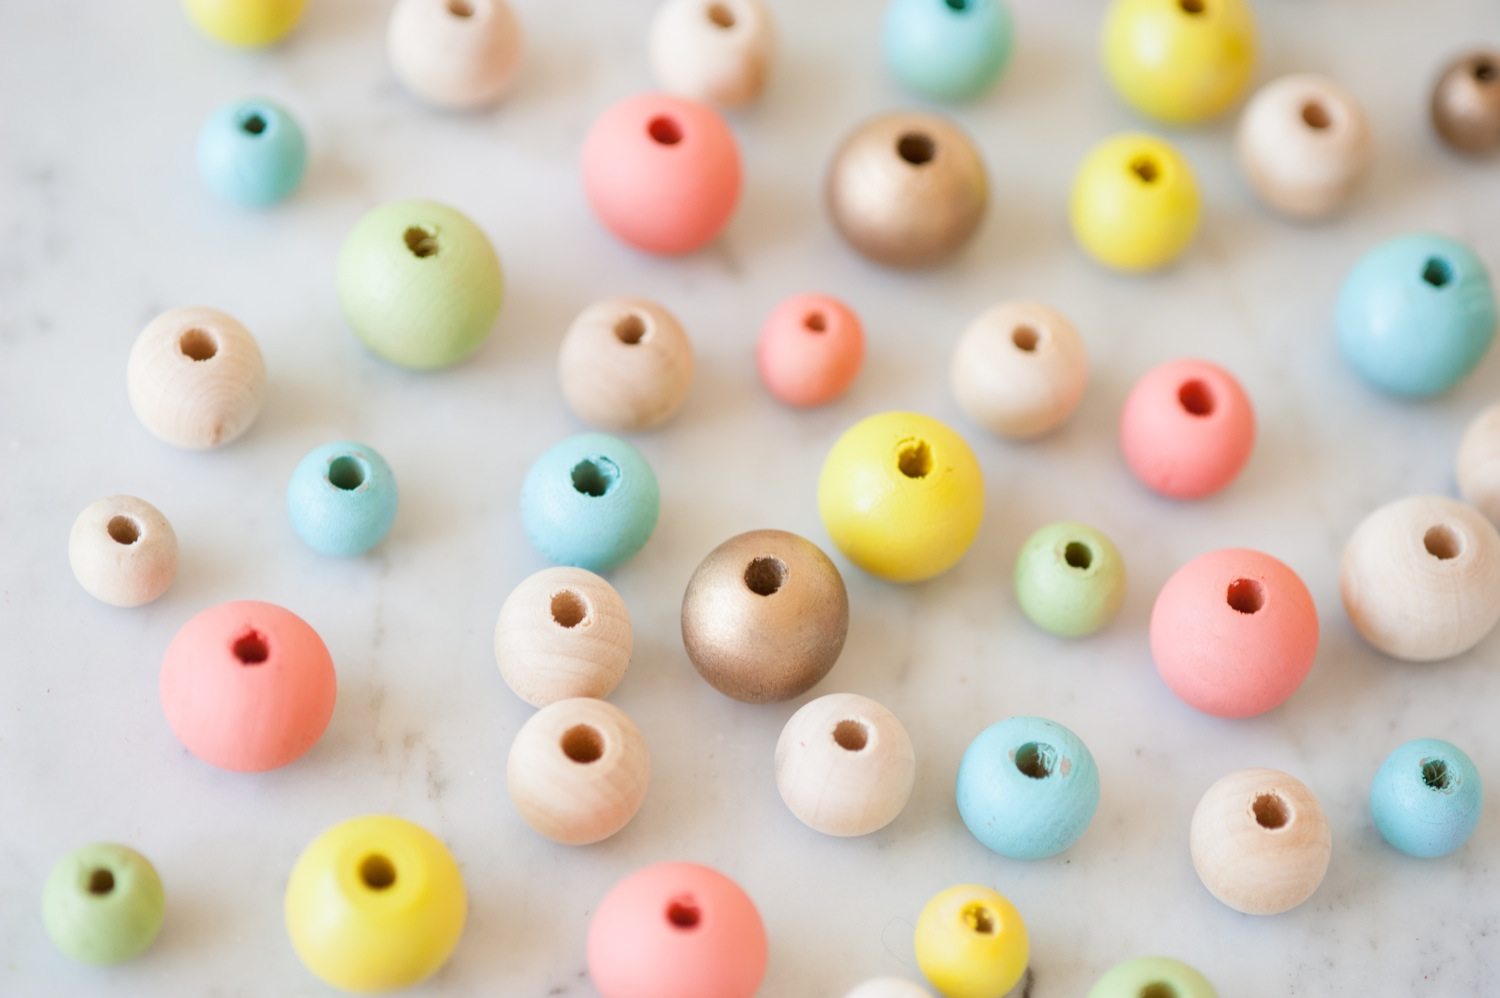
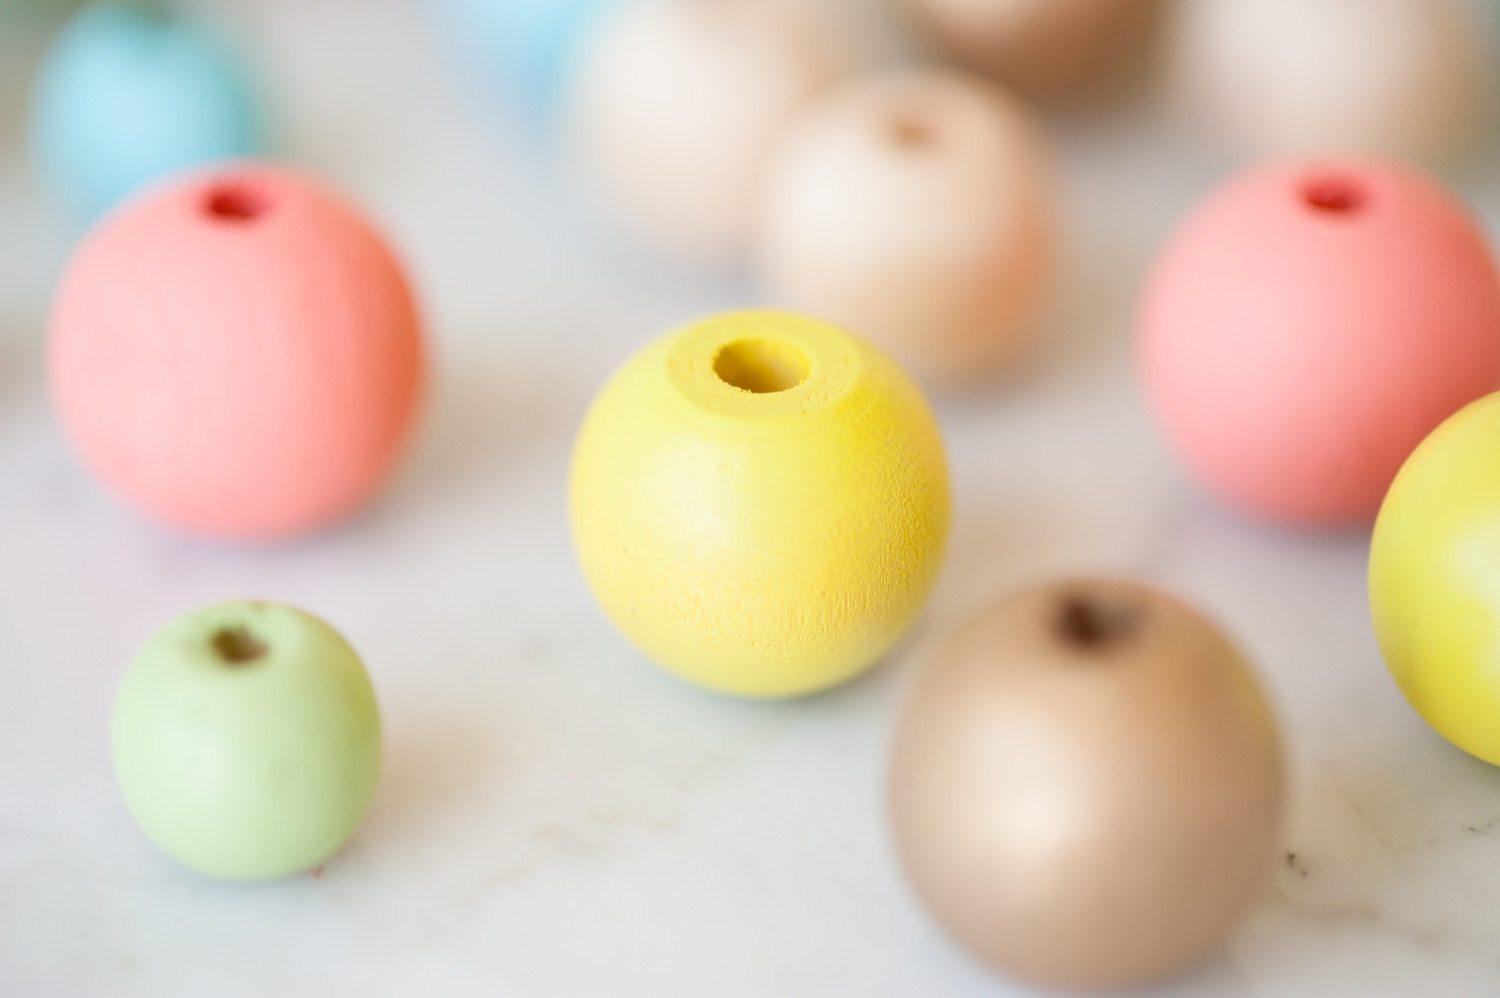
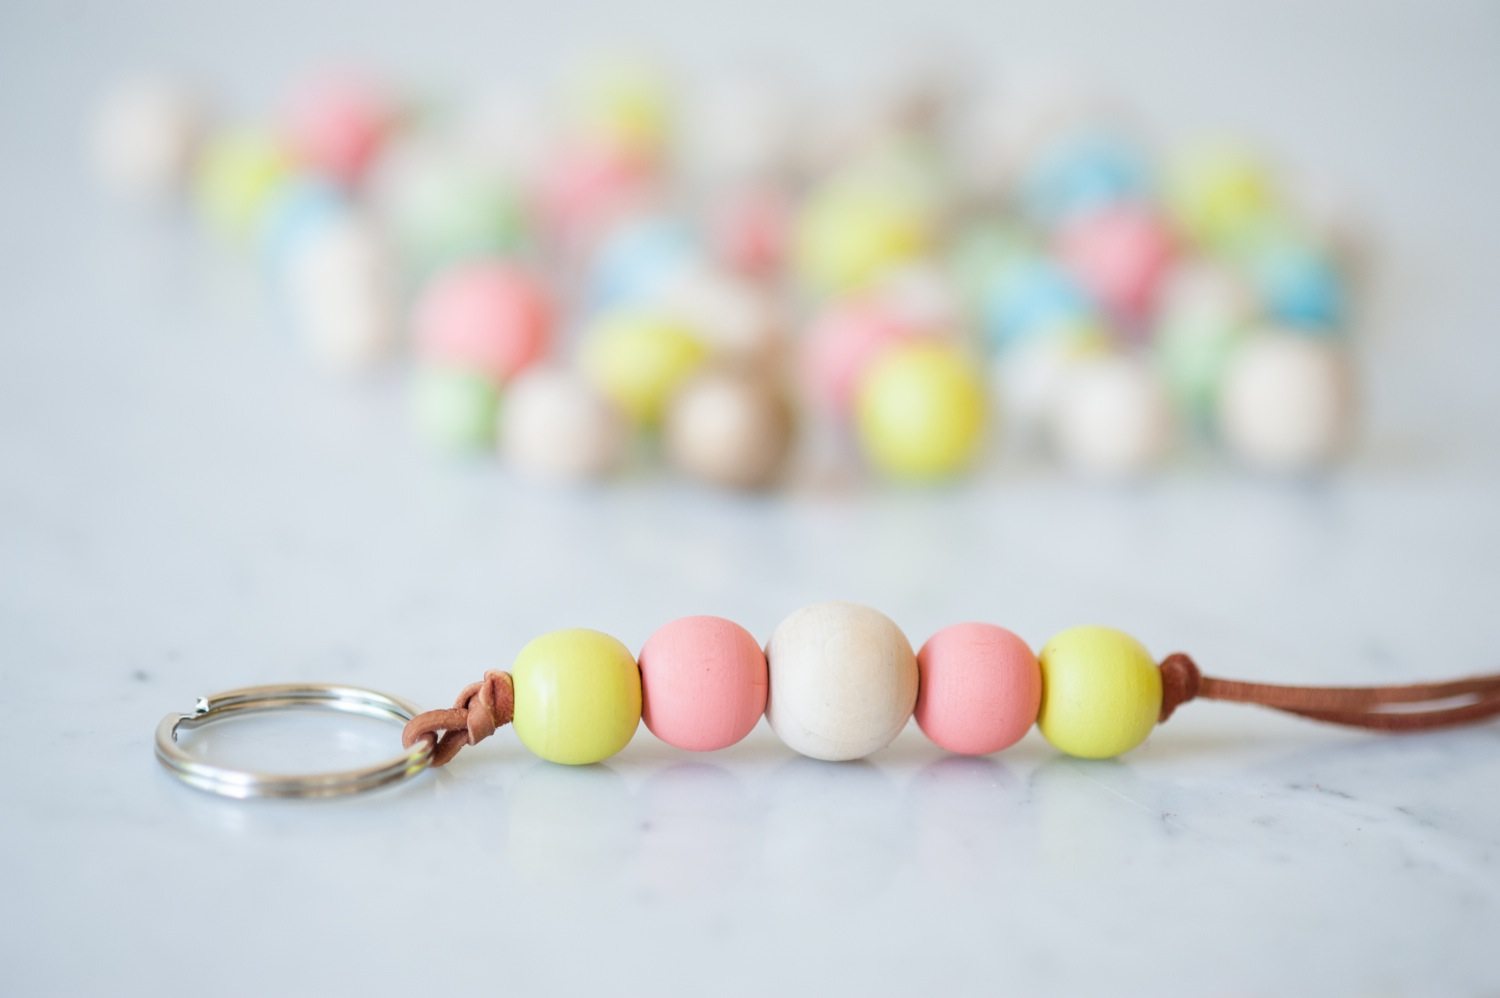
Start by painting your wooden beads a variety of pretty colors. I used three sizes of beads (which you can find at any craft store) and simply chose a bunch of paints from my collection that looked nice together. You can use spray paint or craft paint with a little brush, either method is completely fine. Paint them up and let them dry completely. Next up you’ll want to cut long lengths of cording, approximately 18 – 24″ for each keychain.


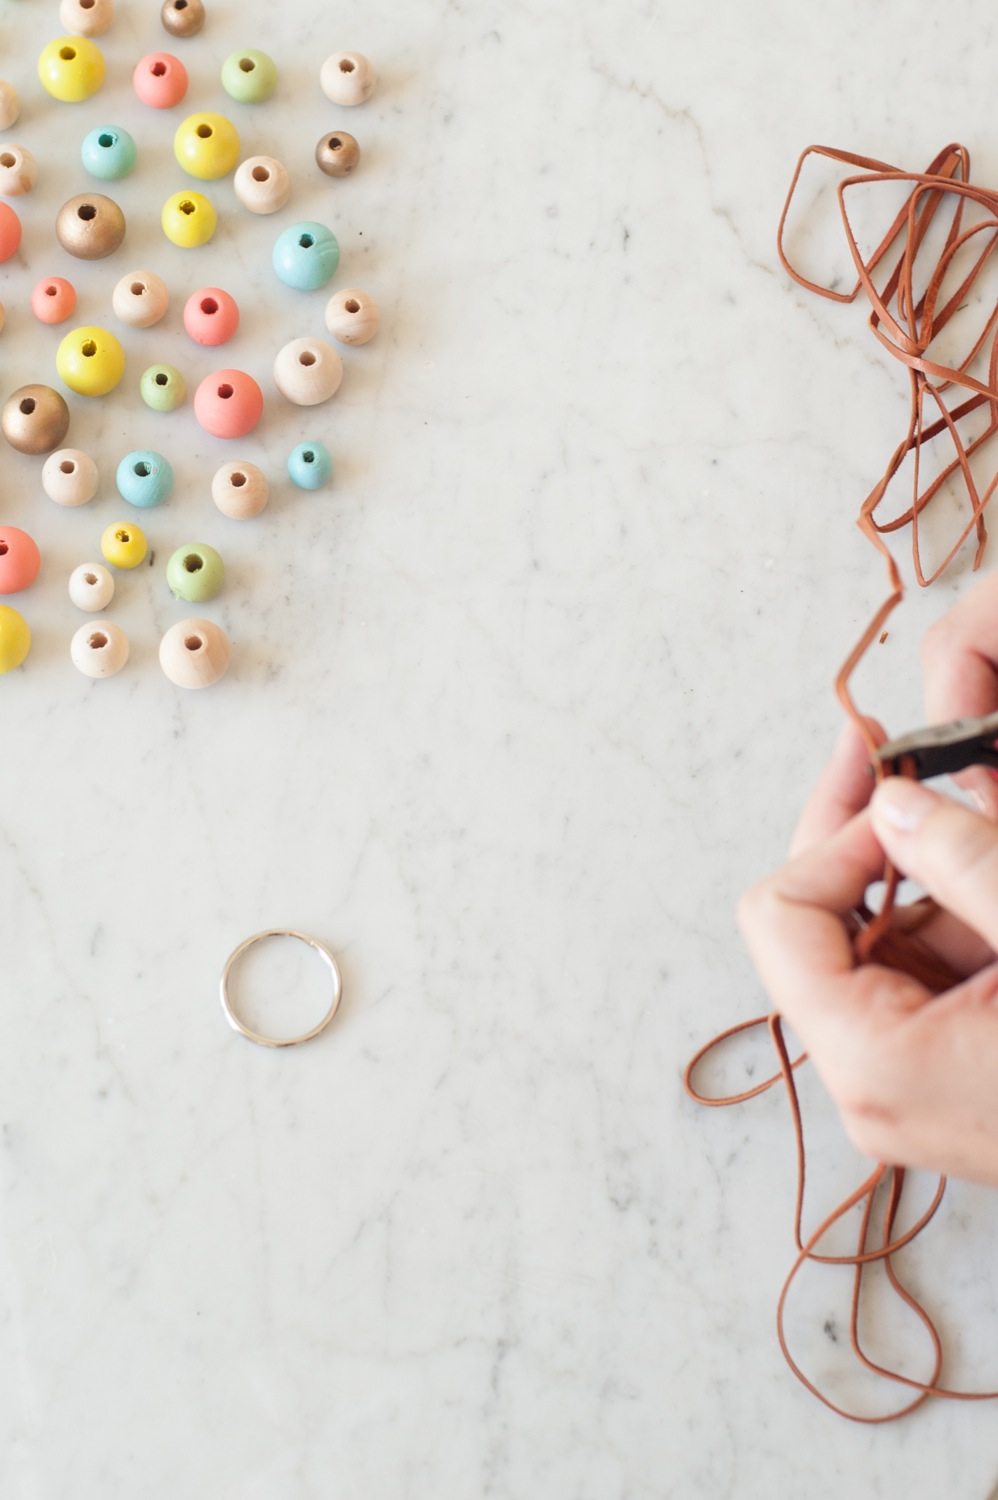
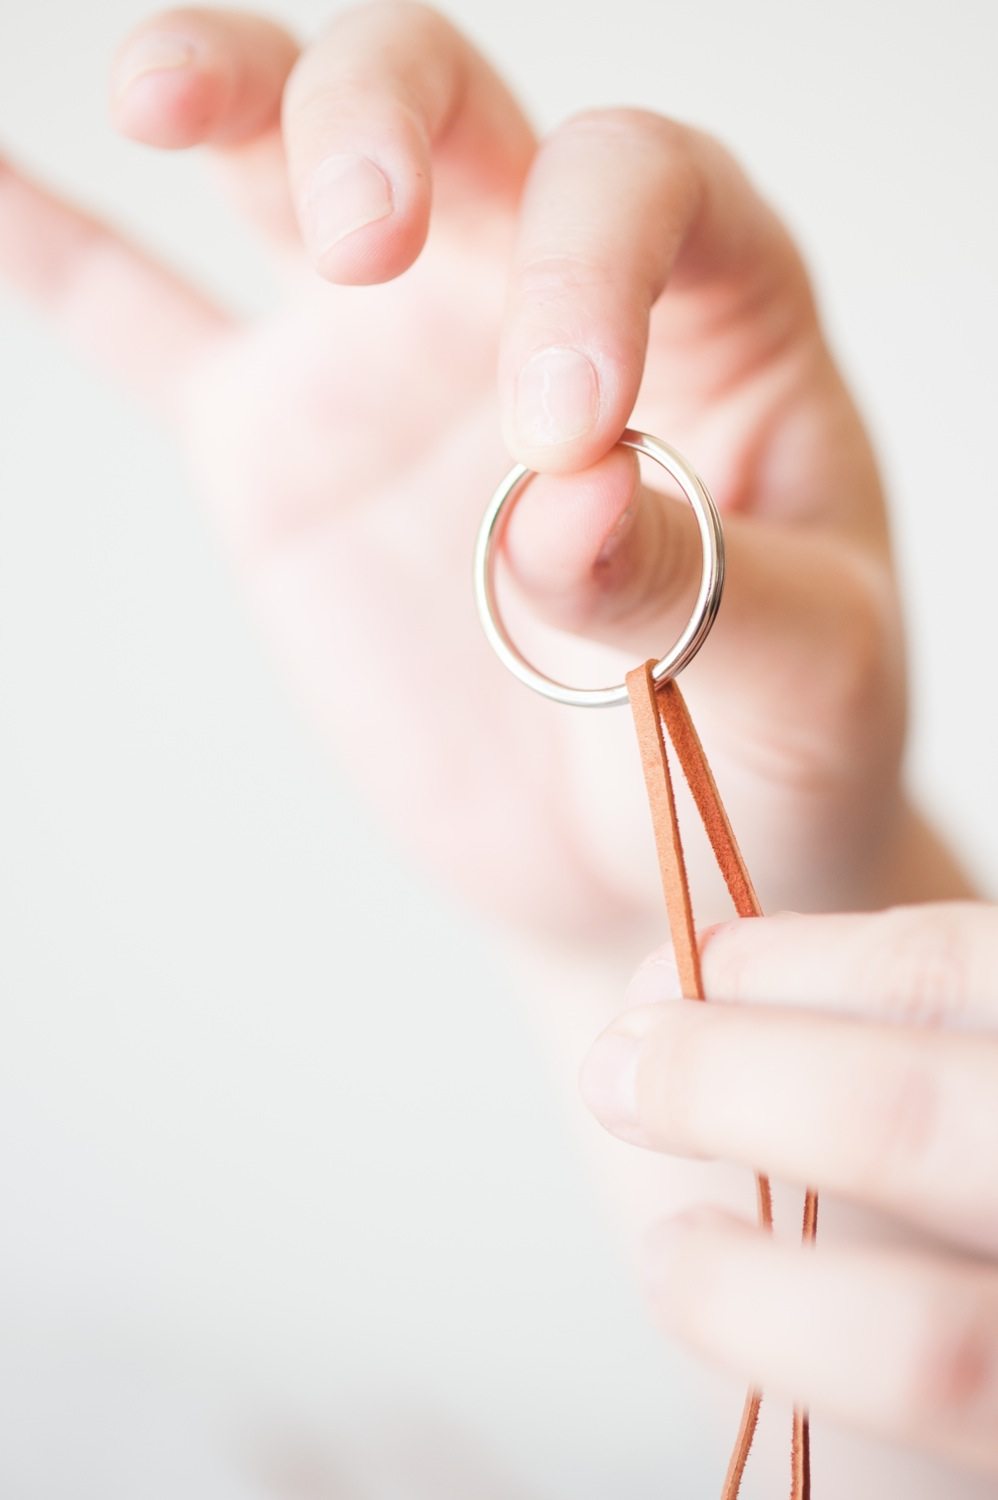
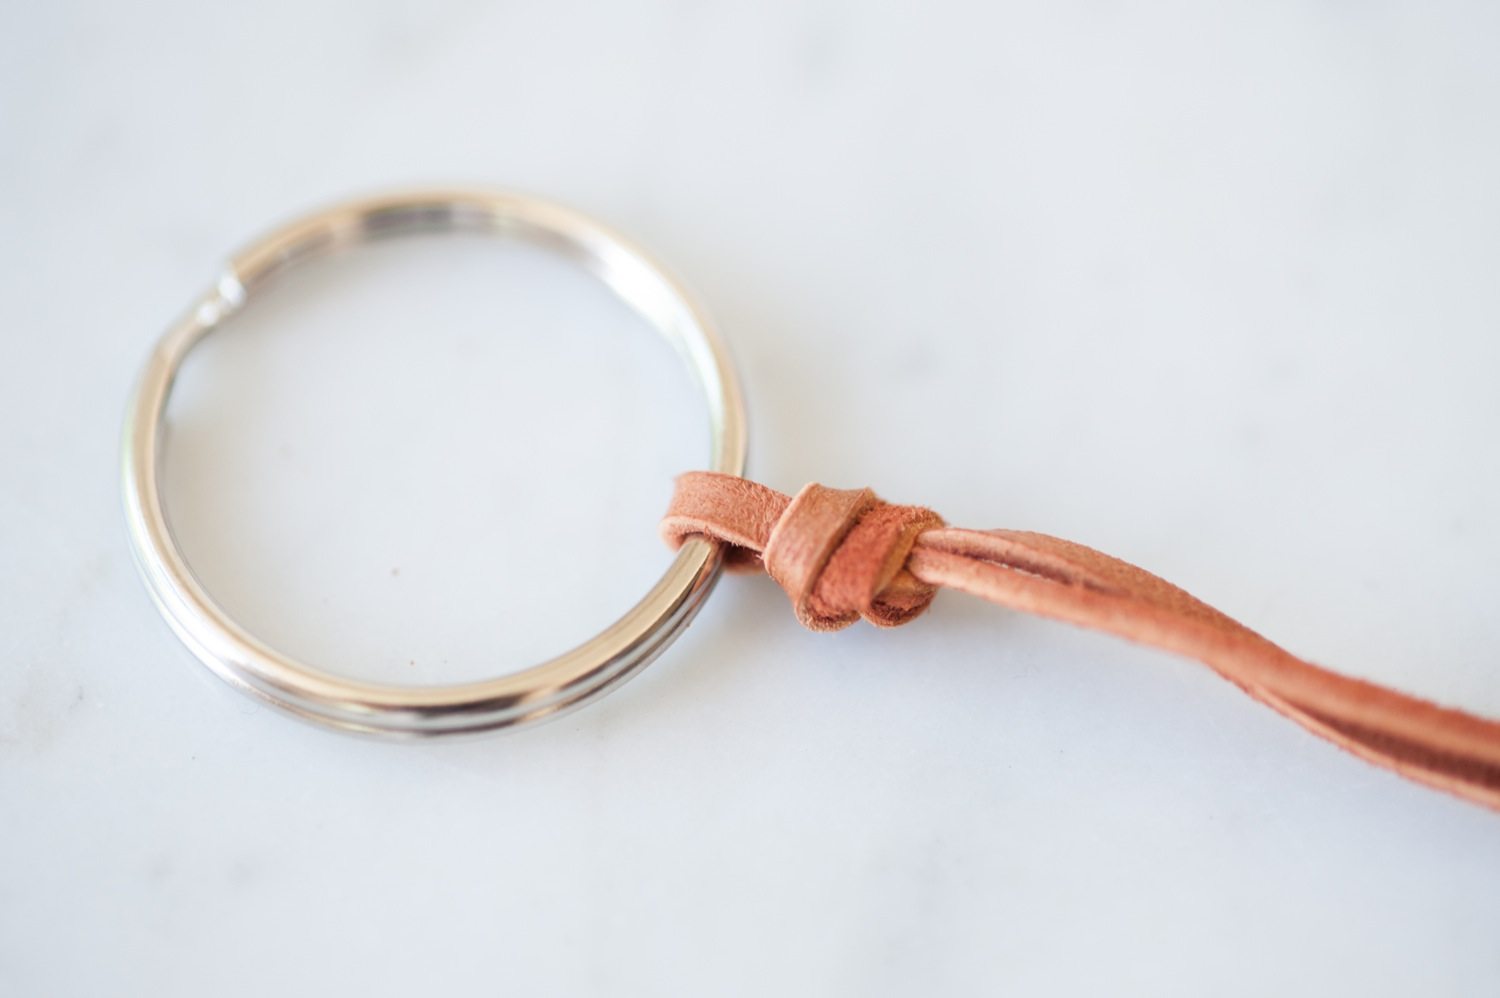
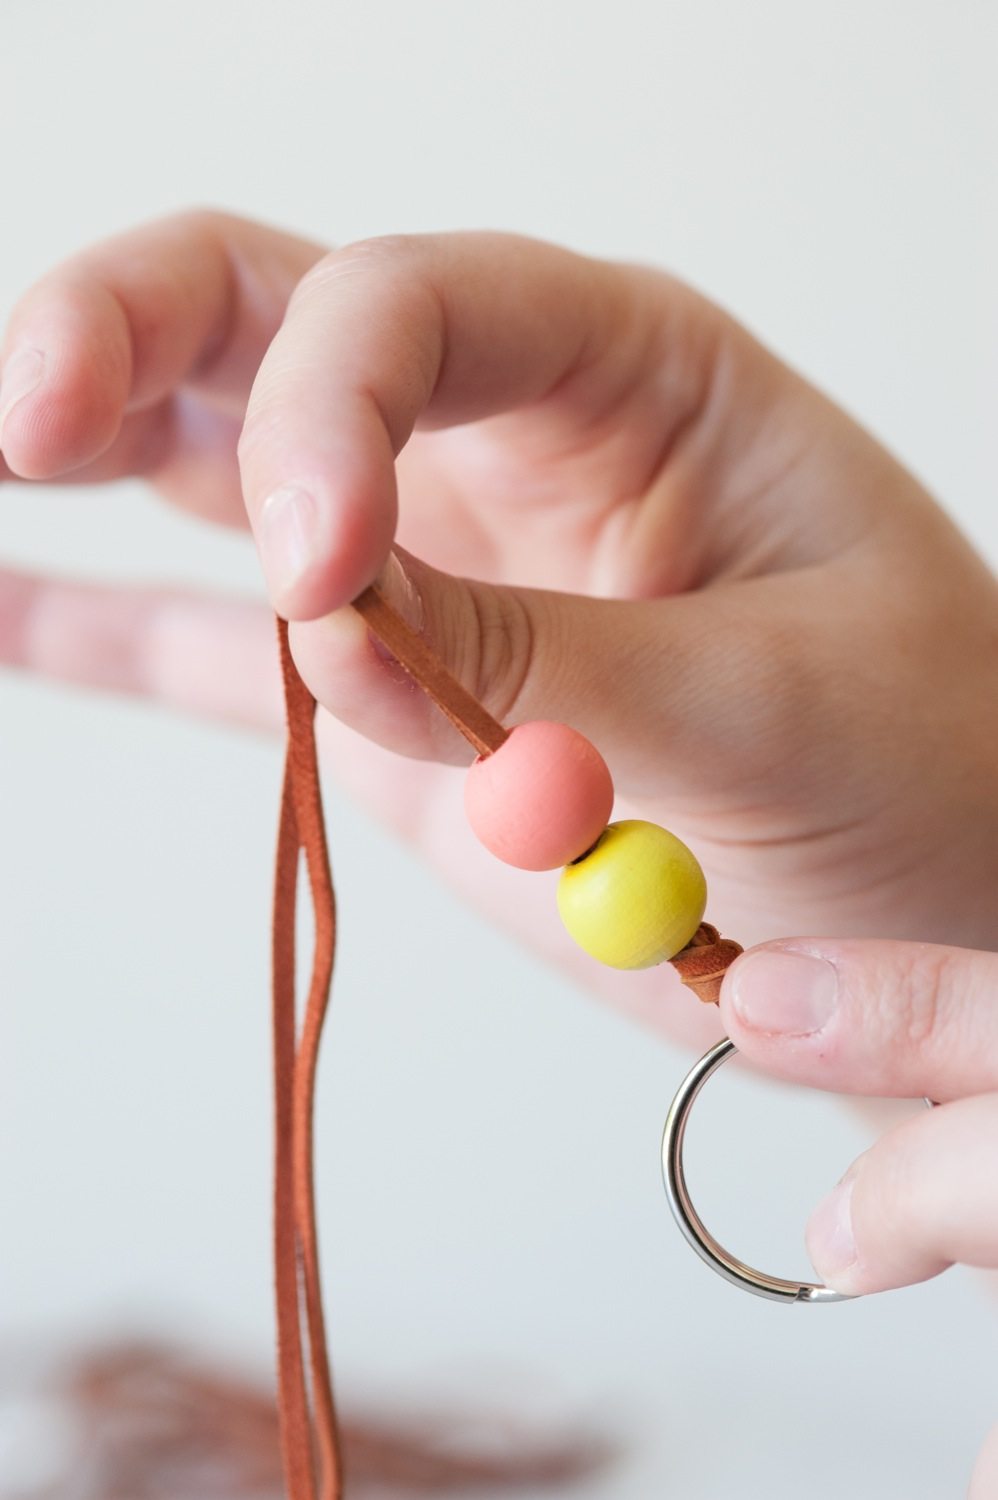
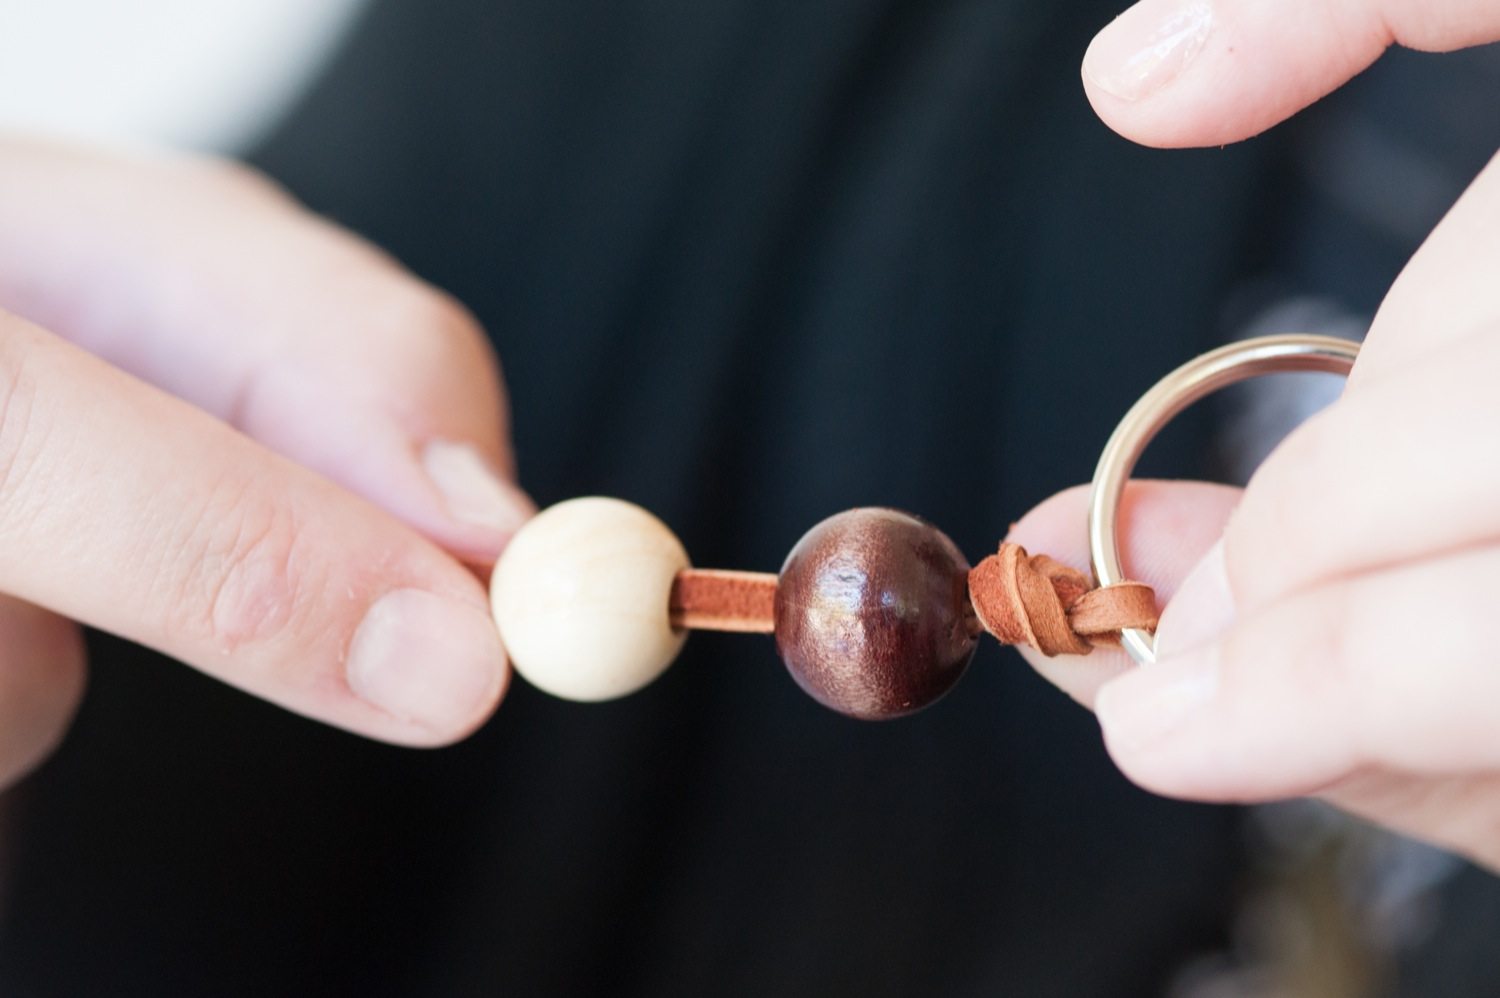
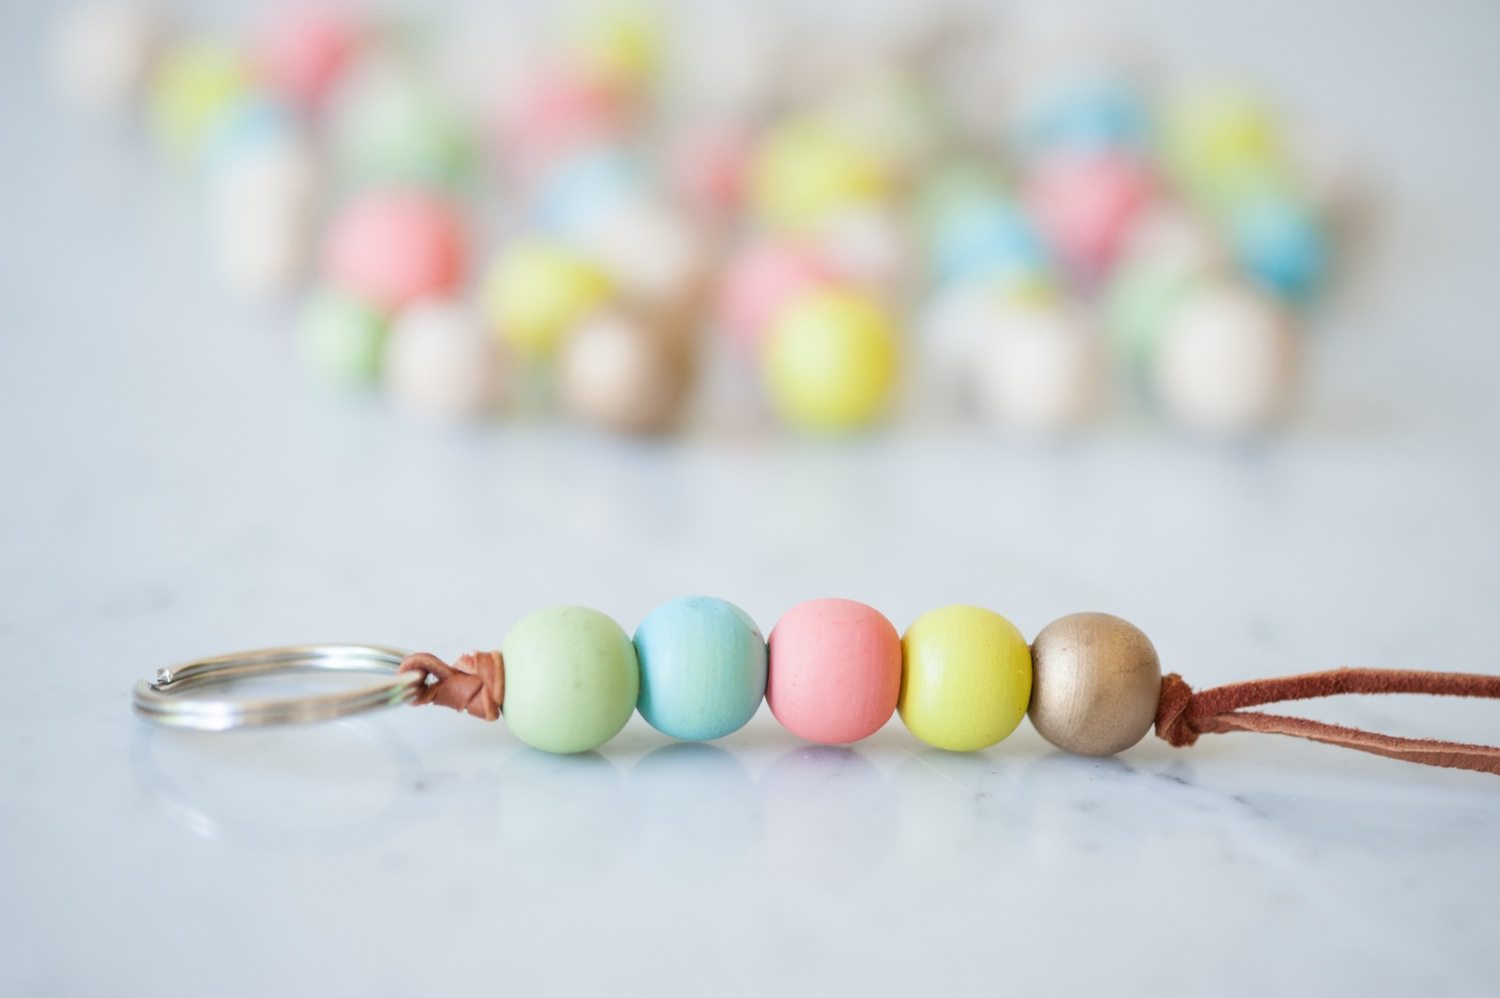
For each keychain, loop a piece of cording through the metal key ring so that the ends meet and the cord is doubled up on itself. I found that using a more pliable faux cording worked best of all, but you can opt for leather, suede or a synthetic version that you like best. Then tie the cord in a tight knot at the top, securing it firmly to the metal key ring so it has room to slide around a bit.


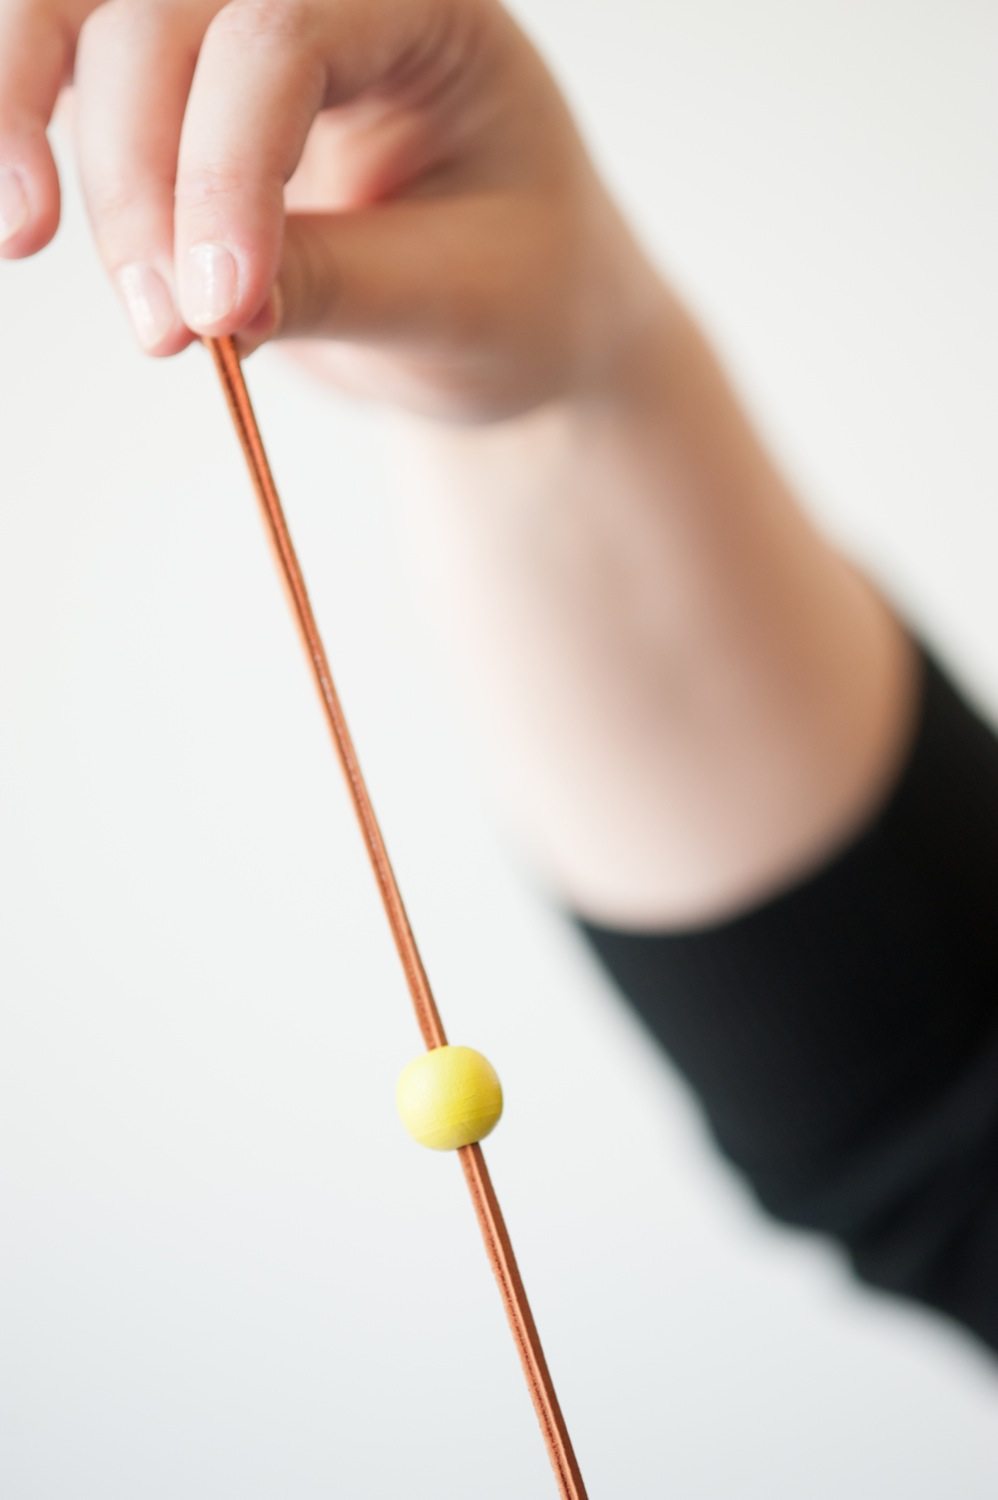
Next up, determine the arrangement of your beads. I like to mix up the colors and size, using a variety of combinations to keep it interesting. Then all you have to do is string the beads onto both strands of the cord, one by one, pushing them firmly into place up against the knot near the metal key ring.


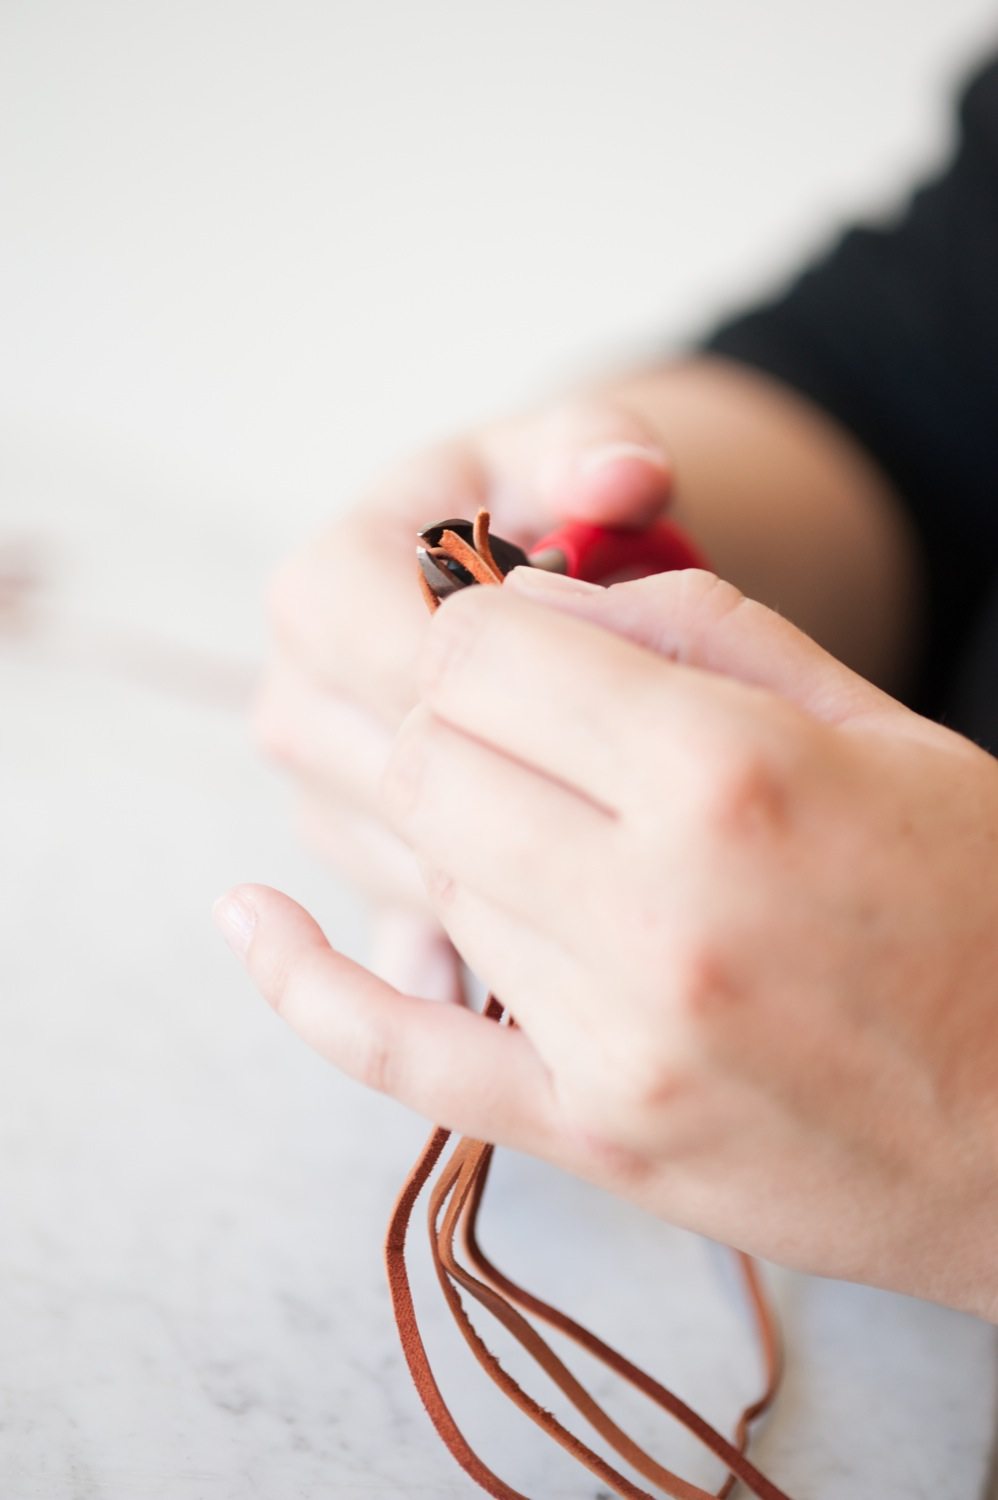
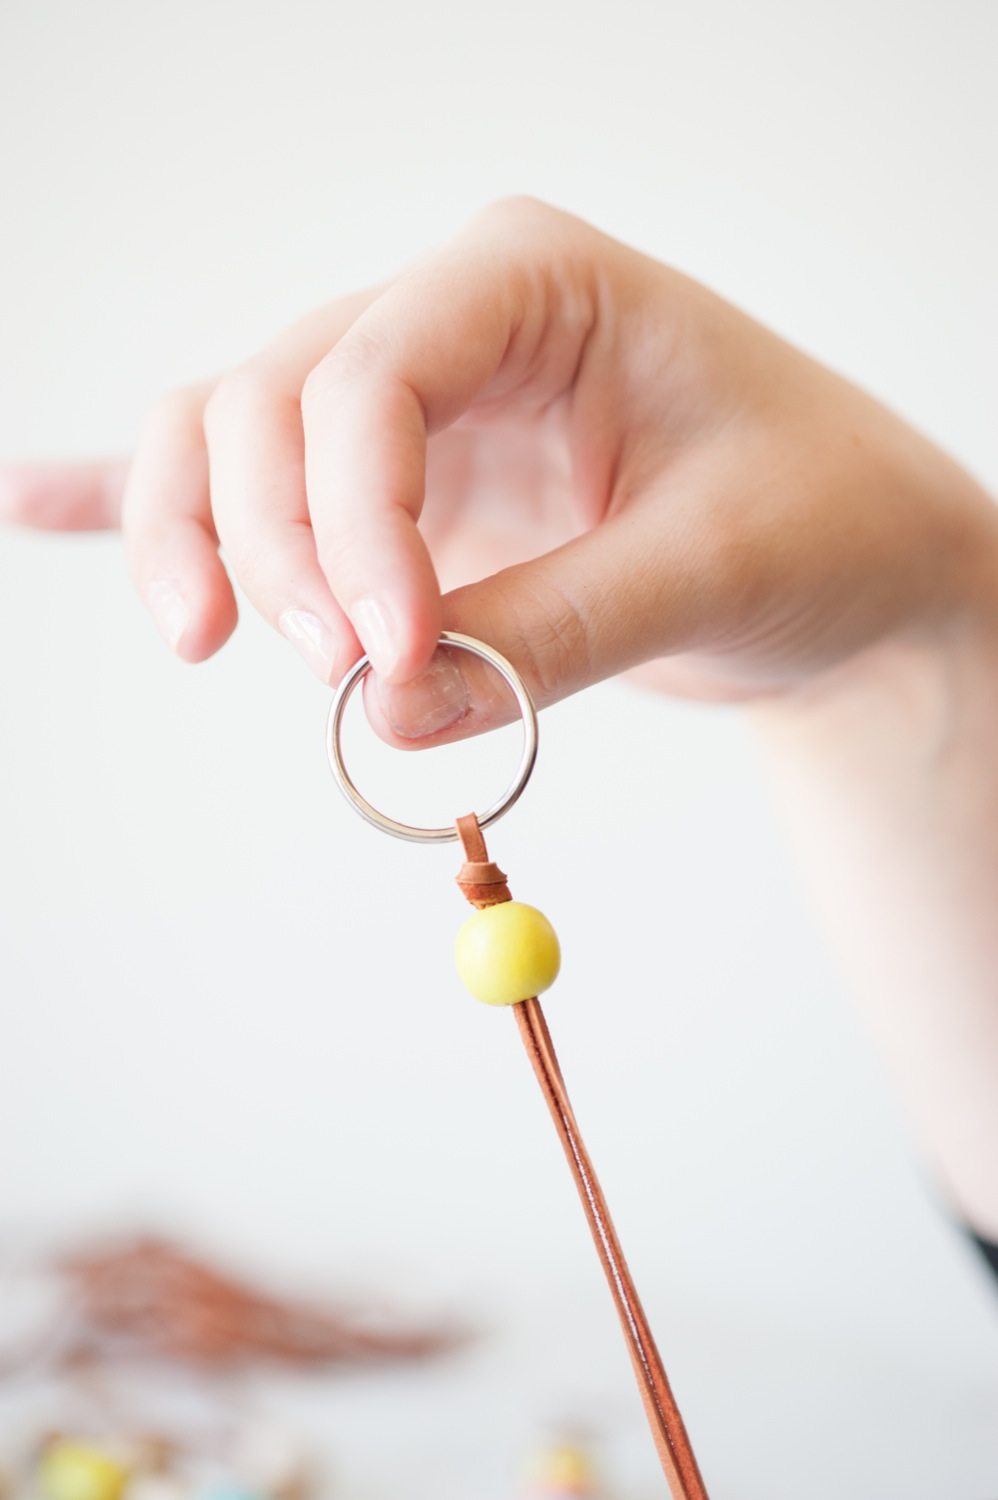
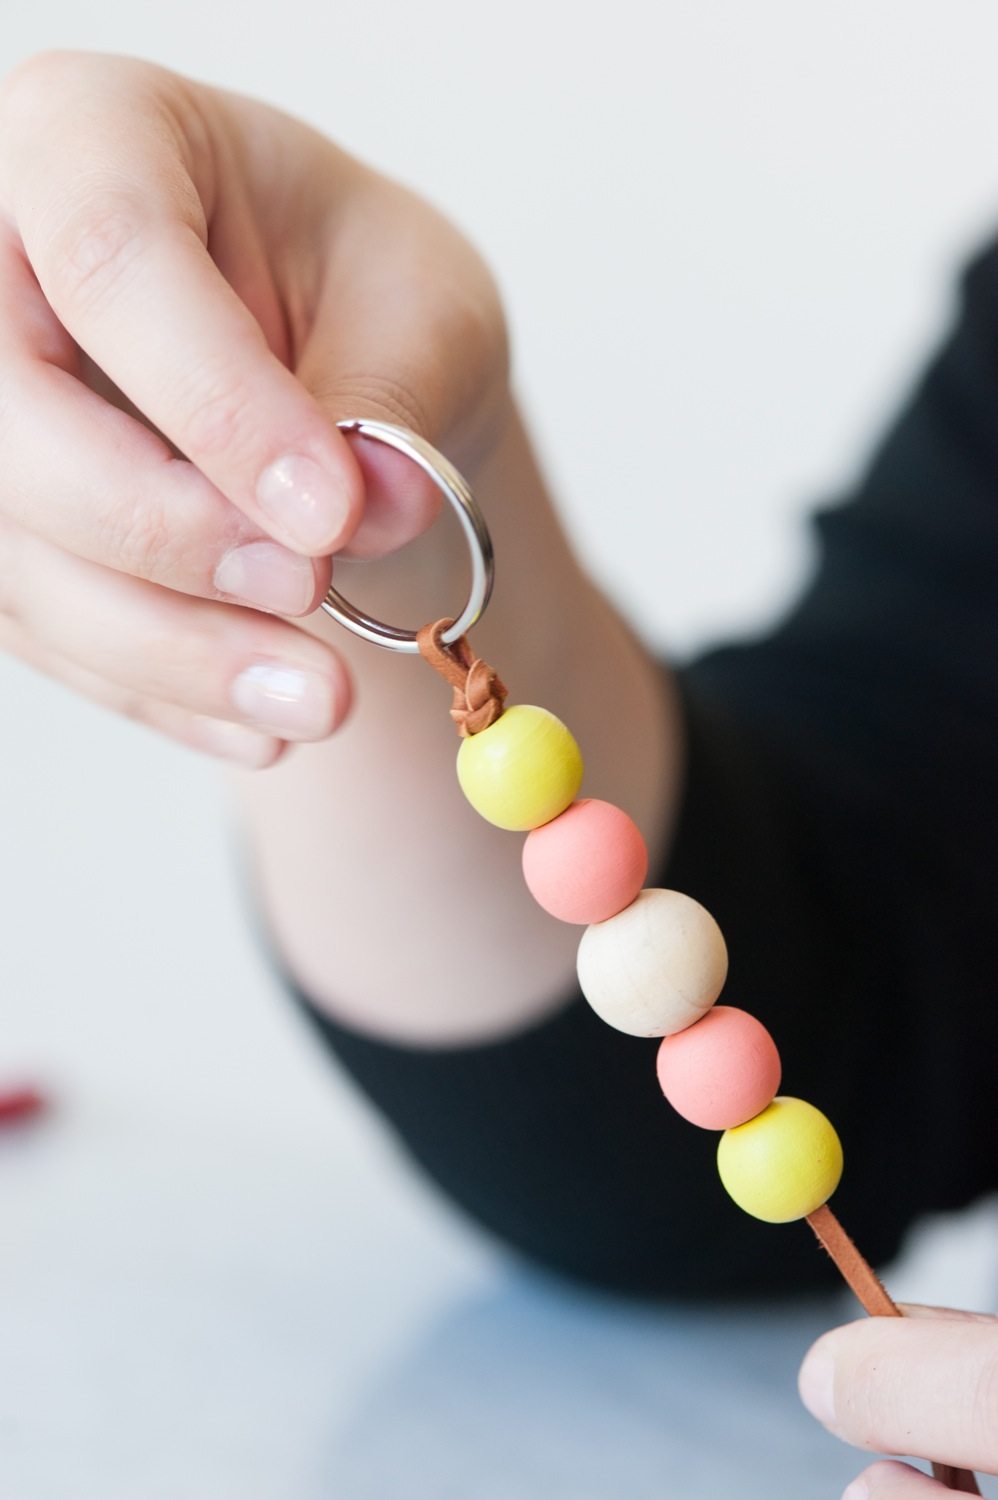
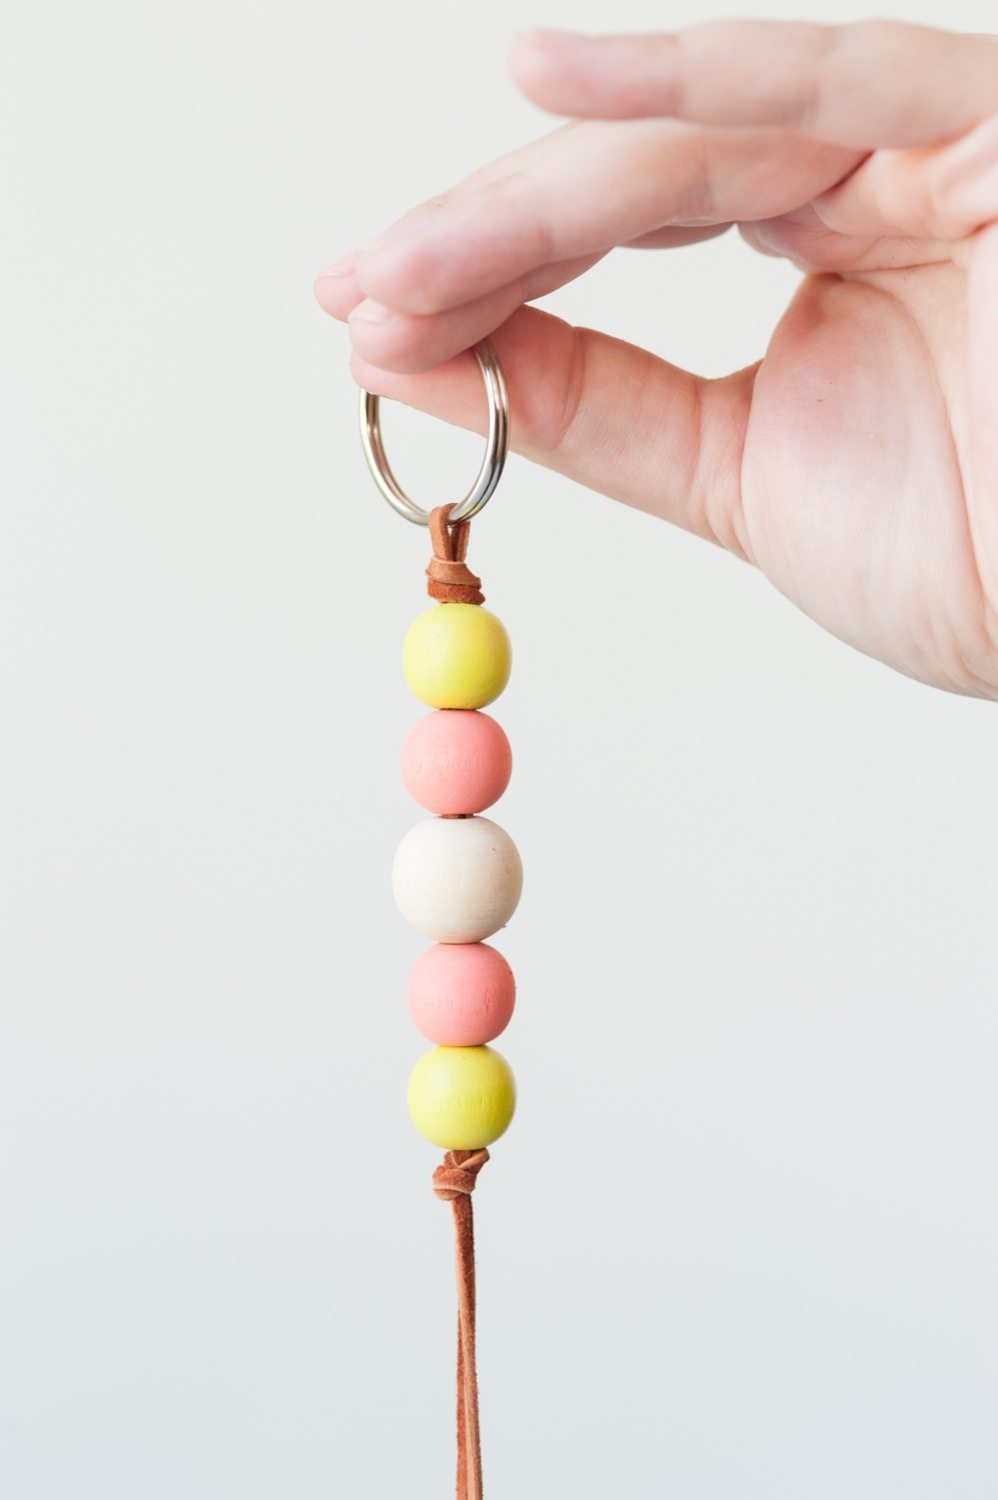
Repeat this process and then finish off the sequence of beads with another tight knot. I prefer my keychains with a of a longer tail at the end, but you can determine the length you like best and then just snip off the excess.


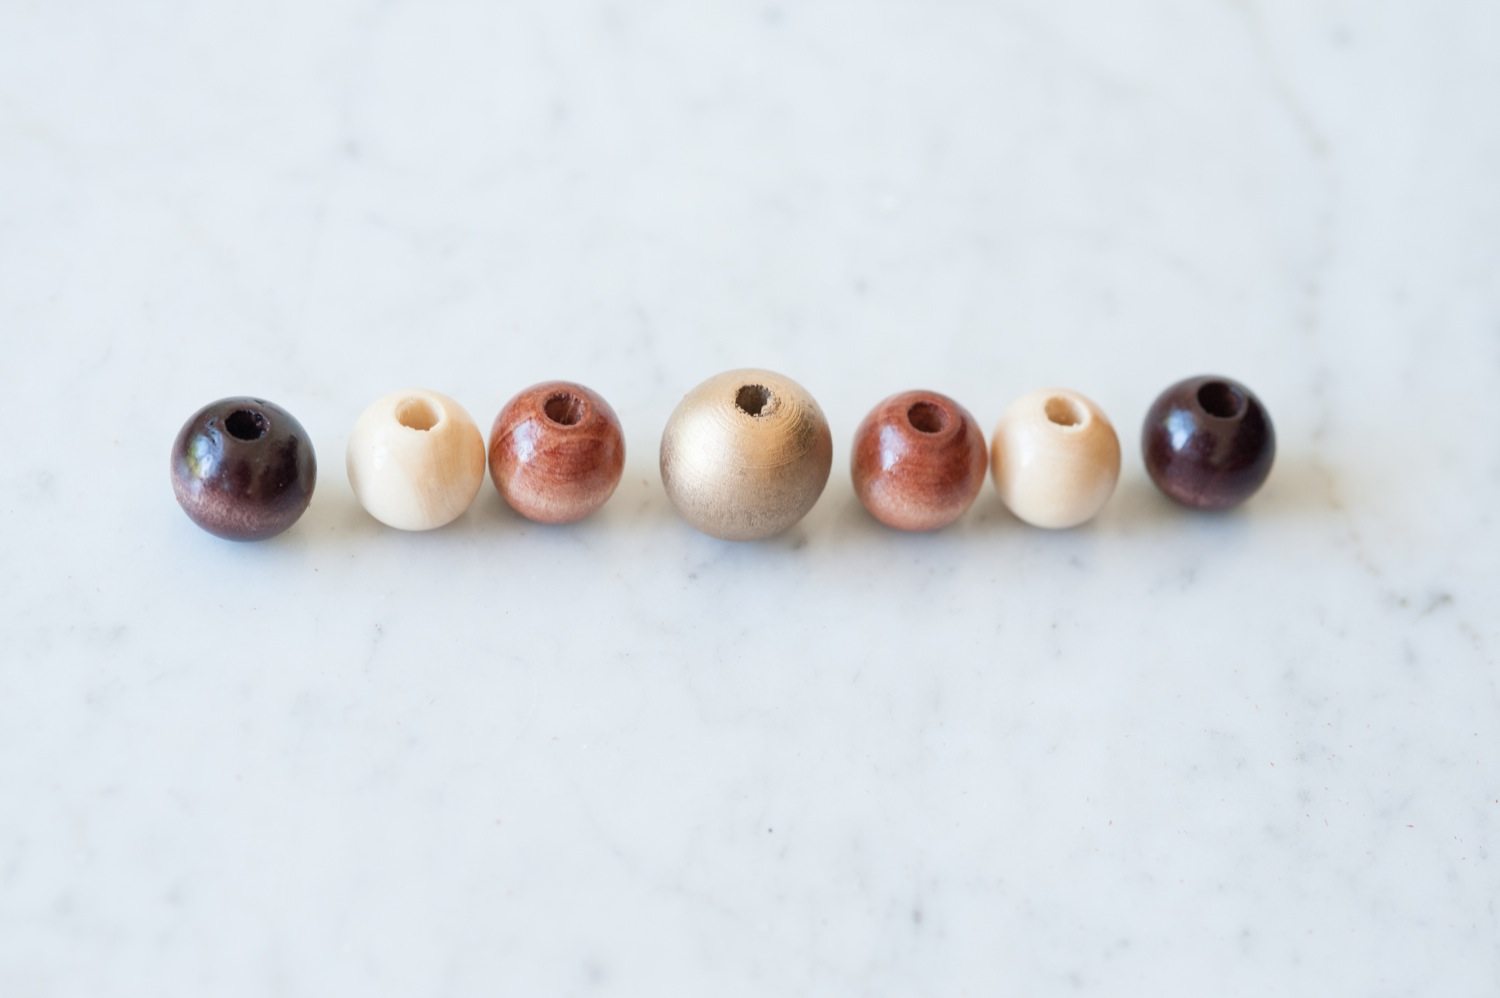
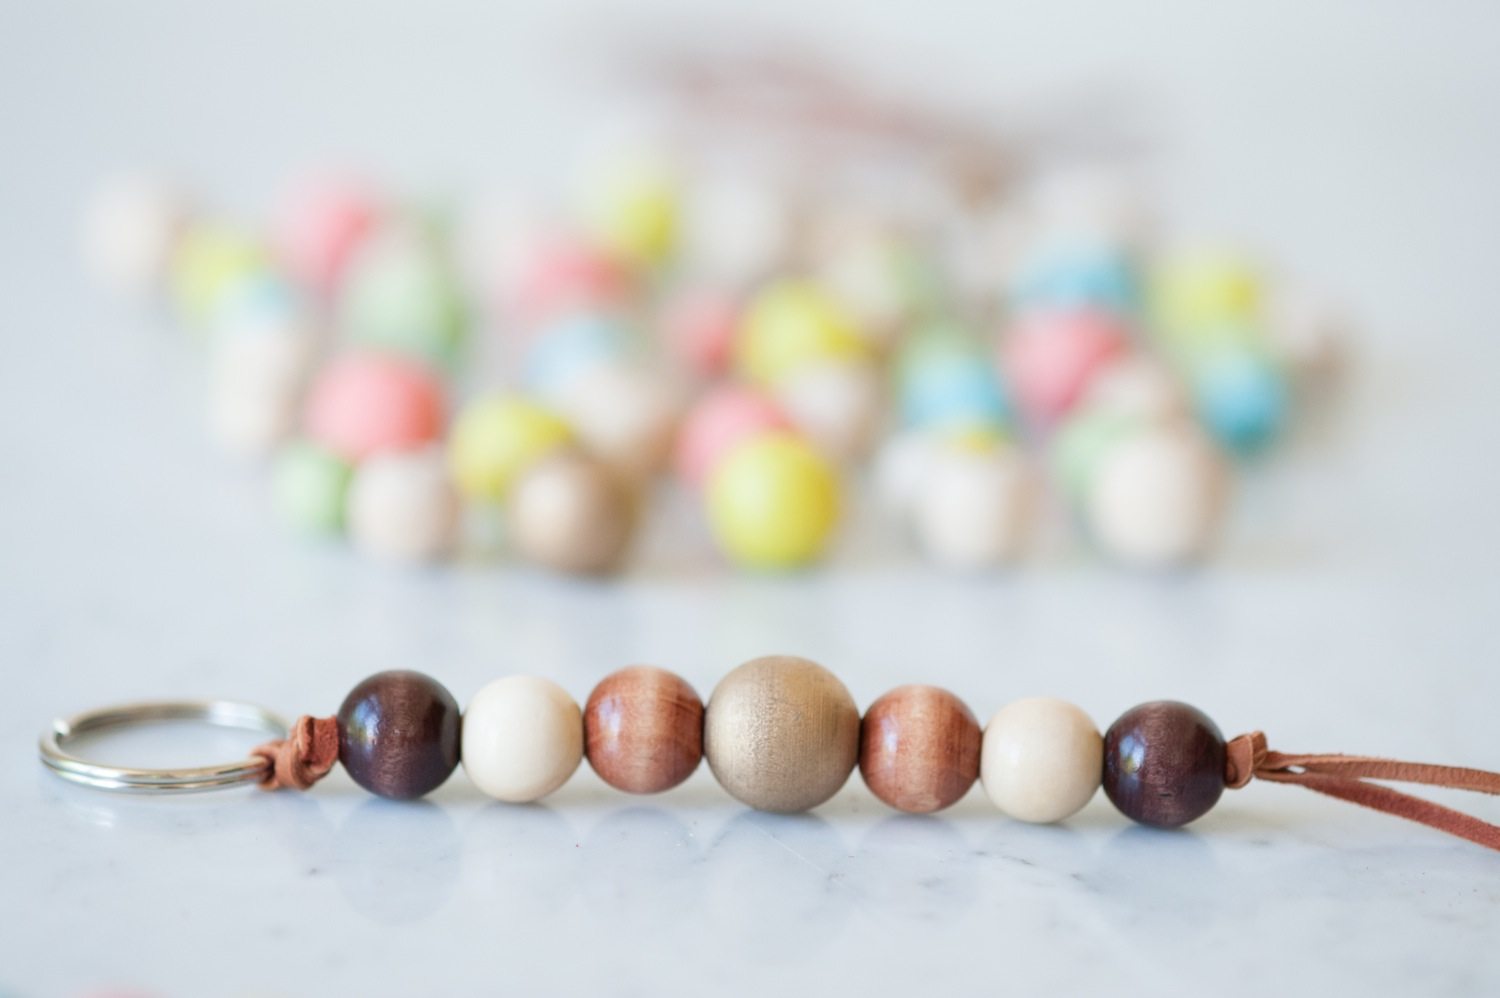
Alternately, if you prefer a more natural look, you can pick up pre-finished beads in the same section of the craft store. Mix and match the stained beads with unfinished beads and painted beads (like the antique gold ones here), and follow the same process as above to create wooden keychains with an entirely different look. You know, for those of your BFFs who aren’t so much into pretty candy colors.


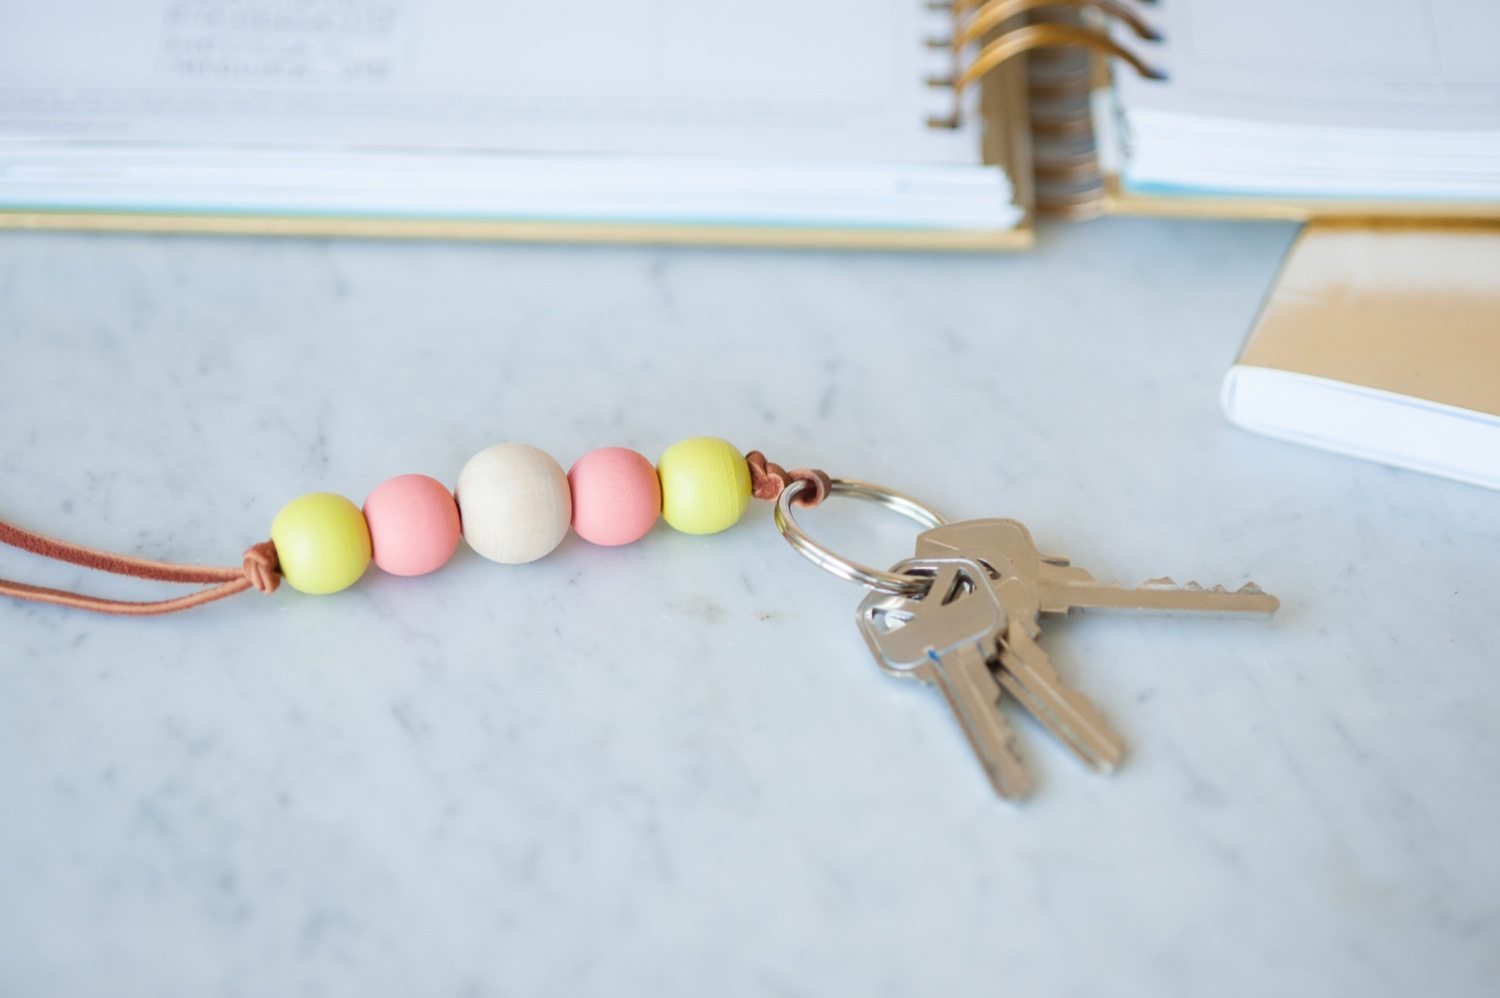
And that’s all there is to it, friends! You’re now rockin’ one super cute keychain. You can very easily make a bunch of these at once, making them perfect as little gifts, party or shower favors or bridesmaids gifts. Honestly, the possibilities are kind of endless. Whatever you do, if you give this or any other projects or recipes a try be sure to share with me by using the hashtag #thesweetestoccasion on Instagram!

(Design styling by Cyd Converse | Photos by Alice G. Patterson for The Sweetest Occasion.)
The fine print: Please link with love! As with all of our posts, DIY projects featured on The Sweetest Occasion may not be copied, distributed or reproduced without express written permission. Love and links are always appreciated! If you’d like to share this post, please link to this post directly for the DIY tutorial and do not include the instructions in your own post. Thanks so much! xoxo
© The Sweetest Occasion, 2015. | Permalink | No comment | Submit to StumbleUpon It! | Add to del.icio.us | Follow me on Twitter | Like The Sweetest Occasion on facebook | Join me on Pinterest
The post DIY Wooden Bead Keychain appeared first on The Sweetest Occasion.
Related posts: