
DIY Footed Wood Slice Tray

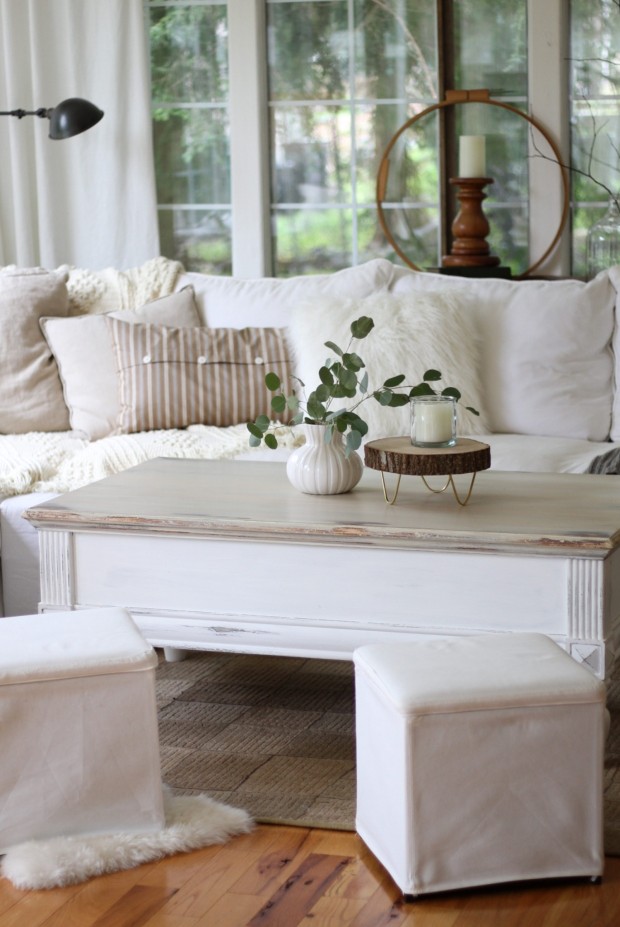
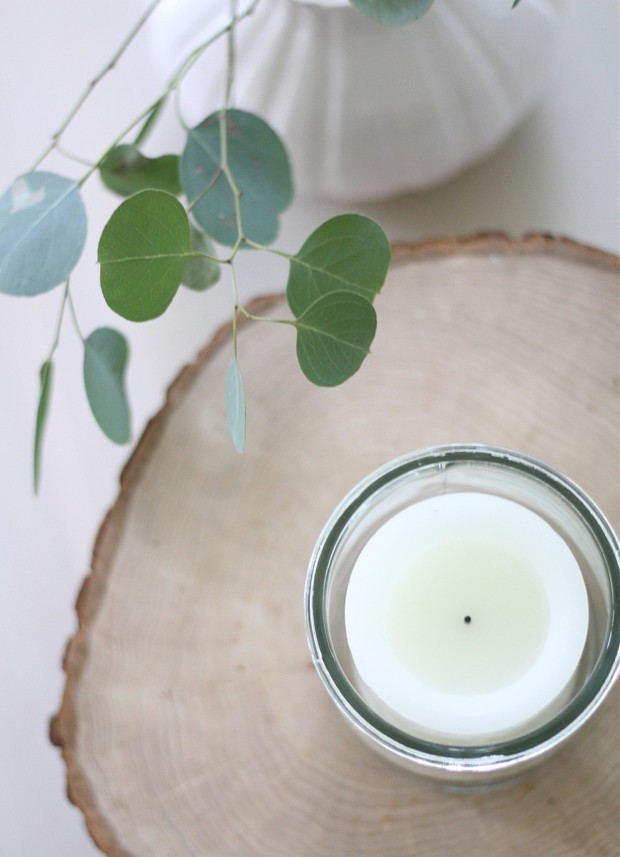
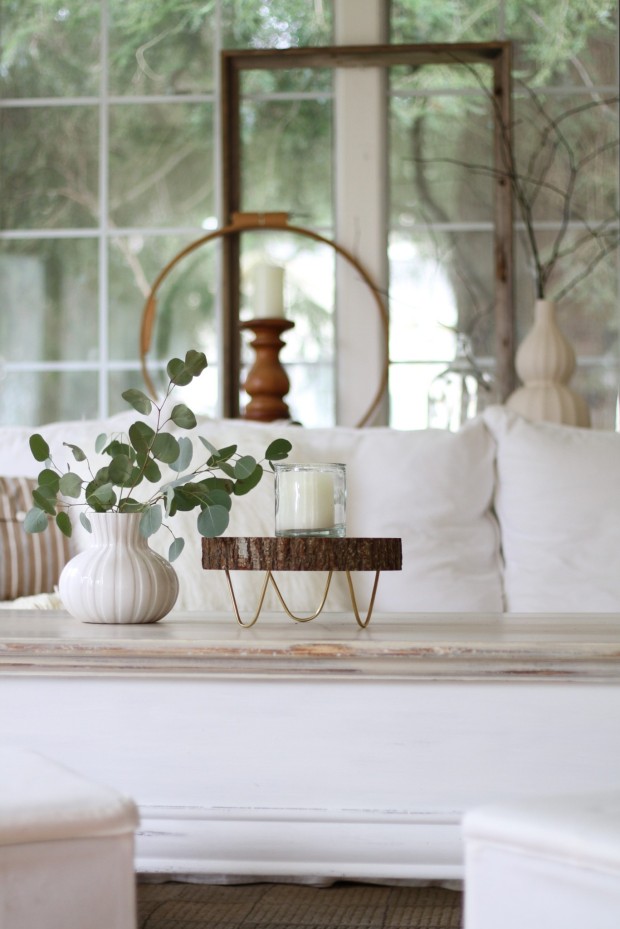
Hello Craftberry Bush friends! I am so happy to be back joining you this week with a new tutorial. Winter is in full swing and it has left me wanting to simplify our home. I have taken down all of the glittery decorations, but still have lots of texture to make our little place feel warm, cozy and lived in. I am using simple foliage such as herbs and eucalyptus to add a pop of color and entice a hope of Spring on its way.

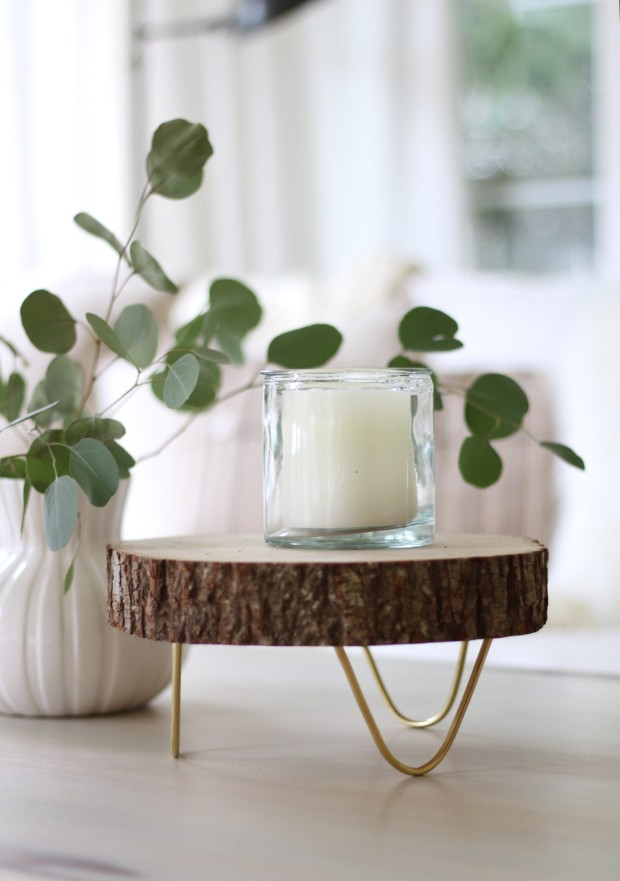
To enhance the cozy textures, I am enjoying pairing some rustic elements. I have seen these pretty trays (here, here and here) made with wood and hairpin legs. As is typically the case, the price for one was out of our budget and so I started to contemplate how I could make a similar wood round tray myself.

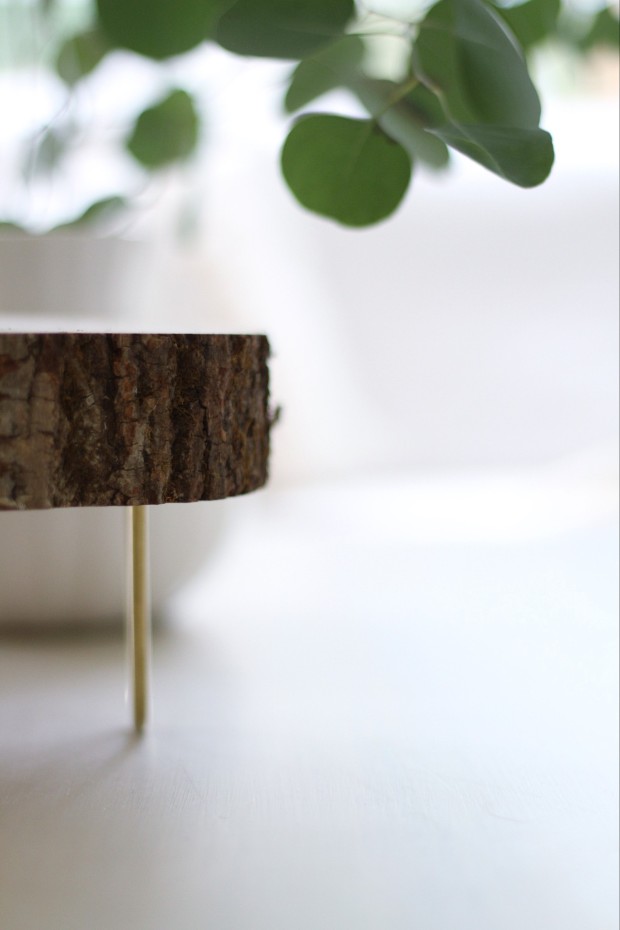
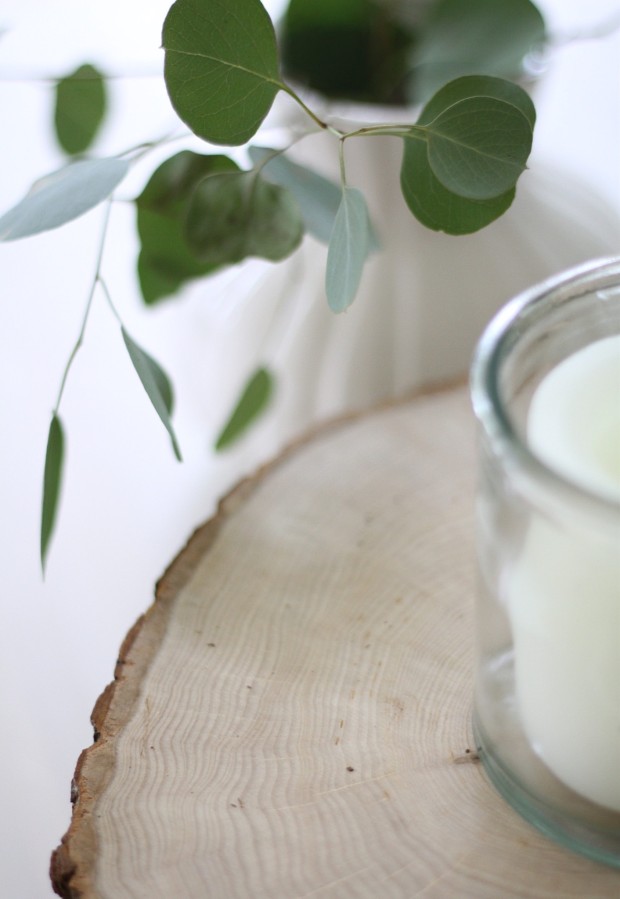
I remembered that you could buy large wood slices at many of the local craft stores and went straight away to get one. The feet, however, were a bit more tricky…

I racked my brain for a way to create them, searching hardware stores, looking at hairpin legs online, and I even thought about using a wooden letter V to create the same effect.

Then one night while scrambling out of the craft store as it was closing, I took a shortcut through the hobby/model building section. As I sped through the aisle, I quickly saw something that caught my eye and instantly knew it could work very well (isn’t it fun being in the right place at the right time?!).

I had found some bendable metal tubes made from copper, brass and silver. It was perfect! I grabbed a few along with a special tool used to bend the pieces and checked out.

When I got home, I made these fun modern legs and then pieced my project together. Here is how you can too:
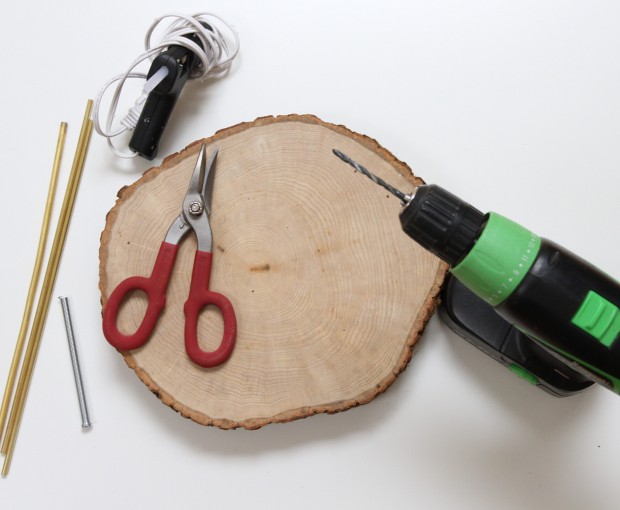
You will need…

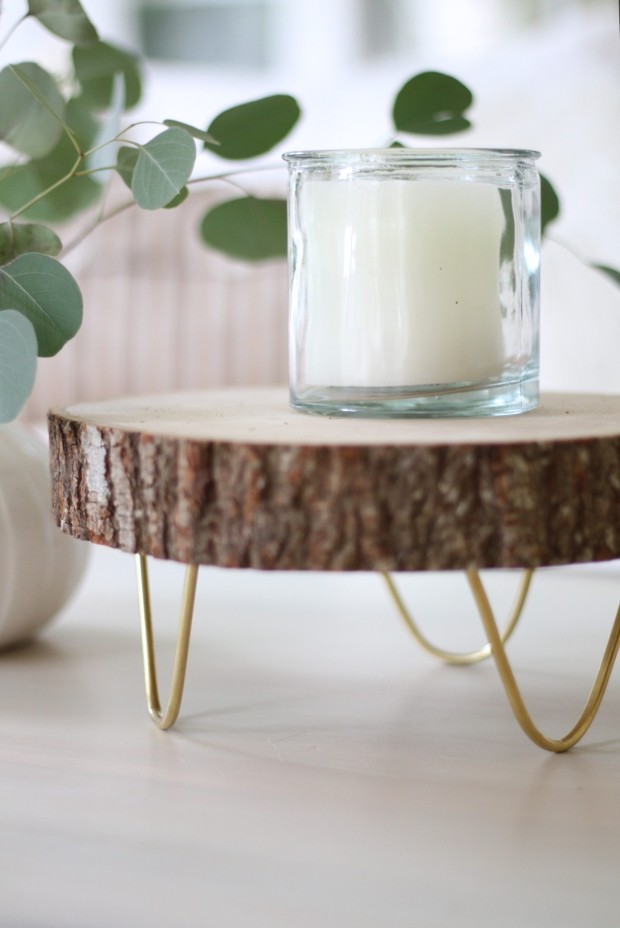
- A wood round or slab (again, this can be found at most craft stores). I used the thickest/largest piece I could find.
- Three bendable metal tubes in a color metal of your choice (example of what I used here). I used 3/16 of an inch in diameter size.
- Tubing bender. This will allow you to bend the metal tubes without them crimping and is an important tool when doing this project. I found out the hard way when I attempted doing it without- ha! (example here also available here).
- Drill with bit size that is approximately the same as your metal tubing.
- Tin snips for cutting the metal tubing legs.
- Glue Gun with glue sticks (I actually did not end up needing this because I was able to match my metal tube size to the drill hole closely and they held secure just fine.)
- As with any project and using tools – please practice safety.

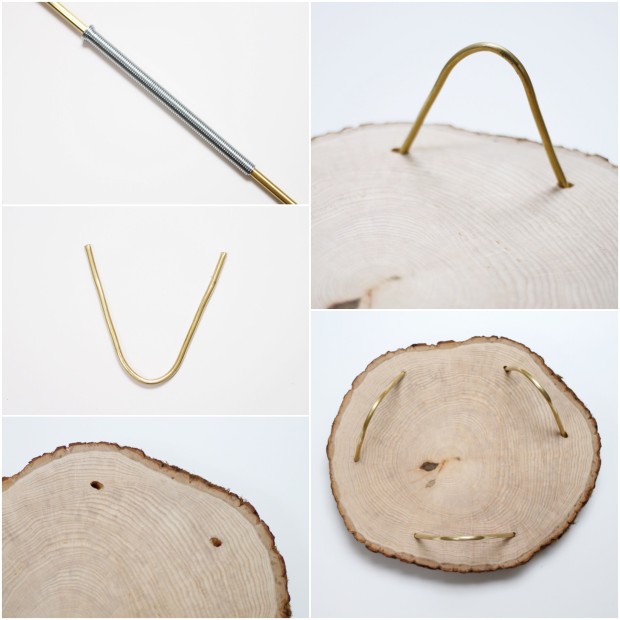
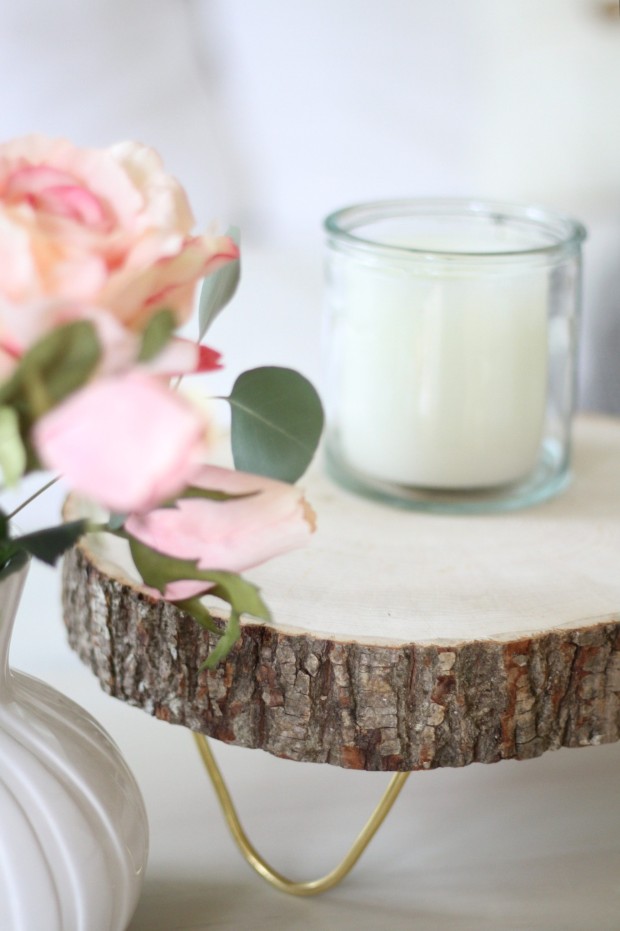
- Begin by using your tubing bender (following the directions on the package) to bend the metal tube. I made a rounded leg (not quite a hairpin) but similar in look.
- Remove the bender and snip both ends of the legs so that they are short enough for your wood round. I started with one and then measured the others against it. I took off about 1 inch on each side of the leg. This could vary though, because it will depend on how big your wood round is and you will want to eyeball what is proportional.
- Now measure and mark the legs on your wood round (where you will drill to make holes).
- Drill holes at a subtle angle (based on the angle of your tray legs) because that is how you will later push the legs in.
- Measure, mark and drill the rest of the holes for the remaining legs. I spaced the legs evenly apart around the wood perimeter.
- Now push the legs in (careful not to bend the legs any more as they are pliable).
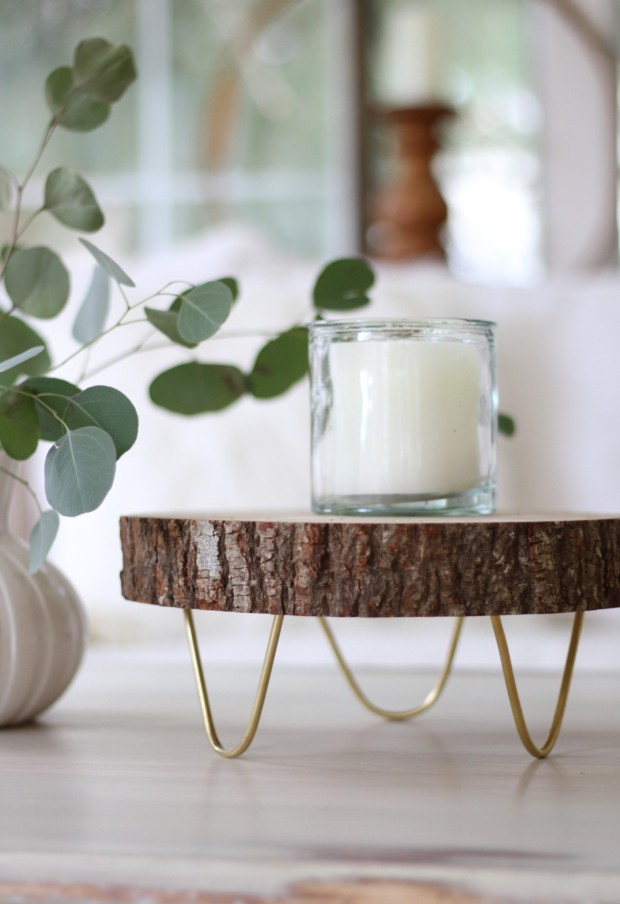
- That is it! You now have a simple but beautiful tray to decorate with.

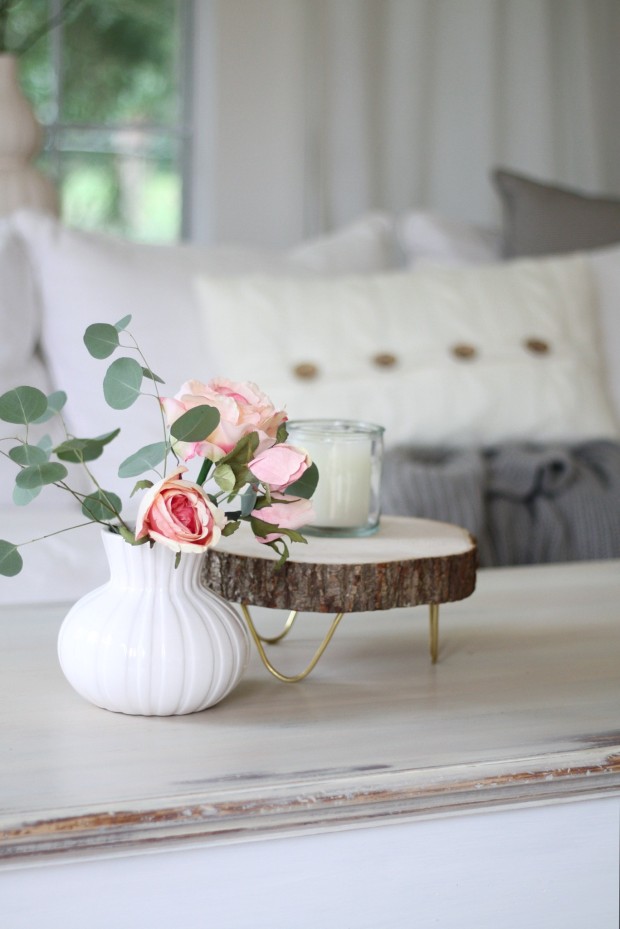
I love how this piece incorporates two opposites in design – rustic and glam. It works well as a candle stand, a place for storing jewelry, a table centerpiece and so much more.


Since Valentine’s Day is right around the corner, I couldn’t help but pair some pretty pink roses alongside it. I am looking forward to using it year round and hope you will let me know how it goes if you try it out.
