DIY Paper Boat Decorations
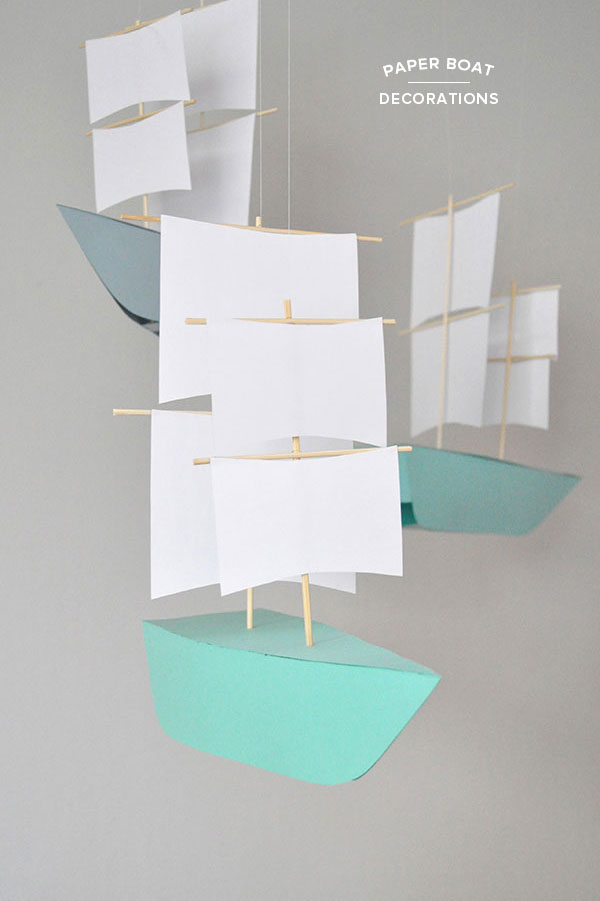
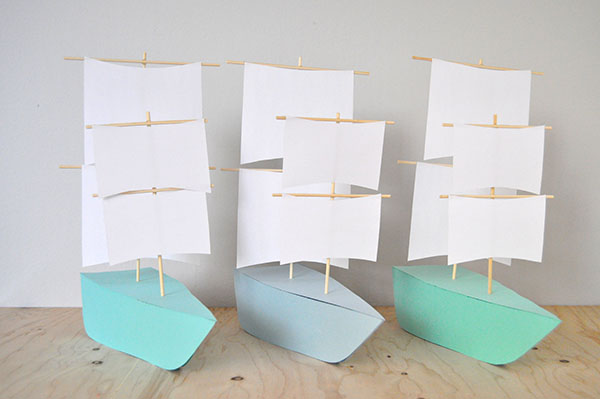
Anchors aweigh! Recently I’ve been pretty obsessed with all things nautical, so these DIY paper boats were a lot of fun to dream up. Make them for a pirate or nautical themed party and keep them around as home decor afterwards. Or, wouldn’t they be great as Mayflower decorations for Thanksgiving? You probably already have all the supplies you need.

Click through for instructions …
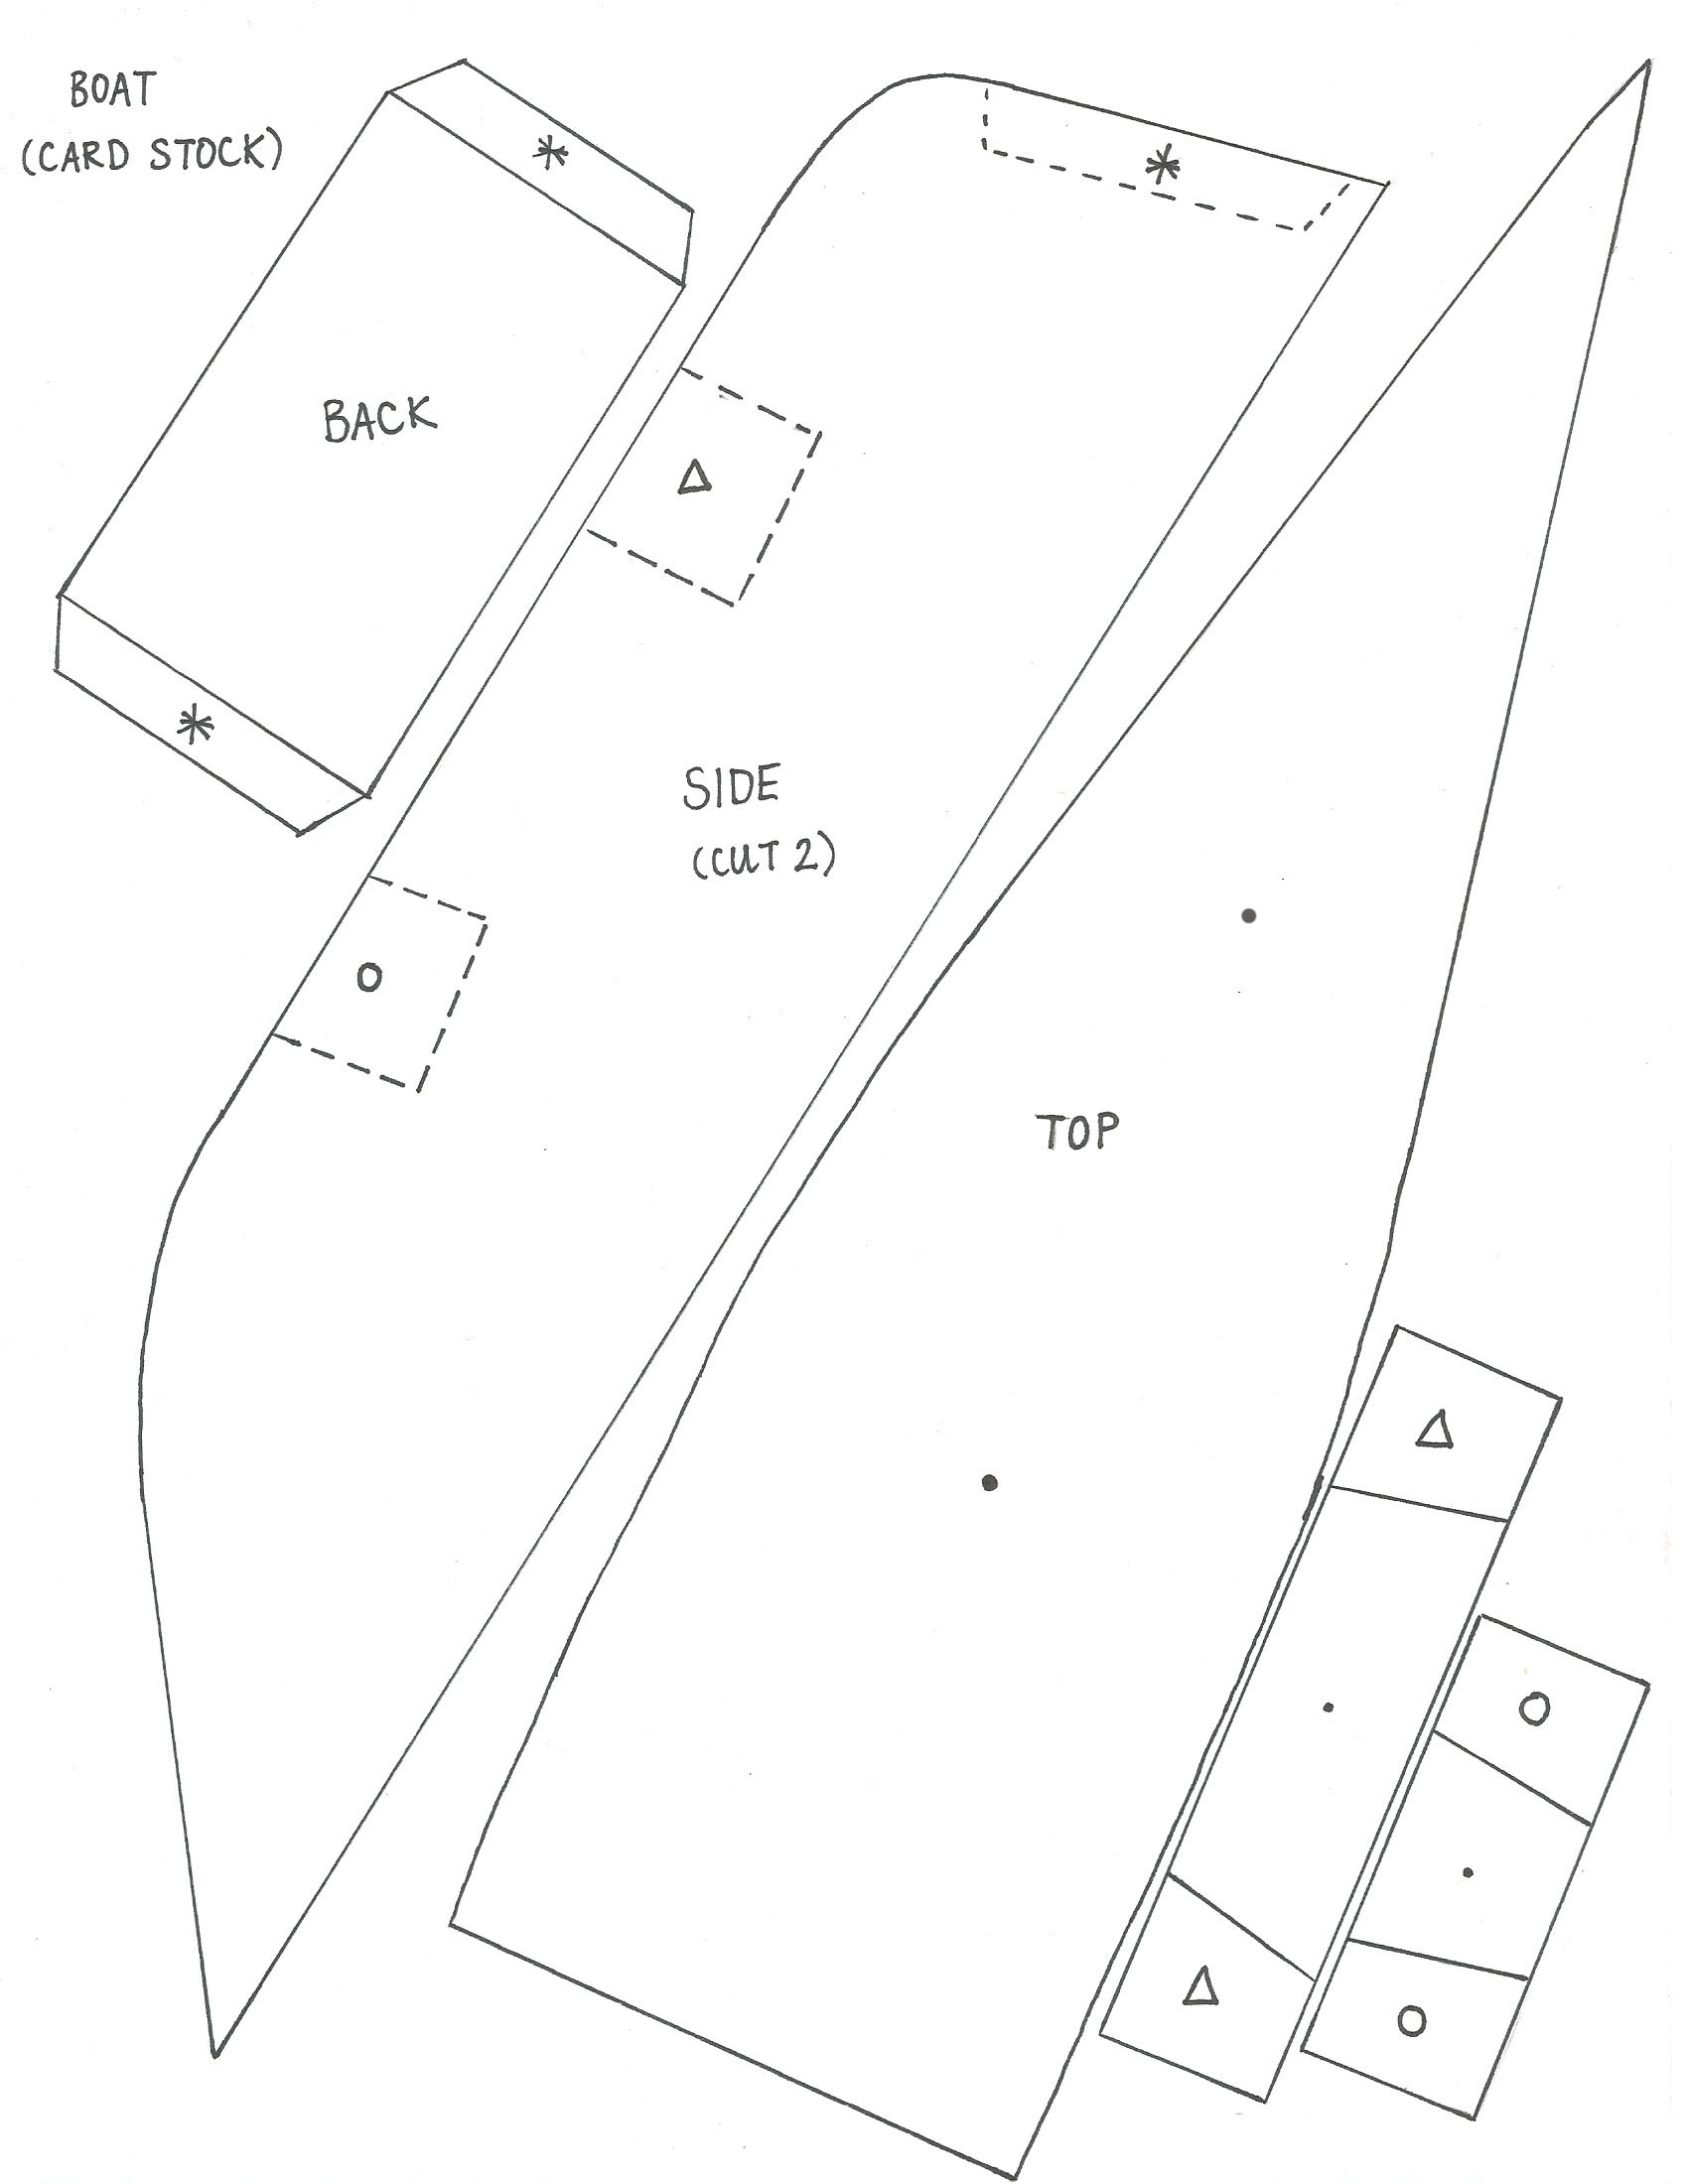
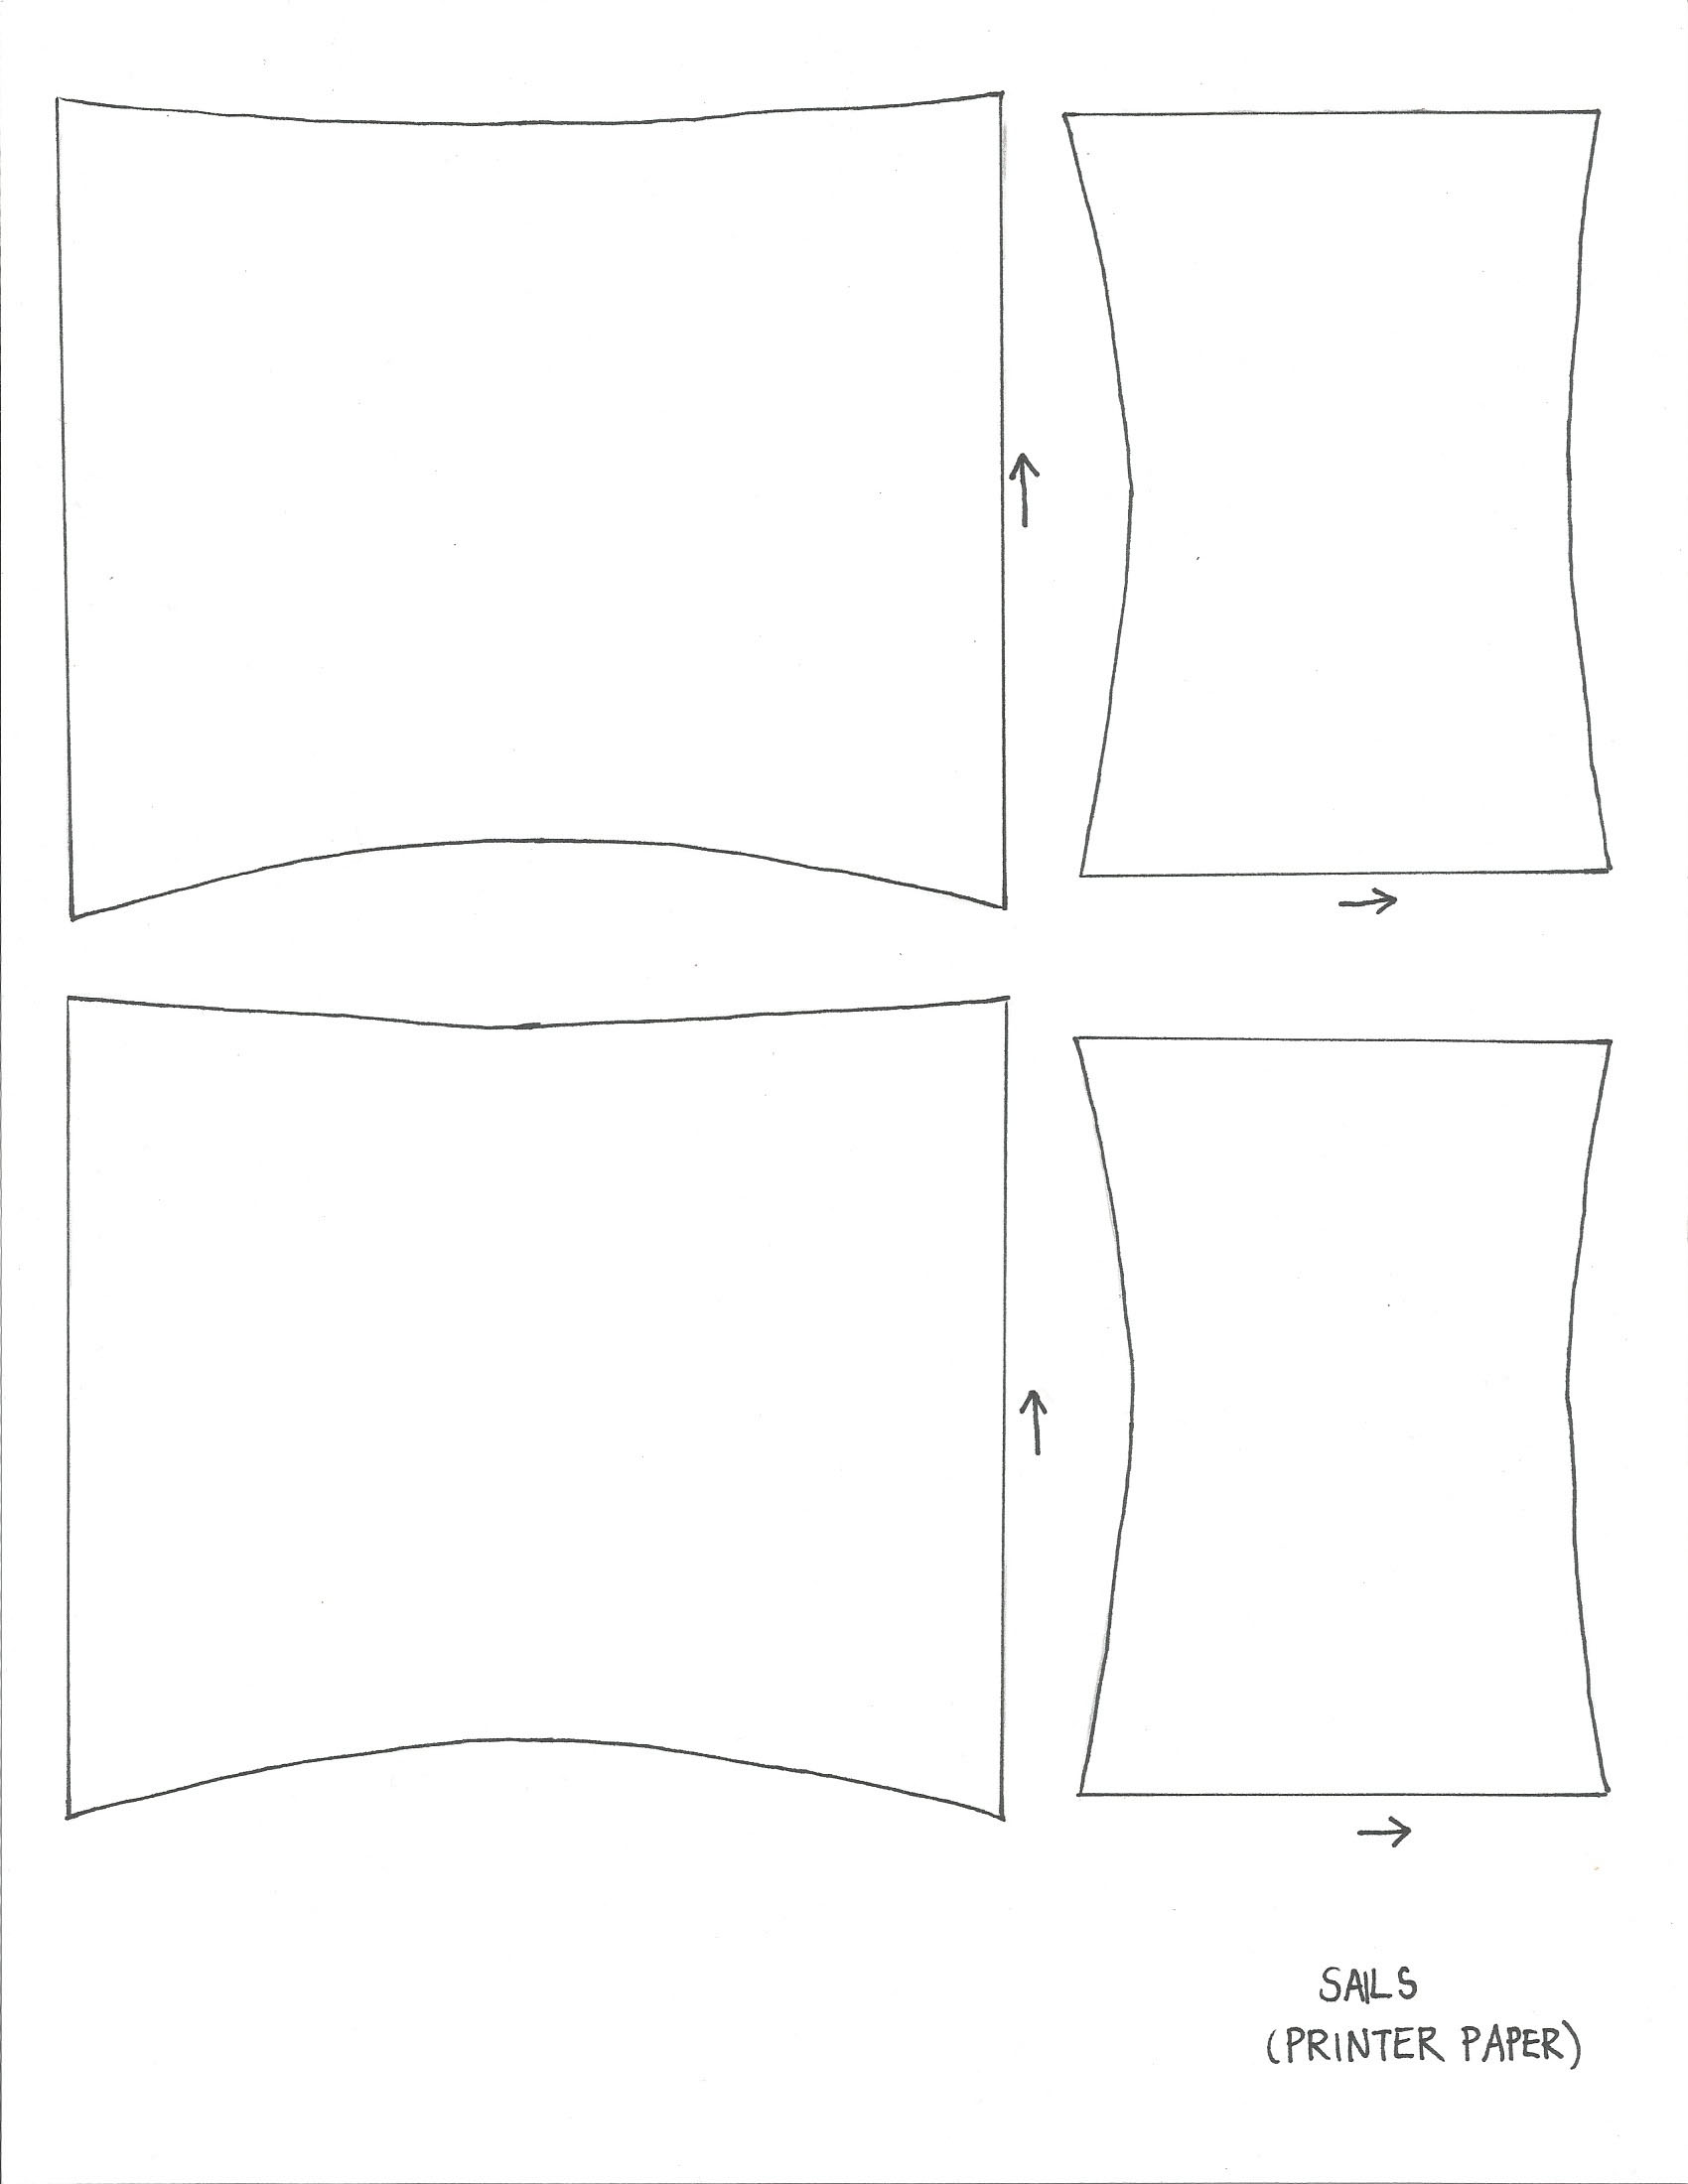
Supplies: Printed boat and sail templates, cardstock


Step 1: Print and cut out the boat template.
Step 2: Trace the templates onto your choice of card stock. Be sure to transfer fold lines, glue lines, and dots with a pencil.
Step 3: On the piece labeled “TOP”, use a safety pin to poke a hole in each dot. Use a wooden skewer the widen the holes.
Step 4: Fold the flaps on the three smaller rectangles (including “BACK”). You can use a bone folder and ruler to make this easier.
Step 5: Line up the two “SIDE” pieces so that the front tips line up. Apply a piece of tape from the tip to the curve. Trim any overhanging tape at the tip.
Step 6: Use hot glue to attach the back to the sides.
Step 7: Hot glue the two rectangles to their corresponding spots – look at the template to match circles to circles and triangles to triangles.
Step 8: Carefully apply small dots of hot glue to the top edge of the boat and attach the “TOP” piece. It’s best to apply glue a few inches at a time and apply the top piece as you go; otherwise the glue dots will dry before you’re ready.

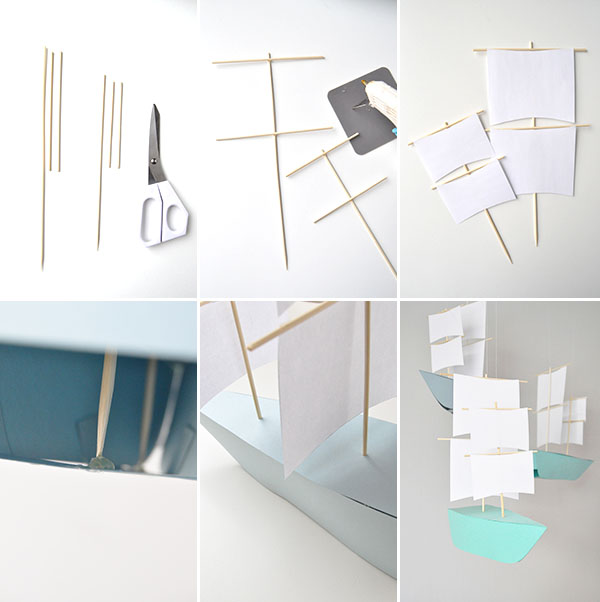
Step 9: For the big sail, you will need one 12″ skewer (full length) and two 6″ pieces. For the small sail, you will need one 9 1/2″ piece and two 4 1/2″ pieces.
Step 10: Use hot glue to attach the skewers. For the big sail, glue the short pieces 1/2″ and 4 3/4″ from the top point, keeping them centered. For the small sail, glue the short pieces 1/2″ and 2 3/4″ from the top point.
Step 11: Cut the sails from the printed template. Apply hot glue to the top two corners and attach on the skewers.
Step 12: Put the small sail in the front hole of the boat and the big sail in the back hole. Use a blob of hot glue to attach the skewer to the card stock underneath to keep them straight and secure.
Step 13: Make sure the sails are facing the right way. When finished, it should look like this. Repeat!
Step 14: To hang from the ceiling, tie lengths of thread to the top joints of both sails. Tape the other ends of the threads to the ceiling.