
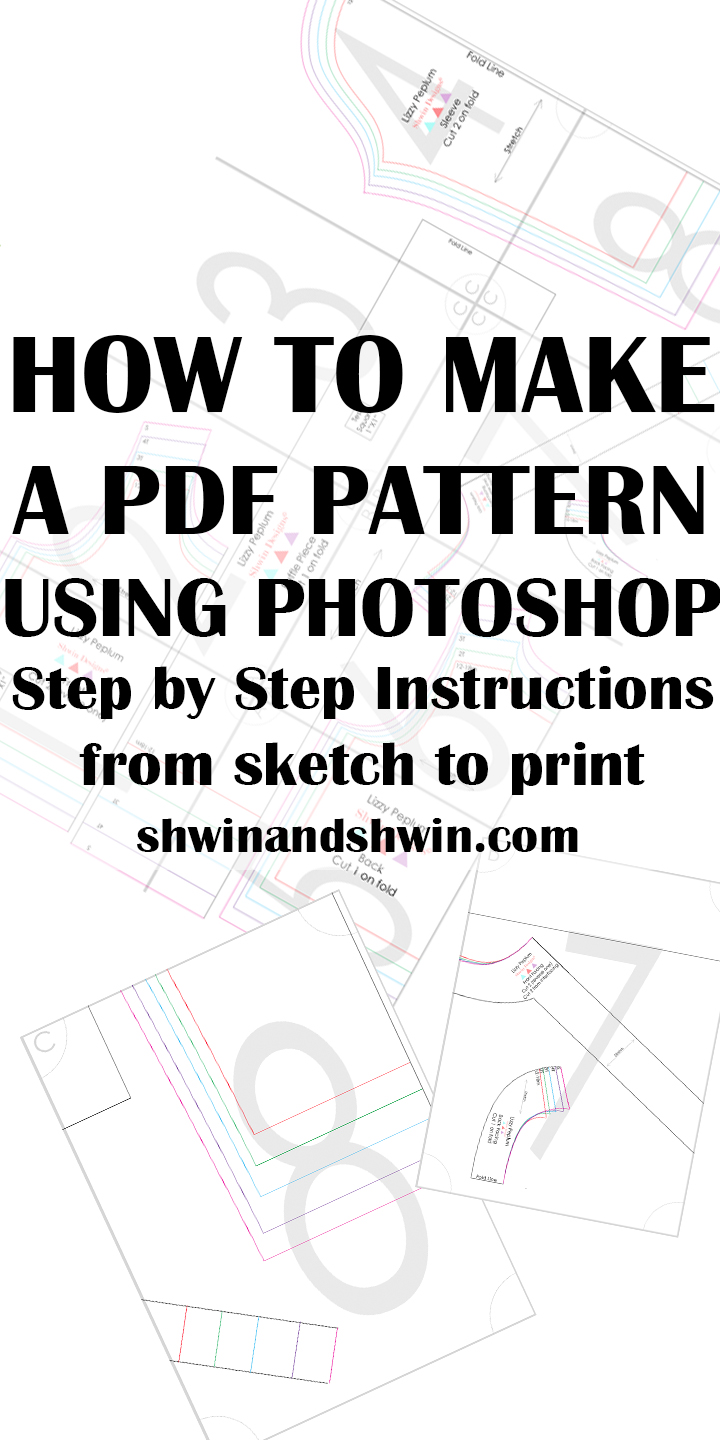
How to make a PDF Pattern in Photoshop

I get asked frequently “how do you make your PDF Patterns?” Either from those who want to start their own pattern line, or those who just want to share, or save their own patterns in a digital form. I really LOVE being supportive and as helpful as possible but the answer is really quite lengthy and hard to just explain to someone. So for some time now I have been wanting to share my process, since there is not a whole lot of info out there on how to do this in photoshop, and over the years I have learned A LOT and tweaked my process quite a bit. So I am sharing a 4 part series on how to make a PDF pattern.
I choose to use photoshop because it’s the program I use for everything, all of my photo editing, collage making, graphics, everything. So I am most comfortable with photoshop and while I was attempting to learn Illustrator a while back since the claim was that it was superior, I found the learning curve was just more time consuming than I cared for when really photoshop does everything I want, even though I know illustrator does some things better. If you want to use illustrator, I recommend taking THIS class which will teach you illustrator. Also, you CAN draft right in photoshop, the line tool measures the line for you, and you can essentially draw right in the program. I however am a pencil and paper kind of drafter. I like the better visualization. So I start by drafting AND grading my pattern on pattern paper, and these lessons will NOT be covering drafting or grading, just digitalizing.
What do I use?
Photoshop CS6 (although other versions including elements may also have the same tools)
Mac Preview (for combining the PDF although I recently switched to InDesign for this)
My computer is a Mac, although I think everything will be about the same for a PC.
Today we will cover the uploading and “tracing” your pattern in photoshop.
To start I scan my drafted pattern into the computer. For large patterns I cut the drafted patterns into smaller pieces (8.5″X11″) so that they can be easily scanned in. I scan them in as JPEG. I make sure the scan size is 8.5X11″ and the resolution is 100 since that is what I will also use later.

Then open up photoshop.
To start you need your pattern base.
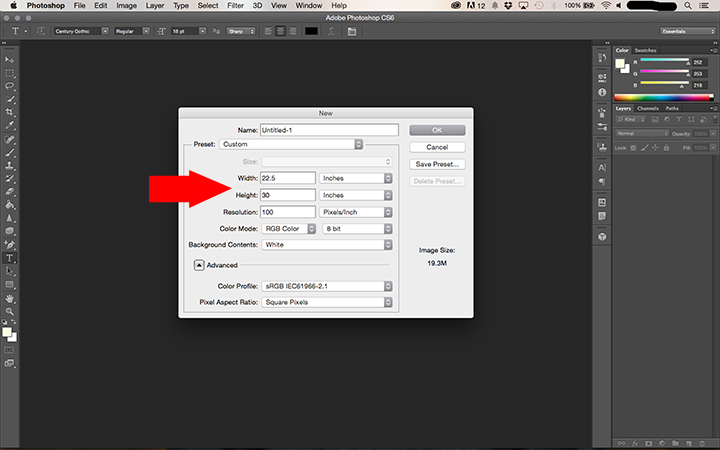
File –> New
To create the base I will either make a nice large workspace (60″X60″) or in this case since it’s a single size simple pattern I went with a more reasonable work space of 22.5″X30″ For the resolution I go with 100, so the files don’t become too large. You can choose any resolution just make sure everything you work with is the same resolution so sizing stays consistent.

Then select
File —> Open
and open the scanned files of the pattern. You will notice they open in new tabs. You may have one page for your pattern or 40, depends on the pattern size and how many scans it took. So you want to
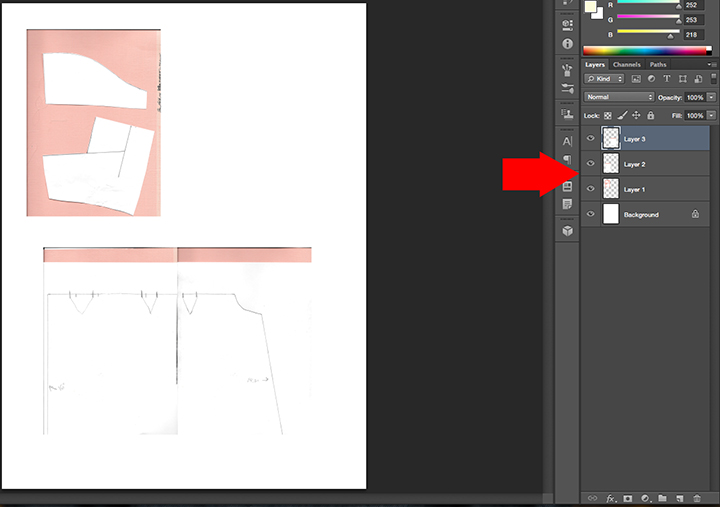
Select —> All then Edit —> Copy (or ⌘A ⌘C)

Then click back over to your base and
Edit —> Paste or (⌘V)
You will see your pattern appear, and on the right you will notice it’s a layer. If I am working with several layers I sometimes rename them so I can keep them straight. Continue pasting all the scanned in pages. You will notice for the bottom two images I had to place them together to create the whole piece.

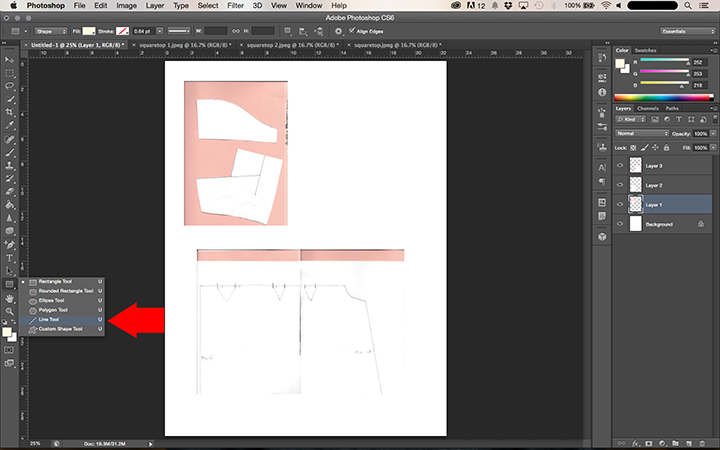
Now we will start by “tracing” one piece at a time. (starting with the sleeve in this case) select the Line tool.
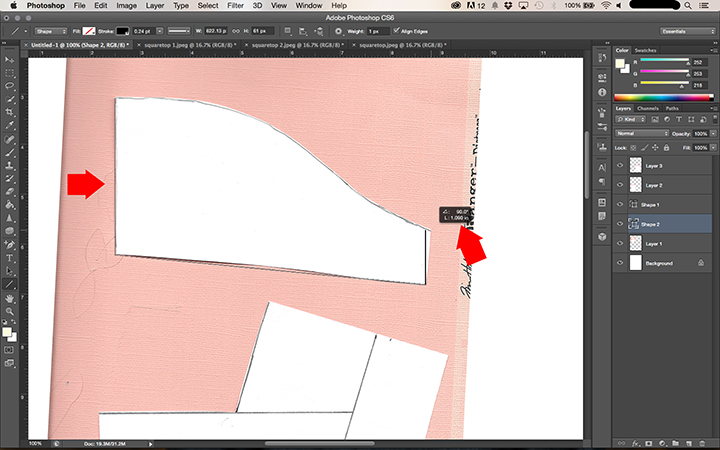

A couple things to point out as you draw a line.
- You want the fill (up at the top toolbar) set to none
- You want the stroke (up at the top toolbar) set to the color you want the line
- You want the stroke weight (number right next to the stroke color) to be .24
- You want the weight (up at the top tool bar) set to 1px. (you can make it heavier if you want but 1 keeps it nice and neat.
- To draw a line you click and then drag the mouse, let go when the line is the length you desire.
- When you want to draw a perfectly straight line hold the Shift key down while drawing the line.
- You will notice a small black box (shown with arrow above) appear while drawing a line, this measures the line for you.

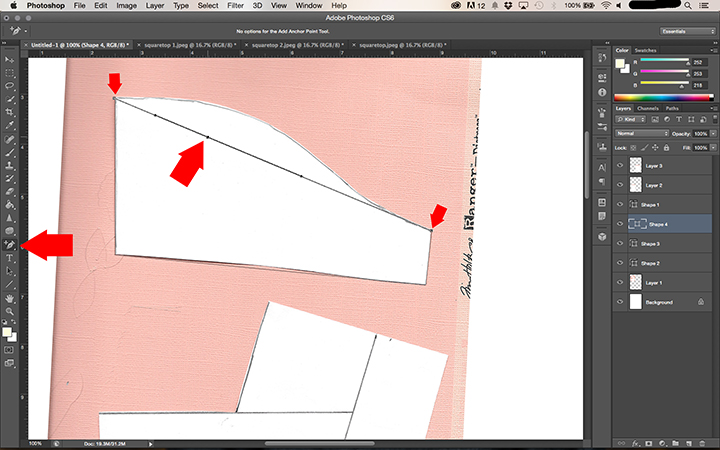
To draw a curved line:
Draw a straight line from one point to the opposite point where you want the curved line to go. So in this case at the top of the sleeve to the underarm.
Then select the Add Anchor Point Tool.
Click on the line to add an anchor point right about the middle of the curve.

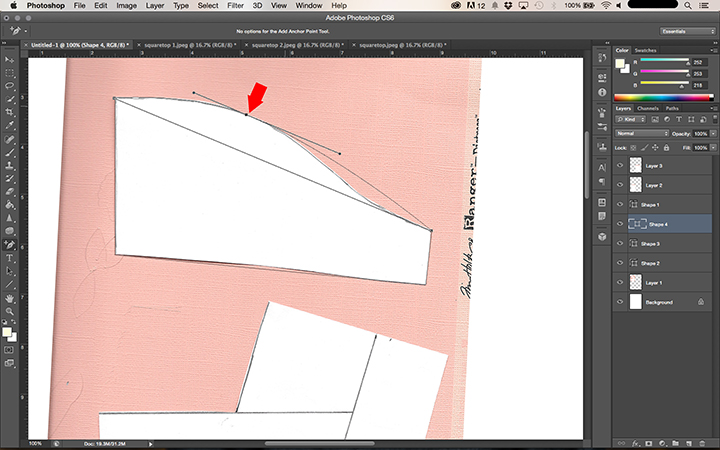
Then grab that point (click on it) and drag it to match up with your curve. You will notice the sleeve curve has 2 curves, so you will be matching up the first curve. The bottom edge of the line will stay straight. (we will deal with it later)

Add an anchor point in the other part of the curved line mid curve with the second curve. Then drag it into place (shown with the arrow) Then I add an anchor point to the bottom of the straight line that was left behind and I drag it out of the way.


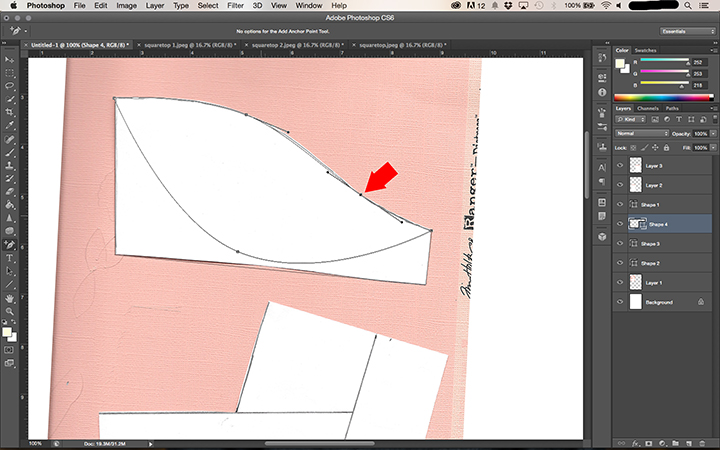
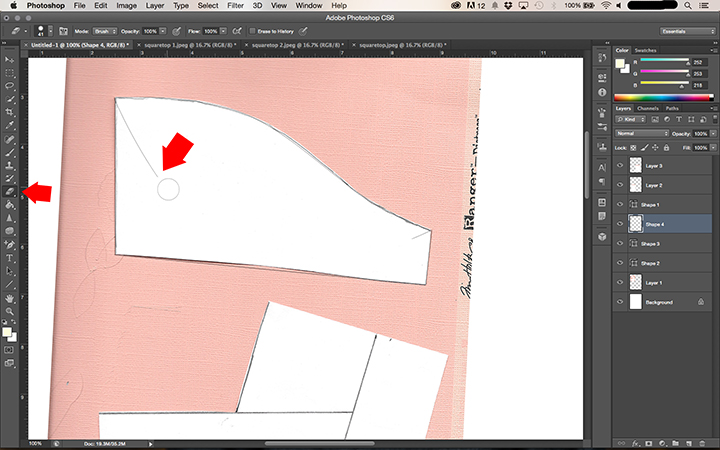
Then erase the bottom part of the line and what you have left is a nice, and even curved line. (you will see it better in a moment)

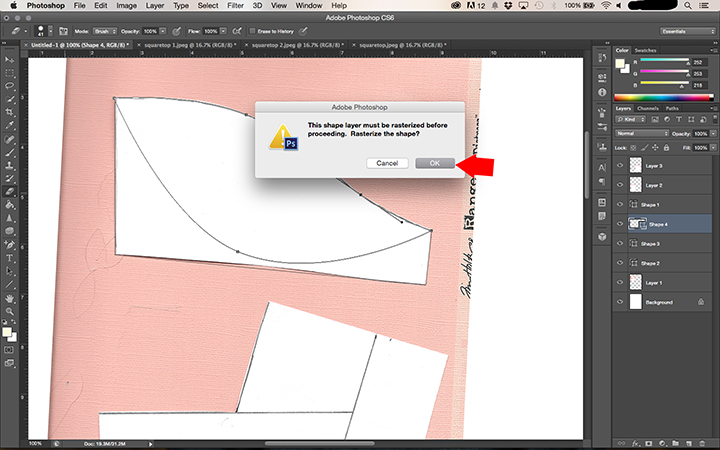
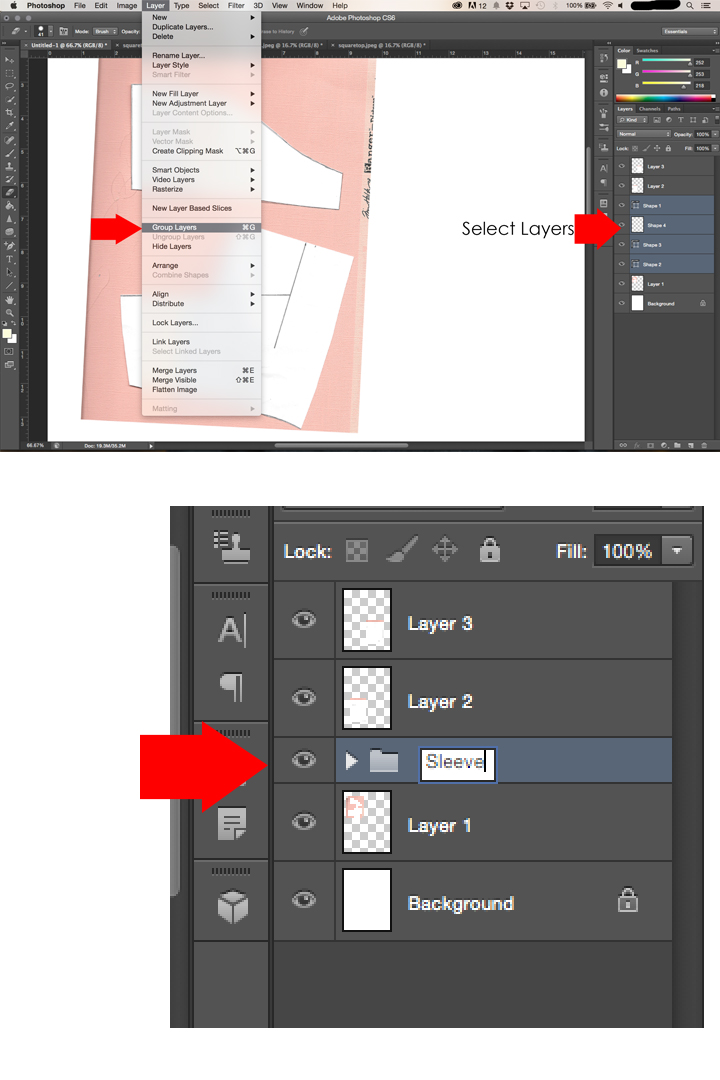
Now that the sleeve is done being drawn. I select all the layers (shapes) that made the sleeve and I go to
Layer —> Group Layers or (⌘G)
Then I rename that group (sleeve) or whatever it is.

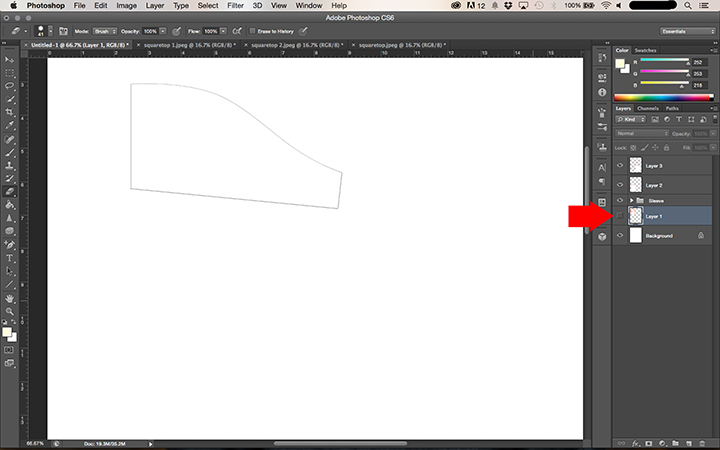
Then simply go to your layers over on the right and “hide” (click the eye) on the layer of the scanned pattern and you will be able to easily see the pattern piece you just drew left behind.
Now you will just continue “tracing” each piece into photoshop. Continue to make a folder for each piece so you can keep them separate.
Go to day 2
The post How to make a PDF Pattern in Photoshop appeared first on Shwin&Shwin.