More DIY Metallic Backsplash!
Sidenote: Sorry everyone, but no Nifty Thrifty this week! We are heading down to LA for a big art book fair, and don't have time to do the photos and such. We had a few good finds which we'll share next week though!
Last week I added an awesome metallic backsplash to cover the terribly ugly tile behind our sink (read all about it and see the picture here), and this week I decided to use a little more to liven up some nearby built-in shelves! This project took very little time at all, and serves the double duty of making our space more cohesive and making those random very narrow shelves much more interesting.

I don't think we've ever shared any photos of this angle, looking into the kitchen and hallway from the living room, probably because it just wasn't very exciting before. Now at least there's something going on, and the kitchen and living room feel much more cohesive with that little bit of matching tile on either side.

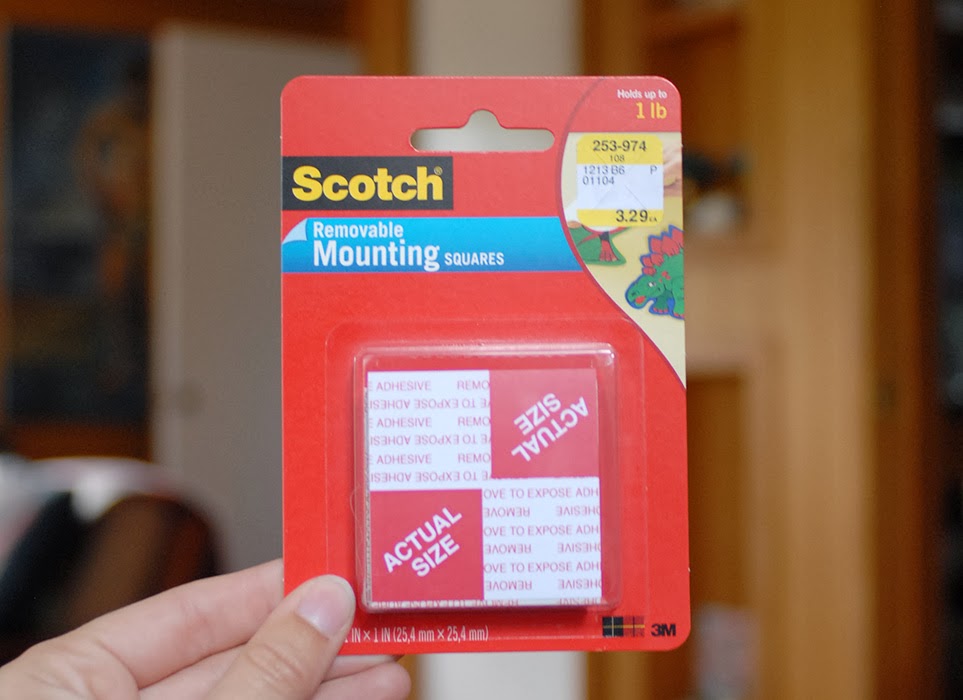
For the kitchen backsplash I used more serious adhesive tape, but this time I was working on wood instead of tile, and I wanted the panels to be easily removable, so I picked up some Scotch Removable Mounting Squares for $3.29. The shelf panels will basically never get touched, so they don't need to be as sturdy, so this tape worked perfectly.
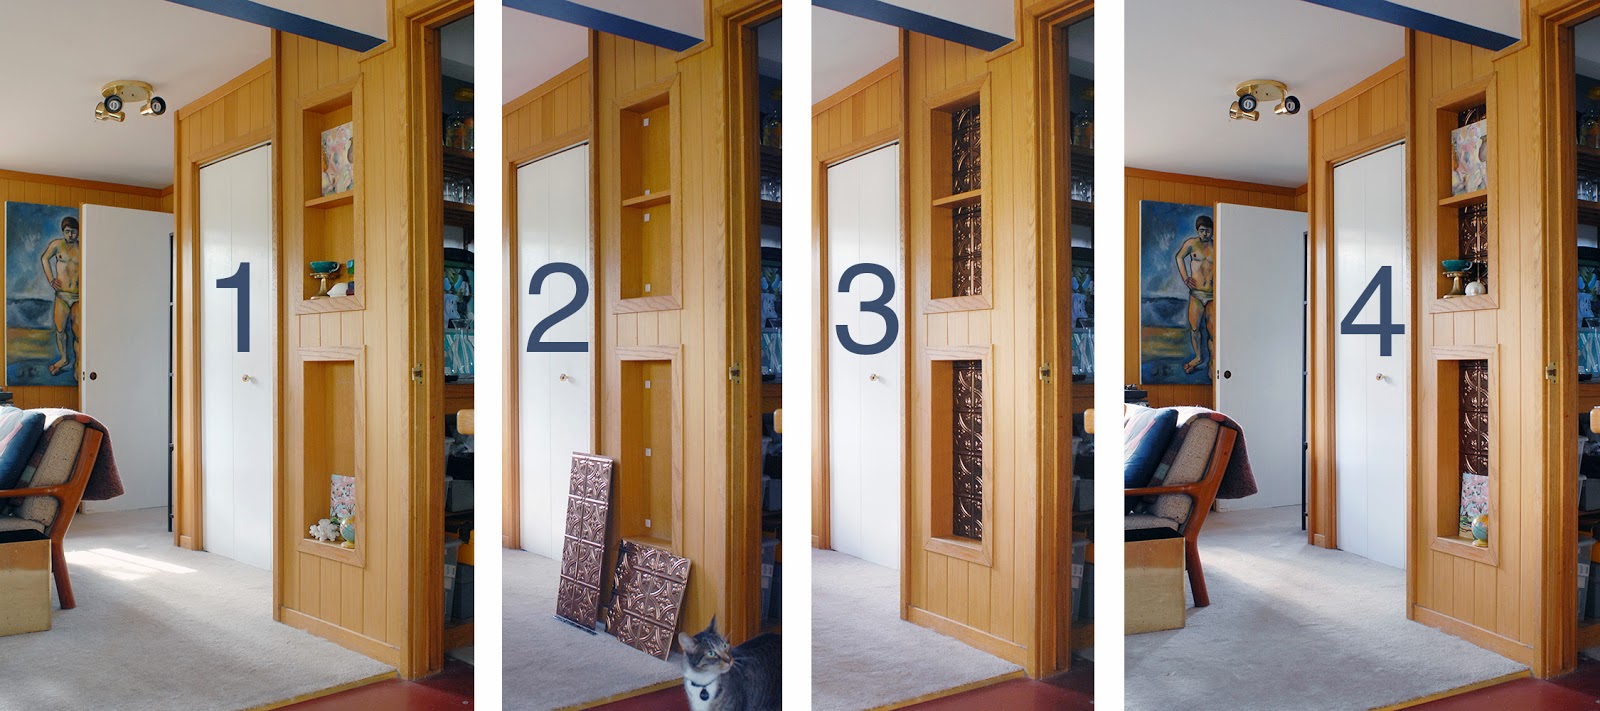
I used two more of our faux tin decorative thermoplastic panels in an oil-rubbed bronze finish (you can buy them new here, but we picked ours up at a thrift store for $10 for five, and now we just have one left), and the process was basically the same as in the kitchen, but here's a little progression of how it went down:

1. Before, these built-ins had flat wood backgrounds that matched the paneling, so they ended up just blending into the wall. They are also strangely thin, so it's hard to find things that fit on the shelves and look good at the same time; at some point we just threw some stuff up, but it looked rather haphazard.
2. I removed the stuff, cleaned the surfaces, and stuck rows of adhesive tape on the wall. I also cut the panels down to size using normal scissors, and Bella peeked in the corner to check out what was going on.
3. I simply stuck the panels in place! I made sure the lines of the "tiles" on the panels lined up so it looked like the whole background was tiled on the upper shelves, even though that middle shelf is not actually removable.
4. And finally, I put a few of the decor items and art back! We might switch out some of those things, as they are a bit random (a vintage paint-by-number and tiny globe on the bottom, teacup candle on brass stand and ceramic hedgehog on the middle shelf, and one of my paintings on the top), but I do think they look more purposeful and curated then they did before, just by having a nice dark background behind them.

It was a bit hard to get good photos of that space, but here you can see how the kitchen backsplash and the built-ins now relate to each other, and those shelves are just much more interesting in general! I'm loving how each little project makes our apartment feel so much nicer and more "us."
What do you think of our second backsplash project? Have you been doing any little improvements around your home? If you rent, do you think it's worth it to make some small upgrades?
More posts from