
Watch This Lace - Jane's cunning Alma
Kick-starting the last month of Watch This Lace for us, I've got the lovely Handmade Jane! This lady hardly needs an introduction and I think we can all agree that one of the most distinctive things about Jane, is her very strong sense of style. For me, Jane proves that less really is more - she knows what she likes and sticks to what suits her. As a result she has an enviable handmade wardrobe, filled with chic individual pieces that also work beautifully together. You can see why I wanted Jane to take part in this...
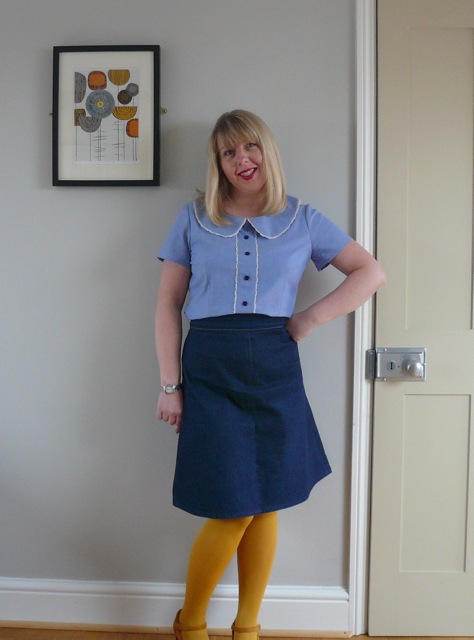
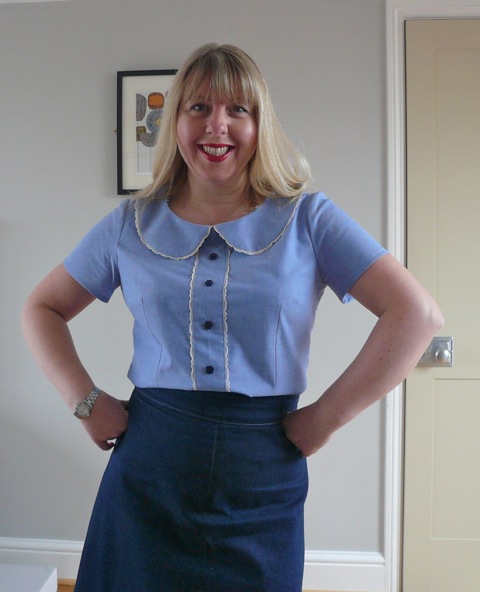
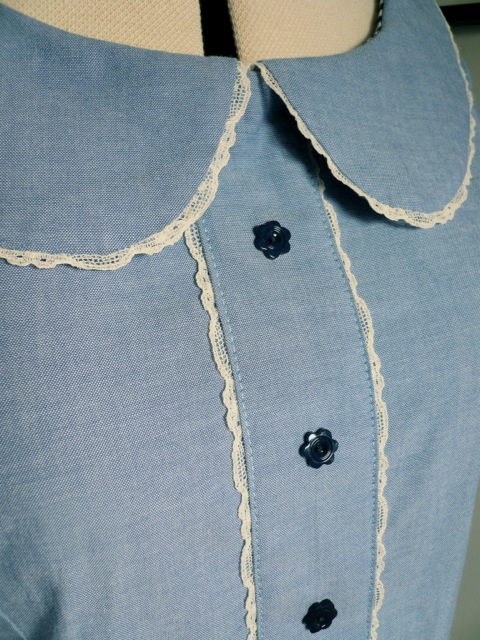
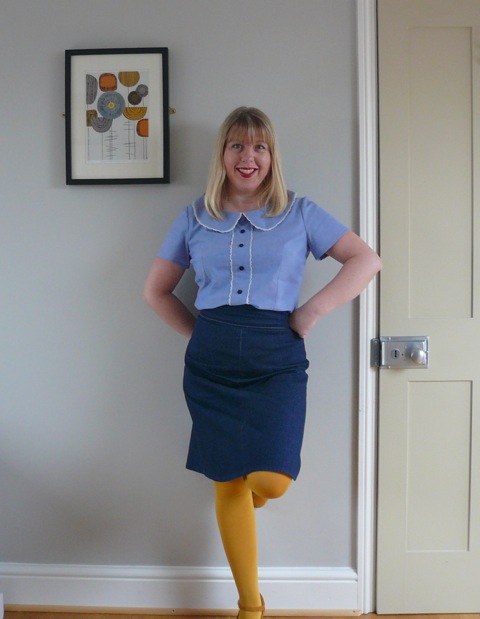
When Marie asked me to take part in Watch this Lace I was thrilled and flattered, but also a tiny bit worried! Apart from trimming a hem, I've never used lace in my sewing before, so I needed to think long and hard about how to use it. I wanted the finished garment to fit in with the rest of my wardrobe and be something I'd wear, but as I'm not a particular lover of frills and flounces, I knew my version was always going to be on the reserved side. I finally decided to use the lace as a border/edging on a collar and front edges, using the Sewaholic Alma blouse pattern.

My other consideration was that I wanted to use fabric from my stash for this make. After pulling out all my dressmaking fabrics and holding the beautiful, cream lace against them, nothing seemed to get me going. Purely by accident, a chambray coloured shirting happened to be on the bed at the same time, and when I held the lace against it they were a perfect match. Hoorah!

I only just managed to cut the blouse out from the metre of fabric I had to work with though. If I'd had more fabric, I'd have made a button up version (anything to avoid a side zip) but given my scant allowance, I had to be creative. So I added a fake placket, which still gives the appearance of a button up blouse but is much simpler to sew. I carefully pinned my lace up each side of the placket, having first decided what level of lace was allowed to peep out. I then just top stitched down each lace trimmed placket edge. Easy peasy! Attaching the lace to the collar edge was a little more involved, but still pretty straight forward. As a final touch, I sewed small, flower-shaped vintage buttons down the front.

With my last Alma blouse, I cut a size 10 in the bust, 8 at the waist and 4 at the hips. This time round, I cut a straight size 10. I had to take in the shoulder seams quite a bit and the hips a smidgen, but joy of joys, it goes over my head WITHOUT A SIDE ZIP!!! And because of the contour darts it's still nice and fitted. I now have a top that will blend seamlessly into my current wardrobe for a total cost of £3.50, which was the cost of the fabric. The lace was very generously donated by Marie, and the vintage buttons were from my stash.

I've really enjoyed seeing the very different spin each sewing blogger gives to their own individual project. Taking part in this challenge really did make me think more creatively than usual. I had a picture in my head of what I wanted, but I had to fiddle around with a few techniques and ideas before I achieved it. I do tend to get a bit lazy with my sewing sometimes, so this was a perfect project to jump start the New Year. Thank you so much for inviting me to take part Marie, it's been an absolute pleasure. X
I'm so impressed at how Jane cleverly managed to incorporate the lace, without compromising her very clear sense of style! And don't get me started on the styling...the mustard tights are such a cool touch. Many thanks for playing along Jane!
Next week, we're finally venturing across the pond to see what the super cute Sonja from Ginger Makes has in store for us!