
Dreamweave photo DIY with timeshel

This post is part of a social shopper marketing insight campaign with Pollinate Media Group® and timeshel, but all my opinions are my own. #pmedia #timeshelprints http://my-disclosur.es/OBsstV
Mark and I are terrible about printing our photos… which is especially a shame, since we’re constantly snapping. Our computers and phones are full of wonderful memories, but as much as we love to have prints, we never can remember to put in the order.
That’s why we’re loving timeshel, a new subscription service that allows you to sign up to have your latest photos printed once a month.
timeshel offers two levels of subscription. You can sign up for 10 prints a month that come in a nifty envelope for just $5.95, or 30 prints a month — which come in their super durable and handy shel — for $14.95.
It’s fun to decide which pictures to print, and easy, since it’s all contained in one simple app.
Hopefully the monthly reminder will mean we print and keep a whole lot more of our memories from here on out — and this simple diy will make it easy to display our favorites close to our workspace, just so we never forget.
timeshel is only available for iOs, but it’s easy to download in the Apple Store. Be sure to check it out if you’re anything like us, it’s such a shame to let those memories just sit on your phone.

Supplies:
Simple metal ring (purchased at a craft store — for dreamcatchers)
Matte white spray paint
Black waxed leather thread
Small clothes pins
Scissors
Feather (optional)
1 // Paint your metal ring and let dry. I chose white, but you could use any color you like.

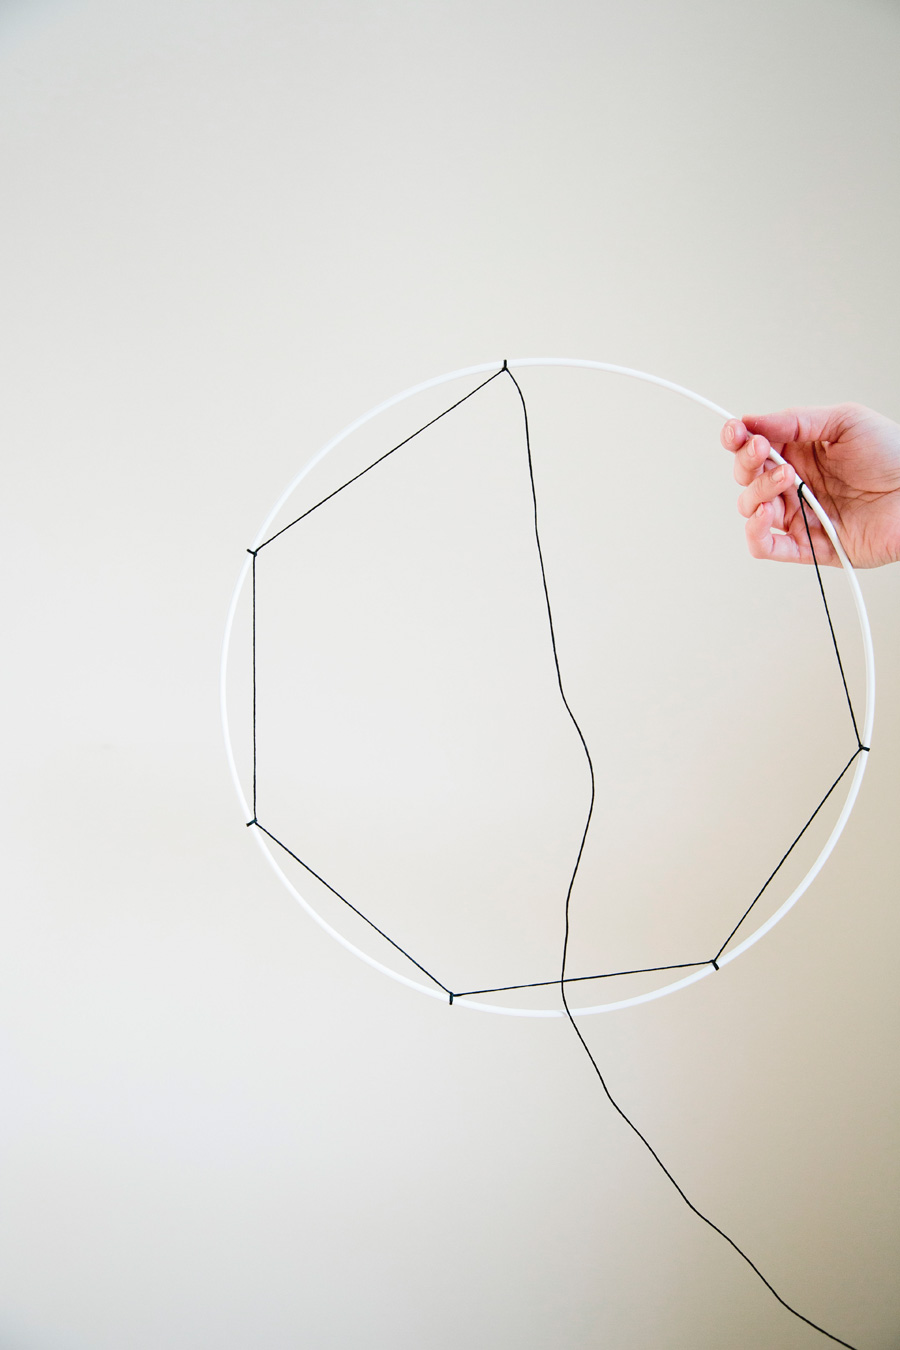
2 // Using your waxed thread, tie 7 points along your metal ring. I just used a simple knot, like tying a shoe. Tie fairly tight.

3 // Continue around your circle, just looping your thread now. No knots necessary until you make it to the end. (You might find you need one as you transition from one circle to the next, use your best judgement.)

4 // I went around 3 times total. Go as many as you’d like. And remember, you’ll be pinning pictures to it, so it doesn’t have to be absolutely perfect. (Perfectionists like me, don’t stress.)

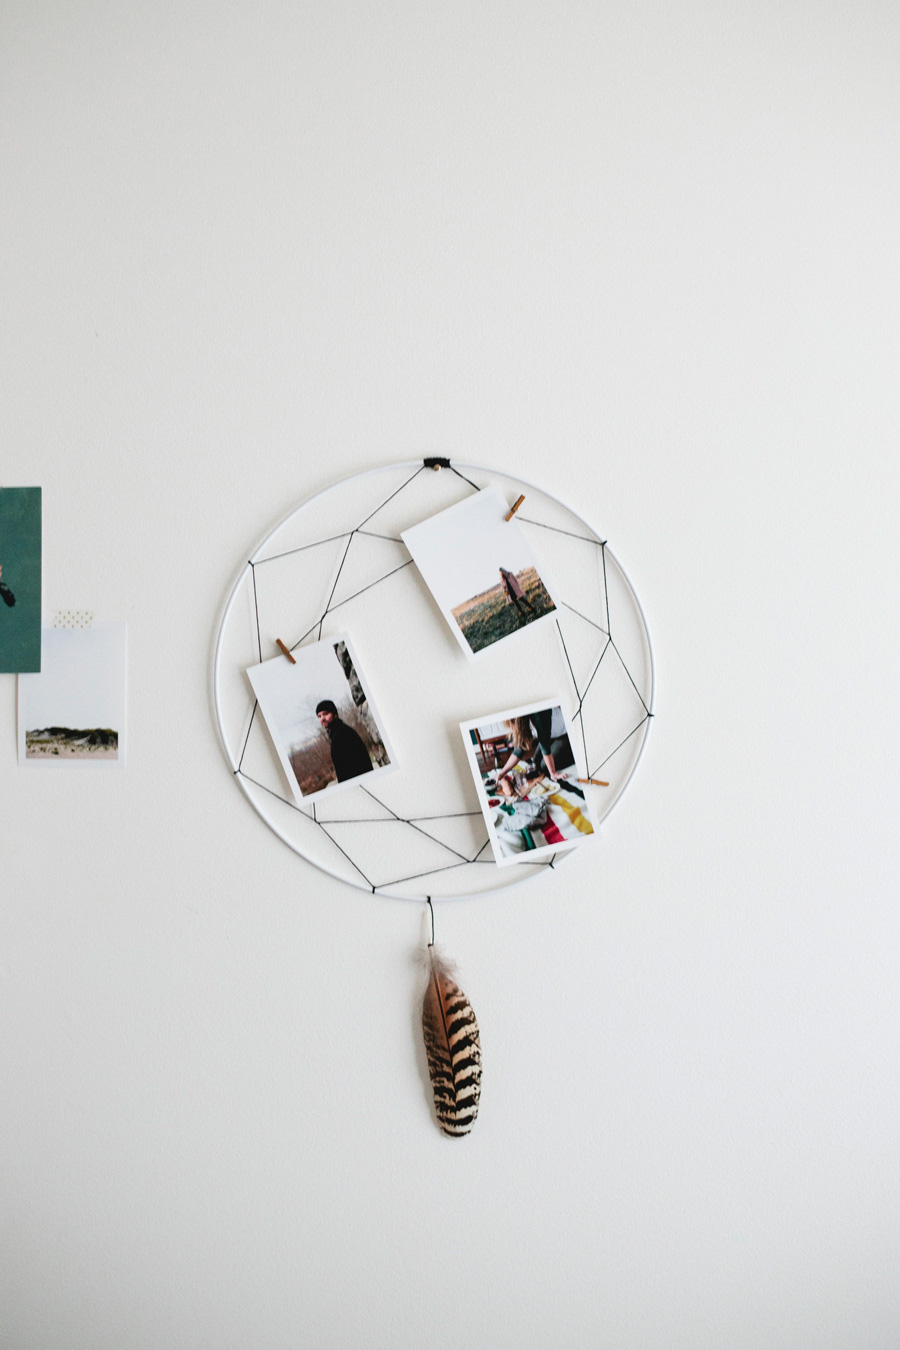
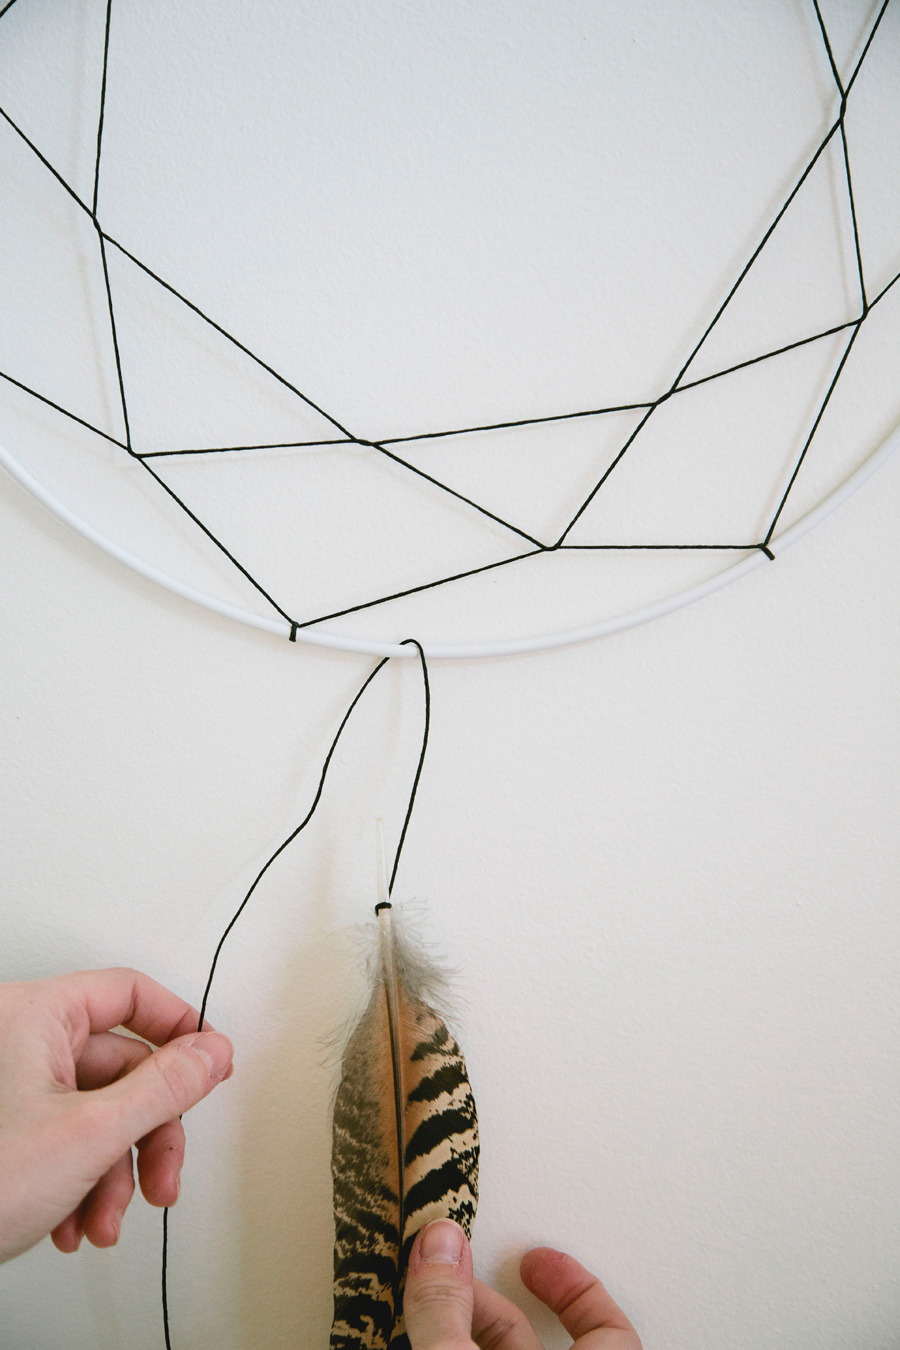
5 // Tie off with a double knot and hang a feather on the bottom if you’d like. But if that’s a little too far down the dreamcatcher road for you, feel free to skip it.

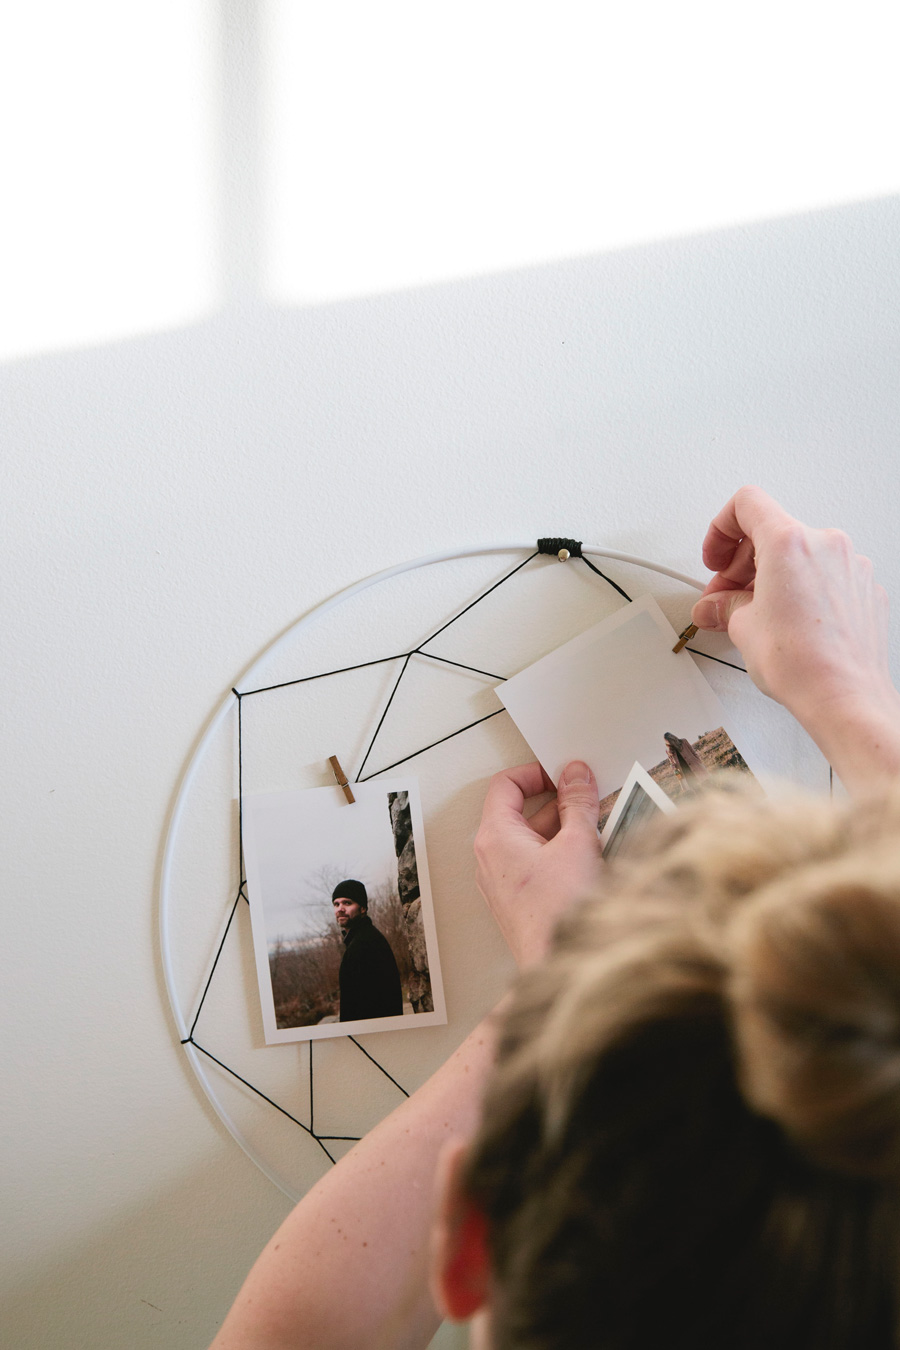
6 // Hang and use clothes pins to pin your pictures to the threads. Change out as frequently as you’d like!

The post Dreamweave photo DIY with timeshel appeared first on A Thousand Threads.