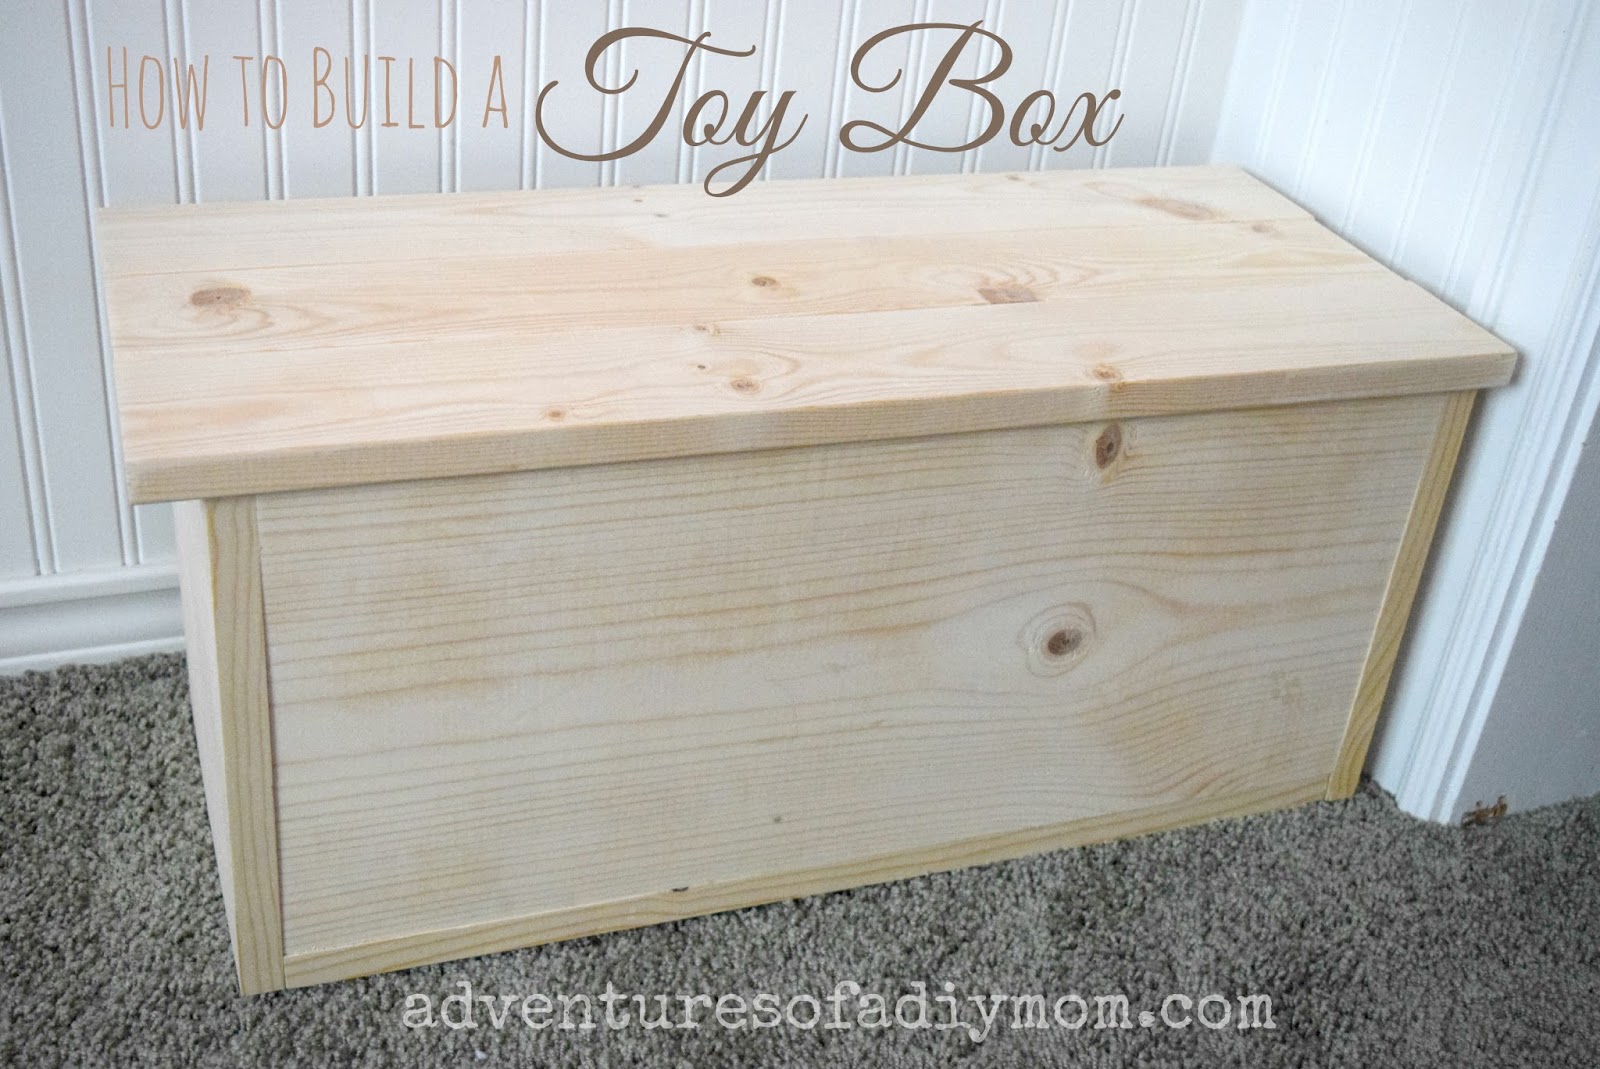
How to Build a Toy Box
Today's project is a toy box. Last summer, my then 6 year old really wanted a toy box. One day we went out and made one. It's a pretty quick project. You can make it in an afternoon.

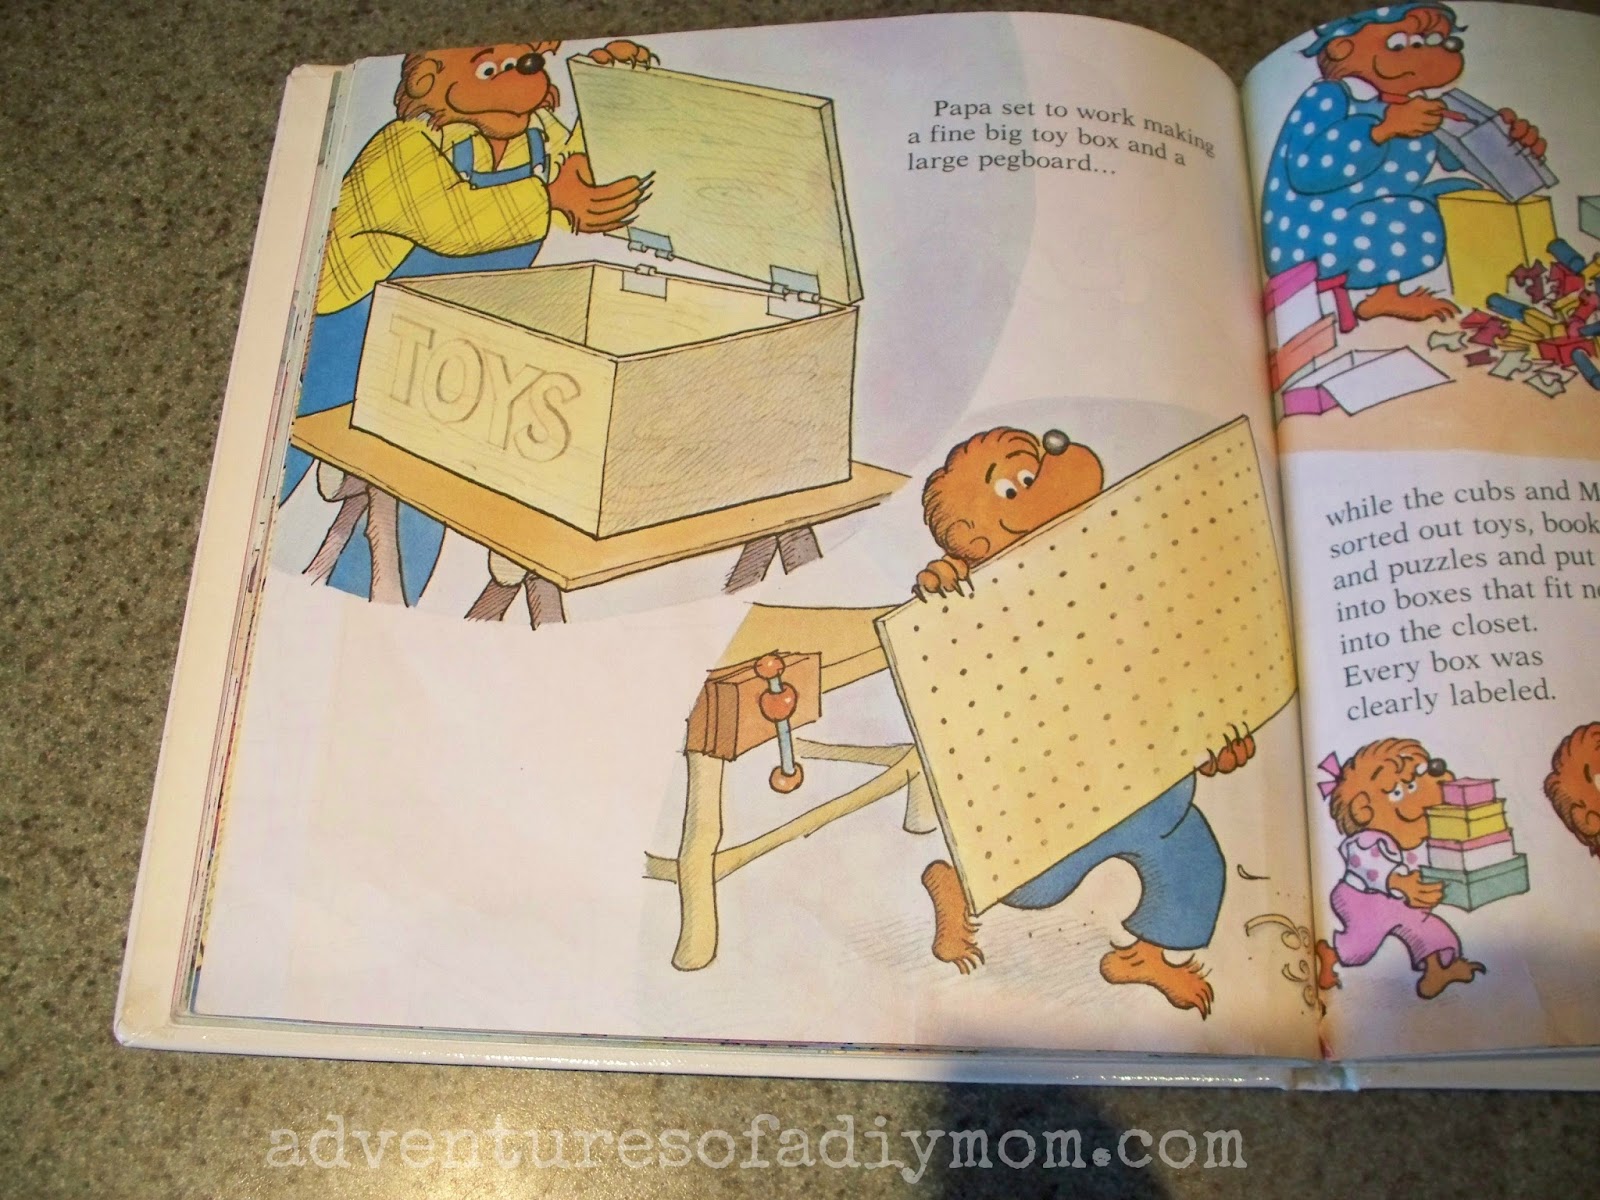
It all started with this Berenstain Bears book. We got it from the library. My daughter was intrigued by the toy box that Papa built to help the cubs keep their room clean. She just had to have her own. I happened to have some 1X10's in the garage from another project. So a few weeks later I built my two little girls their own little toy boxes.

Want to Build your own Toy Box?
You will need:
1 - 8 ft 1X10
1 - 8 ft 1X4
1 - 8 ft 1X2
power saw
brad nail gun - I used 18 gauge brad nails that were 1 1/4" long
wood glue
2 - 2" hinges
wood putty for filling holes
I like to cut the pieces as I go, measuring the box for an exact measurement to get the best fit. This is especially important for the last piece on the cut list.
Cut List:
2 - 22" pieces of 1 X 10
2 - 10" pieces of 1 X 10
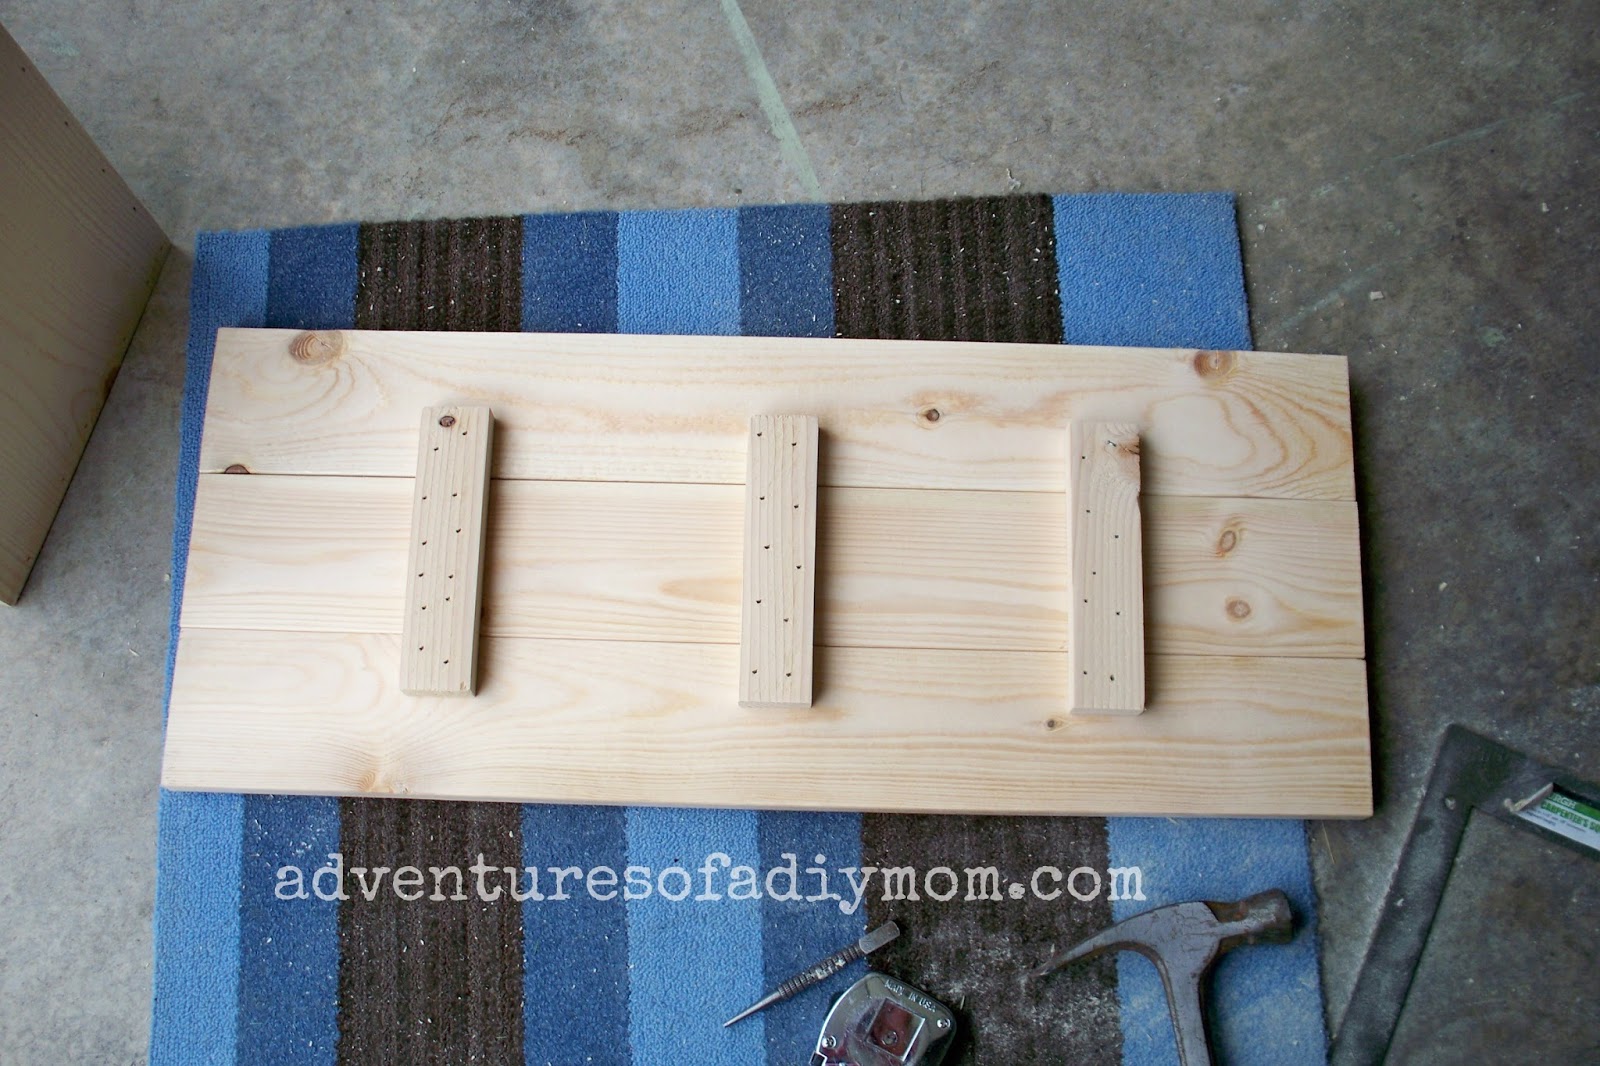
3 - 25" pieces of 1 X 4
3 - 6" pieces of 1 X 2
1 - 22" piece of 1 X 10 - *wait to cut this piece until you have assembled most of the box and measured the spot where this piece goes*
Be sure to sand the pieces well before assembling. It is much harder to sand in the corners of the finished box than a flat piece of wood.

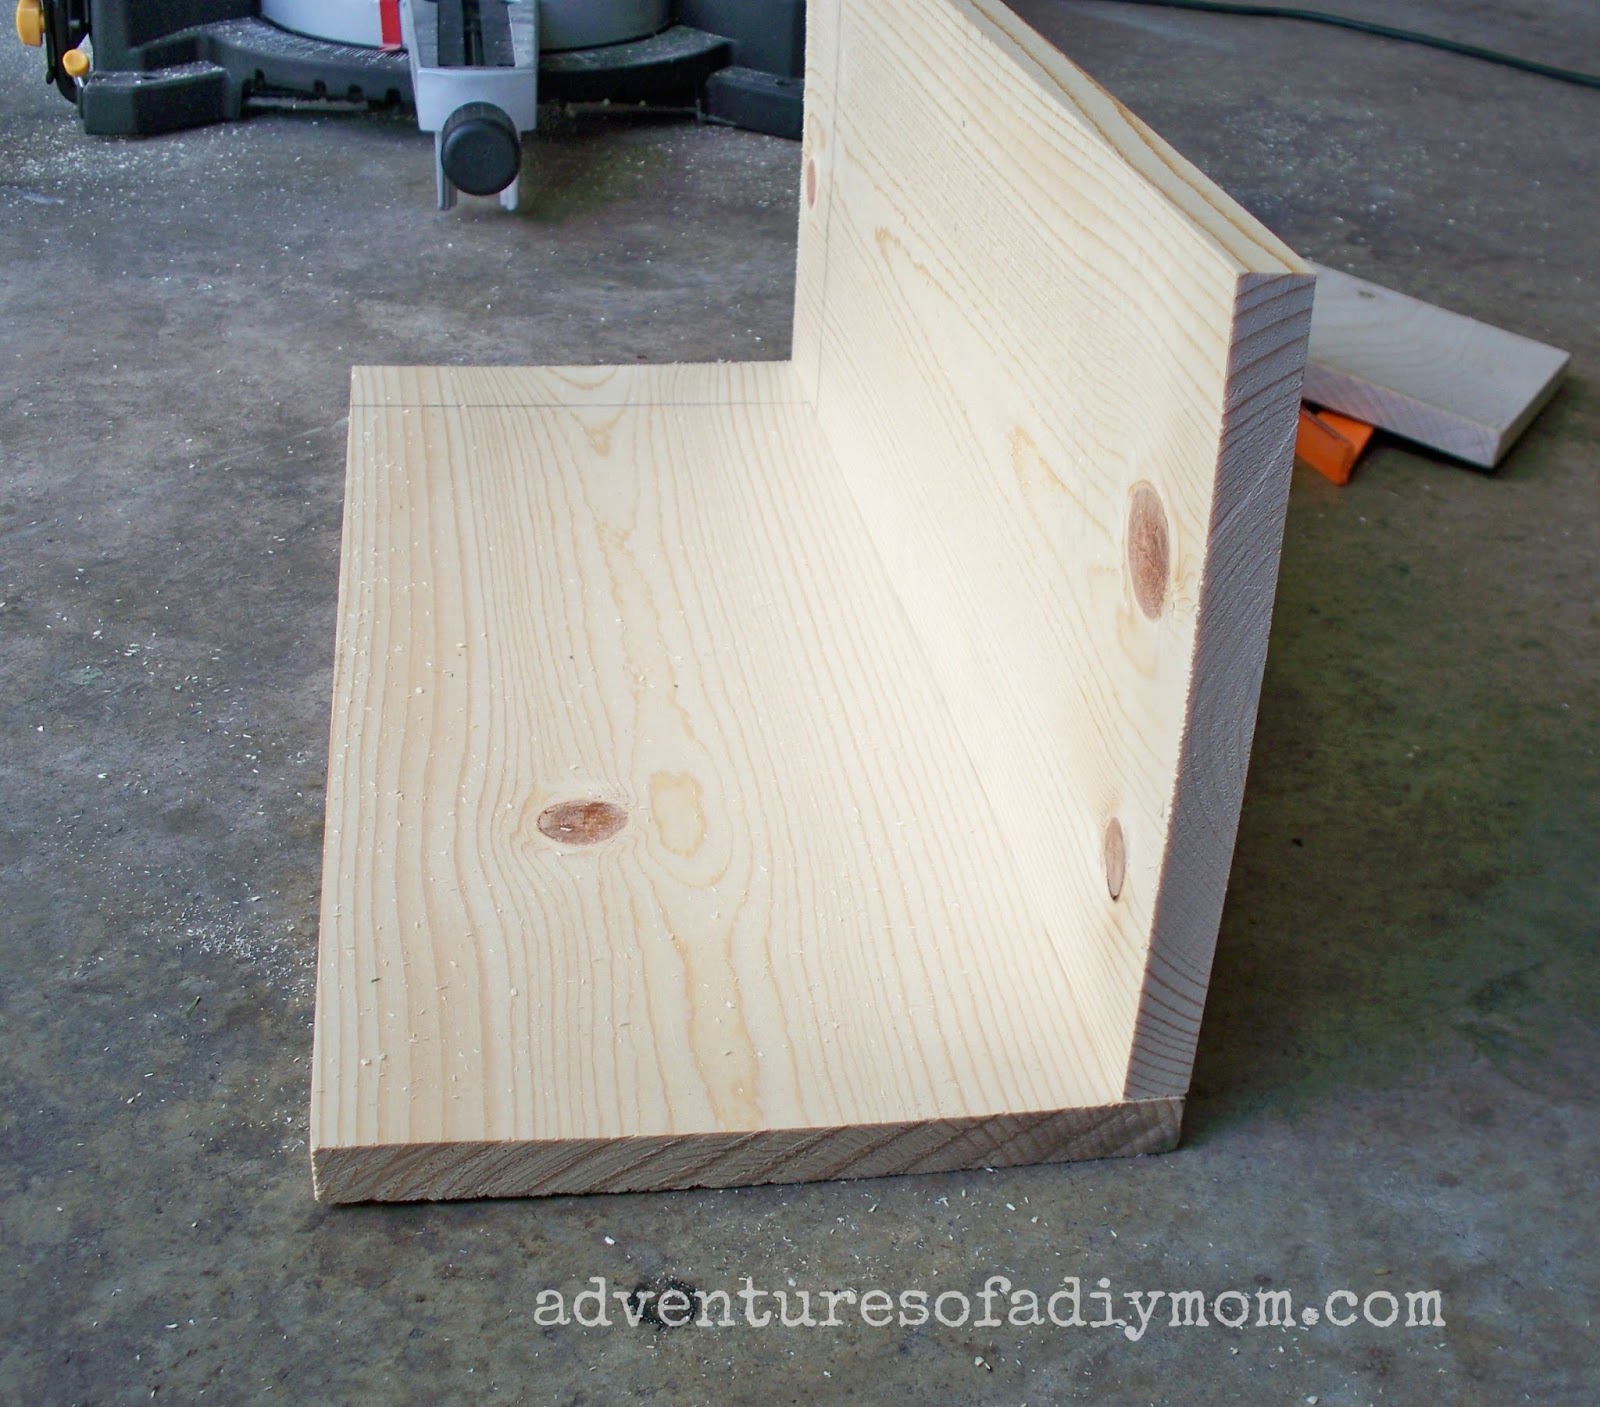
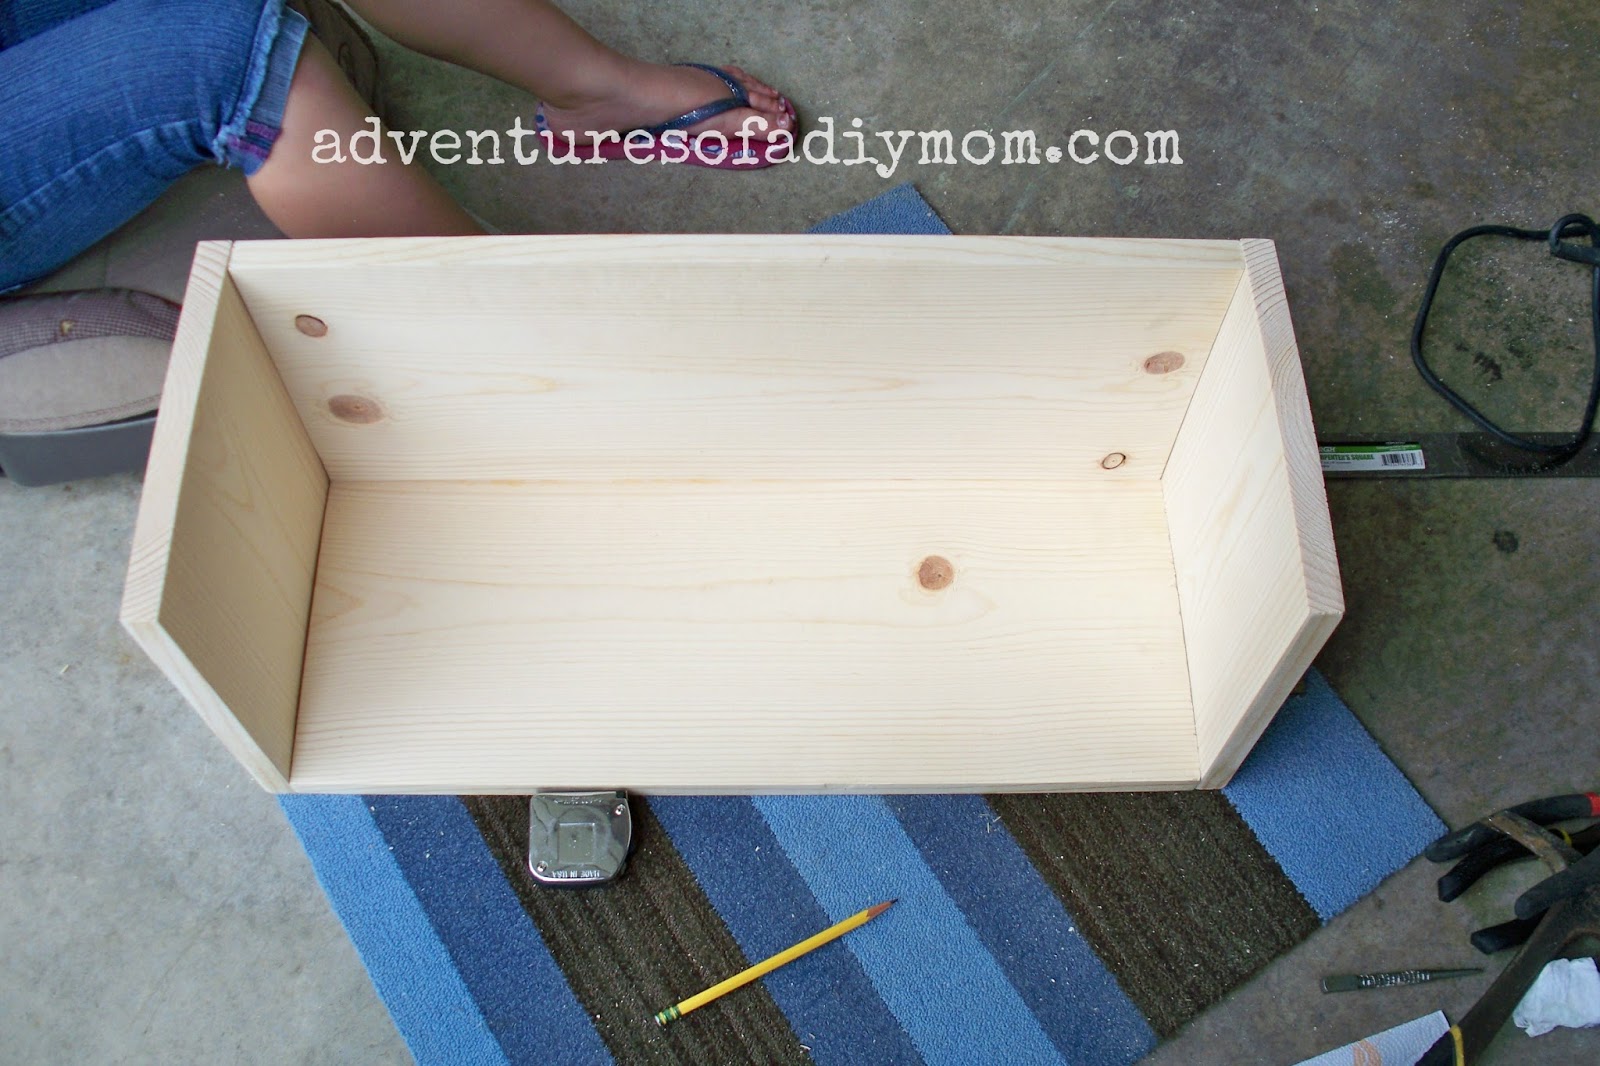
Begin with your two 22" pieces of 1X10. Place one on top of the other at the edge. Apply wood glue liberally and then nail the piece in place from the bottom. This is best achieved with two people in order to keep it square.
A note about wood glue: Use a liberal amount. The glue is what is holding the boards together. The nails are just to hold it in place until the glue has dried. Make sure to use a damp paper towel and wipe up any glue that squeezes out while it is still wet. Glue is super hard to sand off after it's dried.
A note about wood glue: Use a liberal amount. The glue is what is holding the boards together. The nails are just to hold it in place until the glue has dried. Make sure to use a damp paper towel and wipe up any glue that squeezes out while it is still wet. Glue is super hard to sand off after it's dried.


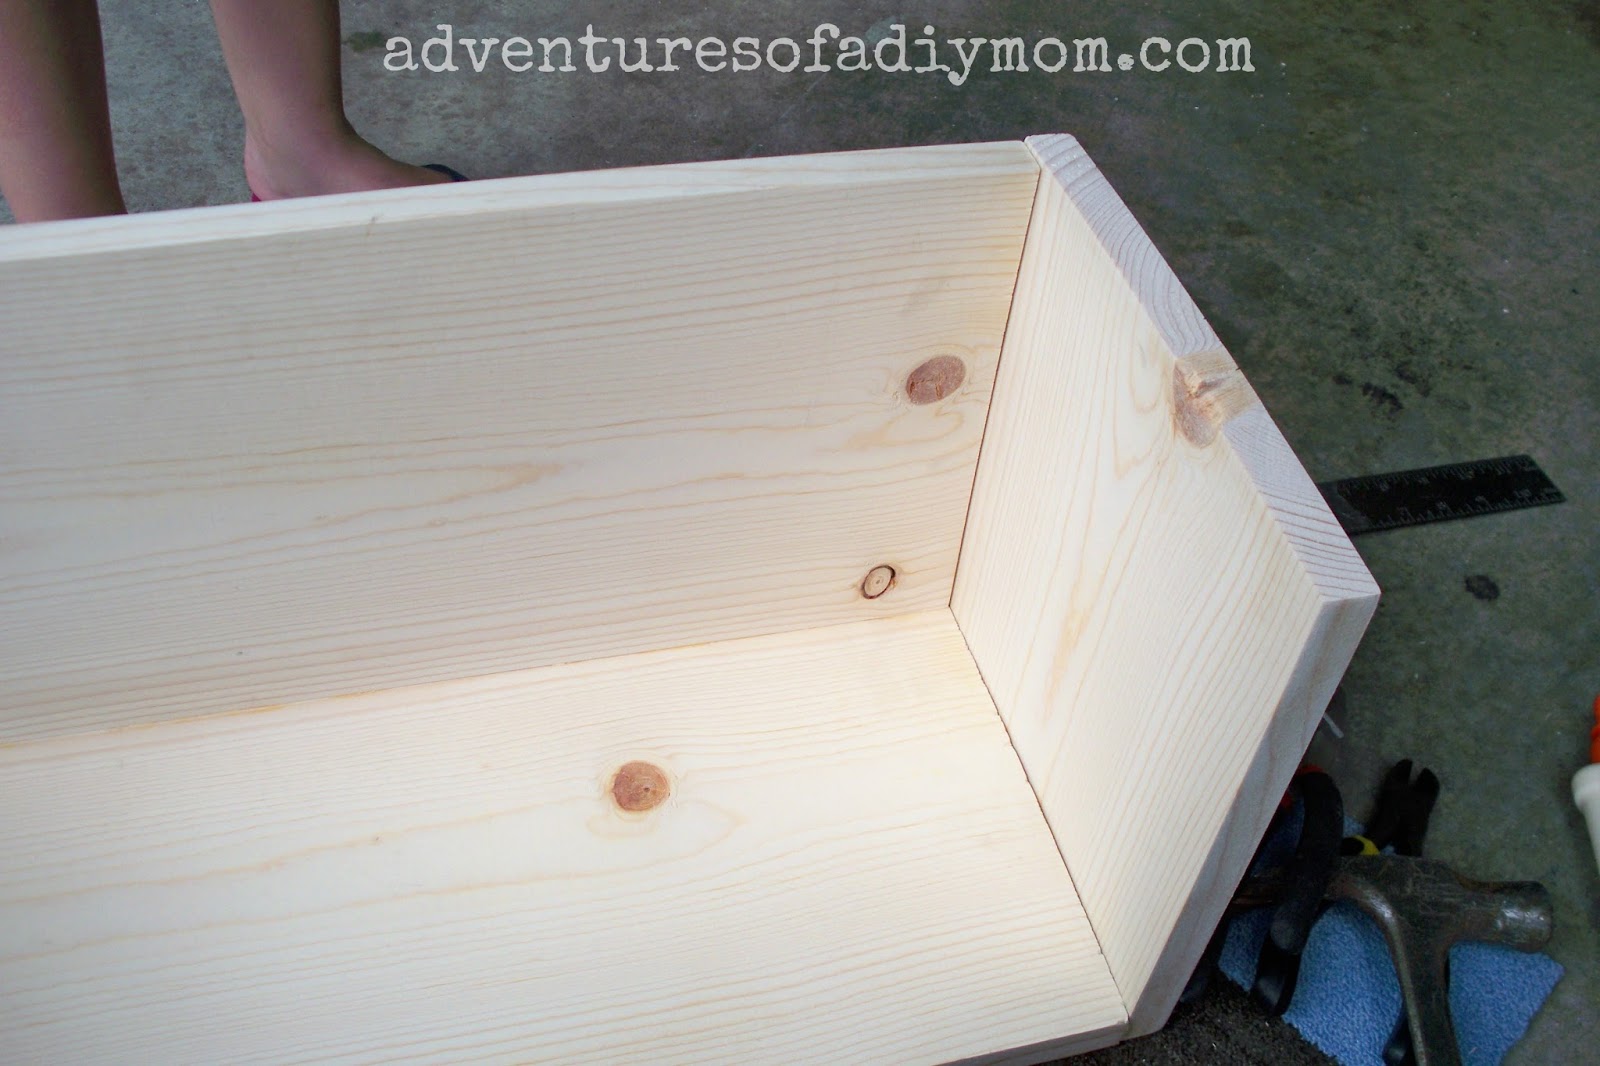
Repeat on the opposite end.
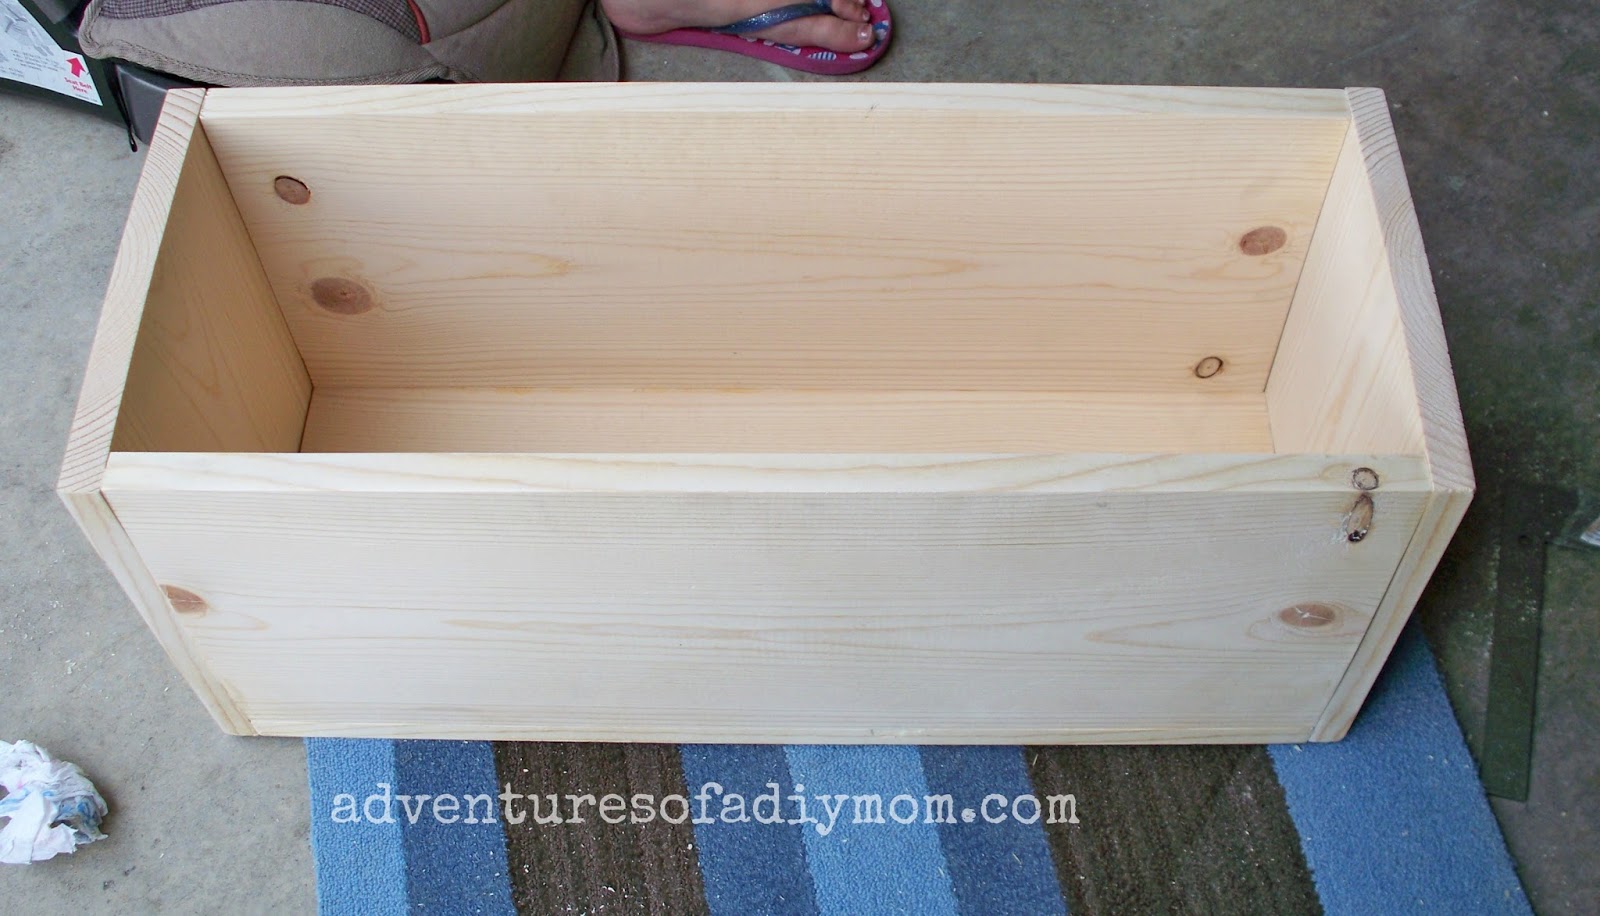
Then measure the front of the box at the bottom and at the top. Use those measurements to cut the front of the box. It should be close to 22", but depending on how square the box is the measurement may be slightly different.
Then measure the front of the box at the bottom and at the top. Use those measurements to cut the front of the box. It should be close to 22", but depending on how square the box is the measurement may be slightly different.


Place the 6" pieces of 1X2 on the 1X4's and nail them in place, using wood glue. This will be the inside of the lid.

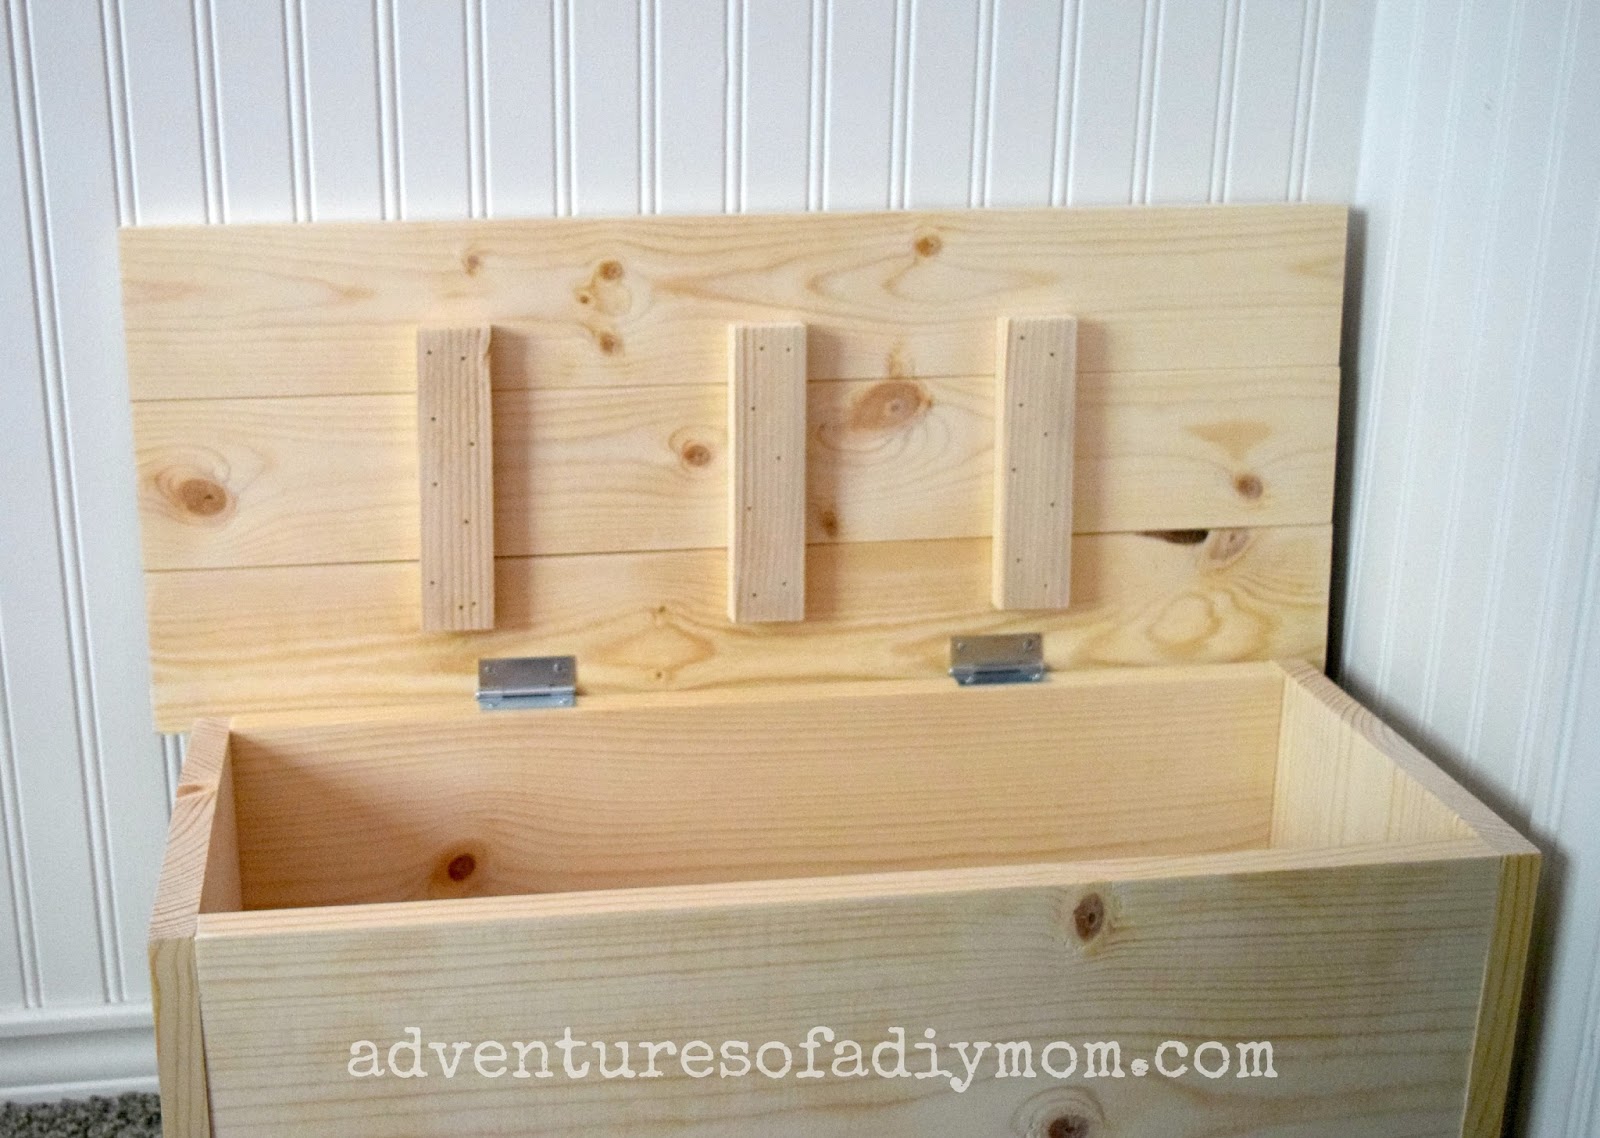
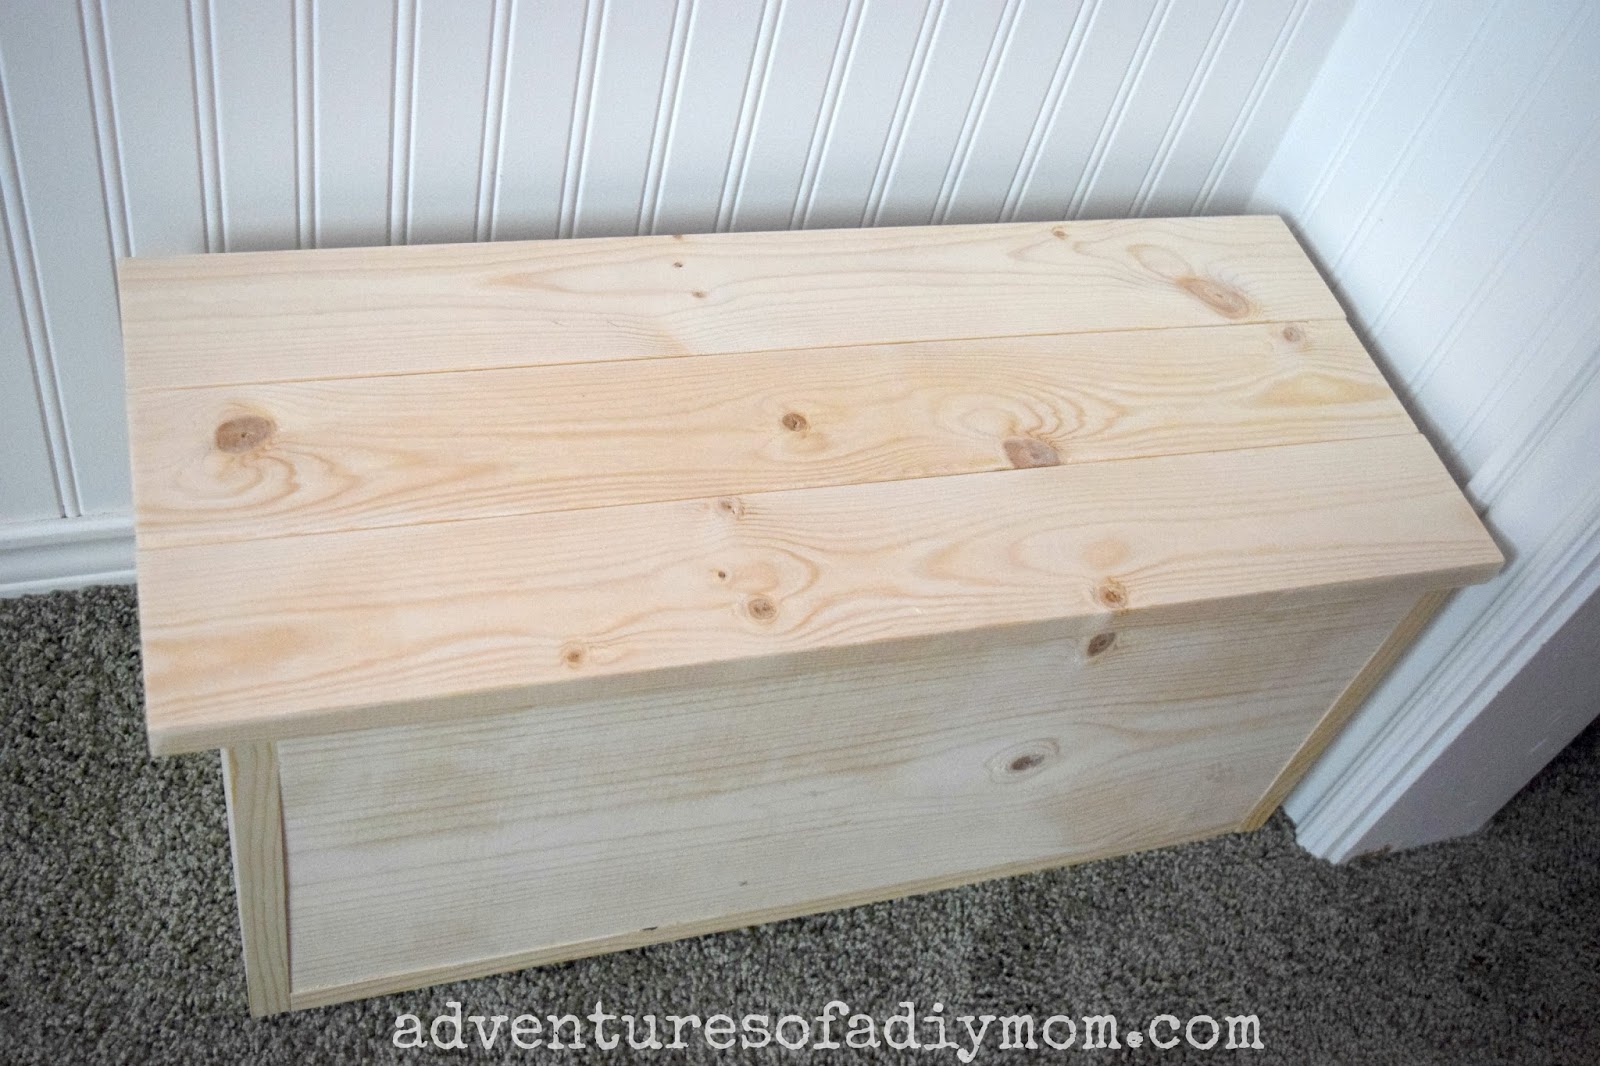
Attach the lid to the box with the hinges.
Then fill the nail holes with wood putty, if desired. I filled the holes on the box we painted, but not on this one. If you wish to paint your toy box, I would recommend painting it before adding the hinges. I painted one box and we left the other natural wood. A coat of lacquer would protect the wood, but I haven't done that yet.
Then fill the nail holes with wood putty, if desired. I filled the holes on the box we painted, but not on this one. If you wish to paint your toy box, I would recommend painting it before adding the hinges. I painted one box and we left the other natural wood. A coat of lacquer would protect the wood, but I haven't done that yet.

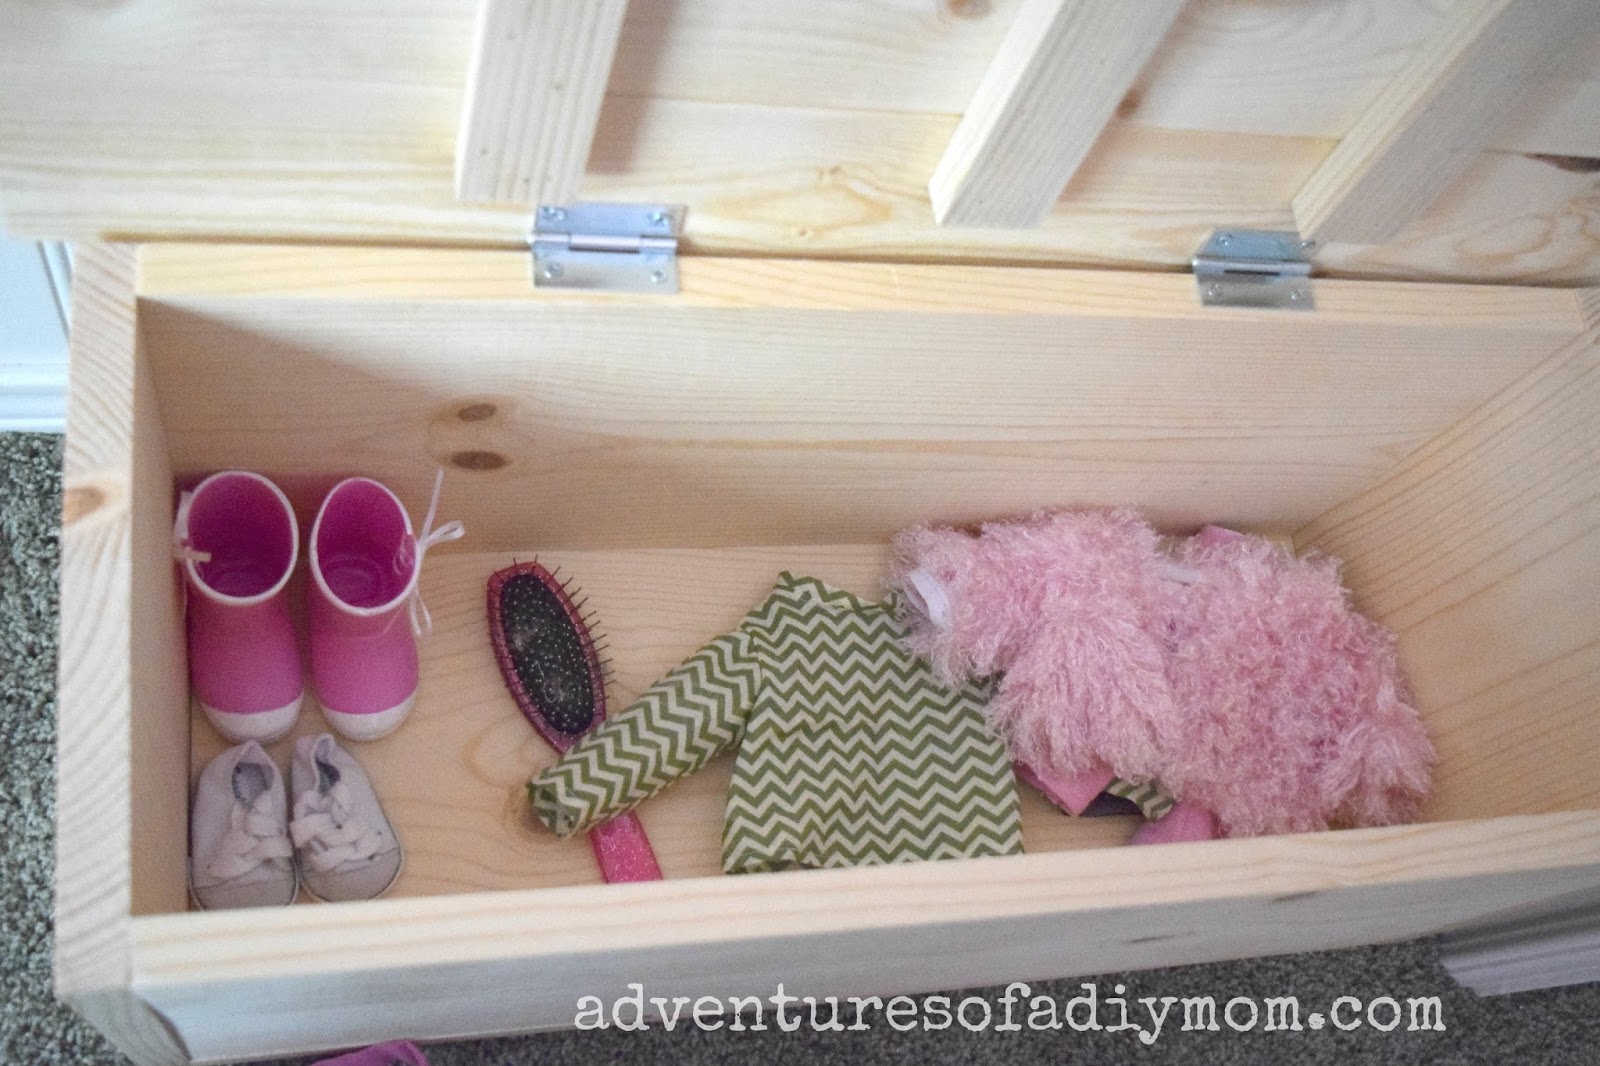
We've decided to put doll clothes in this one. I recently went through the baby clothes and gave them some newborn dresses to add to their collection of doll clothes. So now the toy box is nearly full.


.JPG)

.JPG)


More posts from