
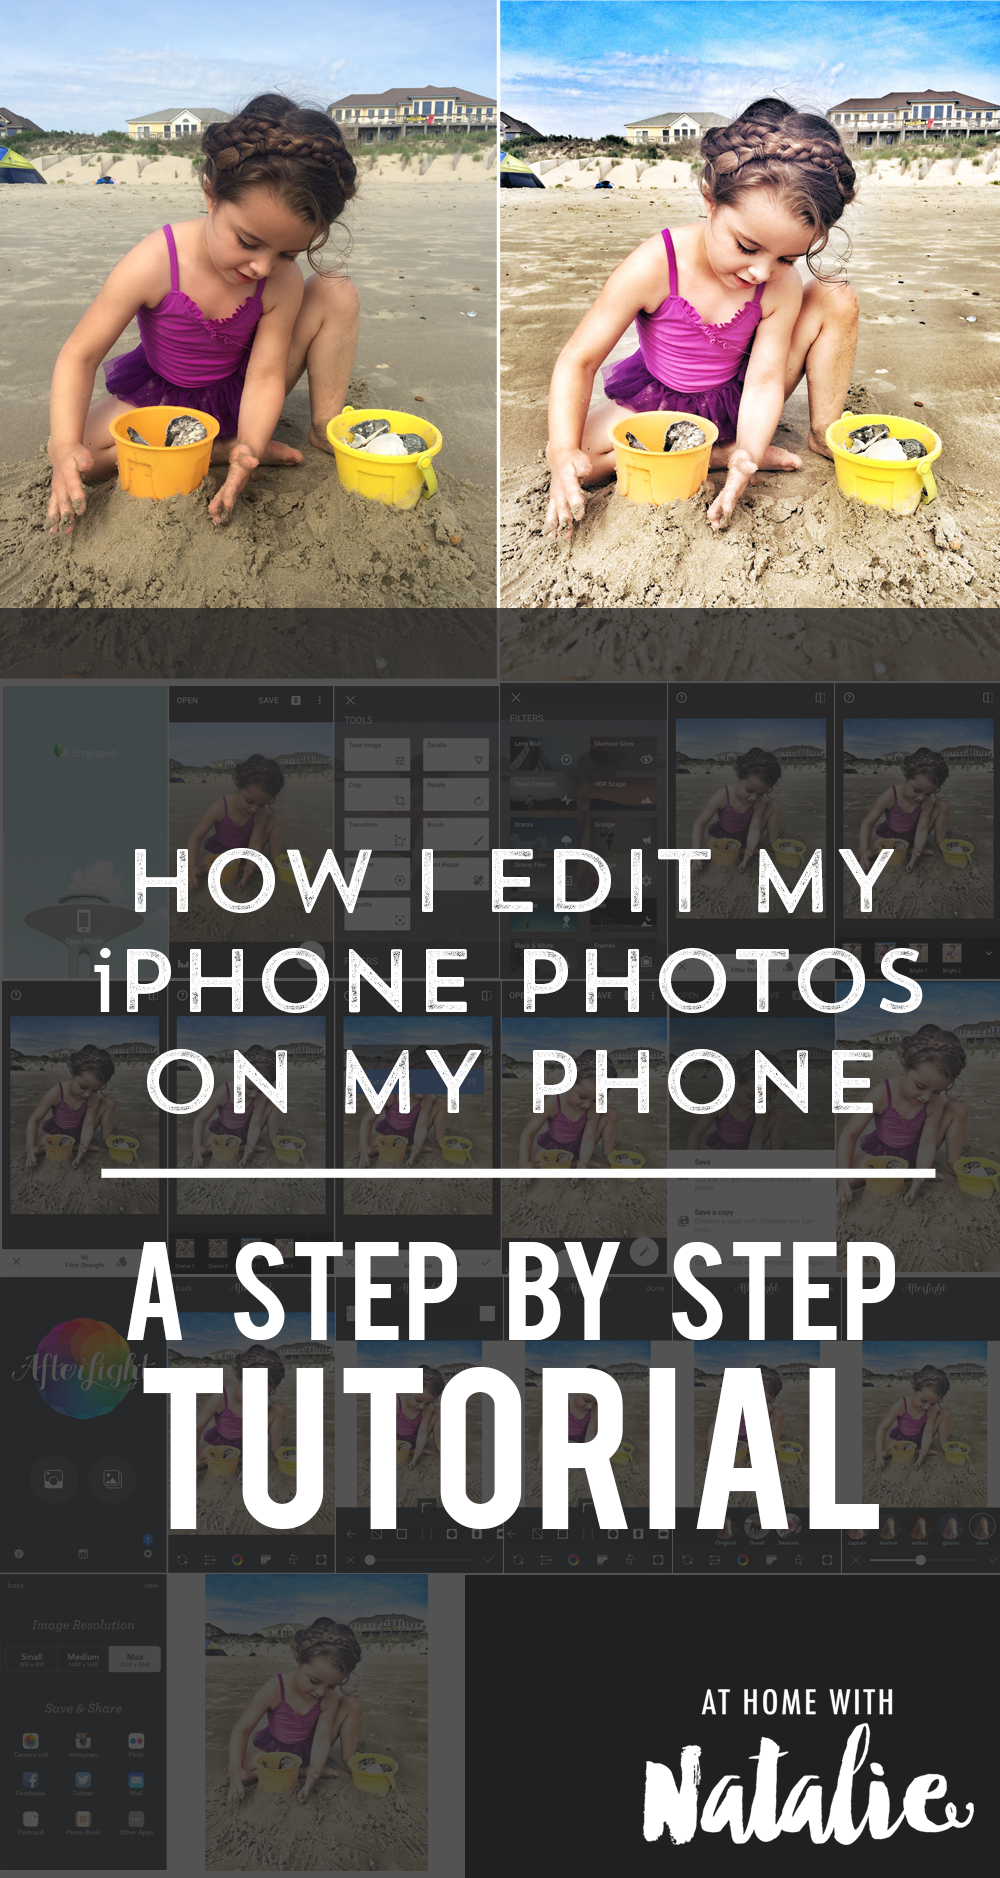
How I edit my iPhone Photos on my phone- A Step by Step TUTORIAL
I love taking photos with my iphone! But sometimes the photos need to be brightened up a bit.
I’ve been editing my phone photos with two apps for years and “how do you edit your photos?!” is probably
one of the most asked questions on my Instagram. besides, “what paint color is that???
Took some work but I pulled together this step by step tutorial to show you exactly how I edit my photos.
There are other things I do to some photos for fun, but these are the basic steps I do on almost all of them.
If you check out my Instagram, you’ll see that most of my photos have a bright pop to them.
You can get that too! And you’ll be able to enjoy your photos that much quicker because
editing on your phone is super easy and quick. We just got home from vacation and
I just edited all the photos and am ordering a photo book today!
(I use PRINTASTIC for my photo books! You can use code NATALIE20 and get 20% OFF yours!!)

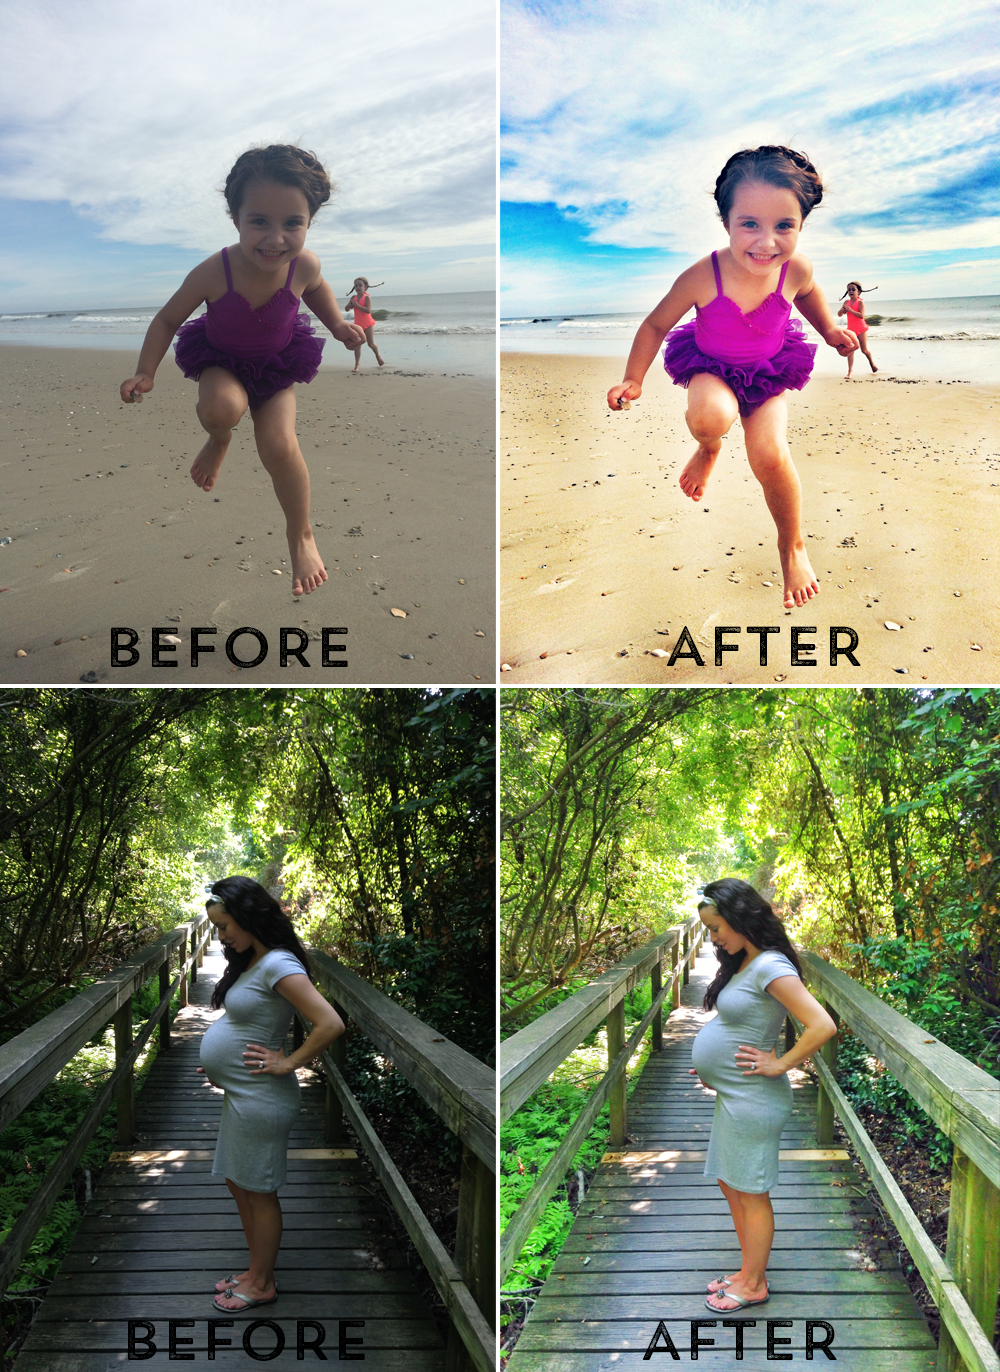
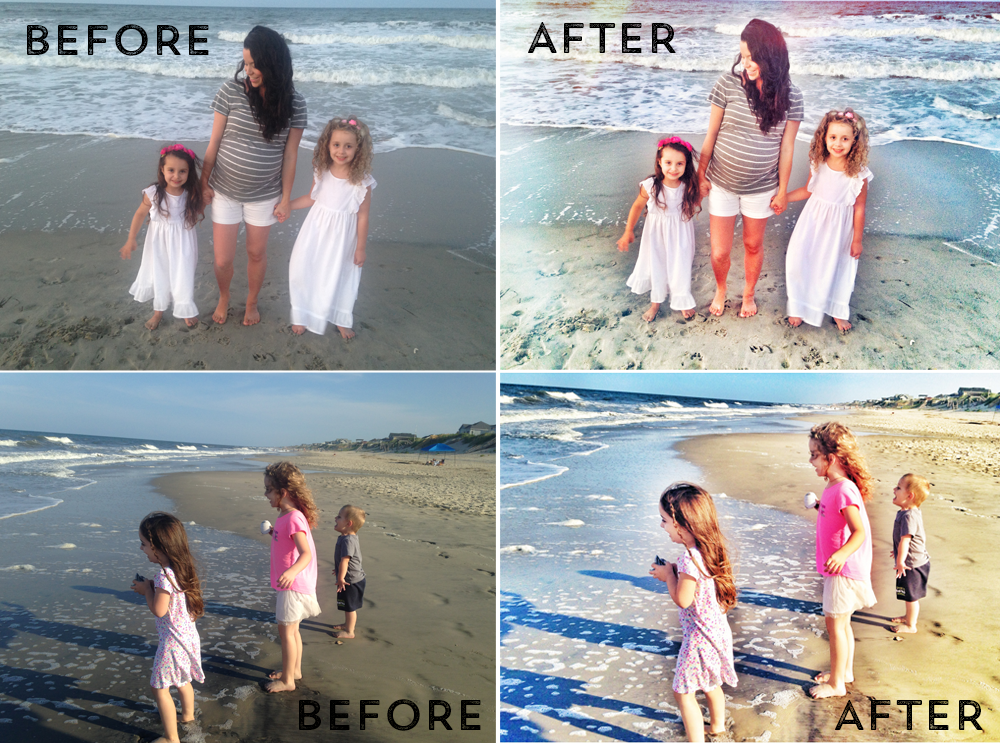
Here’s some before and afters to show you how with a few steps below, you can transform your photos!
Anyone can do it! Once you try it a few times, you’ll soon be doing it without even thinking!


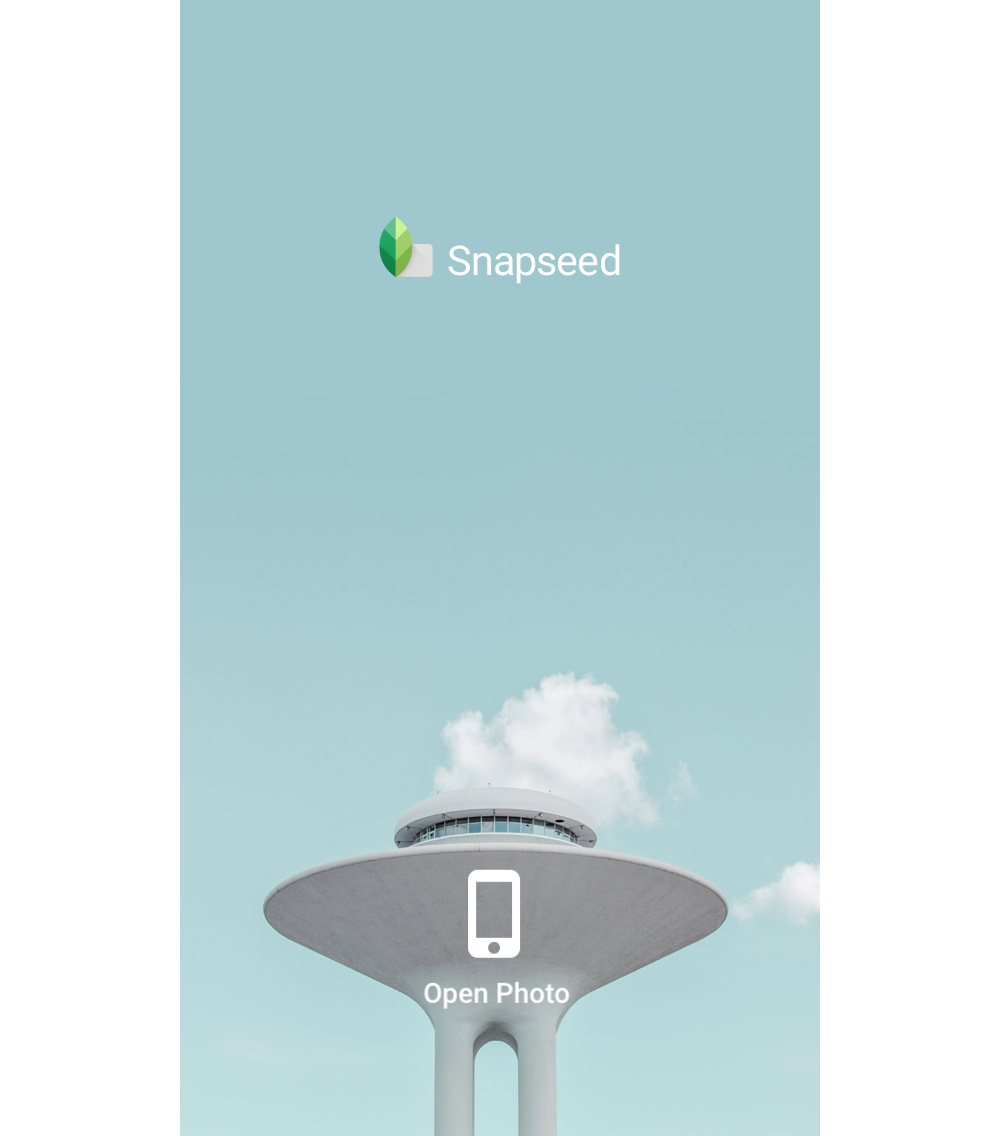
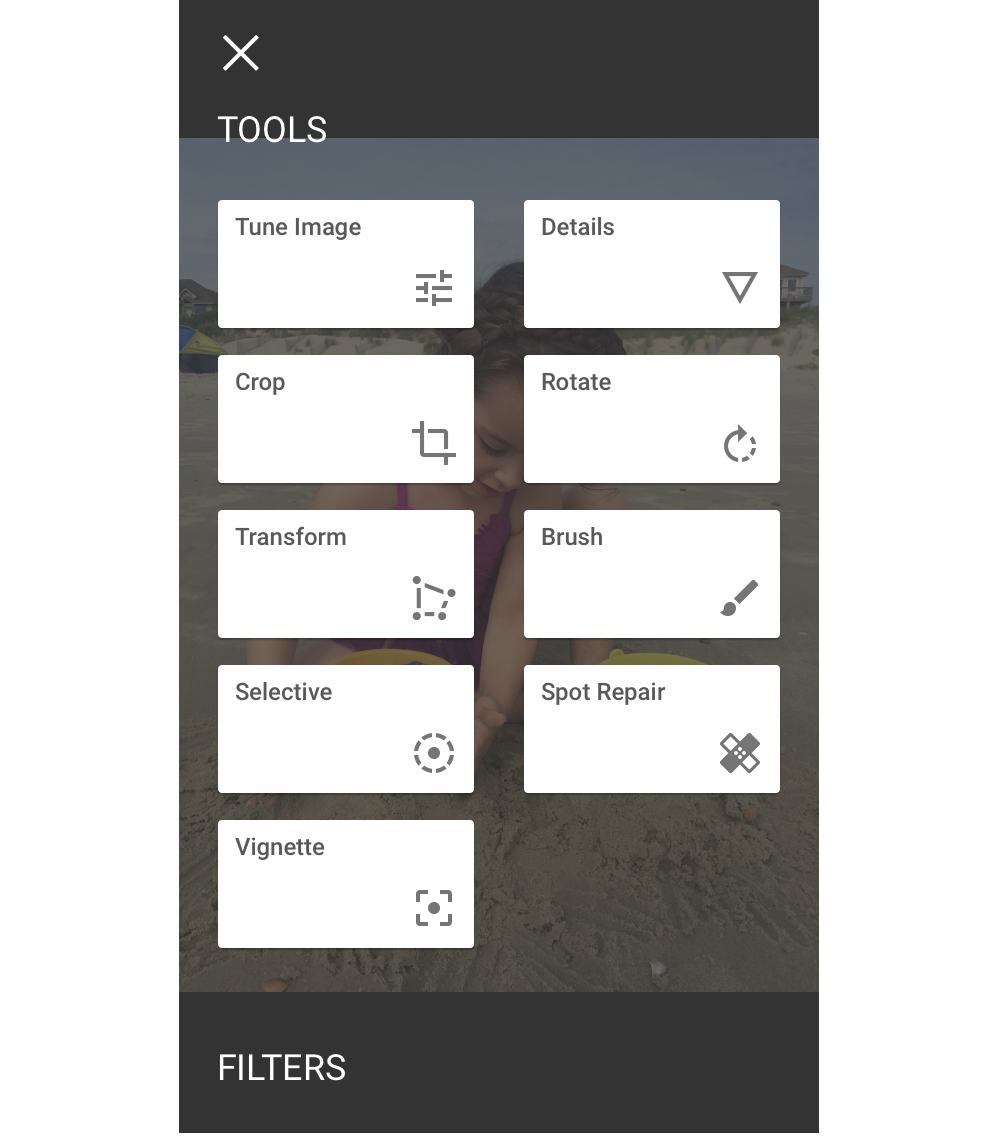
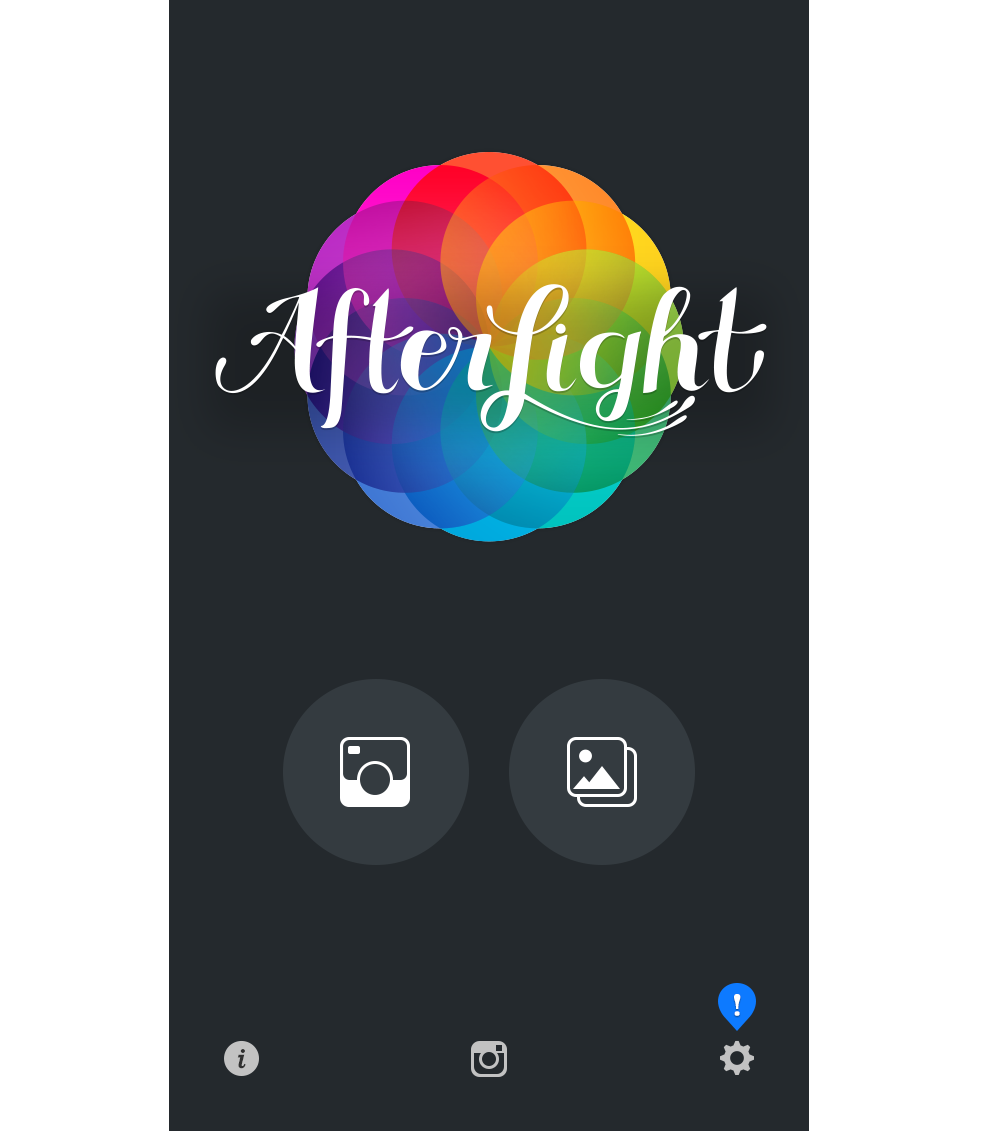
Ok first things first, You’ll need two apps!
Snapseed and After light.
I start in Snapseed. open it up and choose the photo you want to edit.


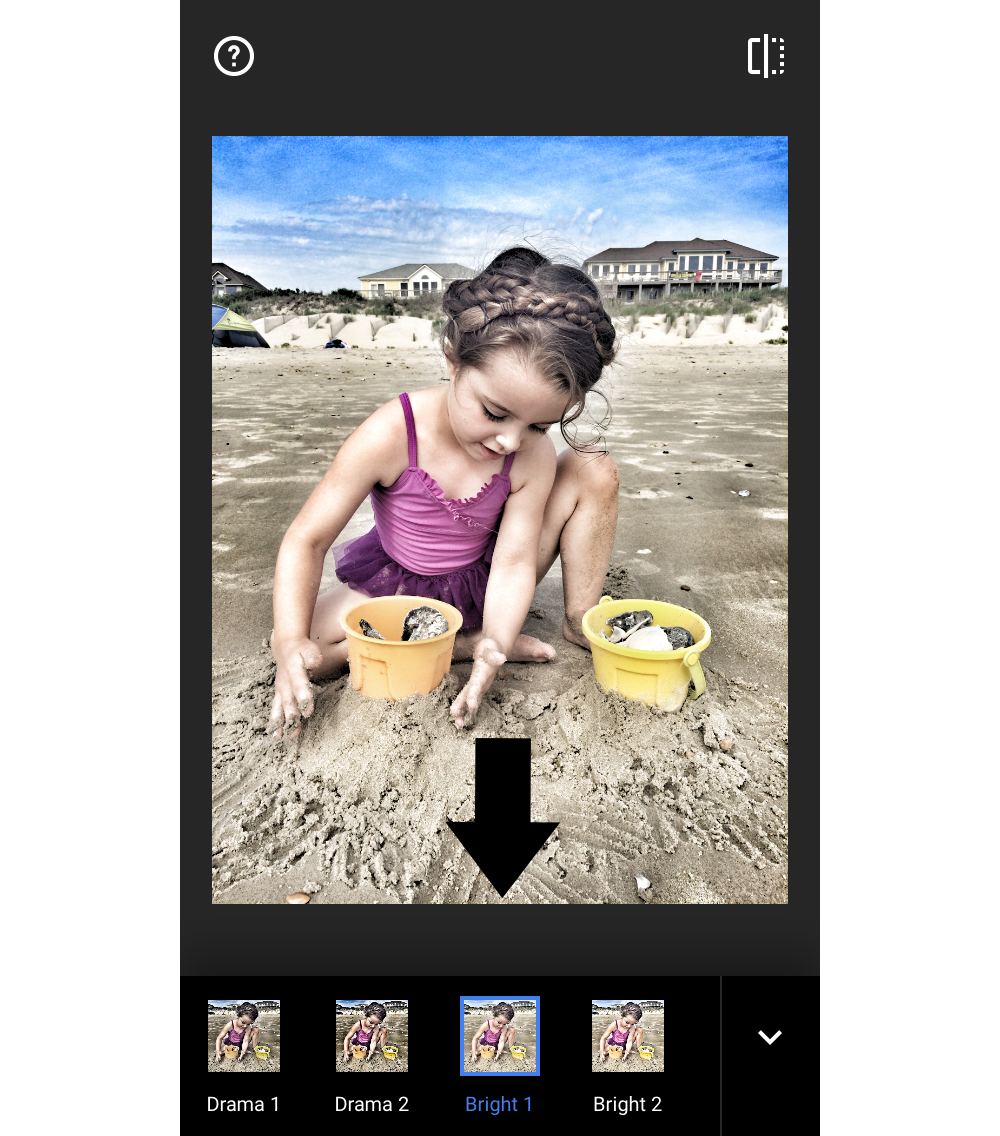
It will automatically have it set to the first setting…but you want to change that.
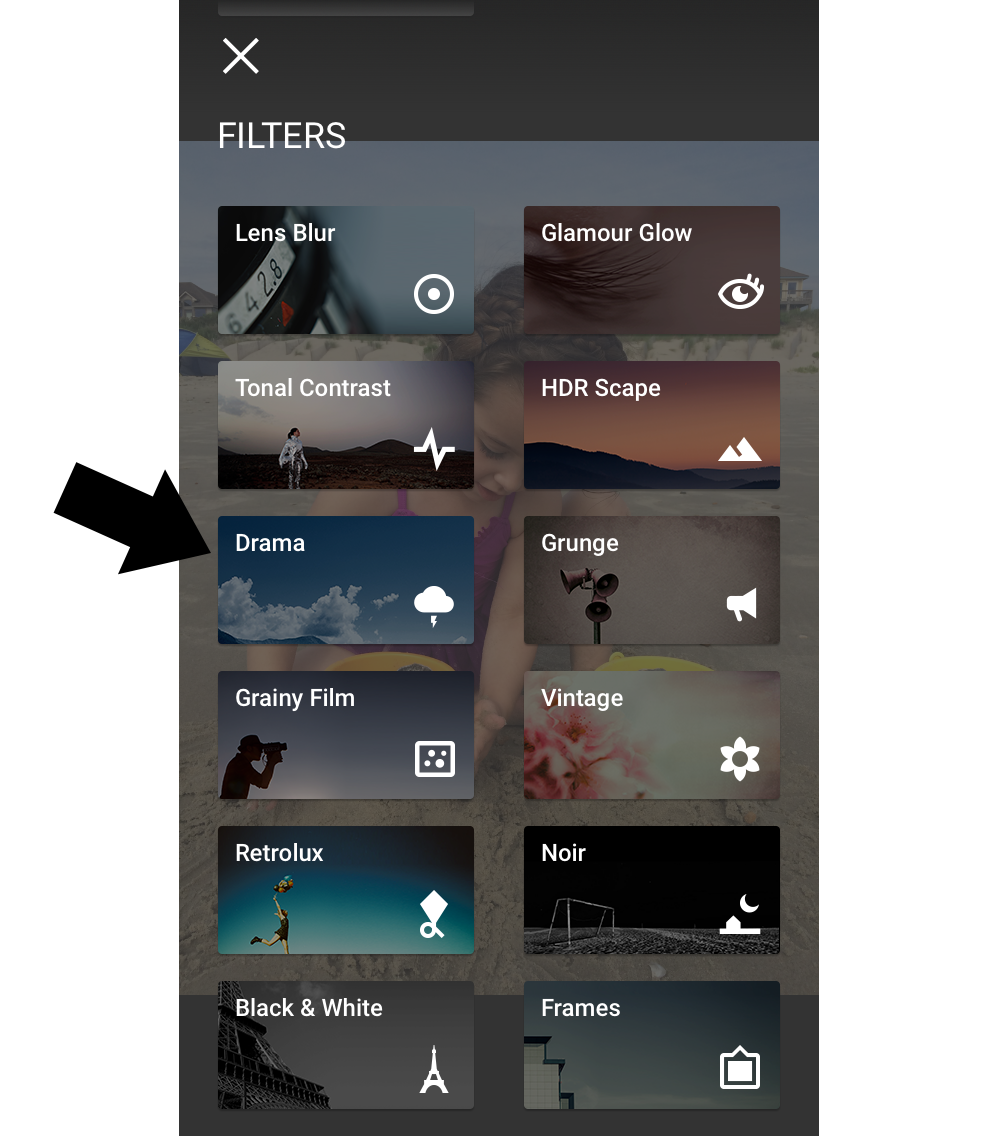
Click on the bottom icon of paint cards.

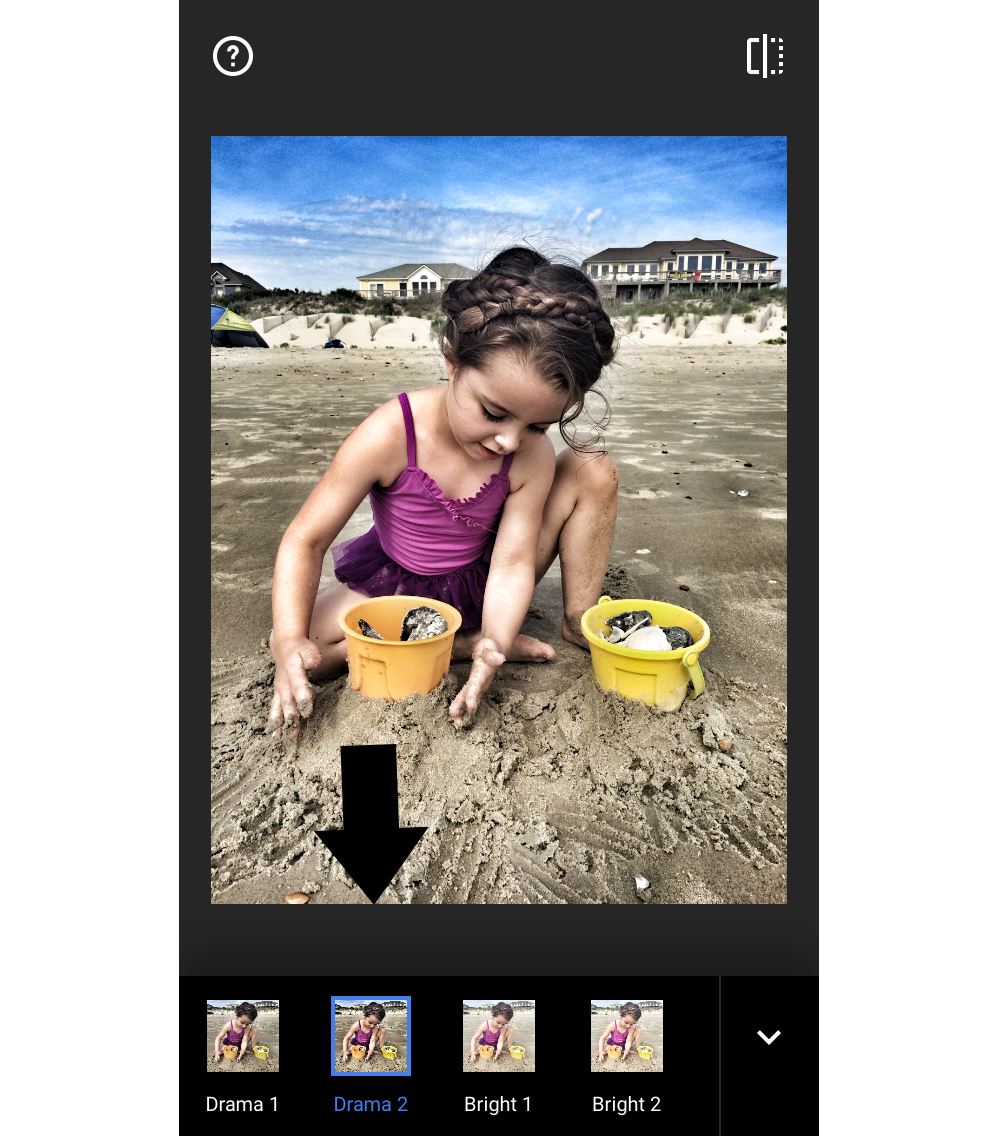
Click Drama 2!
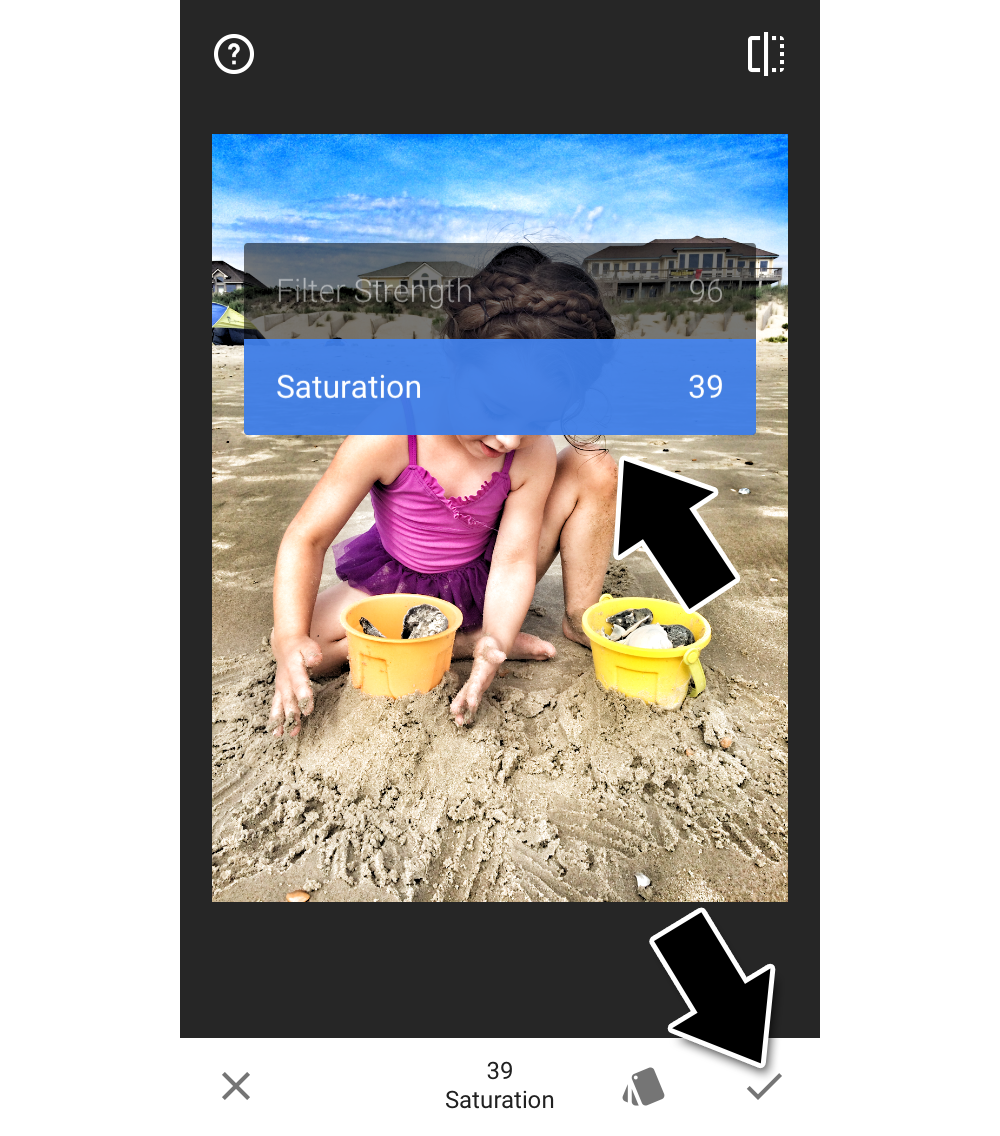
by holding down your finger on the screen you can change the
strength of the filter and saturation.
I usually don’t mess with this one that much.

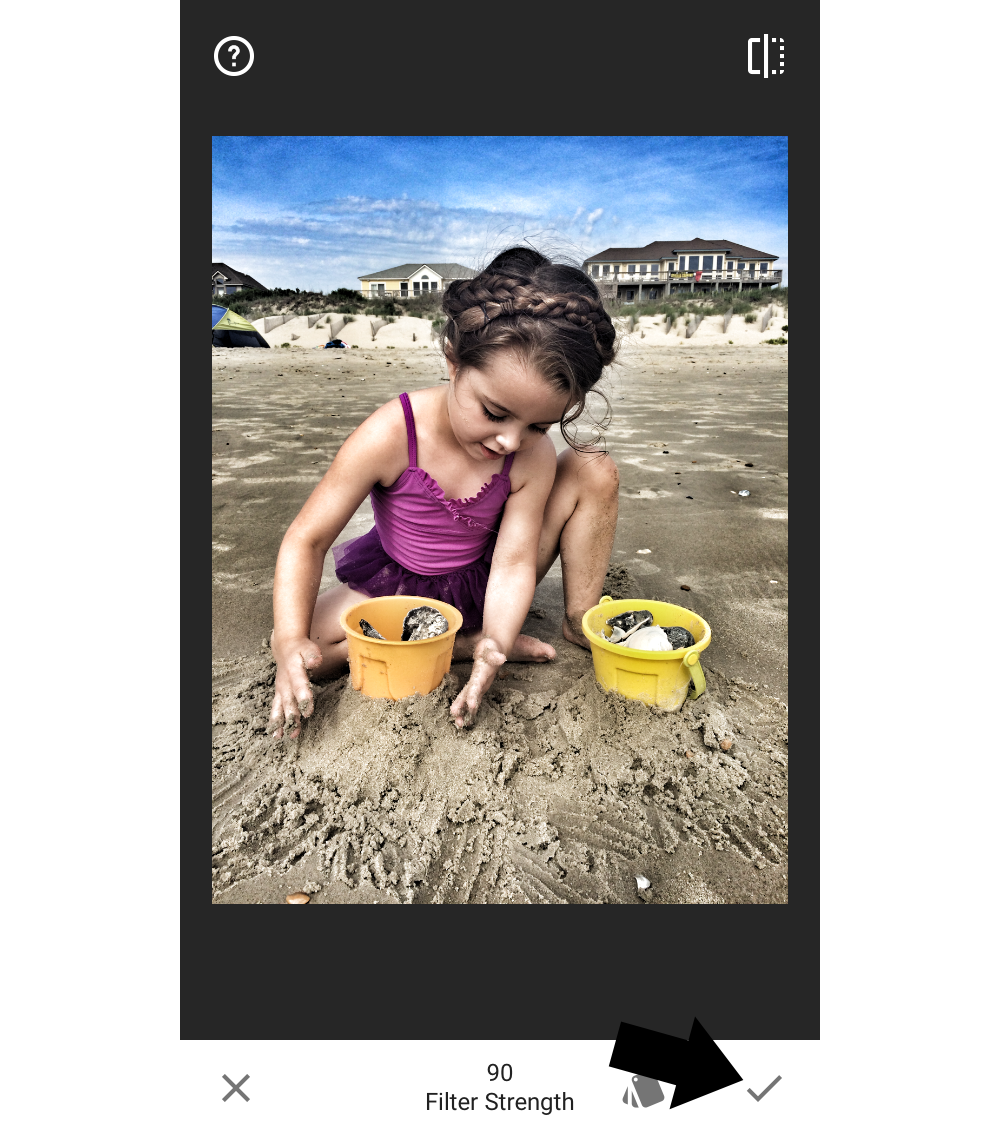
Click the check mark in the bottom right!
This part is important because you want it to save this filter before you do it again.


Now this is where I hold my finger down on the image and up the saturation!
Sometimes I lower the filter depending on the brightness of the photo.
Click the check mark in the bottom right.


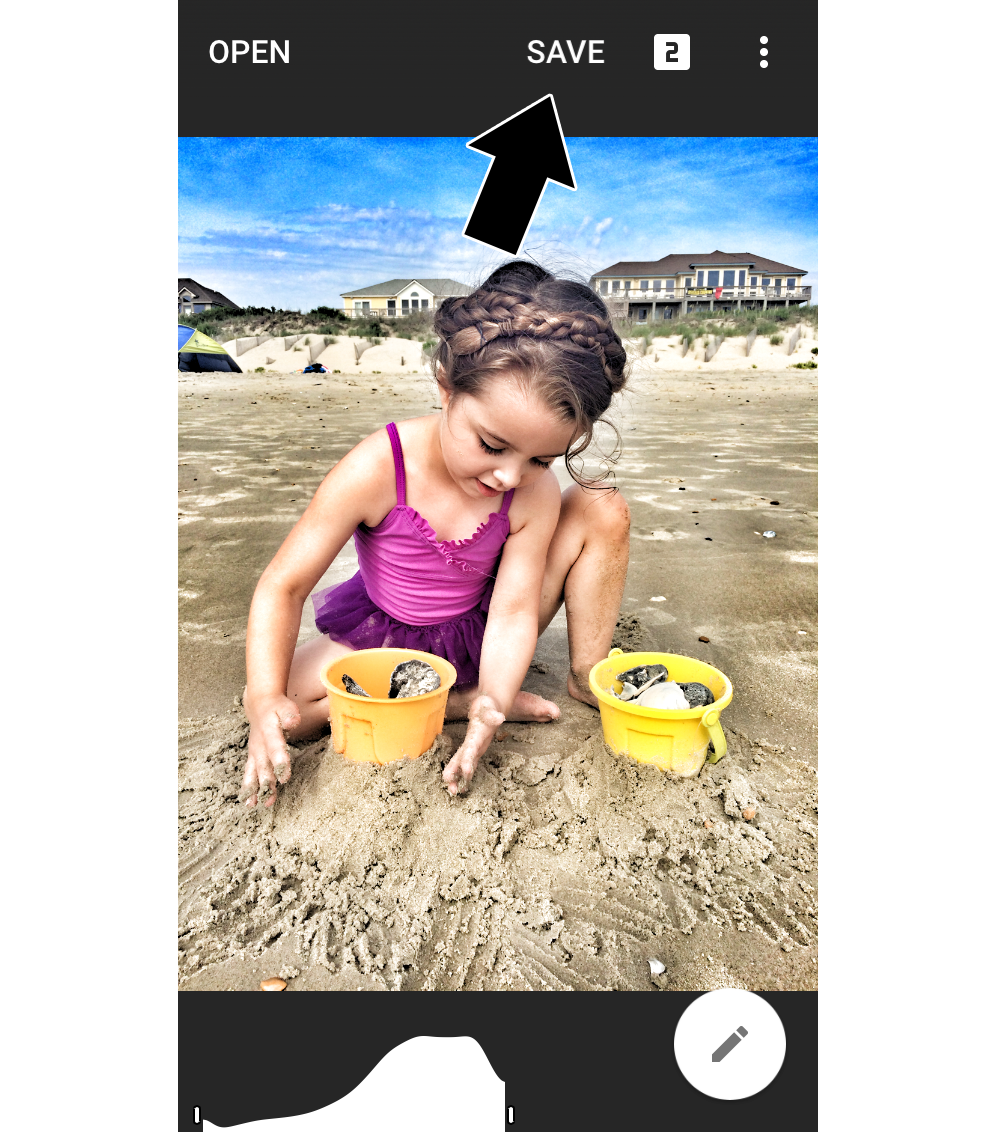
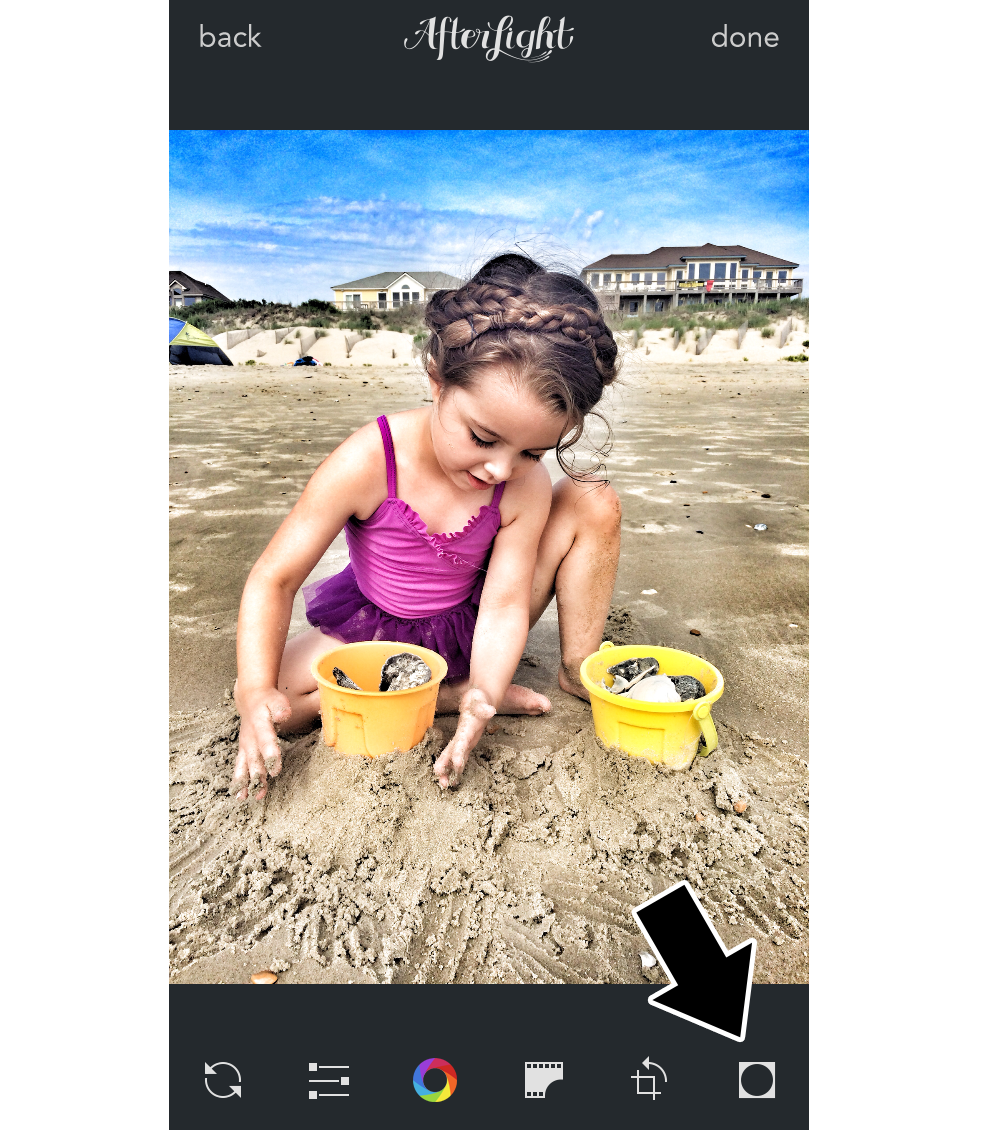
And here’s your final photo from Snapseed!
You could stop here… or keep on going with the next app I like to use.
(It makes my images square for instagram and sometimes softens the photos with one more filter.)

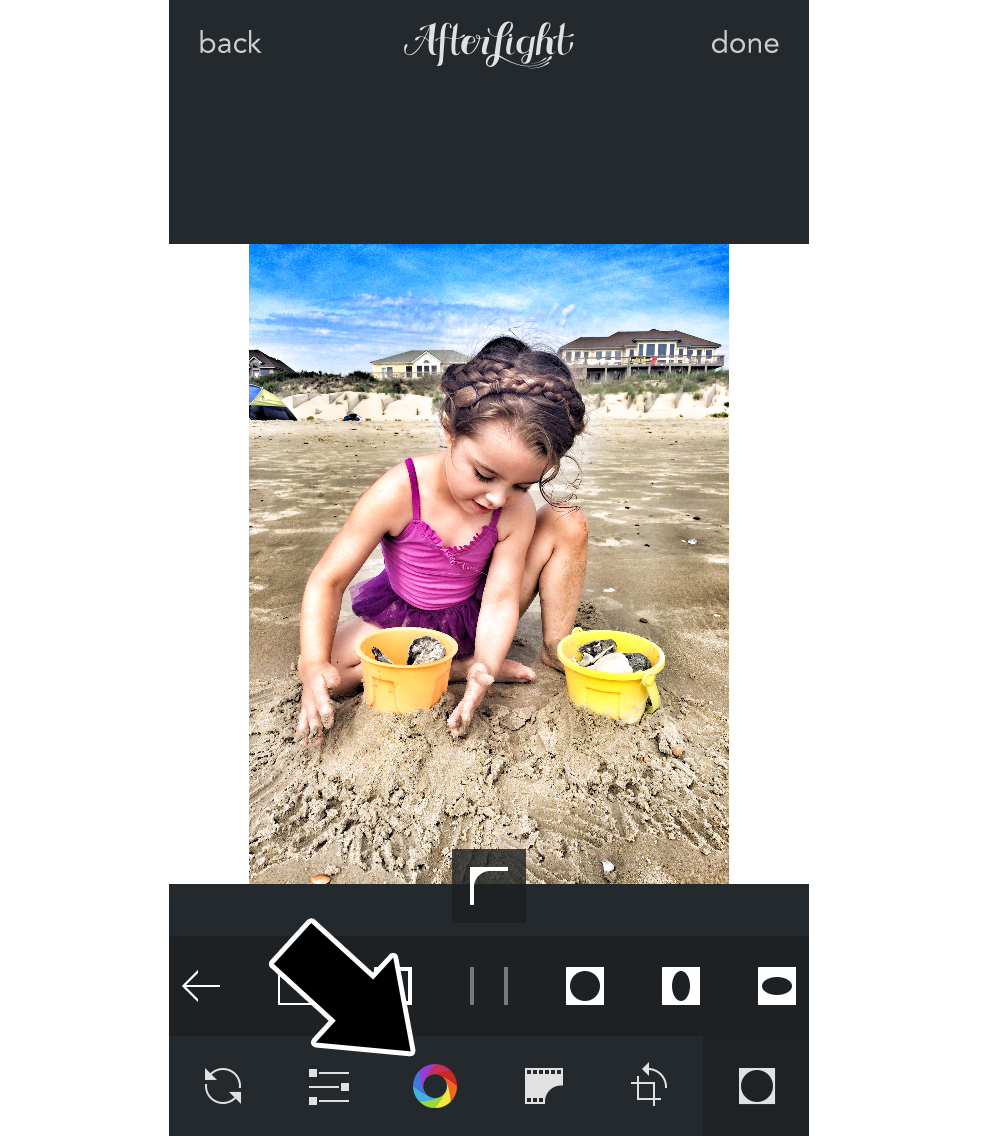
Next up is After Light! Open up the photo you just edited.
(click the right button below with photos…not the camera.)


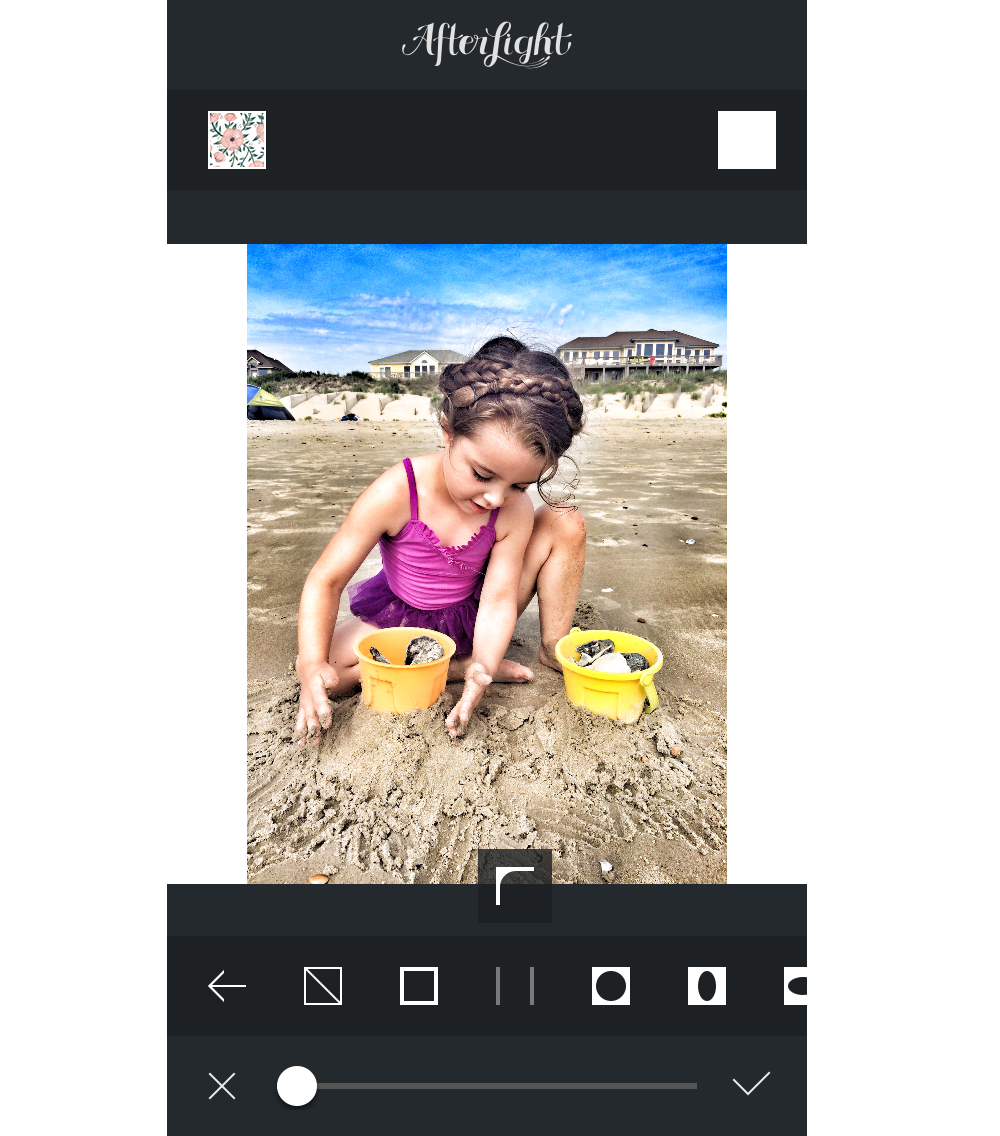
Click Original. (I sometimes use some filters in the other sections,
but for today I’m keeping the filters simple.)
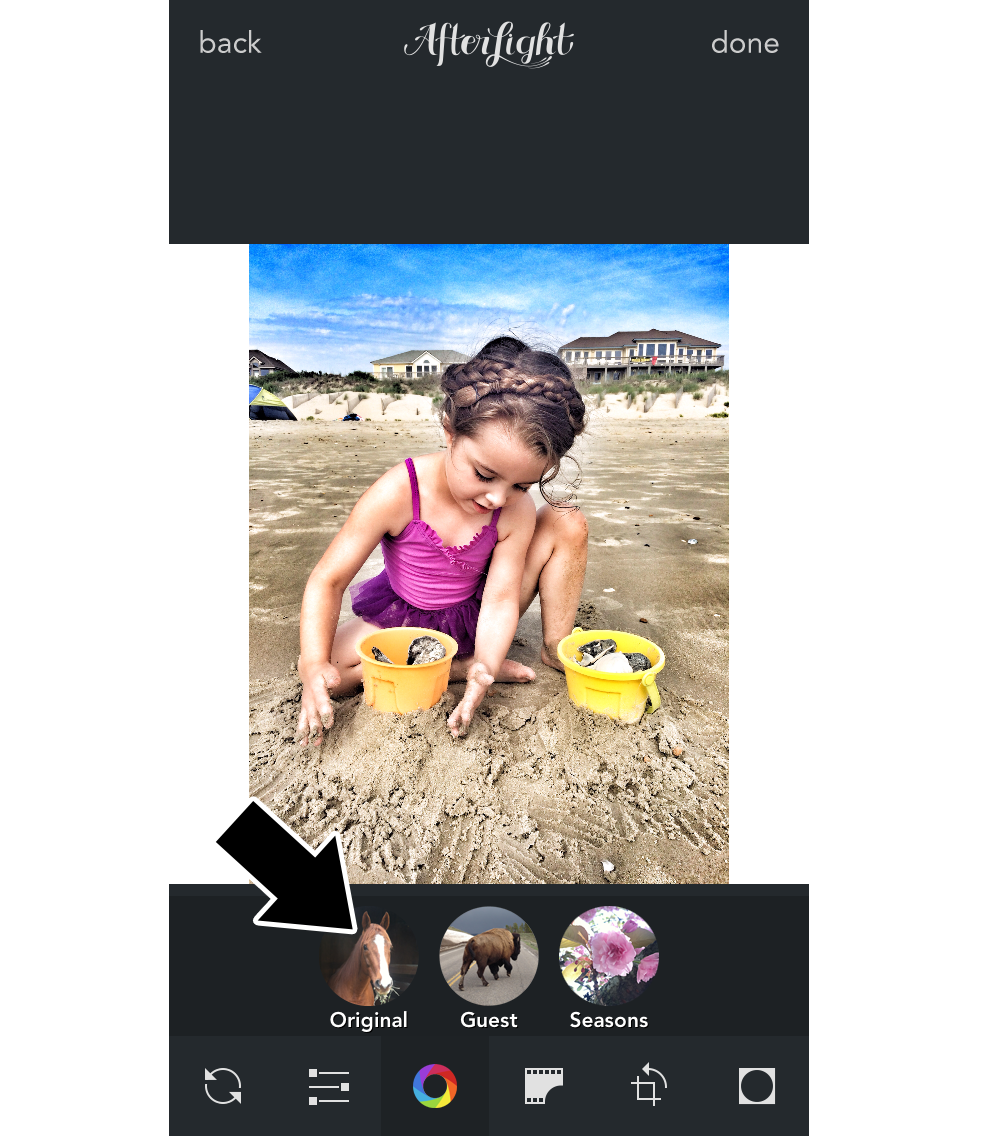

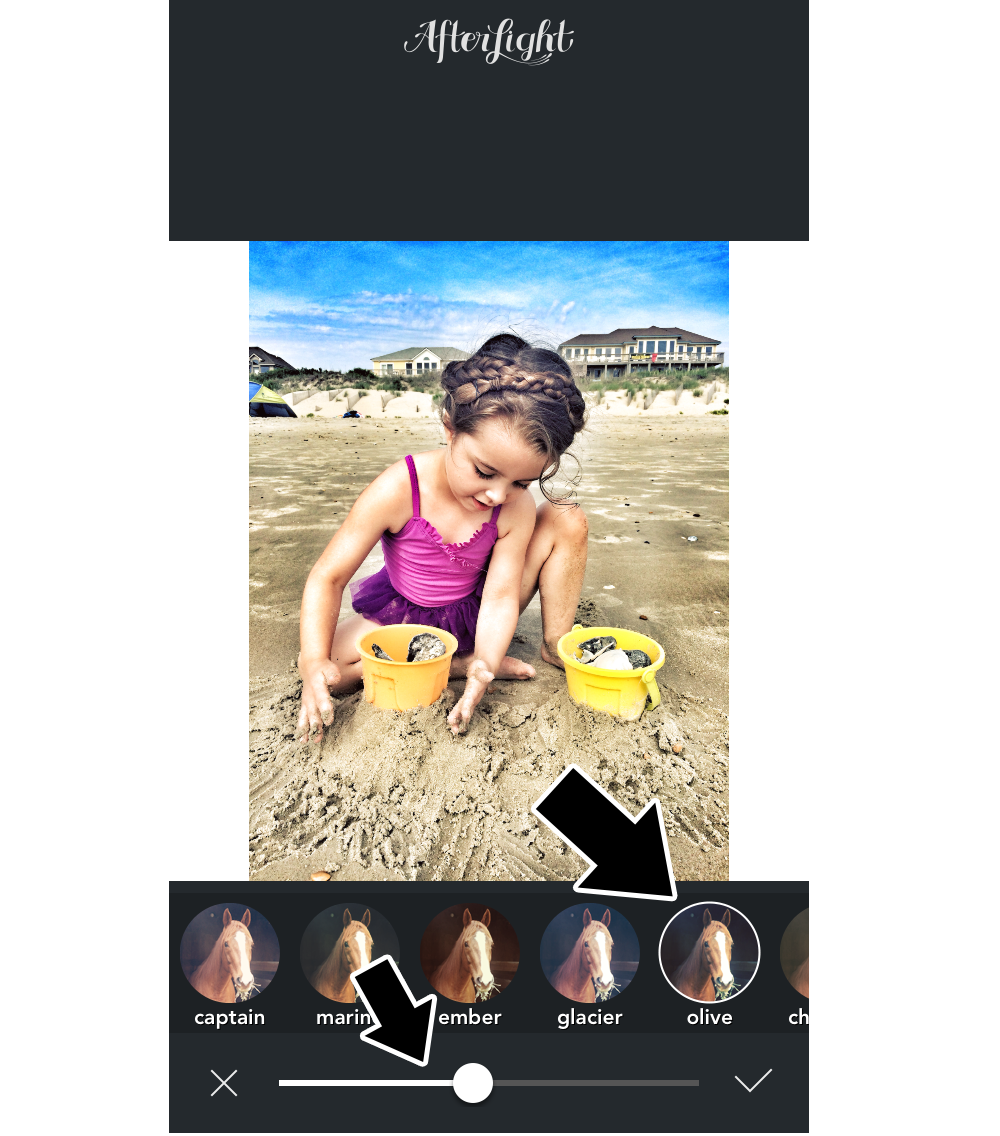
I use Captain a lot. But for photos that are already really bright
and I want the blues and greens to pop I use Olive!
Click the check mark to save the filter.

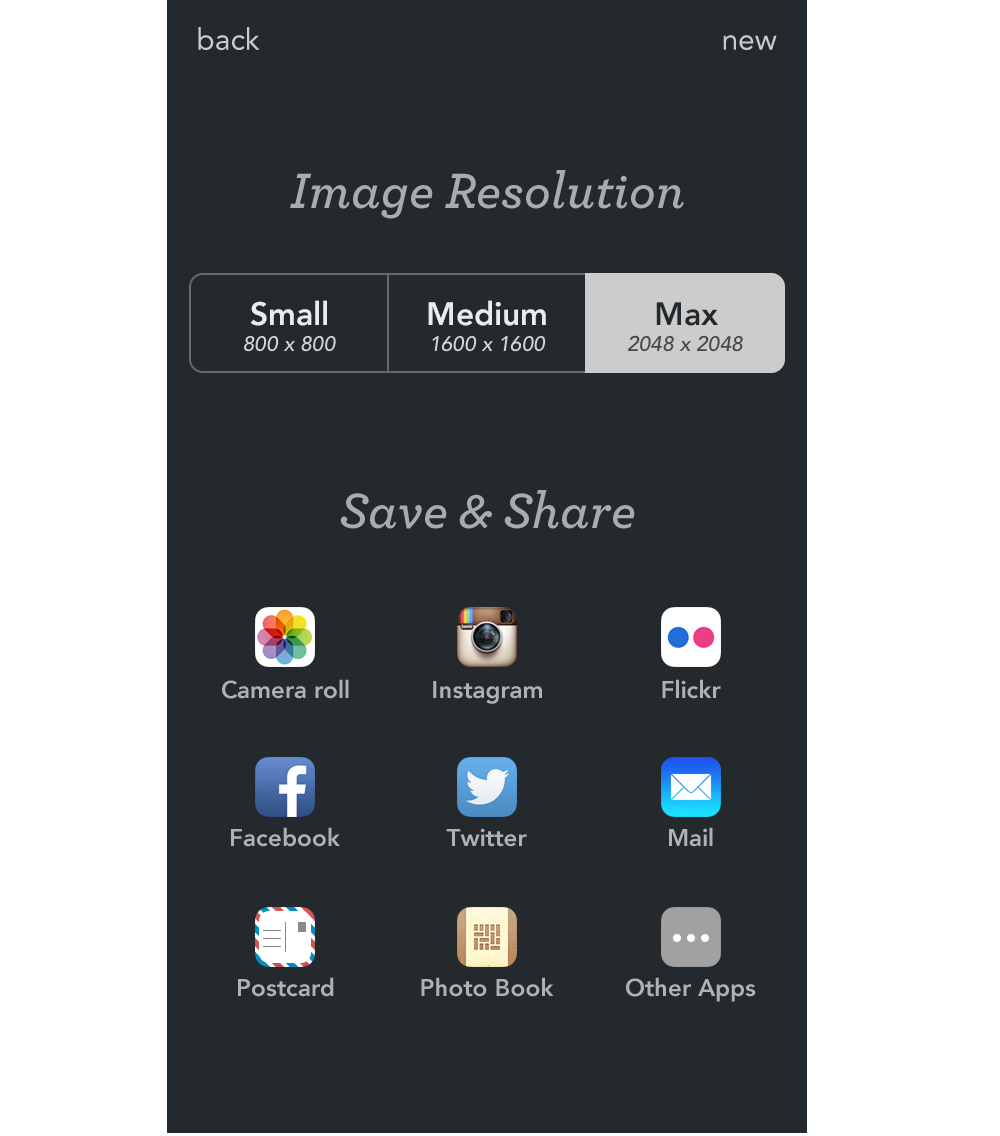
It’ll take you back to the home screen.. click done in the top right corner.
It will give you saving options. I usually do Max and save to Camera Roll.

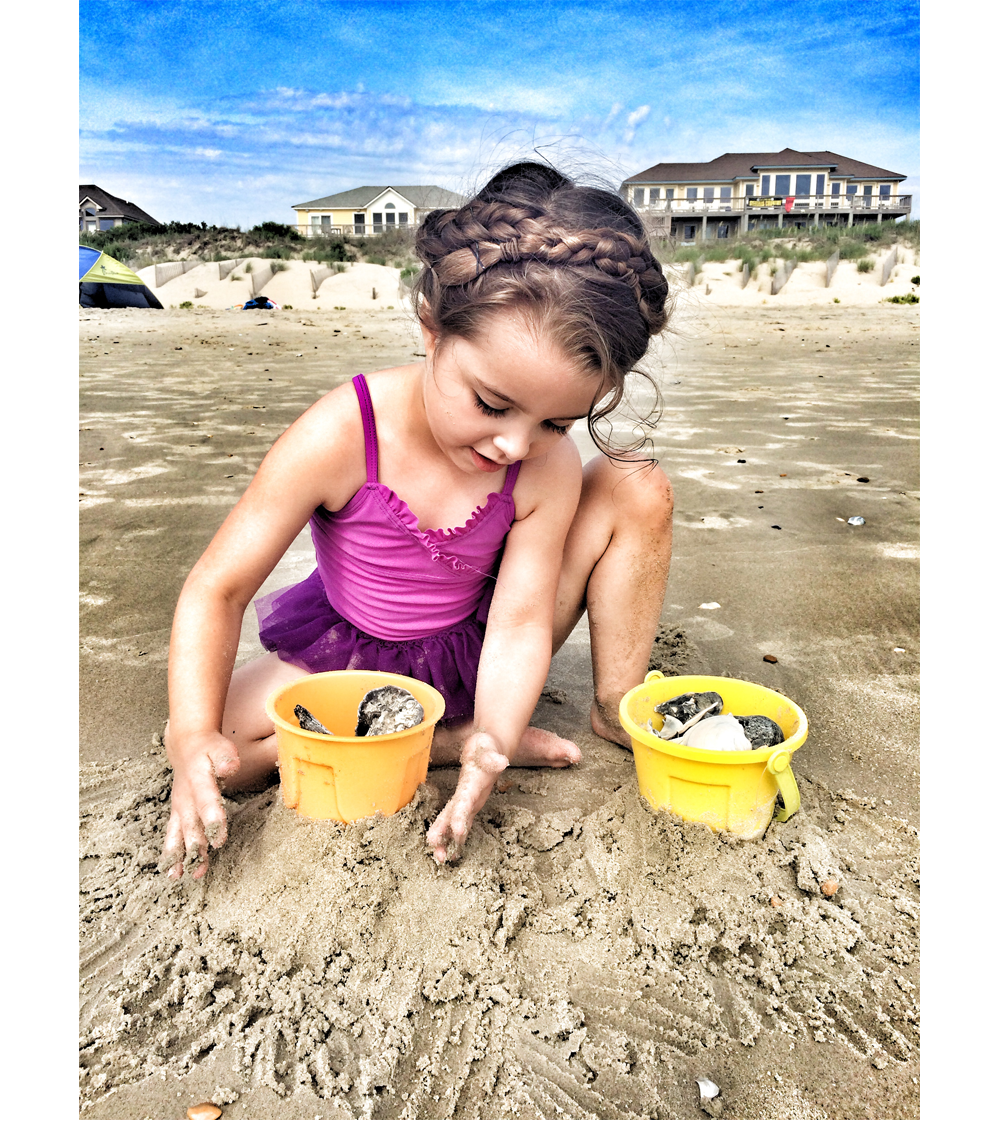
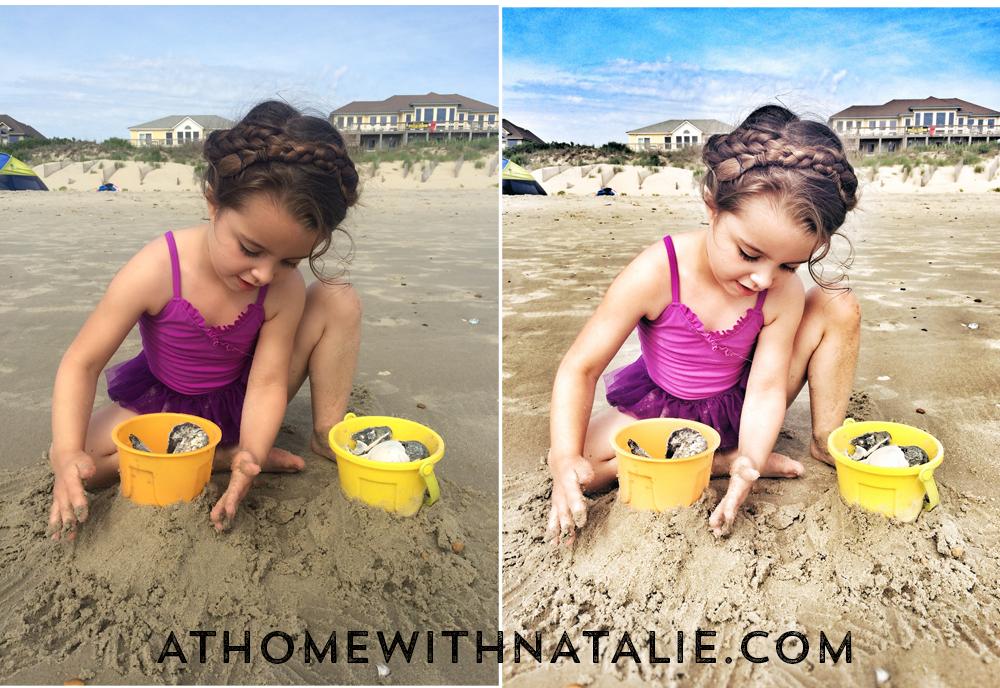
And here’s the before and after of the photo!
A few little edits can make a huge difference!
I adore Sienna in both photos but I can’t wait to frame the one on the right.
If you’ve taken a beach vacation this summer… download the apps and edit them.
You’ll love the results. The sunshine makes for great photos!

Hope this tutorial was helpful!
Subscribe to my Newsletter and get more fun tips like these.
I’ll be sharing more easy photo editing tips for your phone!
ENJOY your photos. I use PRINTASTIC for my photo books!
Use code NATALIE20 and get 20% OFF yours!!