Grow Tomatoes from Seed – Save Money, Get More Varieties

Tomatoes are the most commonly grown plant in backyard gardens, and with good reason. Nothing beats the flavor of a freshly picked tomato still warm from the sun, and homemade sauces and salsas are amazing. With the recent growth in gardening and interest in non-genetically modified foods, stores are starting to stock more heirloom tomato seed varieties, but they’re only scratching the surface of the dozens of types of seeds that are available. When you grow tomatoes from seed, you can pick varieties that are right for your growing conditions and experiment with many different colors, shapes, sizes and flavors for the same amount of money you’d spend on just a few store plants.

Which Potting Soil to Use to Grow Tomatoes from Seed
My personal favorite for potting soil to date is FoxFarm Organic Potting Soil, which contains worm castings and other organic fertilizers right in the mix. You can also make your own potting soil mixes, if you are so inclined.
When Should I Start My Tomato Plants from Seed?
Check out the post When Should I Start My Seeds? Printable seed starting calendar to get a schedule for seed starting, hardening and planting out to the garden.
Containers for Starting Tomato Seedlings
I save the black plastic containers that you get plants in from the greenhouse, and have friends and neighbors save them, too. They fit neatly in seedling trays (and under my grow lights on my seed starting shelves). They also have drainage already built in, which is critical for healthy plants. They last for many years, and stack easily for storage at the end of the season.
Other container options:
Basically, if it will hold dirt and allow drainage, you can probably use it to start seeds.
Marking Seedlings
I like to mark my seeds using popsicle sticks broken in half. I write the name of the variety on both sides of the stick with a ball point pen (in case it gets it gets wet, which it will, generally one side remains readable). The popsicle sticks are cheap and reasonably durable, and also be tossed in the compost when they are no longer needed.

How Deep Should I Plant My Tomato Seeds?
As a rule of thumb, you want to plant seeds roughly three times as deep as the seed is wide, so tiny seeds stay on or near the surface, and larger seeds go a little deeper.
If your seeds have been in storage, you can do a germination test or pre-sprout the tomato seeds in a coffee filter, but I usually don’t bother. (Pre-sprouting is discussed in more detail in the comments of Early Greens from the Garden.)
You may want to do a quick soil test on your potting mix before you start, as many on the market are lacking in key nutrients and/or overloaded with other nutrients.
Getting the Tomato Seeds to Germinate
Cover the seeds with a clear plastic cover, and put them in a well lit location. I like to give them a little jump start with a seedling heating mat underneath, since they like a little extra warmth to get going. I put the heating pad and the lights on a timer, leaving them on for about 16 hours a day and off for the remaining time. If you’d like some more photos of my planting bench and seed starting setup, take a peek at this post on seed starting.
Can I Use Old Old Tomato Seeds (Left Over from Previous Years)?
Because I plant so many varieties, I end up with leftover seed from year to year. Tomato seeds generally store quite well (I have had some last over 10 years), but the germination rates decrease over time. I made up a simple spreadsheet in Excel where I track date planted, variety, seed source, number of seeds planted, date of first seedling appearance and final number of seedlings. (You can see the sheet and print your own copy in the post “Simple Record Keeping Tips for the Garden with Printable Seed Starting Chart“. This allows me to compensate for the reduction in germination rates over time.
Troubleshooting Common Tomato Seeds Starting Problems
Tomato Seedlings Drop Dead
Once you get seedlings popping up, uncover them within the first 24 hours. Keeping them covered can lead to damping off. Damping off results from fungal infection. It generally comes from keeping your seedlings too wet. One day they’ll look fine – then WHAM! The seedlings are laying there dead.
Generally the stem shrinks up near ground level, and the soil is very wet. Sometimes here will be mold or fuzz growing on the surface of the soil. (Yes, I have made this mistake – it’s not pretty.) A sprinkle of cinnamon or a spritz of chamomile tea may help save the remaining seedlings, but once a plant has keeled over, it’s a goner.
To help prevent damping off, some folks sprinkle sand over the dirt when they plant seeds – just enough to cover the top of the soil – but if you maintain proper moisture levels and good circulation, damping off shouldn’t be a problem.
Tomato Seedlings are Pale or Yellow
If the color of your seedlings is off – check moisture levels. You want damp soil, not too wet or too dry. If the moisture level seems fine, try a soil test. As I mentioned above, some soil mixes are just not right.
Tomato Seedlings are Skinny and Flop Over
If your seedlings are really tall, skinny and floppy (also known as “being leggy”) – chances are your lighting is inadequate. Try a different location or more artificial lighting. Putting a fan on a timer and having it blow on the seedlings off and on through the day will also help toughen up stems (and prevent damping off and other diseases – ever wonder why they have those fans running all the time in commercial greenhouses?).
Alternatively, you can run your hands lightly across the tops of the seedlings from time to time during the day. Proper lighting is the first step, but movement will help, too. If you start your tomato plants early and they need to be transplanted into bigger pots one or more times before being planted in the garden, you can plant them deeper than they were previously growing. (More on this below.)
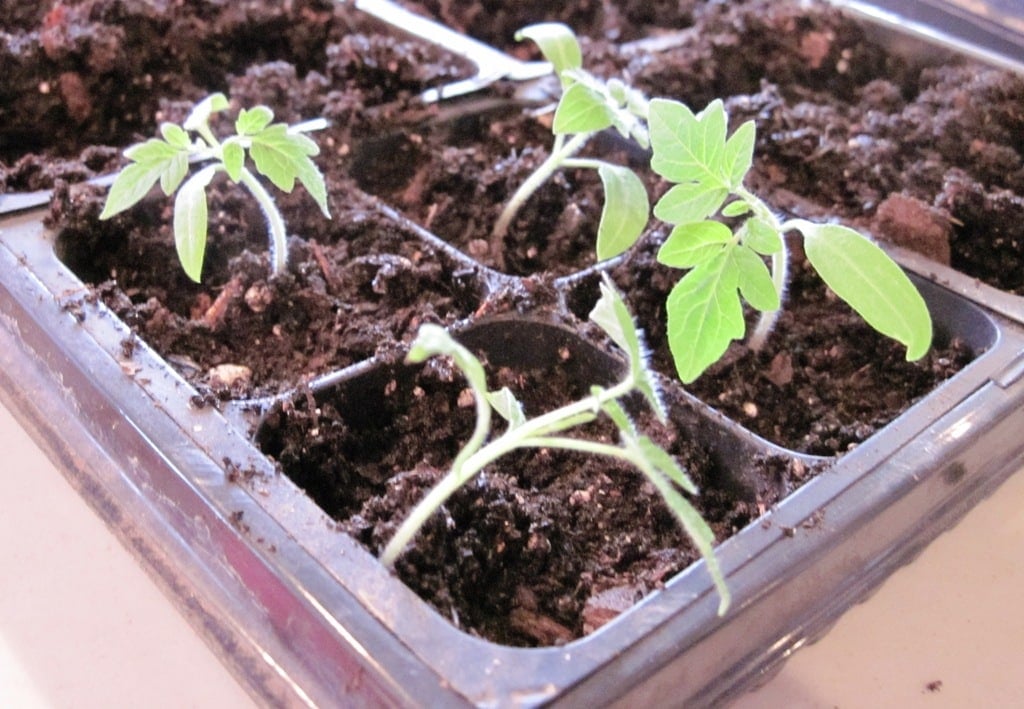
Seedling Leaf Tips are Stuck Together with the Seed Casing
If you’ve got leaf tips that are pinched together by a seed that didn’t fall off, like this (this plant is an eggplant, not a tomato, but you get the idea).

It is okay to gently remove the stuck seed. Try not to tear the leaf. This will go a little easier if the seed is moist.

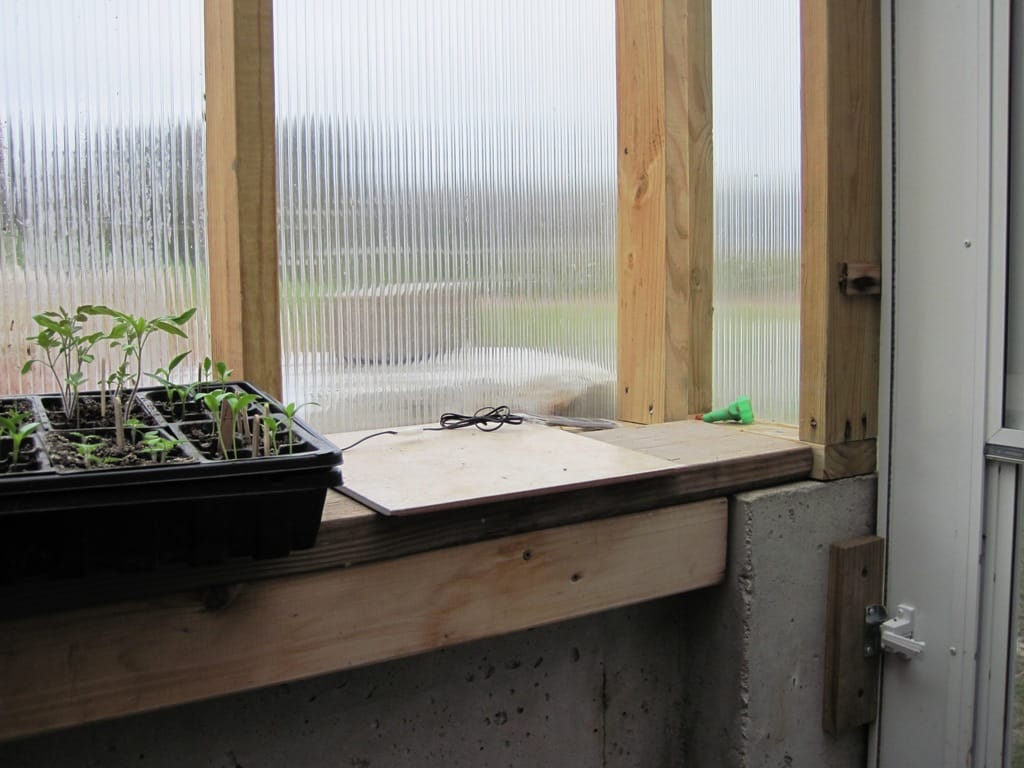
As the tomatoes get larger, they can be moved into a greenhouse or cold frame – just make sure to keep them from freezing (preferably between 50-80F).
If you come into your greenhouse and find this:


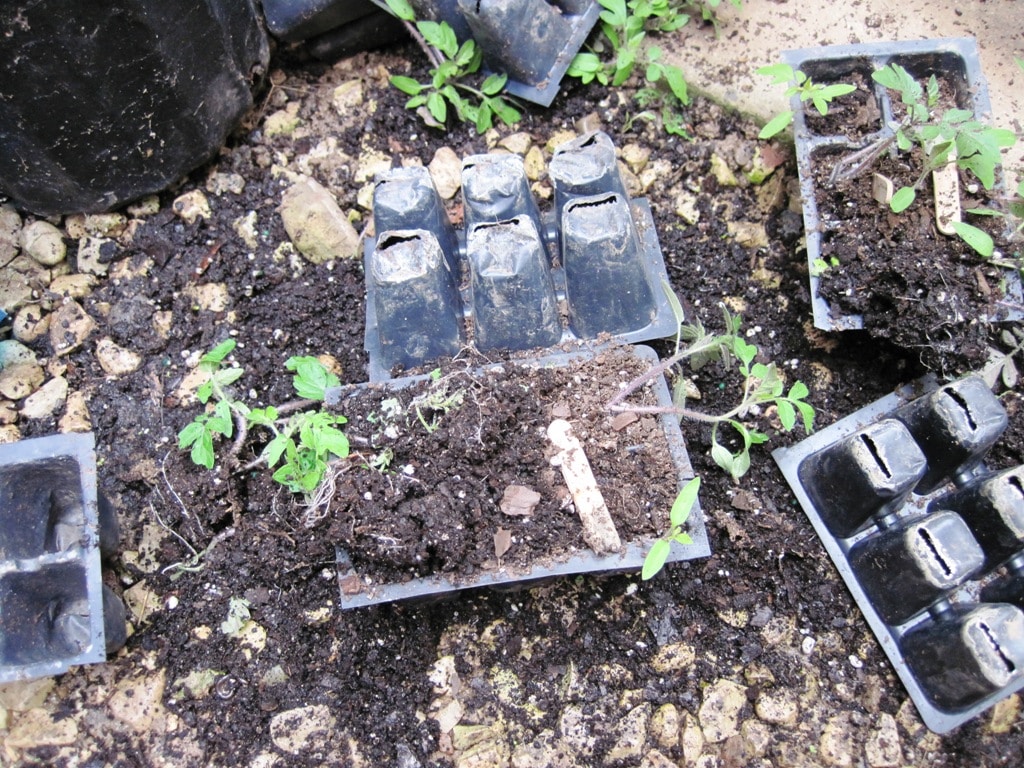
And muddy smeared cat footprints at the scene of the crime (because you left the door to the house open to keep the plants from freezing), try not to cry when you see this:


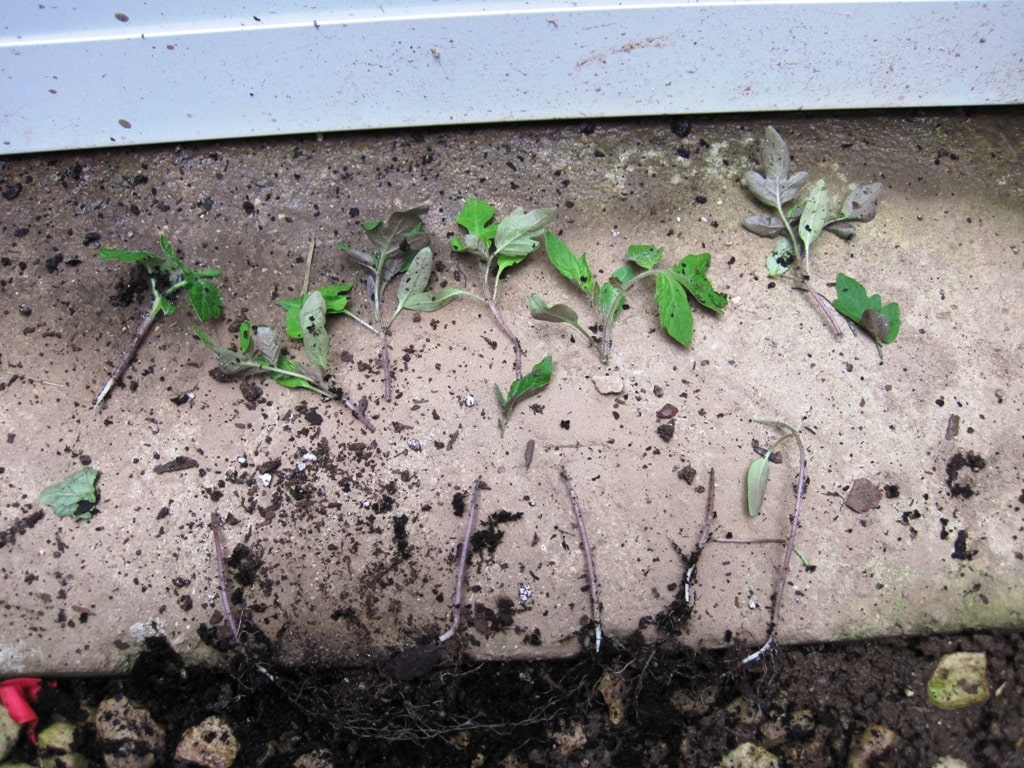
Yes, the tops and bottoms of these tomatoes have been parted, never to be whole again. Thankfully, most of the varieties killed were ones that I had in excess.
What’s the Difference Between Determinate and Indeterminate Tomatoes?
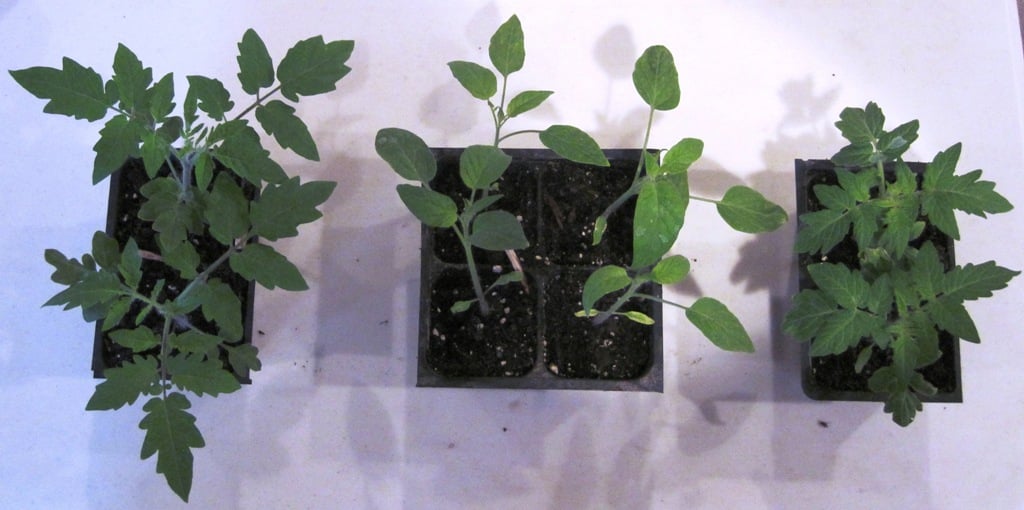
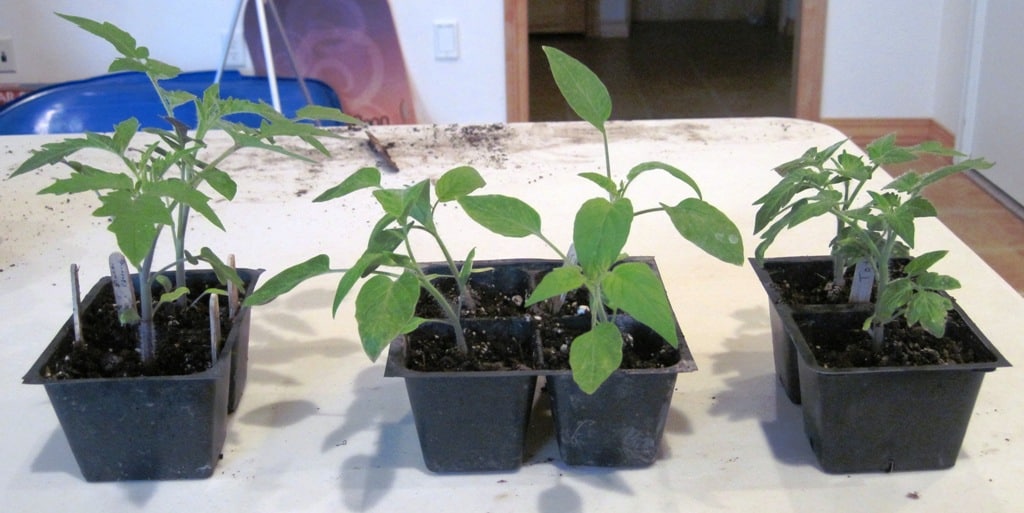
If you end up trying to determine varieties from a scrambled mess of plant material and dirt, here is a comparison of the main types of tomato foliage. In terms of leaf shape, you have regular leaf (RL) plants and potato leaf (PL) plants. Growth-wise, you have determinate and indeterminate.
From left to right, we have RL indeterminate, PL indeterminate, and RL determinate.


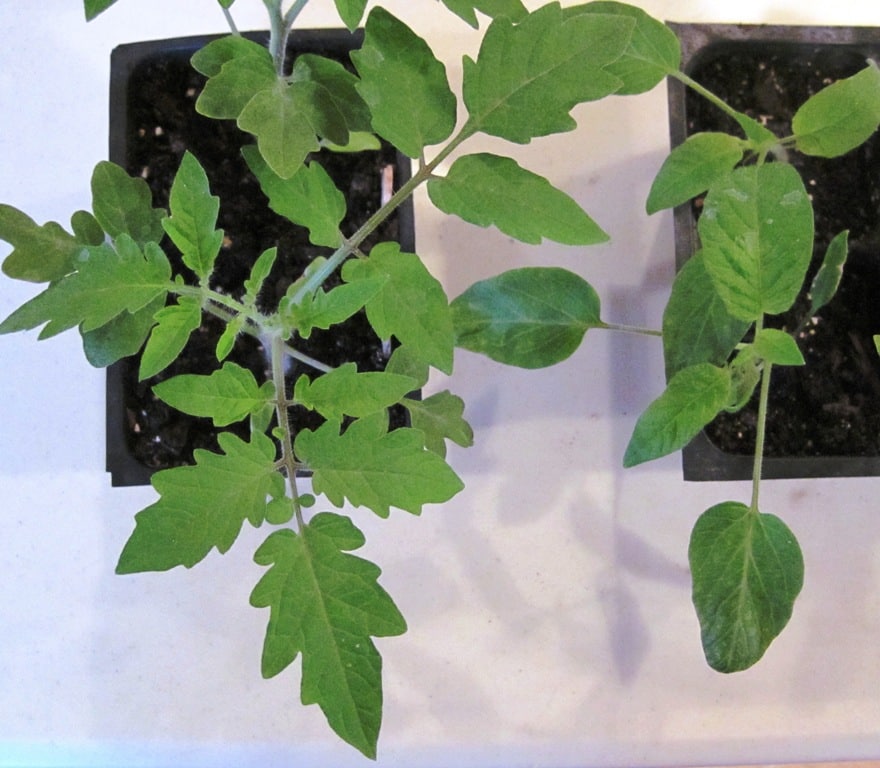
You can see the RL determinate plant on the left has more, smaller, branched leaves, while the PL determinate plant has fewer, larger leaves.

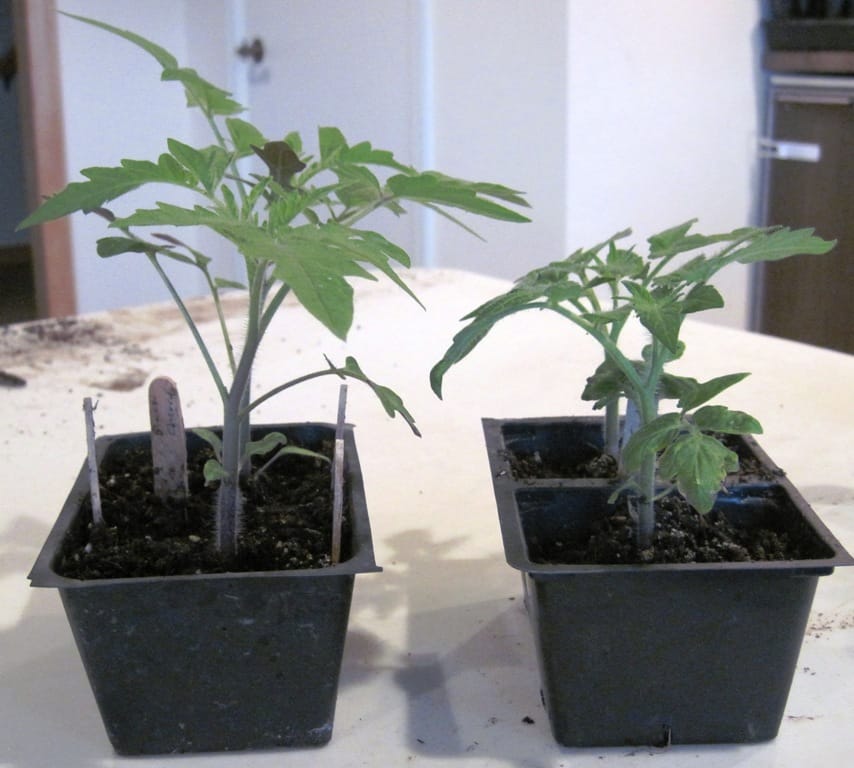
Comparing indeterminate to determinate, the indeterminate on the left is taller and leggier, while the determinate plant is smaller and stockier.

Indeterminate plants will continue to grow larger and set fruit until frost – mine commonly reach six feet or more in height. As the end of the season approaches, you may wish to pinch off new growth to focus their energy on maturing existing fruit. Determinate plants will grow to a more modest size (they often don’t require staking, and thus are generally preferred by commercial growers). They set all their fruit at roughly the same time and are ready for harvest during a narrow window of time. Most heirloom varieties are indeterminate, while most modern hybrids are determinate.
Transplanting Tomato Seedlings to Larger Pots for Stronger, Better Plants
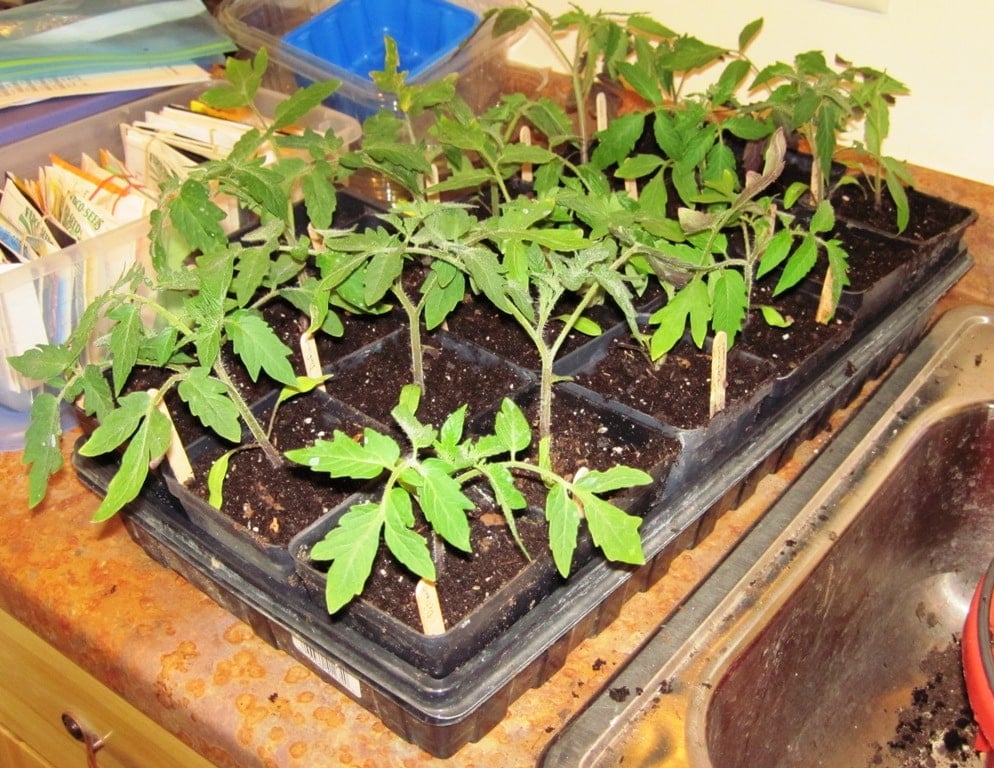
I start my seeds in the cell packs with openings that are roughly 1 inch square. As they grow, I transplant them into larger containers. First, I’ll move them to two inch containers, then up to three or four inch, depending on how fast they’re growing and how long until I can get them in the garden.
Here’s a cellpack of tomatoes that’s more than ready for transplant. You can see they’re a bit overcrowded and leggy. You can generally transplant any time after they get their first “true” leaves (the leaves that look like tomato leaves, not the first little oblong leaves that appear). I confess, my plants can get a little overgrown before I get to them.

I have seen some gardening gurus recommend cutting off the excess seedlings in each cell at ground level with a scissors and keeping only the strongest, but I just can’t bring myself to kill healthy little plants.
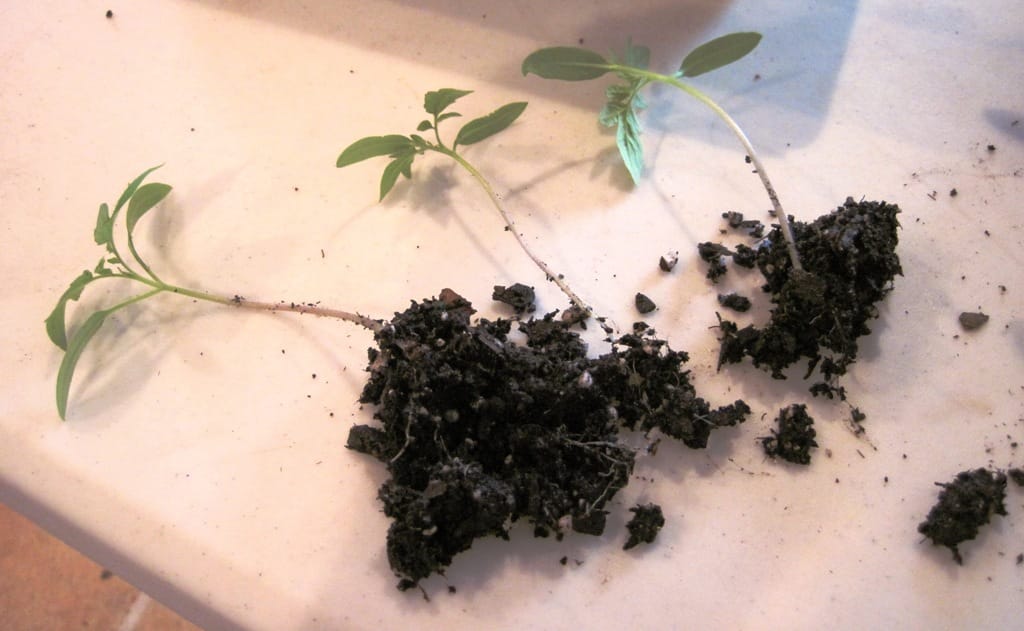
Gently pry a group of seedlings out of their cell, pushing up from below as you pull from the base of the plant above. Ease the roots apart, trying to keep as much soil as possible on the roots.

If you encounter a severely stunted plant (like in the bottom left corner of the photo below), don’t bother trying to save it – it won’t grow. Trust me on this.

Transplant seedlings as deep as possible in their new container. This will help support the stems. Yes, it’s okay if bottom leaves are covered.


Hardening Off Your Tomato Seedlings
When it’s getting close to the time to plant them outside, I start hardening them off. “Hardening off” plants is the process of gently introducing them to the outside elements to toughen them up enough to survive in the garden. You want to take it slow, or you’ll end up killing all your little seedlings (again, trust me on this).
I prefer to harden them off over 3-4 days, starting them out with no more than an hour or two of direct sun the first day and increasing exposure each day. Make sure they are protected from the wind and adequately watered when you set them out. A little extra TLC at this point goes a long way.
Planting Tomatoes in the Garden
When you plant them in the garden, I prefer deeper holes over shallow trenches (in my climate and location). Planting deep (just leaving a few inches of leaves exposed above ground) will yield a more robust, more drought tolerant plant. The plant will send out new roots from the buried stem.
I add a small handful of crushed eggshells to the planting hole to help prevent blossom end rot, which is caused by inadequate calcium levels and is generally made worse by fluctuating moisture levels in the soil. Tomatoes like rich soil, so I also add some well rotted manure or worm castings, but you don’t want to add too much (a shovel full per planting hole is enough). Too much nitrogen will give you too many leaves and not enough tomatoes.
I also mulch, trellis and often add a soaker hose under the mulch for watering. To get the full scoop on planting and TLC for your best tomato crop ever, visit How to Grow Lots of Tomatoes Organically, Plus Innovative Gardening Techniques.
You may also enjoy:
- 5 Terrific Tomato Trellis Ideas
- 5 Reasons the VineSpine™ is the Best Garden Trellis
- Build a Secure Greenhouse Foundation That Preserves Your Growing Space

Originally published in 2011, updated January 2016.
Posts may contain affiliate links, which allow me to earn a commission to support the site at no extra cost to you. Thank you!
The post Grow Tomatoes from Seed – Save Money, Get More Varieties appeared first on Common Sense Homesteading.