
DIY photo backdrops
Talkin’ about DIY photo backdrops today. Just a side note, there are about a million easier ones to make photo backdrops out there (fabric and tape!). If you are looking for easy, this is not the photo backdrop for you, ha! But, it is fun and… double sided! Woot woot! A little back story… I was asked by Piqora to host a panel at SXSW (huge interactive, film, and music conference in Austin, TX) this year. Fun, right?! Me and 2 of my blog faves, Stacy and Kristen, had the opportunity to share our experience as bloggers working with brands. They also asked me to make photo backdrops! And host a crafty hour on St. Patrick’s Day! It was a crazy busy week in Casa de Dorobek.
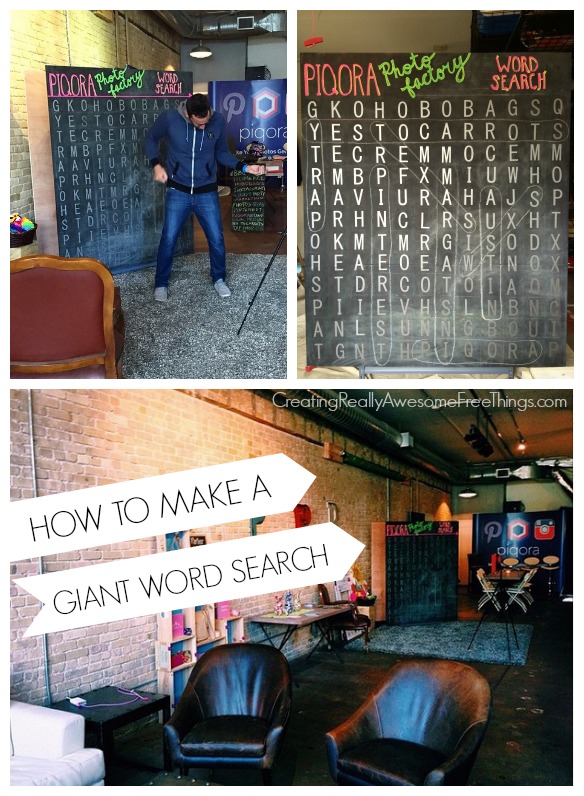
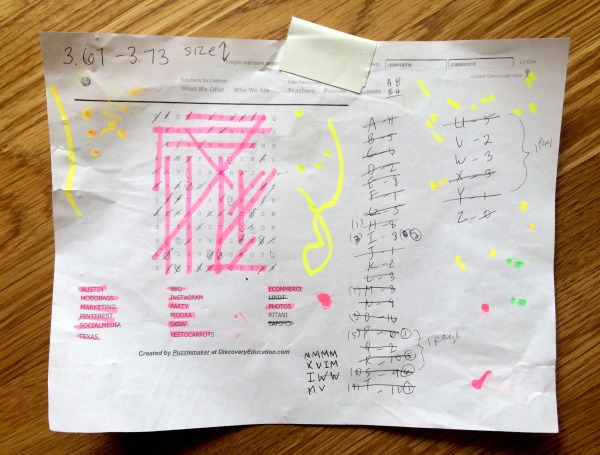
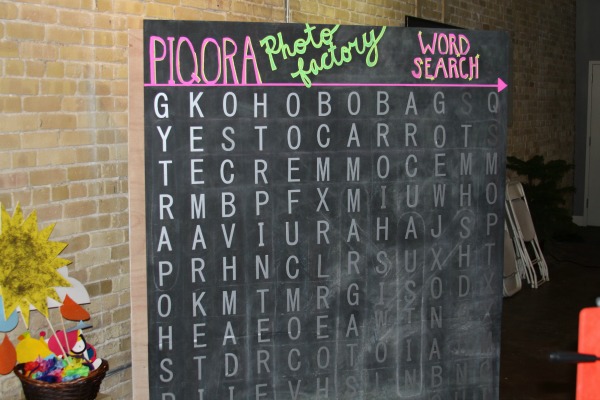
I think this giant word search would be an awesome photo backdrop for a wedding or corporate event! You could add everyones names or things that mean something to the bride and groom. The ideas are endless! I ended up with a 12×12 word search for a total of 144 letters.

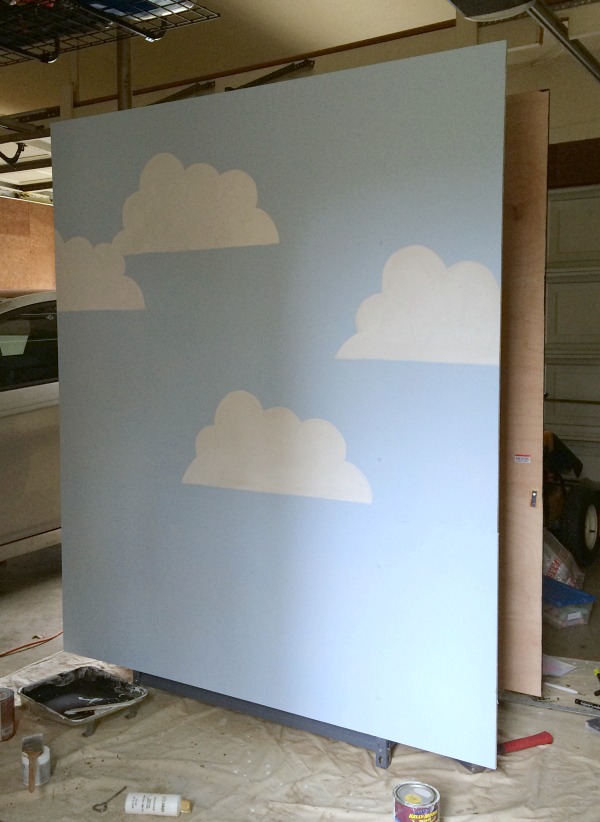
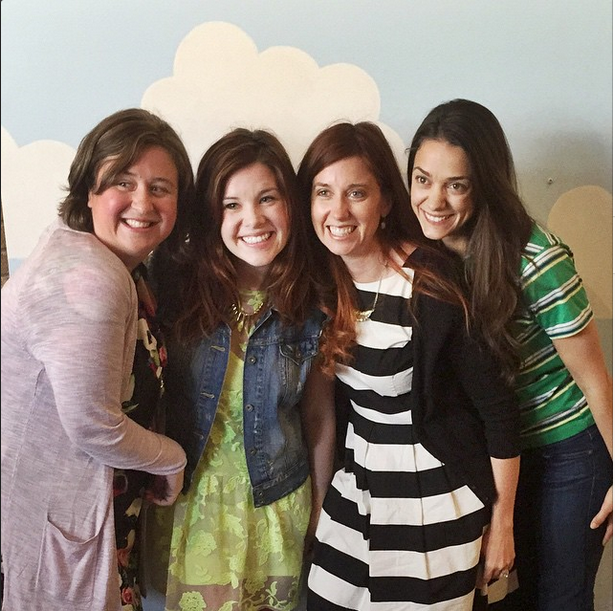
Just for fun, here is the back side of the word search… clouds! Andy and Maxwell came to listen to our panel and then I attempted to snap a few pictures with my baby, this one is turned out best!

So, how to make 2 DIY photo back drops? Here’s what you need to build the double sided photo backdrop:
- 2 8×4 sheets of ply wood
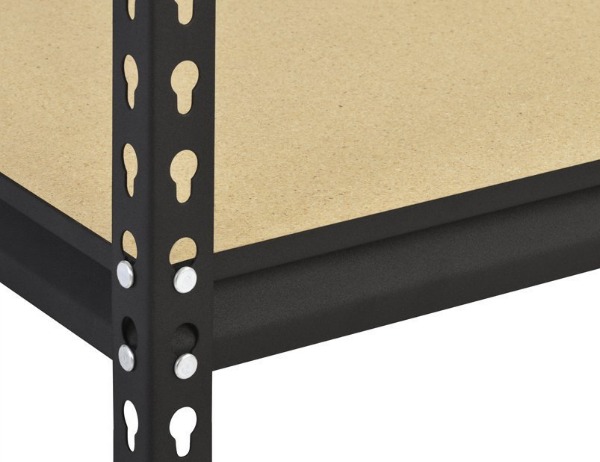
- Garage shelf unit, we used this one.


- Black chalk board paint
- Cricut Explore machine
- Silver vinyl

Our photo booth back drop stands about 6 feet 4 inches tall and 5 feet wide. It’s a great width, but I wish we would have made it 7 feet tall. To make a DIY photo booth you will need to cut your ply wood down into these 4 pieces:
- 2 4×5 feet pieces
- 2 4×2 feet pieces
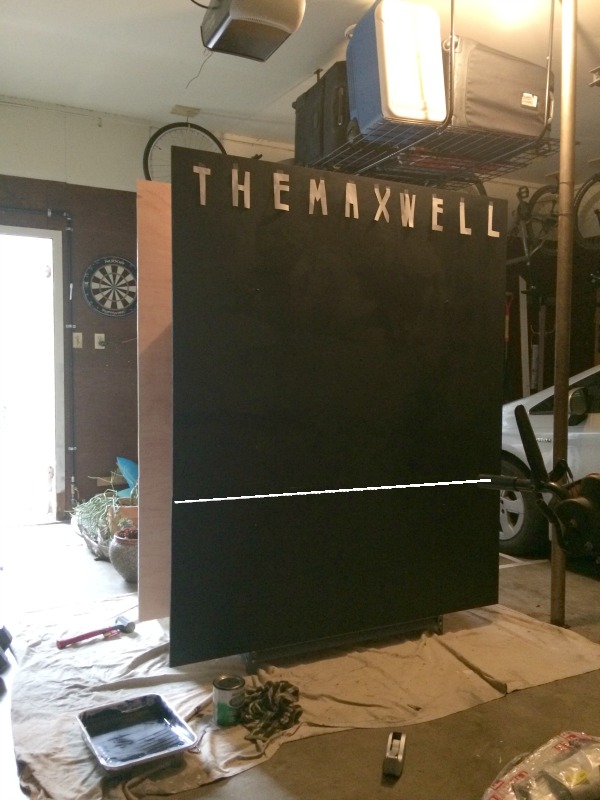
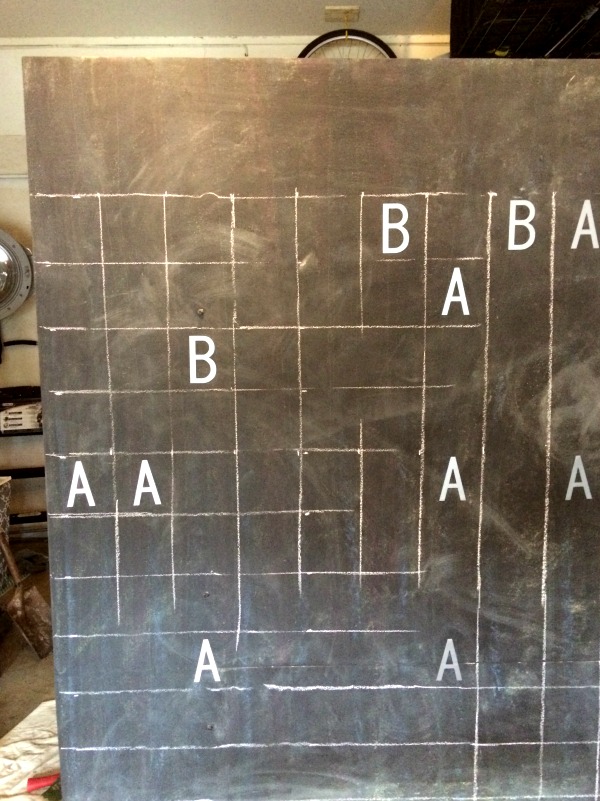
Here’s is my beautiful work space, AKA the garage. It was a rainy and gross for the few days we were building! This picture is obviously after I already painted the chalkboard paint over the ply wood, but you can see where the 2 pieces are and if you look closely you can see a few of the 8 screws. We did 4 for the bottom piece and 4 for the top piece. This is why the holes on the shelf are so important since this is how you attach the back drop.
You can also see in this picture how the back drop is double sided and open for storage in the middle.

“THE MAXWELL” letters at the top were just for size and space visuals. Those letters are 5 inches long and 10 across. I ended up going with letters that were 3.67 inches tall and 12 across. So a few things to note about planning out the word search:
- After you get the wood cut and drilled onto the shelf, it’s time to for the fun! Paint 4-5 coats of chalkboard paint on to the ply wood. The ply wood soaks it up!
- Make sure and let the chalkboard paint dry the proper amount of time. Just read the dang can. Then you have to condition your board! (More on that here.)
- Next use this free online puzzle maker to actually create the word search. Really simple. I used to use it all of the time as a teacher, I had a kiddo who thought word searches were the greatest thing ever!
- Note: There is a reason why all word searches are rectangular in shape. I did not take that into consideration, but figured it out first hand when I went to circle one of my diagonal words! You need the extra vertical space to circle. Plan for this.
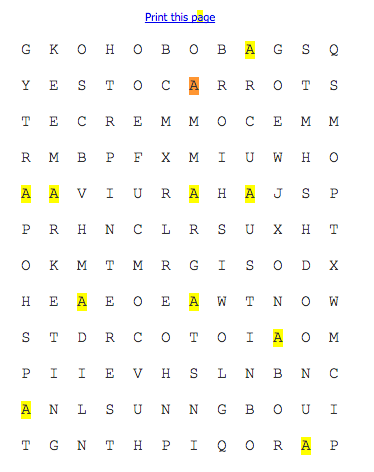
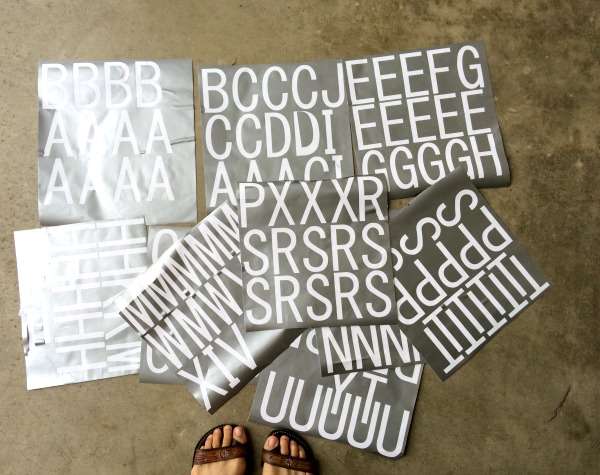
- Now, how to know how many letters to cut out with your Cricut? This is easy. After you get your word search the way you want it on the puzzle maker, go to Edit, Find in the menus at the top of your screen. This will highlight each letter for you so that you can count how many A’s, B’s, C’s, etc you need to cut out. Here are all of the “A” in my word search!


- Then just write the title in chalk markers!
Now, for the other side of the photo back drop! After the word search, this is cake! Just paint the whole thing blue and then doodle on 4 clouds!

I made a sunshine and a clouds with raindrops to go with it! And here it is in action on the day of our panel! (You can see lots more pics with the props here, here, here, and here!)


So, who is going to make a giant word search photo back drop first! I’d love to see it!
The post DIY photo backdrops appeared first on C.R.A.F.T..