
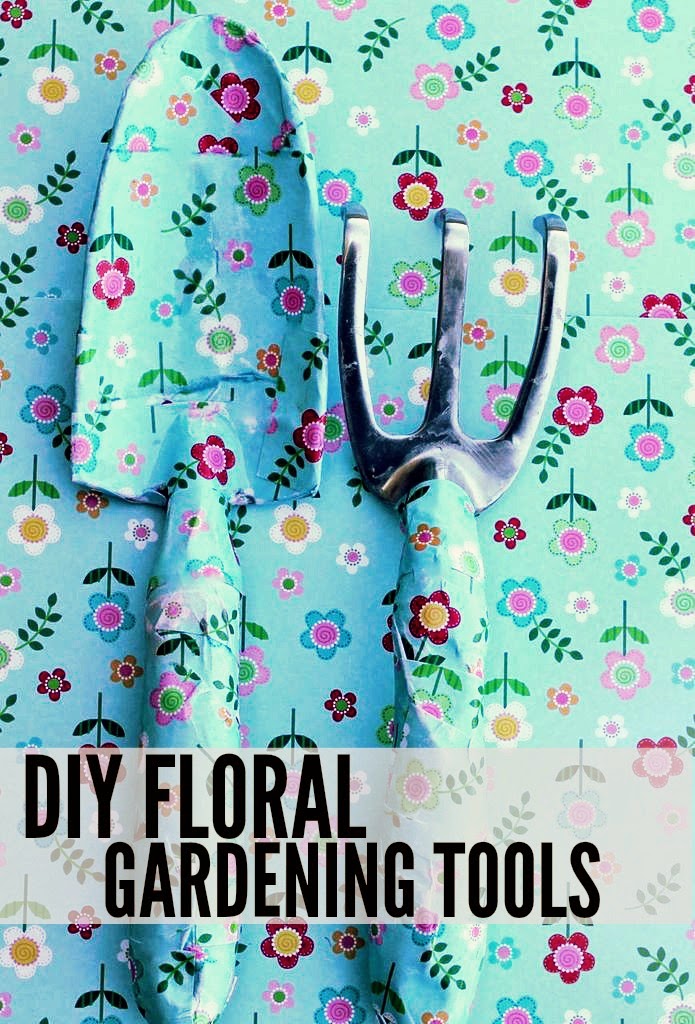
DIY Floral Gardening Tools
Florals are 'in' this season, home decor, fashion and of course-- in the garden! Olivia from DIY Mother is here today to share how to make your own contemporary gardening tools- who doesn't love a good "Anthropologie Inspired" craft?!

Anthropologie is one of those places I can go to and find about 80 DIY projects to do. The latest thing I saw was a printed gardening fork and trowel, for fifteen dollars a piece. I thought, that's a doable, totally cool way to customize a garden set. Even if it doesn’t turn out as adorable as these, it will still make me feel cute when I’m going out to garden.
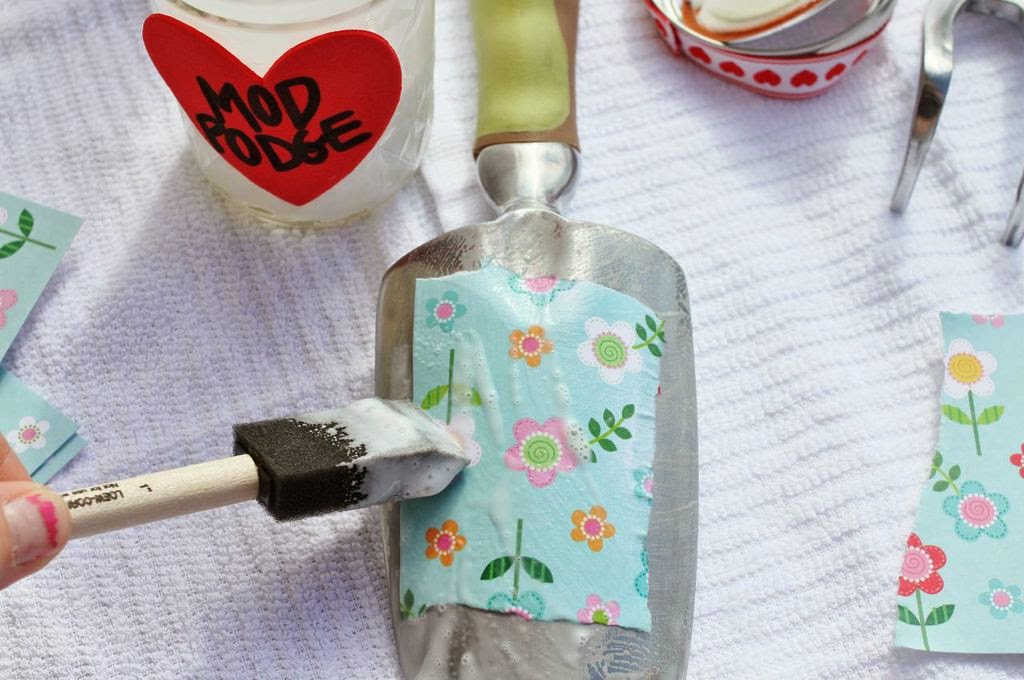
I knew the key was finding a similar “ditzy floral” print to decoupage onto the tools, so I headed to the nearest craft store and perused the scrapbook paper aisle. I ended up with a few sheets of floral sheets and a bottle of glue. You’ll see below that I use my own Mod Podge (I call it Fod Podge) using glue and water.

Here’s my step-by-step tutorial on how to decoupage your garden tools. A couple of months ago, I got a complete garden tool set, with a bag, from HD for about twenty bucks. So I think it's still an ongoing deal. I probably spent a total of 21 dollars on everything, including the cost of the tool set. I only decoupaged two pieces because with all of the nooks and crannies, it takes a while to get everything looking clean and even. Plan on devoting about an hour to this project if you want it to come out right.
Also, I chose not to decoupage the top of the gardening fork, because I didn't want it to get ripped or damaged while I was gardening. If I were to do this project again, I would probably just decoupage the handles on every single piece of equipment.
Also, I chose not to decoupage the top of the gardening fork, because I didn't want it to get ripped or damaged while I was gardening. If I were to do this project again, I would probably just decoupage the handles on every single piece of equipment.

Materials: Garden tools Scrapbook paper, fabric, or printed medium of your choice Mod Podge (or DIY version) Foam brush Sealant
1. Start by cutting (or tearing) pieces of the paper to decoupage the tools with. Coat the tools with the mod podge first, place the paper on, and add more mod podge. Work the paper around the curves of the tools using your hands, if possible.

2. As you move toward the handle of whichever tool you're using, use smaller pieces of your paper. The great thing about using small print paper is that it will look busy no matter how many pieces you use.

3. Work out any kinks in the paper with your hands, and use one final coat of mod podge to make sure everything is secure. When it's dry, use a sealant and spray over the tools liberally. And you are done!
Thank you to Olivia from DIY Mother for sharing her Floral Gardening Tools today! This project would make a great housewarming gift, teacher appreciation present, or an activity to do with the kiddos for Mother's Day.


Like this post? Join the thousands of other readers that have subscribed to Crafty Texas Girls.
Click below to get your free subscription delivered directly to your inbox.
Subscribe to crafty texas girls
Keep in Touch with Crafty Texas Girls
Facebook | Instagram | Pinterest | Twitter | Blog
Follow my blog with Bloglovin
All photos and text on craftytexasgirls.com are copyright protected. You may not copy entire articles or posts (even with a link) without my express written permission. Email any requests or links used to [email protected].
More posts from Samantha Conner