
WashiTape SwitchBoard DIY
Yesterday I were busy in setting up my messy craftroom, To be very honest..my craftroom is not a wonderful place or a big room as my other artist friends & craft bloggers.. But I am relax with this place totally. Its an average small room with one window & two doors but suitable for my crafty needs, in fact more enough for me as you know how content person I am (Remember my Less Is More theory..hahaha) Now I am getting more organized in keeping my crafty stuff together at one place nicely! I am trying to make my craft room even more better and pretty with my art. So what if its small. It should be artistic..That’s it..So I am on & off working & renovating this small space..Let’s see how it turned after an year when I will finish working on..haha..Lazy me..
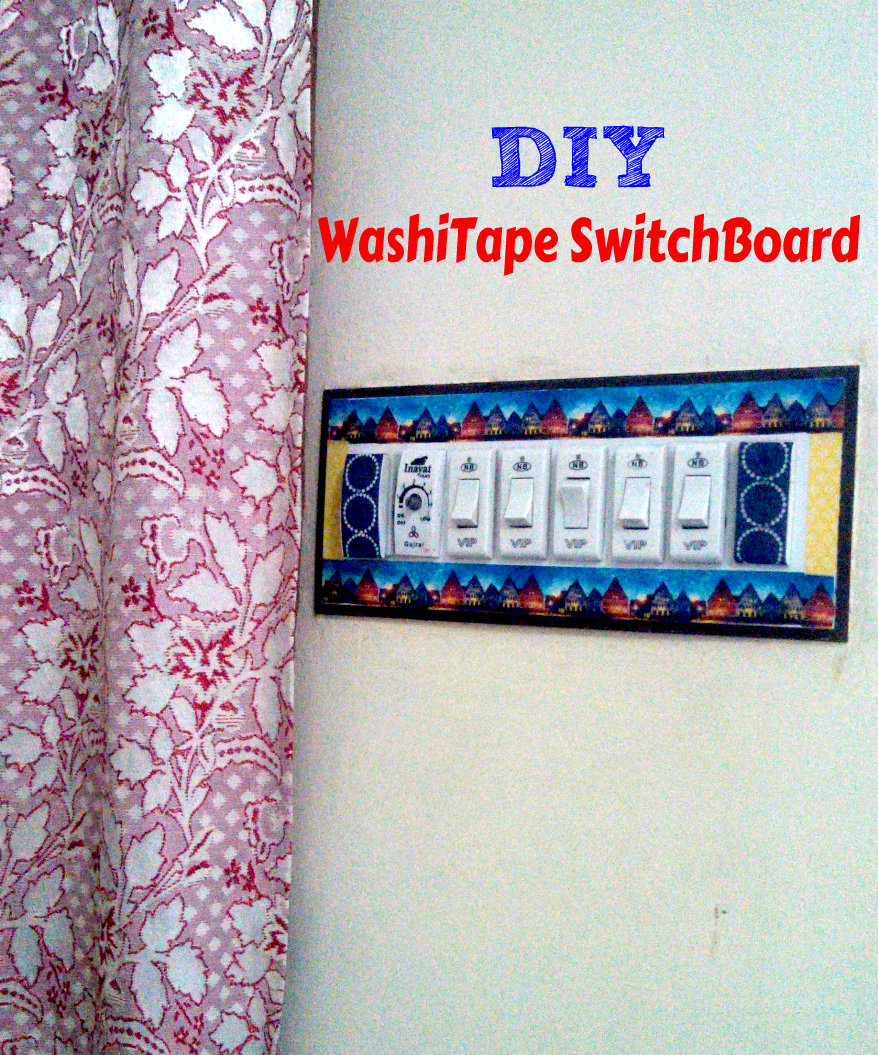
Today I will show you how I design my plain and simple white switchboard. Now it’s colorful with washi tape. It hardly will take 10 minutes and looking so fine.. I hope you will also like to see what colorful change I have done at my craftroom switchboard.
WashiTape SwitchBoard DIY

WashiTape SwitchBoard DIY
This switchboard was next to room curtains, I thought to paint it first but that will be taking more time & as you know how lazy is this blogger..ahem ahem..So I just think about this easy version which is similar to paint or decoupage but it is washi tape!

WashiTape SwitchBoard DIY
a white switchboard in the art room of a crafty gal…?? No way!! Let’s see how simply I have designed it..
I apply the tapes of different designs & sizes and cut it simply! one switch was damaged a little & was not in the use so I cover it too & the opposite one (where you can read -Fuse) I covered both with a wide tape while other areas are covered with different tapes!

WashiTape SwitchBoard DIY
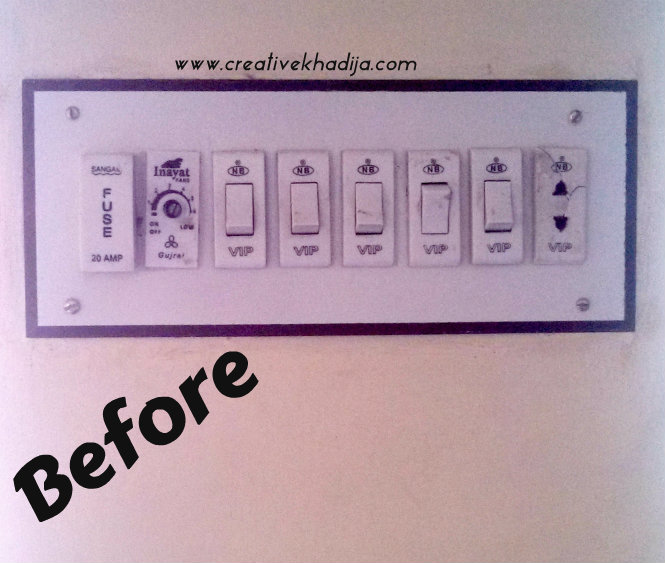
These small boards near the floor were even not visible but now they are prominent on the wall :)

WashiTape Storage ideas
This is how I am currently holding my washitape collection. I got these all the way from Singapore… It’s a brown box of any tech gadget.

WashiTape SwitchBoard DIY
Ta Da…… As Simple as ABC..isn’t it?? what do you think?
I hope you enjoyed this idea, I weren’t having many pics while doing this, but I think there is no need to describe this more!
You can also have a look at my previous DIY ideas with Washi Tape. It’s magical fun! design anything quickly & enjoy!
Thank you.
Khadija
The post WashiTape SwitchBoard DIY appeared first on Creative Mind Khadija.