
Sewing toys: Coverstitch obsession edition
WARNING: This post is loooong. I was going to break it up into two but I decided it’s easier to keep it all together, then those of you looking for coverstitch information can find it all in one place.
You can use these links to navigate:
- What is a coverstitch machine?
- The options
- Unboxing the Janome CoverPro 1000CPX
- Coverstitch tutorials
.
I was a very lucky girl this Christmas, “Santa” didn’t know what to get me so I asked for something I’ve been thinking about for a while: a coverstitch machine.
Santa knows what a coverstitch machine is, we’ve discussed them before. He said, “If you make me a hoodie with cool stitching then I’ll put one under the tree…”
Deal!
So I went into full investigation mode. It’s hard to find a lot of information about coverstitch machines, even more difficult to find one to test drive here in NZ. It seems that, like overlocker machines in the home back in my Mum’s day, cover stitch machines are only just beginning to gain traction with the domestic market.
(I will refer to my overlocker a few times in this post, it being the closest thing I have experienced to a coverstitch. Overlockers and sergers are the same thing. In NZ we call them overlockers so that is the term I will continue to use.)
This is a luxury purchase. Between my Elna 2130 and Bernina 1150MDA I have two very good machines that allow me to create anything I want. I love sewing, I sew a lot and I often sew with knits/stretchy fabrics. The “want” was strong.
So I am going to share my experience of choosing a coverstitch machine and what I think of the machine I purchased. This is from my point of view and based on my personal sewing experience, I am not an expert. I hope this post will help any of you who are also considering one.
Disclaimer: By reading this post you release the curious kiwi from any responsibility should the following cause you to run out and buy a new sewing machine!
So what is a coverstitch machine?.

If you are familiar with an overlocker, a coverstitch machine is similar except that they have no knives and only one looper with 1 or 2 needles. On higher end machines you may also have a 3rd needle.
I am still learning everything that my coverstitch machine can do but the most simple way to introduce you to coverstitch is for you to go grab a rtw t-shirt. See the double row of stitching on the outside of the hem and at the sleeves? It looks a bit like twin needle stitching but inside it looks like an overlocker stitch and encases the raw edge. This is a 2-needle coverstitch.
A 3-needle machine gives you two different widths of coverstitching – using the centre needle plus the left or right needle for a narrow width of 3mm OR using the two outside needles for the wider width of 6mm. And of course you can use all three needles at once.
You can also use the coverstitch to apply the “overlock” looking stitch as a decorative finish to the outside by stitching with your fabric “upside down”. You often see this type of decorative stitch on sports wear, sometimes in a contrasting thread colour.
Stitching with only 1 needle threaded creates a chainstitch. At first I wasn’t really sure what chainstitch was for, apart from embellishment (you can use a thicker thread in the looper), but I have read that it is great for basting because it unravels easily when the correct thread is pulled. Since developing my spot-the-coverstitching-vision I’ve noticed that on some of NH’s t-shirts there is 1 or 2 lines of chainstitching at the shoulder so perhaps it is also good for reinforcing those areas.
Some high-end overlockers can also convert to coverstitich. When I was investigating my overlocker purchase I looked at a few machines that could also coverstitich but chose to buy a dedicated overlocker. The price jump to a machine that could do both was out of my budget at the time but I was also advised that converting them can be difficult and that machines that do both can be a compromise of both designs. I was already 100% overwhelmed by the overlocker options so I decided at that time I would buy a dedicated coverstitch machine when I was ready.
Having said that however, I also know people who own these machines, use them as both overlockers and coverstitchers and love them.
Here are my tips for sewing machine shopping (for any type of machine):
- Each brand is different – consider the brand you are familiar with but don’t forget to look at others
- This is an important purchase so it’s important to “test drive” your options
- Set a budget and decide what you want your machine to do
- Think about how your sewing will evolve, try to buy a machine that you can “grow into”, consider any bonus features you can use in the future
- At the shop try threading and converting the machine yourself
- Take samples of fabrics that you sew with and try them out
- Try all the features
- Ask lots of questions
- If the sales assistant isn’t helpful, go elsewhere
- Make it fun!
My ideal coverstitch machine was less than NZD$1000, 3-needles/4-thread, had a free arm, and was not super chunky.
The options:.
Bernina 009DCC/L220
I have a Bernina 1150MDA overlocker that I LOVE so it seemed logical to investigate Bernina first.

On their website they have a picture of the 009DCC, it is a 2-needle/3-thread coverstitch machine with no free arm. It has front dial-style tension adjustment knobs that look a little old fashioned in my opinion but I was prepared to give it a test drive.
I looked at this machine about 6 months ago and emailed my local Bernina dealer to ask about costs and if they had one in store for a test drive. They are near my work so it meant I could pop down during my lunch break for fun sewing play time. They replied that Bernina were releasing a new model soon and would let me know when it arrived. I rung them about 2 months ago after hearing nothing and got the same response and they didn’t seem inclined to help me further.
When I started looking more seriously just before Christmas I rung a different dealer outside of the CBD. She confirmed that Bernina are releasing a new machine but also offered to ring them to ask when it would be available and how much it would cost. The 009DCC will be replaced with the L220 in March 2014 and will cost NZD$1399 – This was way outside my budget and impatient kiwi didn’t want to wait that long.
Here is a sneak peak I found of the L220 and a
Brother 2340CV
Next I grudging looked at Brother, I say “grudgingly” because Brother makes me think of printers and $199 sewing machines from Harvey Norman. However, since their sewing machines are fairly cheap…perhaps their coverstitch would be too?

I did not get far enough along in my investigation to learn how much this machine costs – perhaps around NZD$600? – I pretty quickly discounted it from my list.
While it is a 3-needle/4-thread machine, it looks hideously clunky, has no free arm and I read some not very encouraging reviews about it online: There are difficulties in releasing the thread tension after you finish stitching and the foot controller is laggy when you start stitching.
Elna 444
This will sound silly (and vain) but when I was overlocker shopping I investigated Elna first. My sewing machine is an Elna 2130 (now discontinued) and it’s a great machine but when it came to the Elna overlockers I really didn’t like how they were painted up all “Fisher Price”. I think the newer machines are different now but at that time the thread path colours were overdone and it made me feel a bit babied. I kind of like my machines to look more grown up

Their coverstitch isn’t so bad and I was willing to give one a try.
Unfortunately Elna have given the majority of their dealership rights to Spotlight, ugh!
I could write a ten thousand word essay on how bad their customer service is so don’t get me started. I was immediately not enthused about purchasing through any of their stores considering I might need to go back there for servicing and purchasing accessories. I rang them anyway and left a message but have not heard back from anyone to this day…there are a few other dealers in Wellington who sell Elna machines and I soon found out that the 444 isn’t available in New Zealand.
I also learnt that Janome make the Elna coverstitch and from what I read online the Janome would possibly be slightly less expensive.
So of course Janome were next:
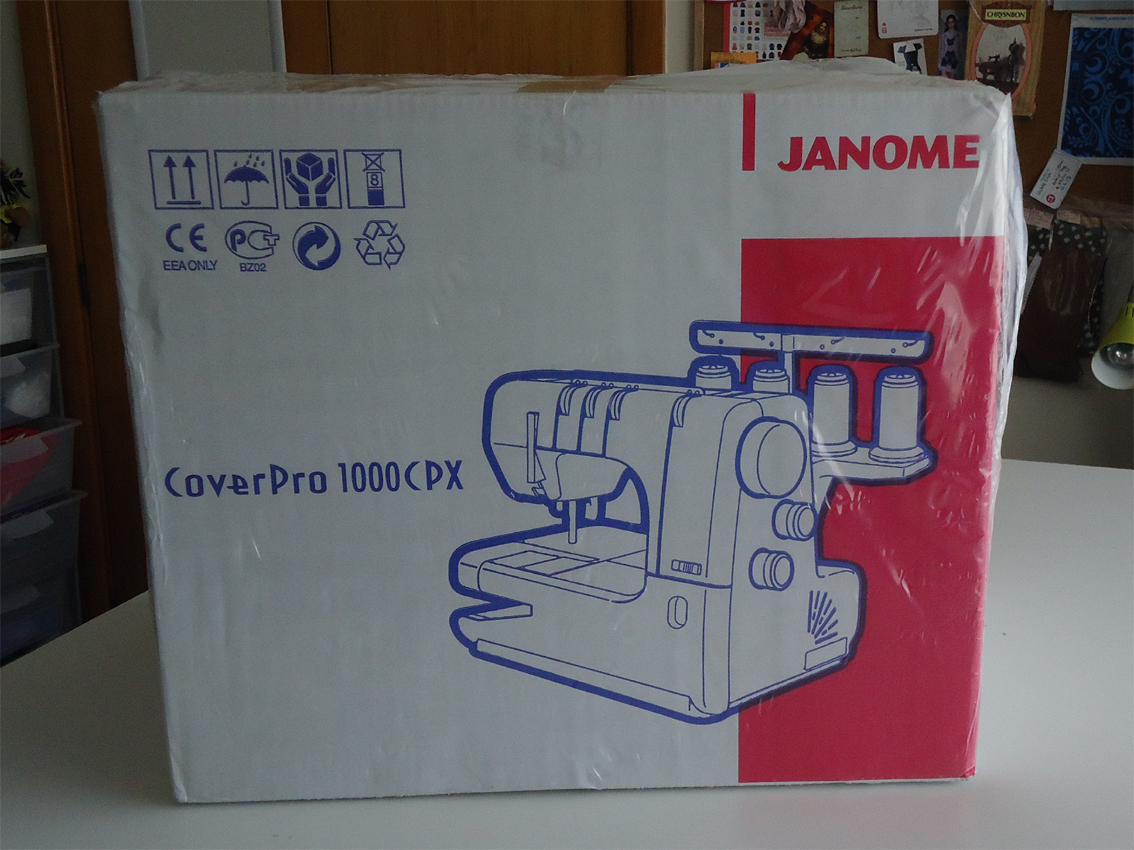
Janome CoverPro 1000CPX – NZD$899 (on special)
I rung Wellington Sewing Services in Kilbirnie where the gentleman who answered the phone replied to all my questions including confirming the price and quickly suggested I come in for a test drive.
Finally, some real service and a machine worthy of my time.

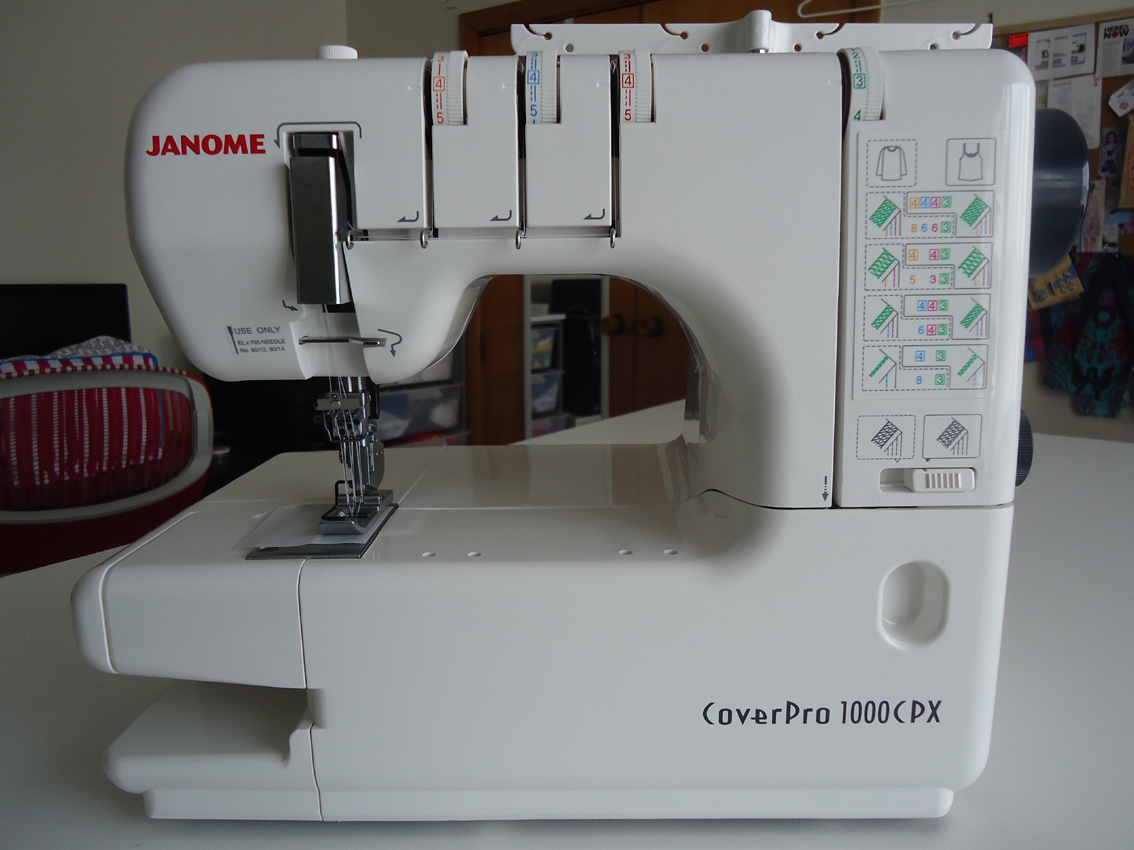
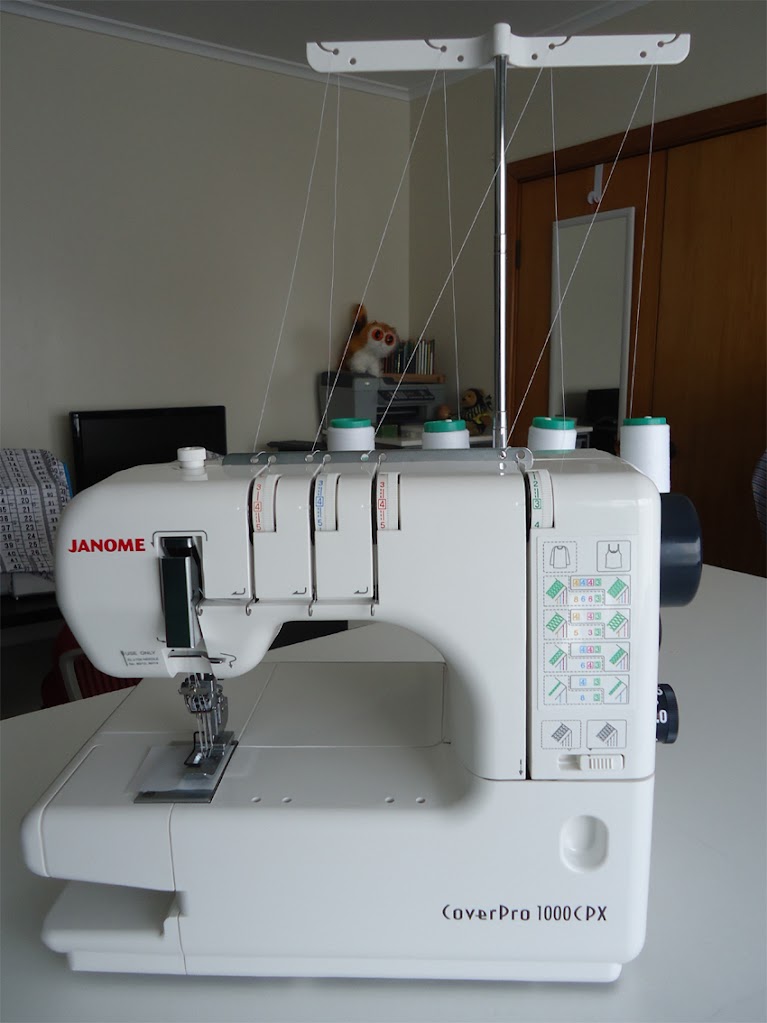
While waiting for the weekend to roll around I read some great things online and watched some YouTube videos. This 3-needle/4-thread machine has the more upright look of a traditional sewing machine with a long arm promising lots of sewing space. It also has a removable piece on the sewing bed that reveals the free arm.
On Saturday NH drove me to the shop. The gentleman who I spoke with on the phone pulled out the machine and showed me how it worked. Then he un-threaded and re-threaded it to show me how easy it was and let me have a go using the samples of stretch fabric that I bought along with me from home.
It was AMAZING! My two fabrics were very different, one a slinky lycra and the other a cotton jersey, but it stitched both pieces beautifully without changing any settings.

The machine in the store had white thread in the two outer needles and a variegated thread through the looper:
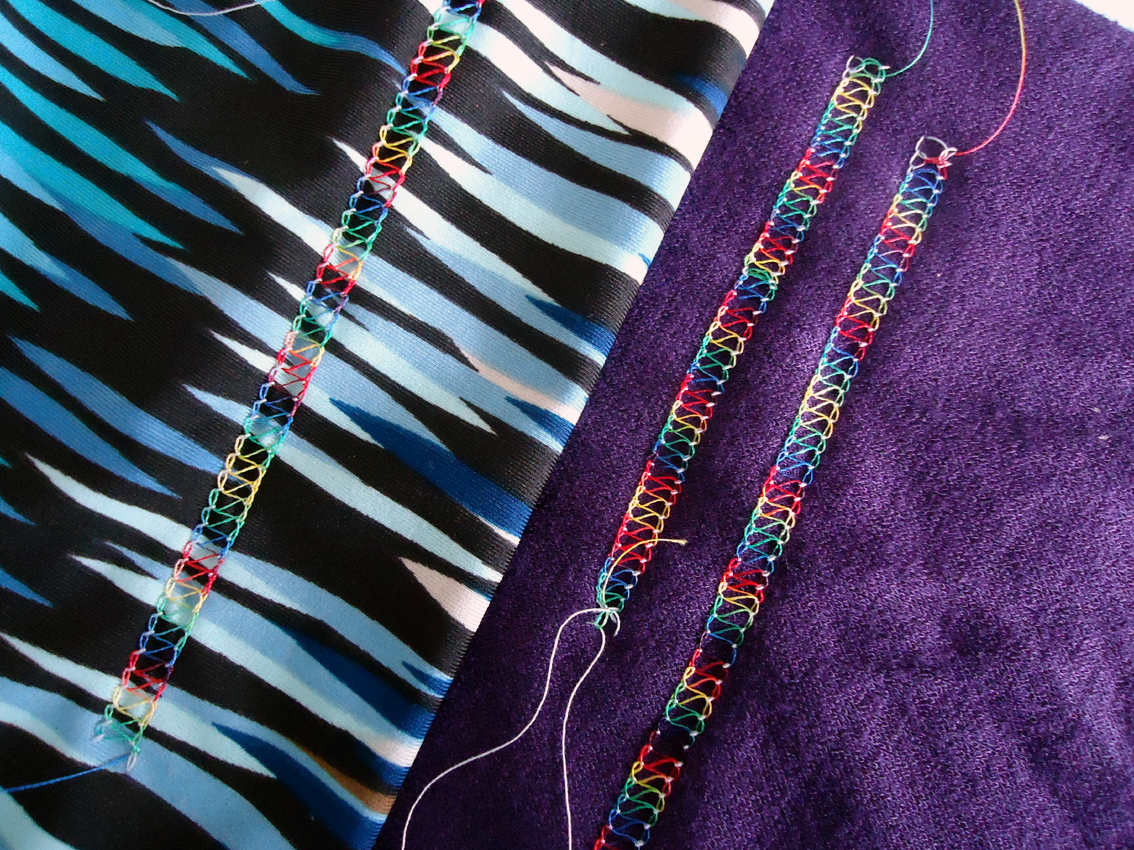

Trippy!
Next I was shown how to correct skipped stitches by adjusting the differential feed.
TOP TIP! This is the most common complaint I read online about ALL coverstitch brands and not many people know this trick. I also leant how to stop “tunnelling” in merino by using a wash away stabiliser.
I was so impressed not just with the machine but with the service. It was my first visit to Wellington Sewing Services and I will definitely be back. It’s an amazing store with lots of stock and the gentleman who helped me really knows his stuff. He picked up quickly that I was an experienced sewist – there is nothing worse than being overly babied – and I enjoyed being allowed to use the machine with little interference so I could make up my own mind.
While I played around he talked a bit more about the machines features and motor. He has been servicing and repairing machines for quite some time and has a very high opinion of Janome in general.
I probably should have test driven another machine as comparison but after 30 minutes it was too late, I was SOLD! I took the machine home that day along with a free pair of fabric scissors and a long strip of the wash away stabiliser.
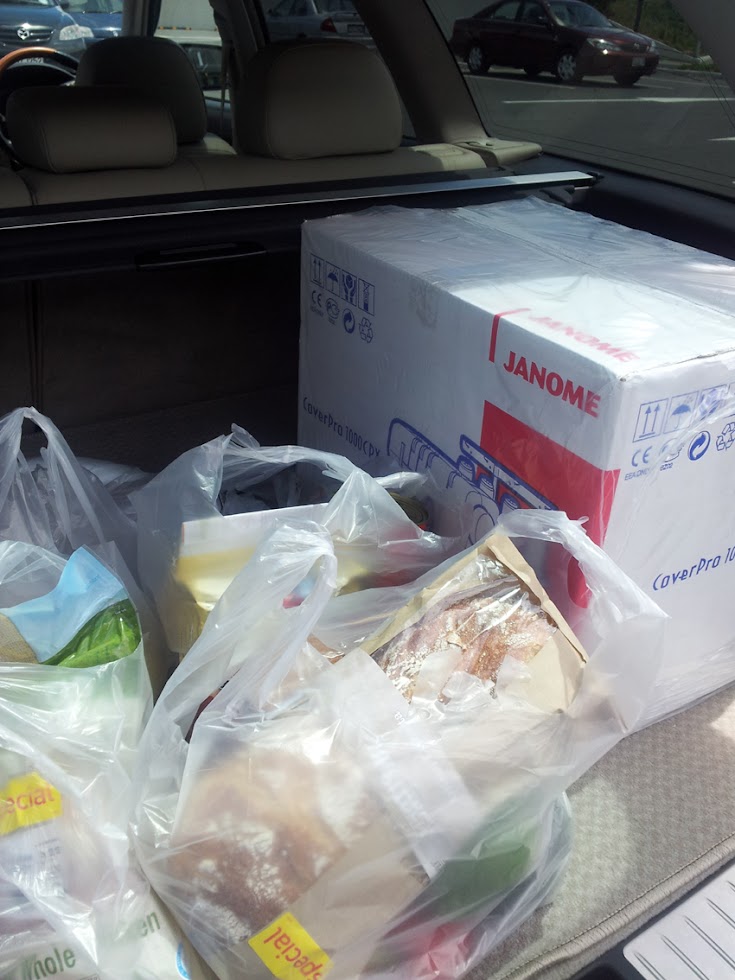

A boot full of Christmas shopping: Doing it right
Other machines I could have looked at, but discounted due to cost was the Babylock at NZD$1999 and the Pfaff Coverlock 3 or 4 at NZD$1699 and NZD$2599 respectively.


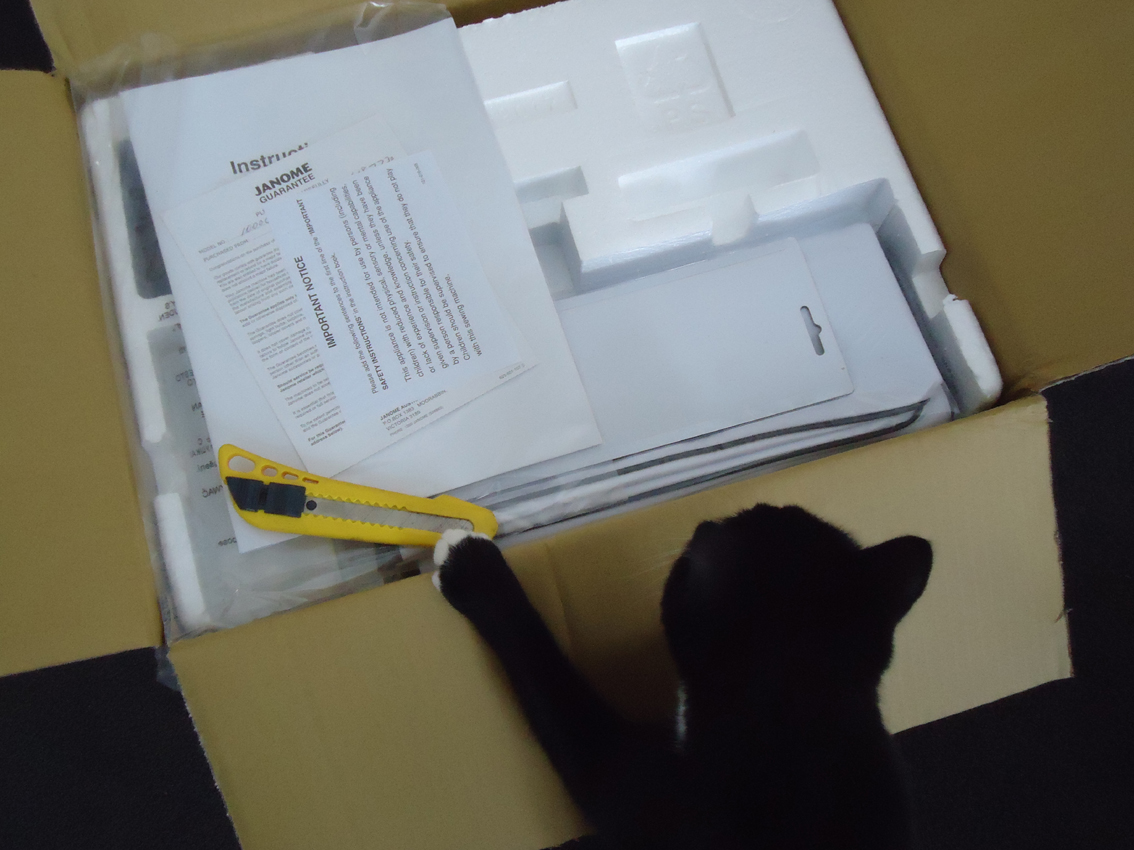
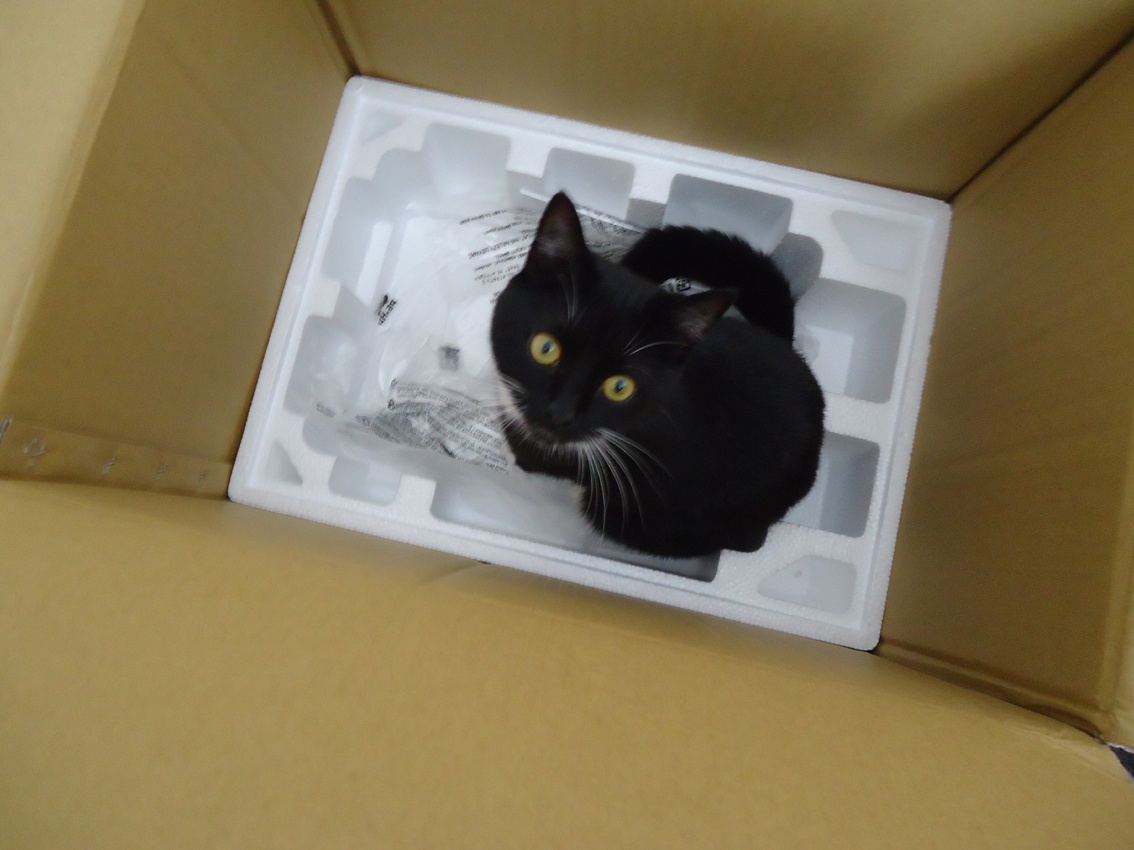
Harri was excited about the prospect of a new box to claim as her own – a chunky bit of polystyrene on top kept her out of it…for now…

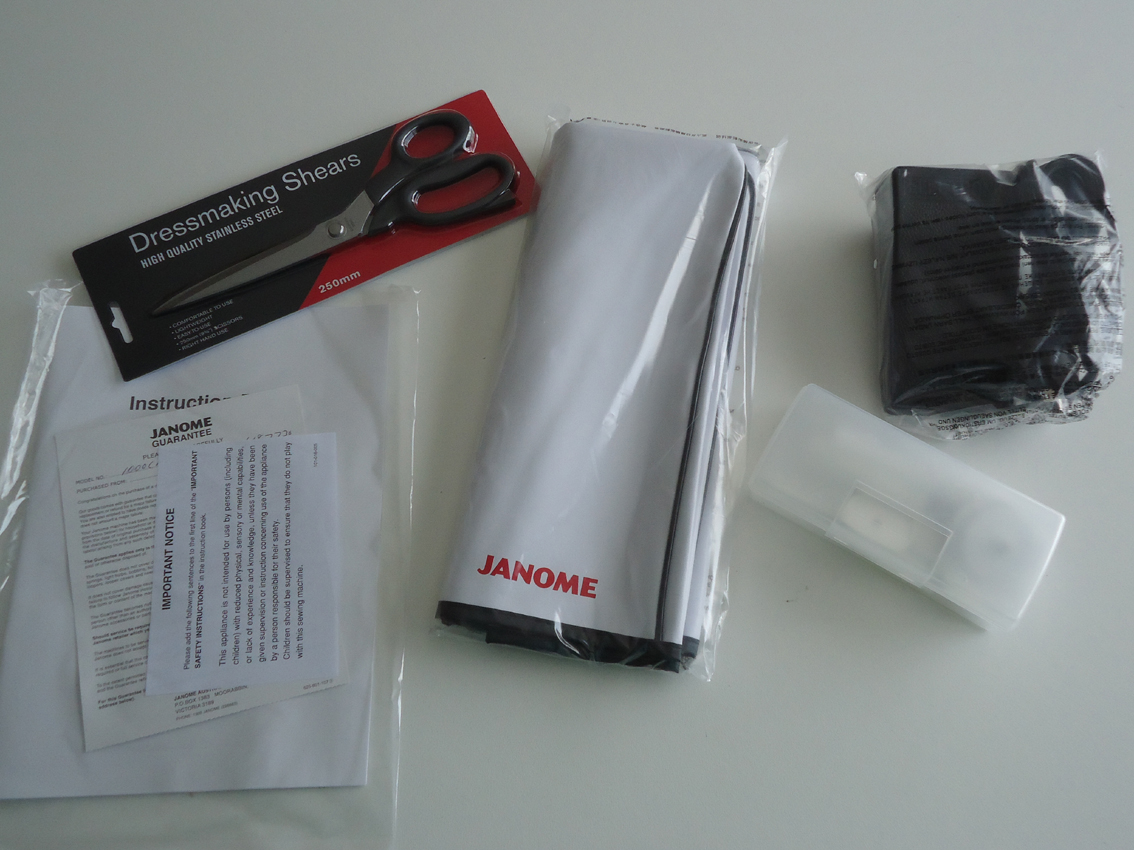
On the top layer were my free scissors (not as nice to use as my Mundials, but always good to have a spare set floating around!), plastic bag with manual and warranty card, vinyl machine cover, foot controller and plastic box filled with the standard accessories.

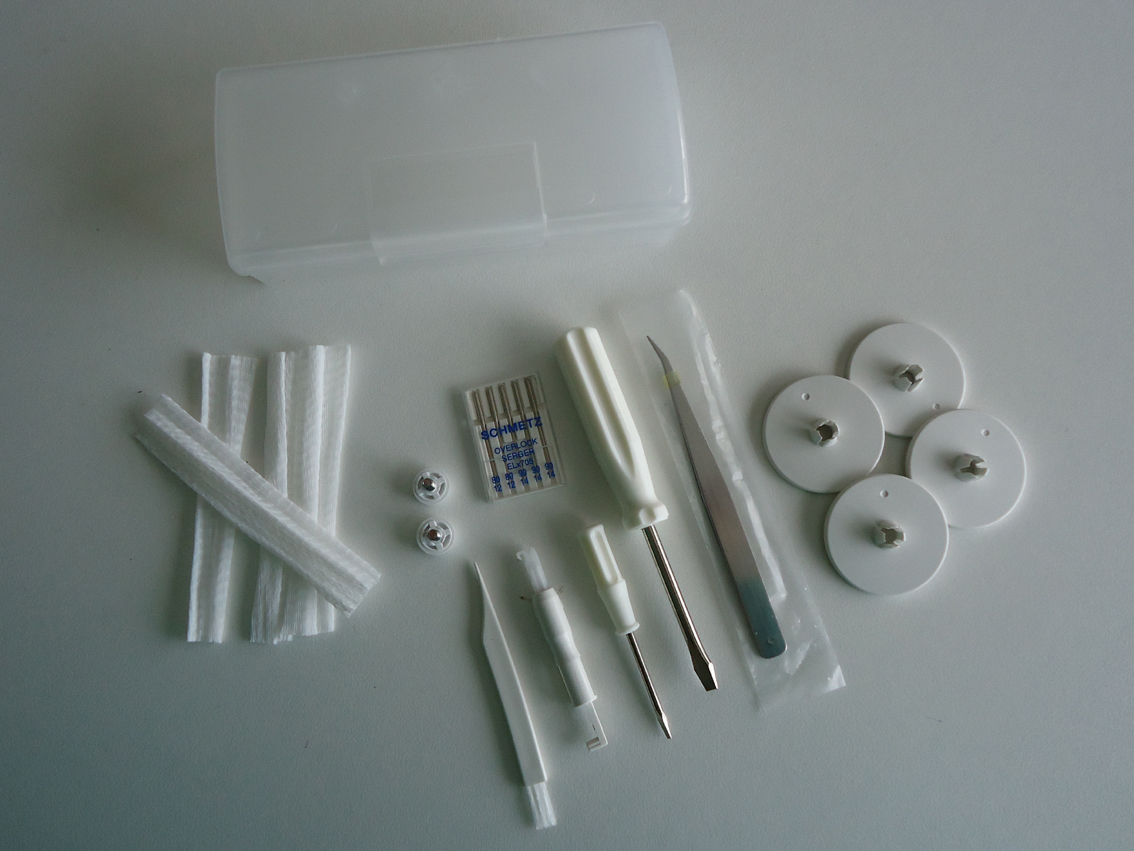
Inside the plastic box:
- 4 thread spool nets
- 2 accessory screws
- Schmetz needles (it uses the EL X 705 needle system)
- 4 thread spool caps
- Tweezers
- 2 screwdrivers
- Needle threader
- Lint brush

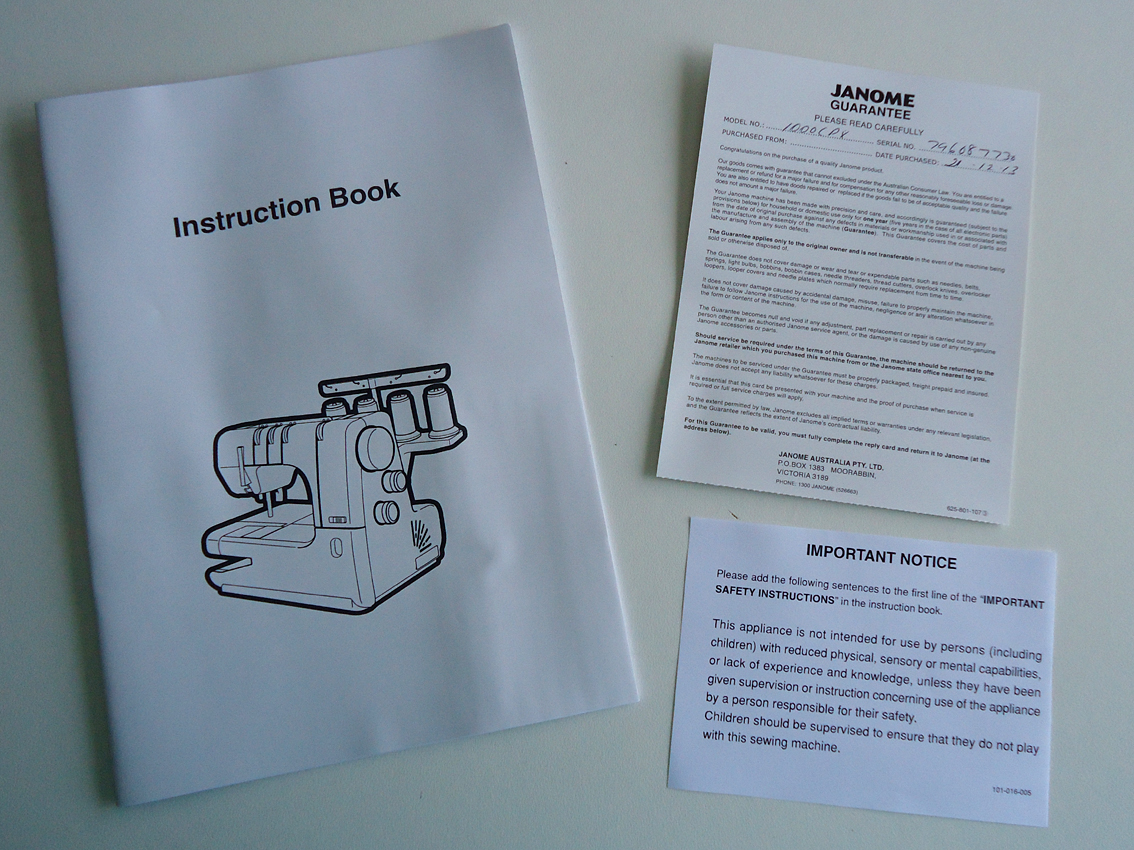
Manual, warranty card and…umm, an “Important Notice” about not letting children play with the machine unsupervised.

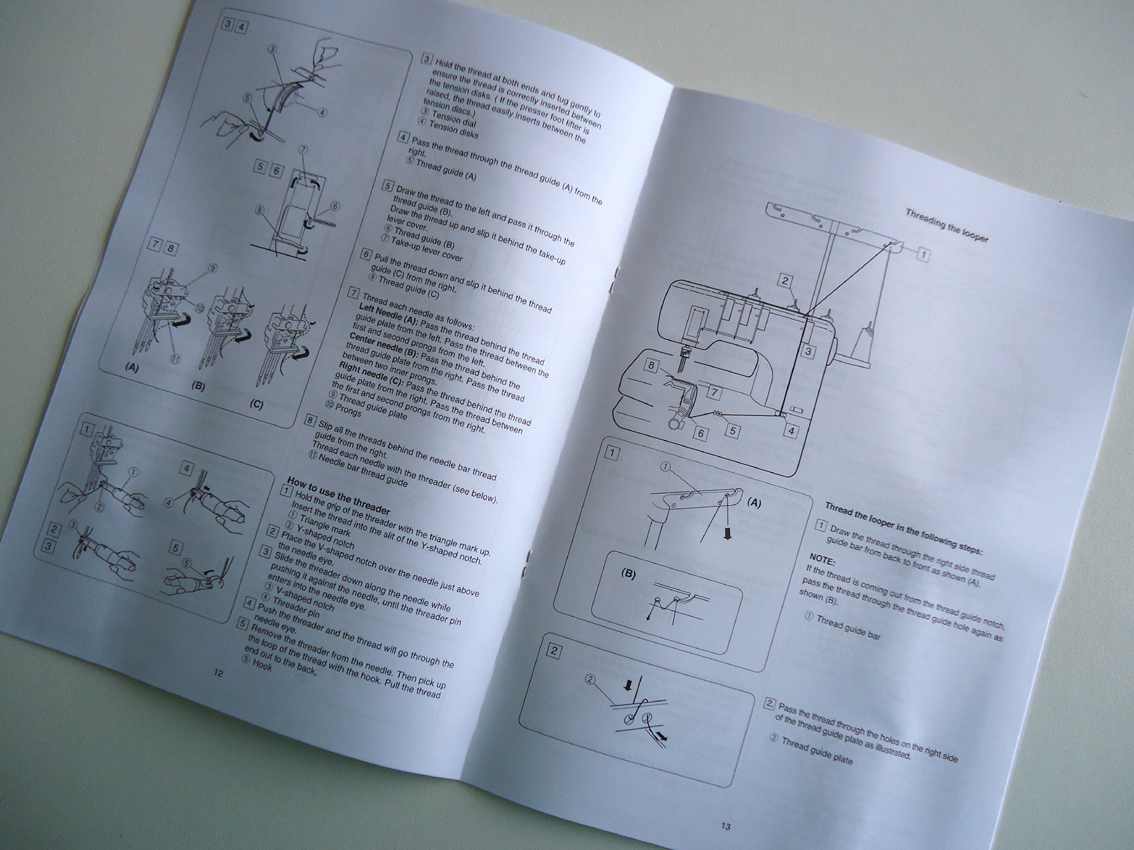
The instructions include a large diagram of the machine, naming all the parts, information on how to set it up and what each dial does. Clear threading diagrams are followed by instructions on setting up each stitch type including correct tensioning. The final section includes machine care and a troubleshooting table.

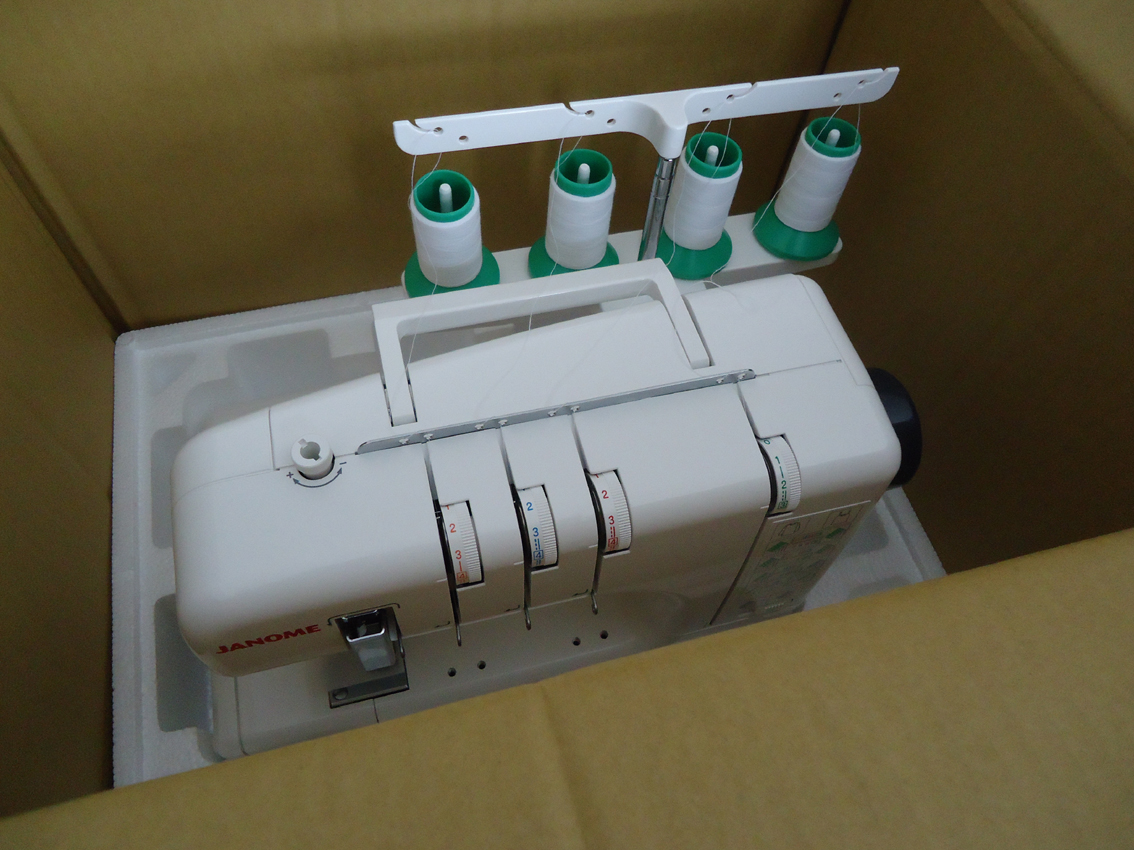
Back to the box – under the foam I was surprised to find the machine pre-threaded with all three needles in white. Nice!


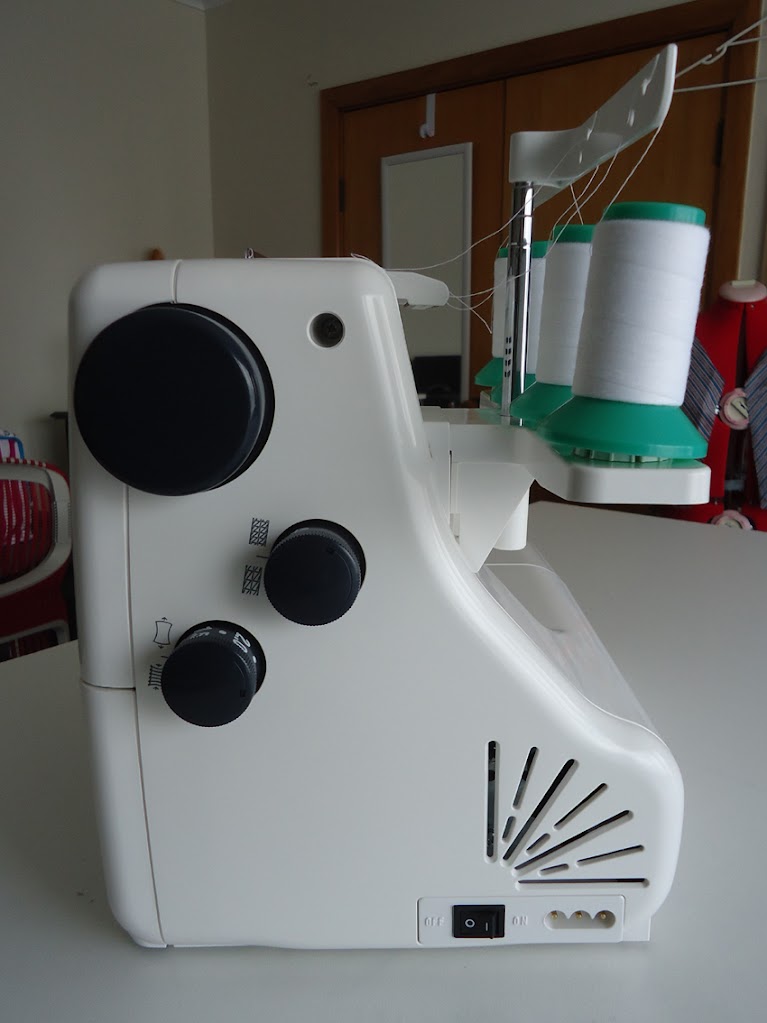
From the side you can see the extra depth. Hand wheel, stitch length dial and differential feed located similar to my Bernina.
More vanity talk: Online I saw a lot of images of this machines with lilac coloured handwheel and knobs – I’m glad mine is dark grey


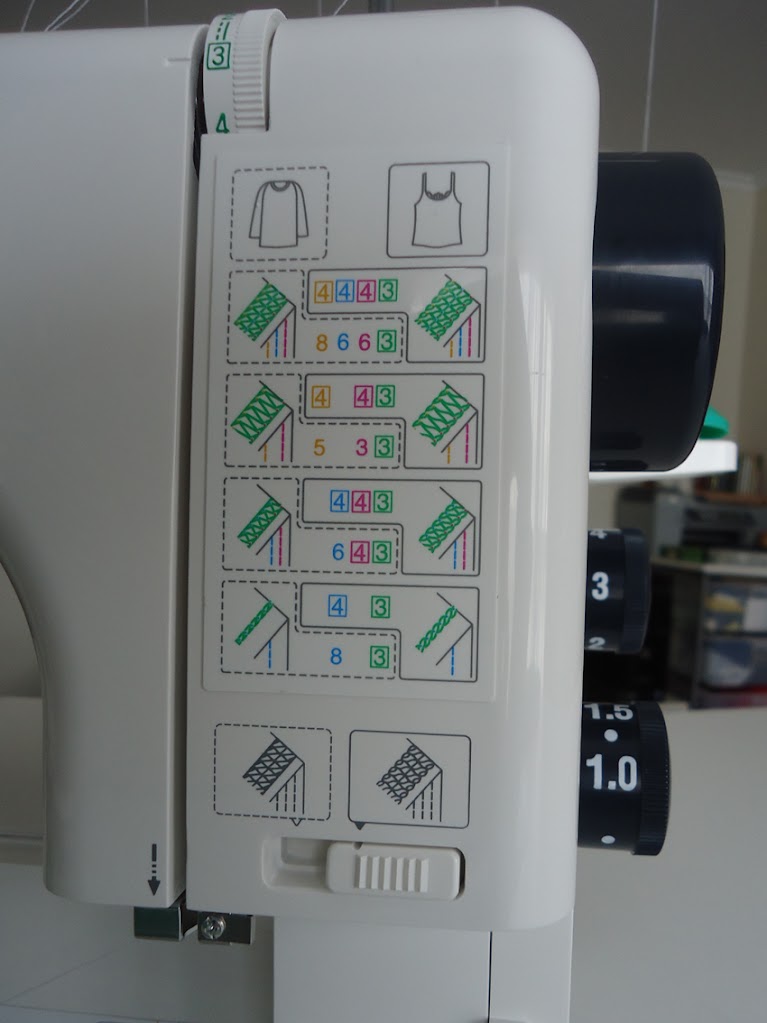
On the left, recommended settings for heavyweight fabrics. On the right, for light to medium weight. As with any tension settings these are just starting suggestions and the manual explains how to tune these for a balanced stitch depending on your fabric.
The slider below this is an additional adjustment to the looper thread tension, used when sewing heavyweight fabrics.

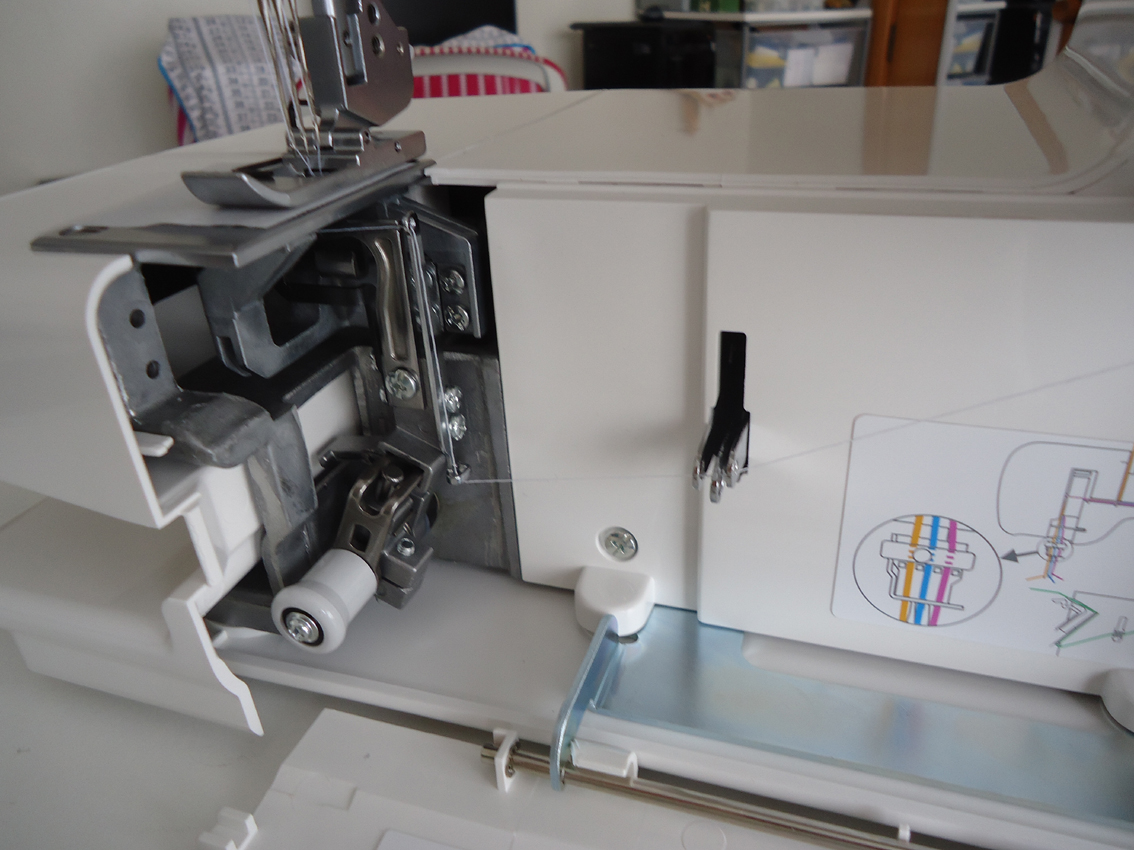
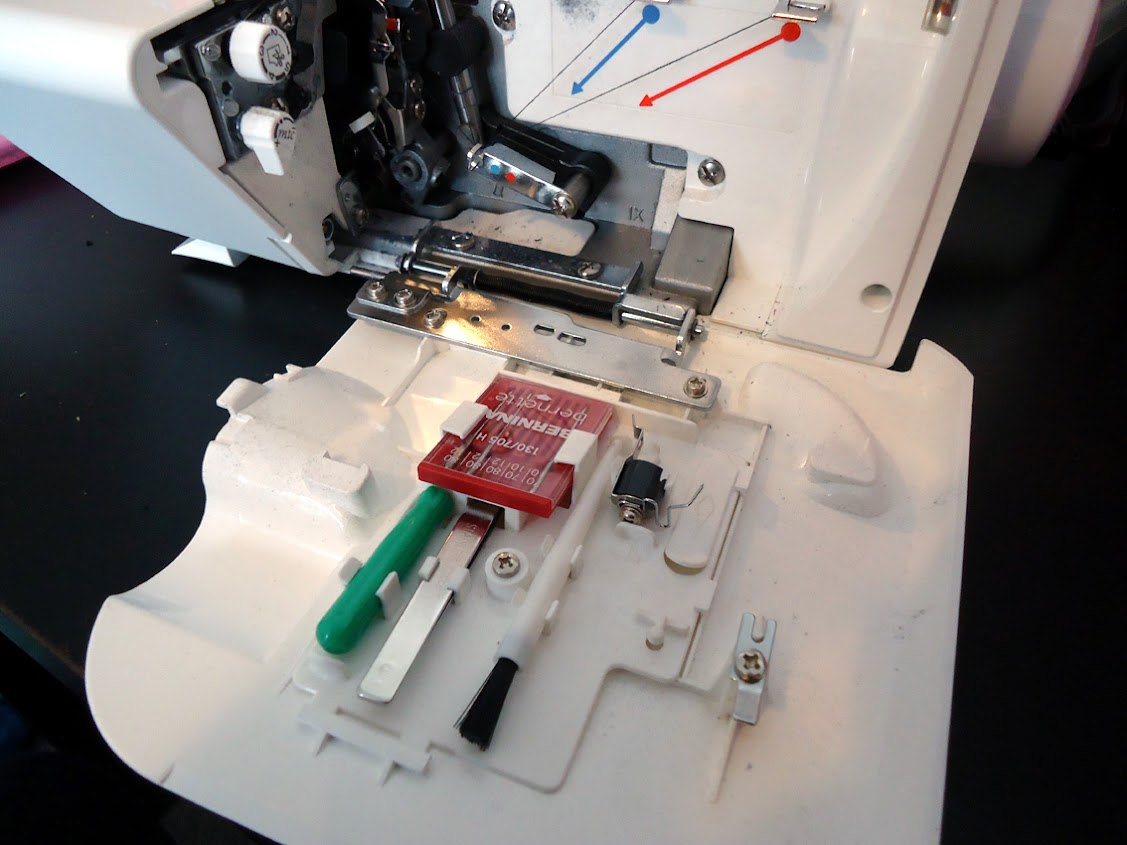
Inside the front cover you can see the thread passing through the looper take up levers (the three fingers at centre) and on to the looper, which is tucked under the feed dogs. The white knob near the base drops the looper out (to the right) so you can easily thread it. You click it back in when you are finished and bring the thread to the top.


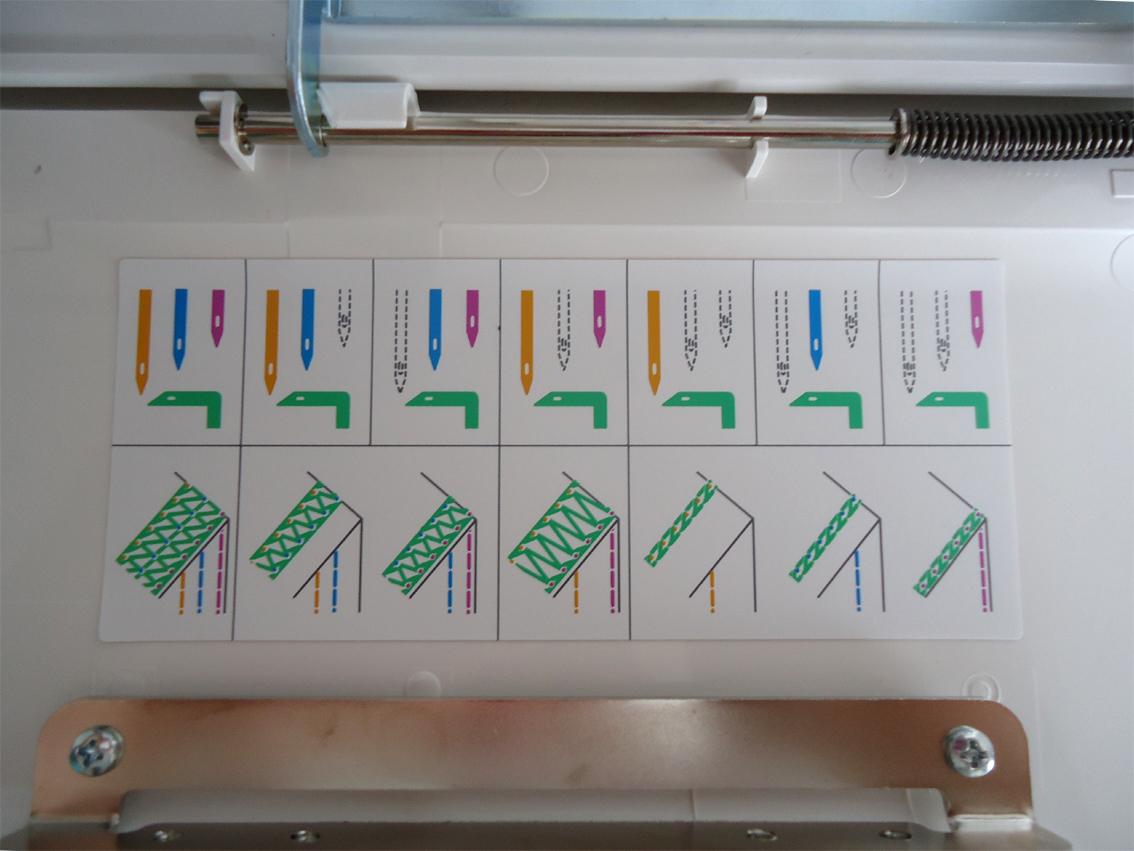
…quick reference for threading each stitch type.
It’s really easy to thread and tension plus the long arm gives you a lot of space to manoeuvre fabric around. It’s also fast (not quite as fast as the Bernina, but I’m ok with that!) and it’s very quiet.


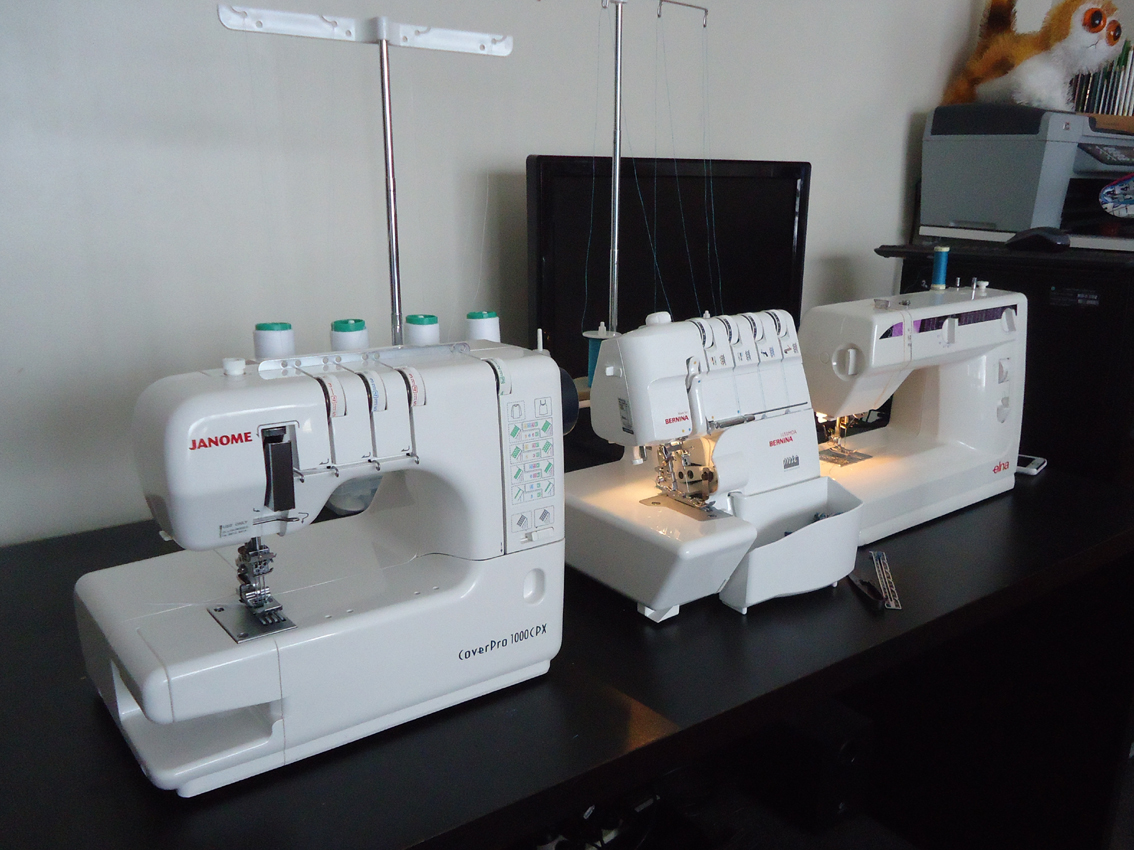
All lined up it appears as if I am trying to collect every brand of sewing machine, and I need a bigger table, hehe! Oh and I just noticed that all the brand names are printed in red.
In reality they don’t sit on my table like this. I’m usually only using two machines at a time so the spare machine sits near the back. Ideally I’d like to position my table perpendicular to the wall so that I can put the overlocker and coverstitch back-to-back.
The only problem I have right now is that the foot controller is identical to the one for my Bernina (but the machine plugs are different so I still have to have both under the table) it’s hard to tell which to step on for each machine. First world sewing problems, I know, solved with a bit of fluorescent pink tape wrapped about the Janome’s cord
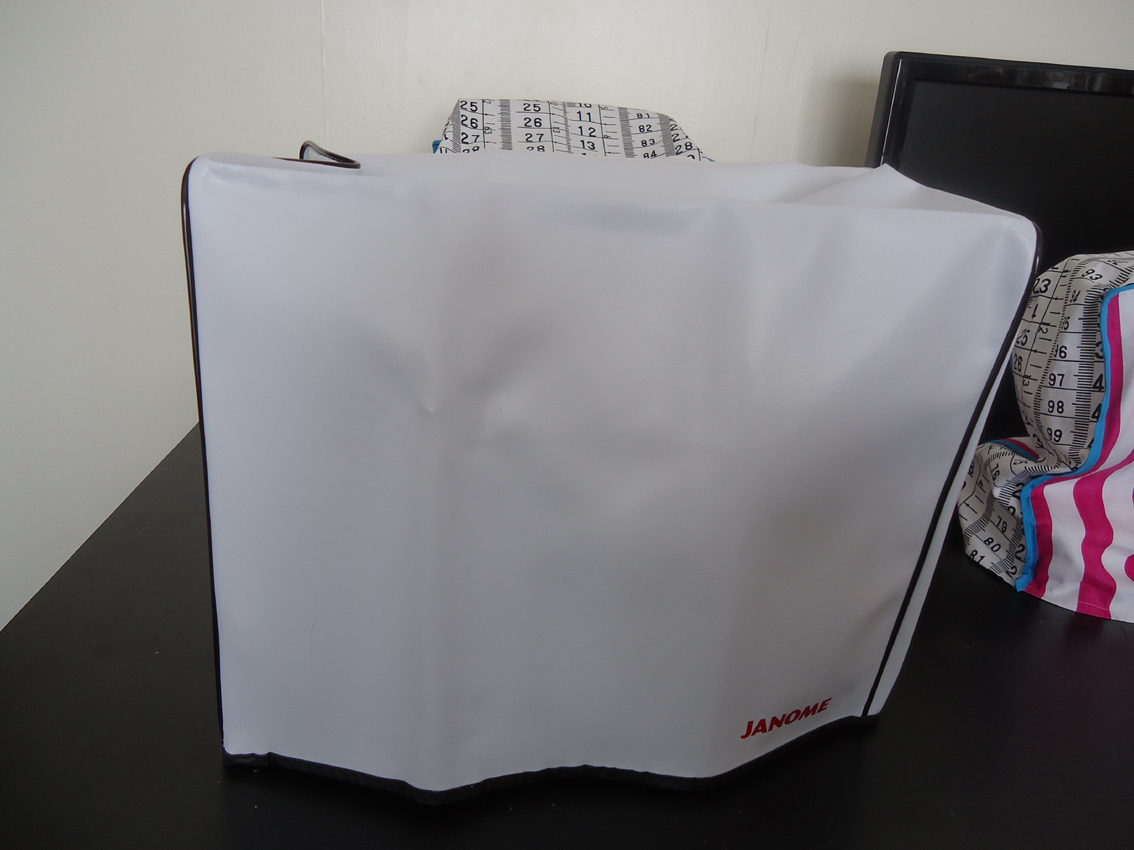
My first official project with my new machine was a fabric cover – look at the naff vinyl one it came with, yuck!

I never used to cover my machines but a certain furry helper who likes to eat thread means they need to be hidden when I am not around.
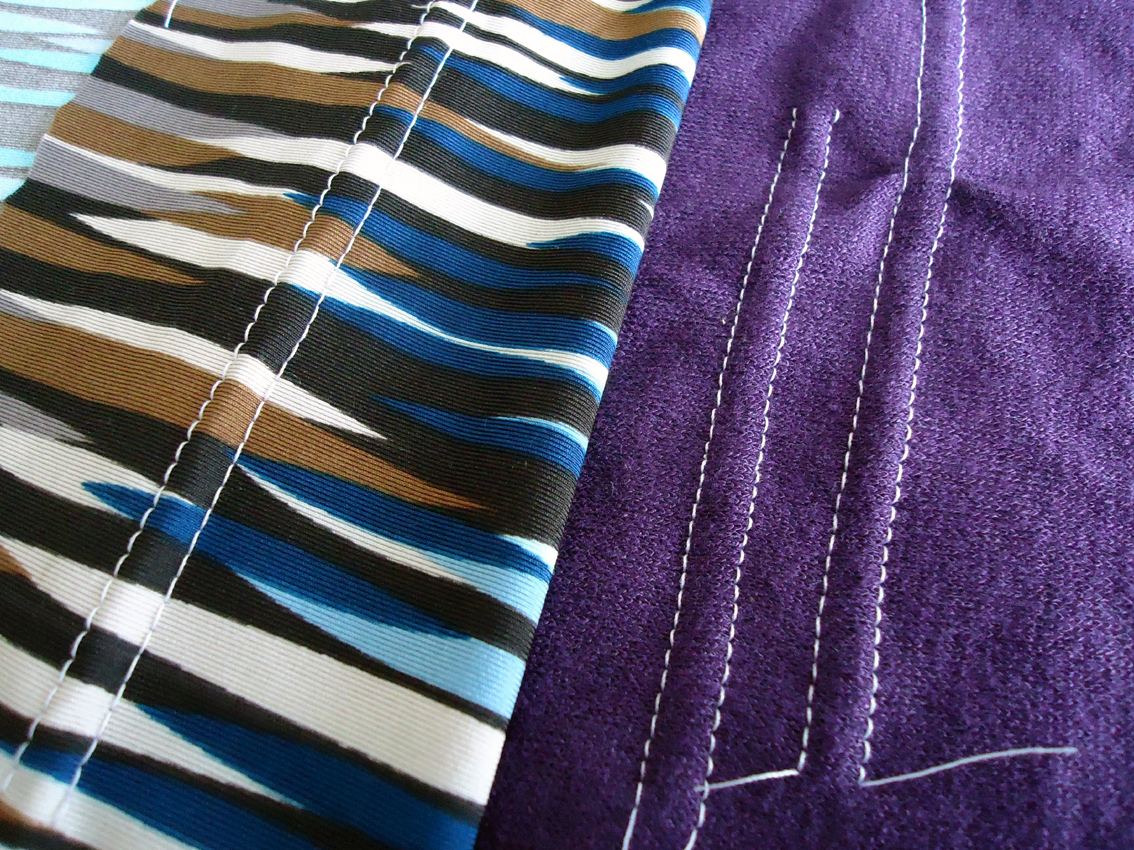
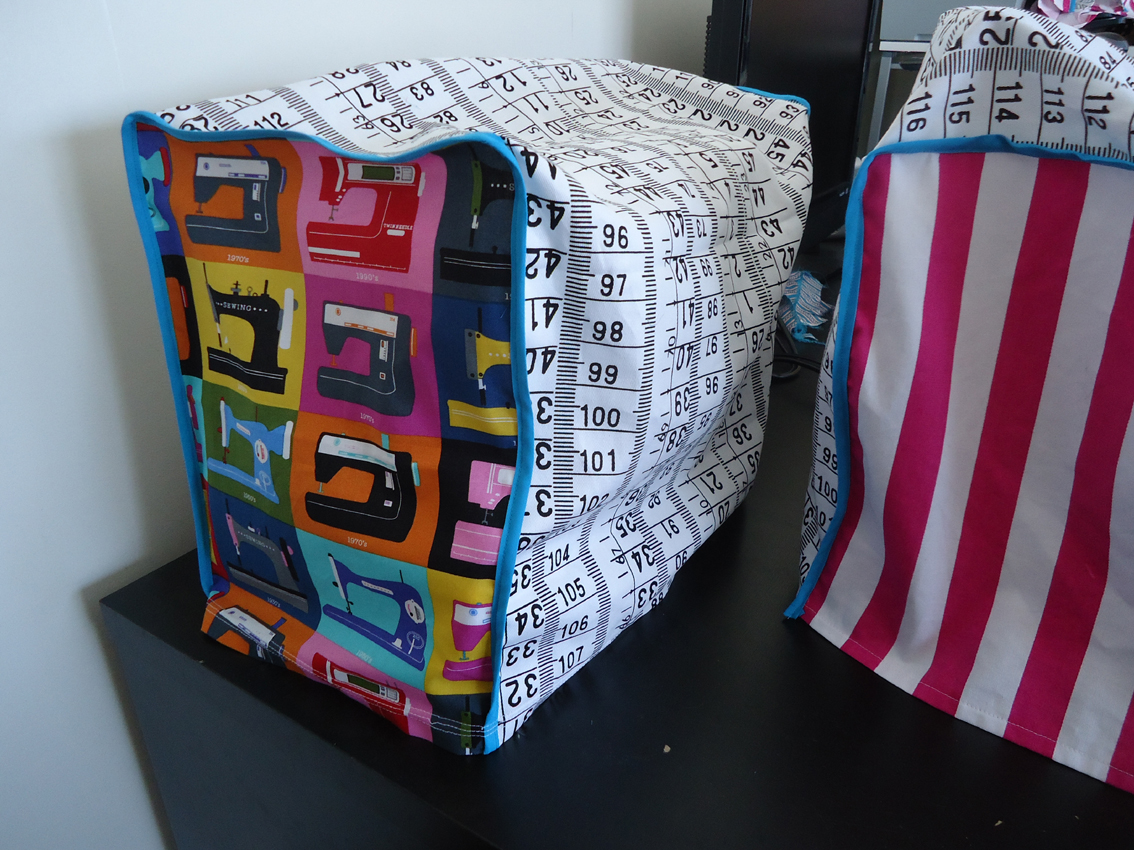
I ran out of the circus stripe (as NH refers to it) so I used some of my precious retro sewing machines. I hemmed the bottom with the coverstitch, pretty!

It’s not all super amazeballs however, and to prove I’m not begin paid by Janome to gush about their machine here’s a quick outline of things I wish it had:
There is no on-board tools storage. When I rethread my Bernina, I do it from scratch, every time. Because reasons. Anyway, I flip open the cover, slip out my tweezers (and screw driver if I’m changing a needle) and get on with it. I also need the tweezers to thread the looper on the Janome and it would be nice if it had a slot inside the front cover to take at least the tweezers, but also perhaps the needles, brush and small screw driver. Instead they live in that little plastic box. The designer in me wishes they had made better use of the spare room inside the cover.

On board storage – Bernina 1150MDA
My Bernina also has a needle threader. While the Janome machine has more room to make threading the needles a little easier the little stick thing they give you for threading is hard to use. I’ll admit I haven’t really tried very hard to get the hang of it yet, I’ve been doing it “manually” so I’ll persevere and come back to you on that. Perhaps there isn’t room for something like the threading mechanism on the Bernina but it would have been nice to see it included if possible.

Needle threader – Bernina 1150MDA
Lastly, I wish it came with a few of the accessories – I did investigate them before buying so I knew they were fairly expensive. You can buy “generic” attachments, but I have read mixed reviews about them.
I will be buying the centre guide foot (NZD$79.00) and hemmer (NZD$39.00) because I already feel I need them. Later on I may get a binder but to use that you also need to buy the special attachment plate. This comes to a grand total, for binder and plate, of NZD$269.00! Ugh Janome, you could have at least included the plate, why did you bother to give me those attachment screws?!

.
I’ve been collecting a few tutorials onto a Pinterest board, most are specific to the Janome but there’s some great general info as well, feel free to take a look:

That’s it, phew!
I am excited about all the things I can sew with my new machine and so is NH. He thought the variegated thread that was in the store machine was very cool and then I made the mistake of telling him about the fluorescent, the glow-in-the-dark and the colour change thread spools I’ve seen on the Gutermann rack at Made Marion…oops

Filed under: Sewing Machines Tagged: Bernina 009DCC, Bernina L220, Brother 2340CV, Coverstitch machine, Elna 444, Janome 1000CPX, Janome CoverPro, unboxing