
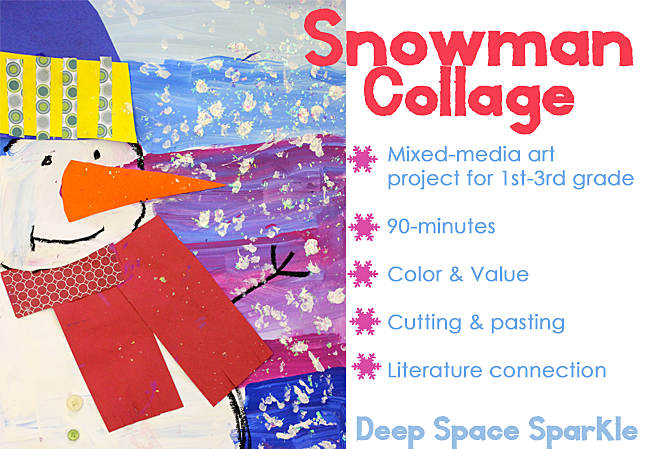
Snowman Collage Project

This happy snowman teaches color theory, collage techniques, and perspective in about two, 45-minutes art classes. I did this project with two first grade classes and varied the sequence or steps to see which method is the most effective. Whenever you have a multi-step project, it helps to figure out the best sequence or you’ll end up creating a lot of confusion. The following instructions outlines what I think is the best approach…
This is what you’ll need:
- 12 x 18″ sheet white paper
- Puck or cake tempera paint for background (or use liquid tempera)
- White liquid tempera paint
- Strips of 6″ x 3″ scraps of paper (craft paper and solids) for scarves
- 5″ x 5″ paper scraps for hat
- 6″ x 3″ orange paper for nose
- Black oil pastel for drawing
- Containers of white school glue and glue brushes
- Scissors
- Brushes and water
- Snowflake glitter and white glue
- Q-Tips and white liquid tempera (watered down a bit)
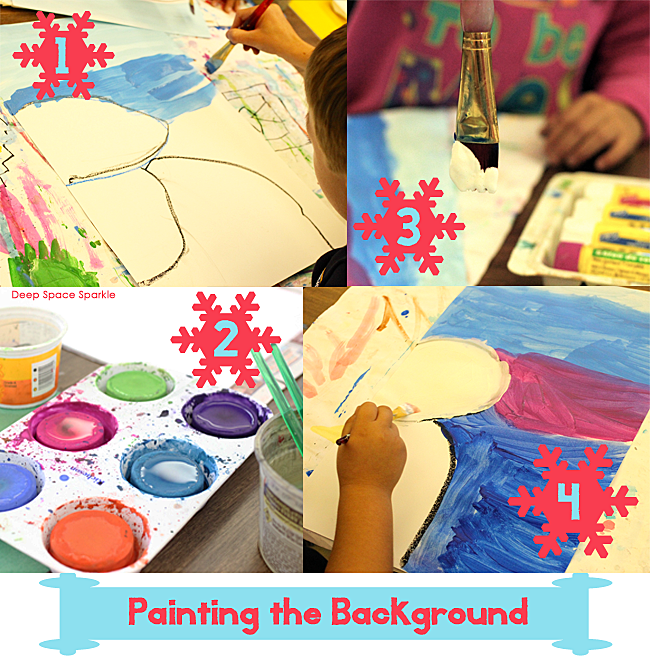
Set-up
For the first step, which is painting the background, set a sheet of white paper at each child’s place setting. Add a cup of black oil pastels, one tray of puck tempera paint, brushes, water, and white liquid tempera paint.
I like to use paper placemats underneath the art work.

Use the first ten minutes of class to read a book to the children. My favorite books to read are Snowballs, A Perfect Day and The Biggest Snowman Ever. The children will use the rest of the class painting the background.
1. Draw a backwards letter “C” on one side of the paper (head). To get the starting point correct, have children place hand over paper with pinky touching the top of the paper. Make a dot where thumb reaches. This is the starting point. Then, place oil pastel near the bottom of the shape and draw a curved line extending towards the bottom right corner (belly). Paint background with blue, purple and white, mixing the three paint colors together.
2. I used puck tempera paints for ease of set-up and the fact that puck tempera dries faster. If you don’t have these you can substitute either watercolor paints (its not necessary to use watercolor paper) or liquid tempera paints.
3 & 4. Paint snowman with the thick white tempera paint. This is an optional step as it is fine to leave the paper white. I wanted the kids to experience adding texture to their artwork, so that is why I added this step.
Place background sheets on drying rack.

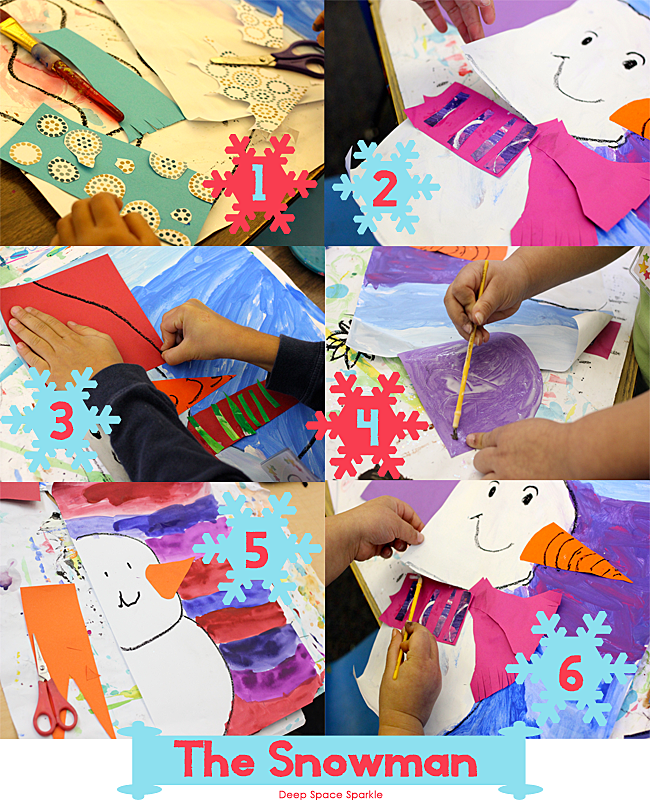
The steps for creating the snowman can be a bit chaotic simply because there are some tricks and tips for each embellishment. Pass back the background. The kids will need their artwork to add the embellishments. Using an oil pastel, trace over all lines in the snowman, adding two eyes, a mouth and one stick arm. Don’t add a nose…yet.
1. With the background close by, have children select a scarf color from either a shared paper tub or a selection that you put on each table. I use 6″ x 3″ rectangle strips to make it easier for children to use (and there will be less paper waste). Have them select 2 rectangles. One rectangle will go around the snowman’s neck and the other rectangle can be cut in half vertically for the ends of the scarf. Decorate the 3 pieces with scraps of paper or oil pastels.
2. Glue decorated scarf pieces to the neck and body. We use scissors to cut along the curve on the neck on the background paper so the scarf can be tucked underneath. This prevents the scarf from covering half the head.
3. Using the square paper, place paper on top of background close to head. Draw a curved line from the top of the paper to where the paper touches the head (see photo above). Cut out hat shape. Add a brim using paper scraps.
4. Glue hat to snowman’s head.
5. Add a nose by cutting a skinny triangle from a strip of orange paper. Glue nose so that most of it is inside the face.
6. Make sure all embellishments are glued down well, including the area where you attached the scarf.

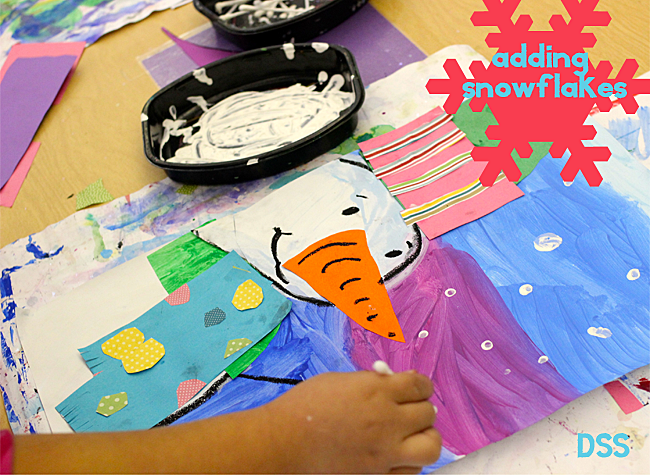
7. The final step involves using Q-tips and white paint to add snowflakes. Some kids used white school glue and glitter for snowflakes, adding snow to the top of the carrot and around the background and over the snowman.
Sometimes pictures can’t capture the details and personalities of each art work, but as I look at the collection of snowman in the photo, i can almost tell which child made each one. So fun!
