Bargain DIY Concrete Floor

Photos and text by Gabrielle.
I’m pleased as punch to tell you about the concrete floor experiment that we tried in the reading loft of The Treehouse. I love how it turned out! The texture is wonderful. The floor looks layered and feels like it has depth — but the whole surface is barely 1/8″ deep! It’s easy to clean and maintain. It has the industrial look I am every drawn to. Plus, it was inexpensive and totally DIY-doable.

I originally thought we would put carpet in the loft, but then I changed my mind and thought I would rather install a sweepable surface with an area rug on top. I made some inquiries about concrete floors and was told the weight of true concrete would be too heavy for this area, so I shifted my attention to tiles. But about that time, Jenny Komenda published a blog post about resurfacing her laundry room counter with a thin layer of concrete and I wondered if I could try the same method on the reading loft floor to achieve a concrete look without the heavy weight.

I finally concluded: why not try? The space is small and a low-traffic area. The materials are a bargain, so if it failed it wasn’t too great of a loss. Plus, if it was a disaster, I could cover it with tile or hardwood and hide the evidence. : ) So I gathered the materials, and when Ben Blair was in France (and I was consequently bored) I went for it!


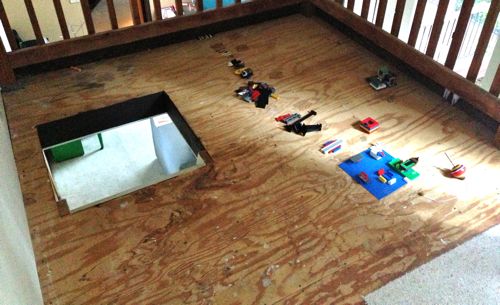
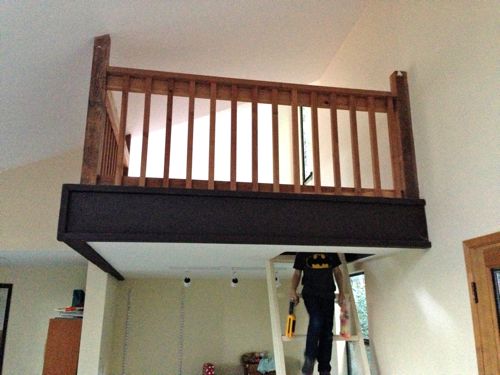
Let’s start with a few before shots. As you can see, the loft is a small raised area above the family room. The whole area is about 7 x 10 feet, and can be accessed by a ladder. The floor was unfinished — a simple plywood subfloor ready for carpet, tile, hardwood, or in our case: concrete!

Next, let’s talk materials. The magic ingredient is Ardex Feather Finish. This stuff is simply a delight to work with! You can apply it in thin, thin, layers and then build it up to a beautiful finish.
The only trick is we had to call around to find someone who stocks it — it’s not widely available at every hardware store. We found a list of suppliers in our area here.

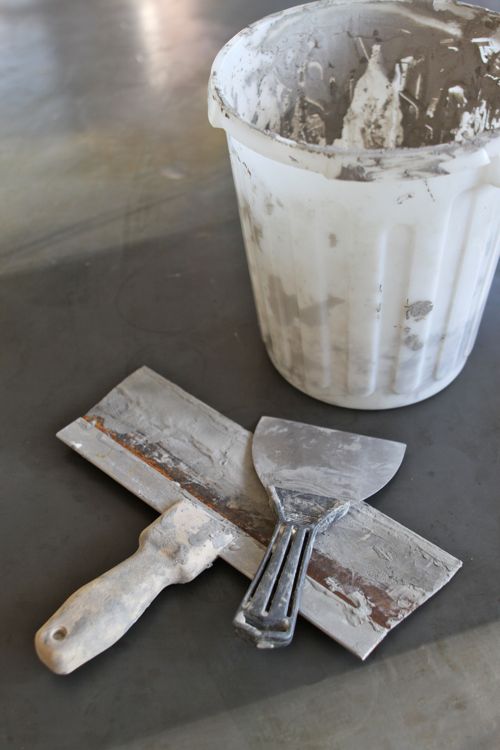
You’ll also need a trowel or spreader — I liked using a couple of different sizes — plus an old bucket and spoon for mixing the Feather Finish.
Once I had the appropriate supplies, I followed directions found here and here. Essentially, you pour some Ardex Feather Finish (it’s a powder) into your bucket and add some water, then stir. You’re going for the texture of a thin pancake batter. I never measured the Feather Finish or the water. I would just add a little of each till the texture was right. I also worked in small batches — because this stuff dries really fast!
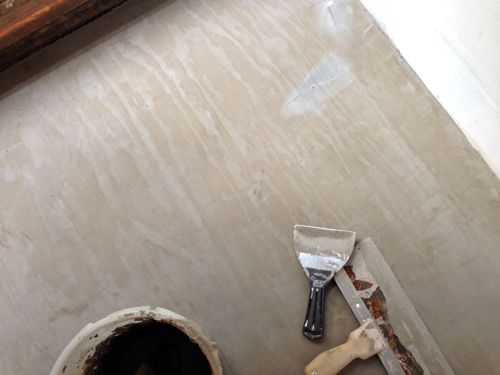
After it’s mixed, I let it sit for 1 minute in the bucket to achieve a sort of “soft set”, then I would pour it out onto the floor and use the trowel to spread it. The first layer went directly on the plywood. (I swept and dusted it really well beforehand.)

I worked in very thin layers. In fact, I could see the plywood through the concrete for the first few layers. I was working on this late at night, so I would do a layer, then head to bed and then let it dry over night. Which means the project dragged out for days! But the layers actually dry quite quickly, so you could truly tackle this on Saturday and finish the whole thing.
Before I added each new layer, I would take a putty knife and scrape off any bits of dried concrete that were protruding too much, and I would give the entire floor a very light sanding. Then I would sweep up the dust and add another layer of Feather Finish.

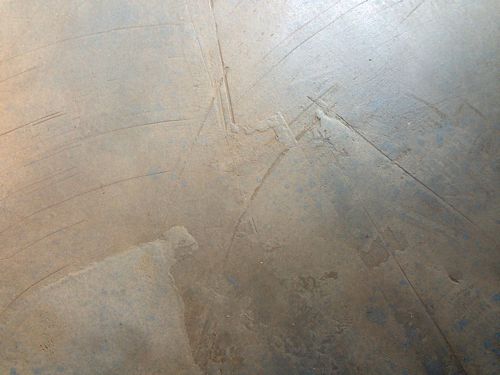
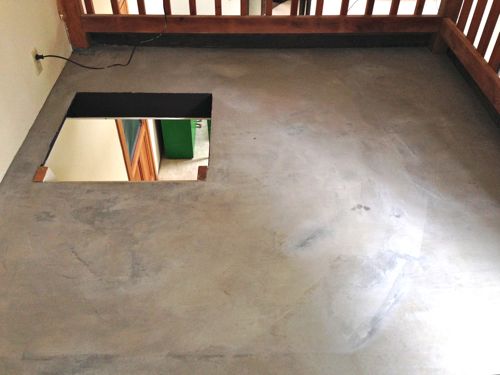
Ultimately, I built up 6 thin layers and then topped it with a thicker layer. But the whole thing is quite thin — maybe 1/8″ thick max.

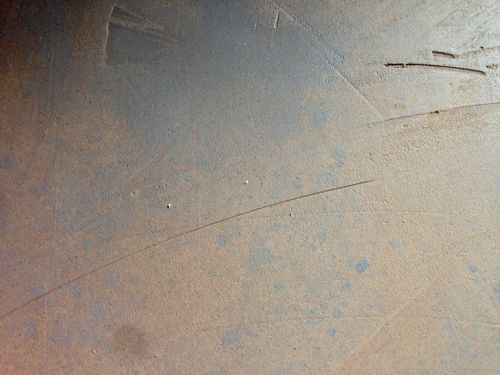
One thing I learned: You can still see the seams of the subfloor (notice the vertical line on the right hand side of the photo above). In the case of the loft floor, having seams showing is fine with me because I knew it was an experiment and I had low expectations — plus, I’ll be adding an area rug which will cover the major seam anyway.
But if I were doing it again, I would put down a layer of burlap cloth first. Apparently, applying the concrete over the burlap will hide the subfloor seams and prevent cracking. (I learned that little tip the day the floor was finished — I haven’t tried it yet, but I’m dying to!)

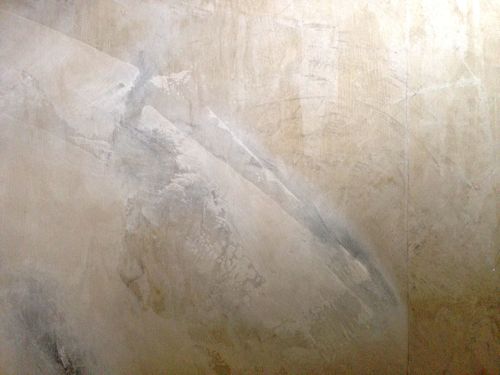
At this point, I departed from the tutorials I linked to above and tried concrete stain, instead of the recommended sealant. This was a tip from sculptor who has worked with concrete before and knew this would add depth. And it totally did.

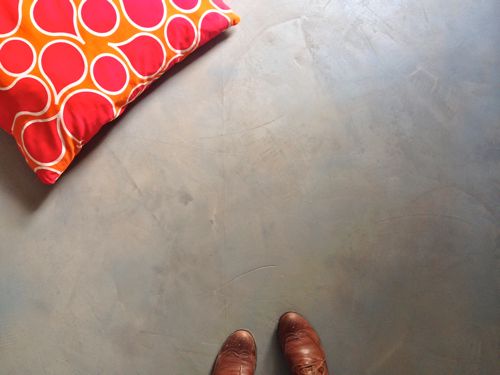
The stain definitely created depth and also left bluish areas that look really cool! I really like how the stain affected the overall look.

One other thing I learned: In addition to the Ardex Feather Finish, I also bought a bag of Ardex SD-M. The Feather Finish only comes in gray, but the SD-M comes in either gray or white. I chose white. I’d read that you can add a layer of SD-M on top of the Feather Finish if you want a whitish floor instead of a gray one — and that you can even tint or dye the SD-M if you want colored concrete.
Since the floors downstairs were white-washed, I thought it might cool to keep the concrete white as well. So for layer number 5, I used SD-M instead of Feather Finish. Turns out, I didn’t like the look of the white at all! I much preferred the gray. And it might have been my imagination, but I felt like the SD-M wasn’t as easy to work with as the Feather Finish. Anyway, for layer 6, plus the finish layer, I went back to using Feather Finish.
And that’s it. Pretty darn easy. Plus economical too! A bag of Feather Finish costs about $15 (in our case, the loft needed one full bag), and then you’ll need some concrete stain. A whole new floor for about $30 in materials! The reading nook is really coming together. I can’t wait to show a full before-and-after once I have it fully furnished and looking as charming in real life as it does in my head. : )
One last note: as I mentioned above, the reading loft is low-traffic area. The concrete is doing great, but I really have no idea how this would hold up in a hallway or kitchen. That said, I think we might try it in another space — possibly the boys bedroom, or even the family room! If we do, I’ll be sure to share anything new we learn.
I’d love to hear what you think! Do you like the look of concrete floors or are they too industrial feeling for you? And would you ever try this sort of project/experiment yourself? Or do you prefer to stick to more proven methods?