
HOMEMADE HOLIDAY GIFTS WITH TOMS FOR TARGET

I am so happy to be partnering with TOMS new line at Target (TOMS and Target...sounds like a match made in heaven). TOMS for Target is a perfect example of giving and cultivating joy for those less fortunate. Starting November 16th, for every Target TOMS limited edition gift purchased, Targets is giving shoes, a blanked or meals to those in need.
Giving gifts is one of my favorite parts about this time of year. I have been sewing Christmas presents for my mom, sisters in law, and nieces for the past few years and it is so rewarding to see them open something that I made with them in mind. I don't sew very many presents throughout the year, but this is the one time I think is important to use my skills to give back to those that I love and put my personal designs aside. While it can be easy to run to the store and grab a perfume, tool set, or gift certificate, I would much prefer to give (and get) a gift that has a bit more of a personal touch to it. If you don't sew, maybe you cook, or paint, or have a special skill that you can use to give a personal and meaningful gift this season.
Today I am showing you 3 basic tutorials that can help you create a personalized gift for your loved ones.


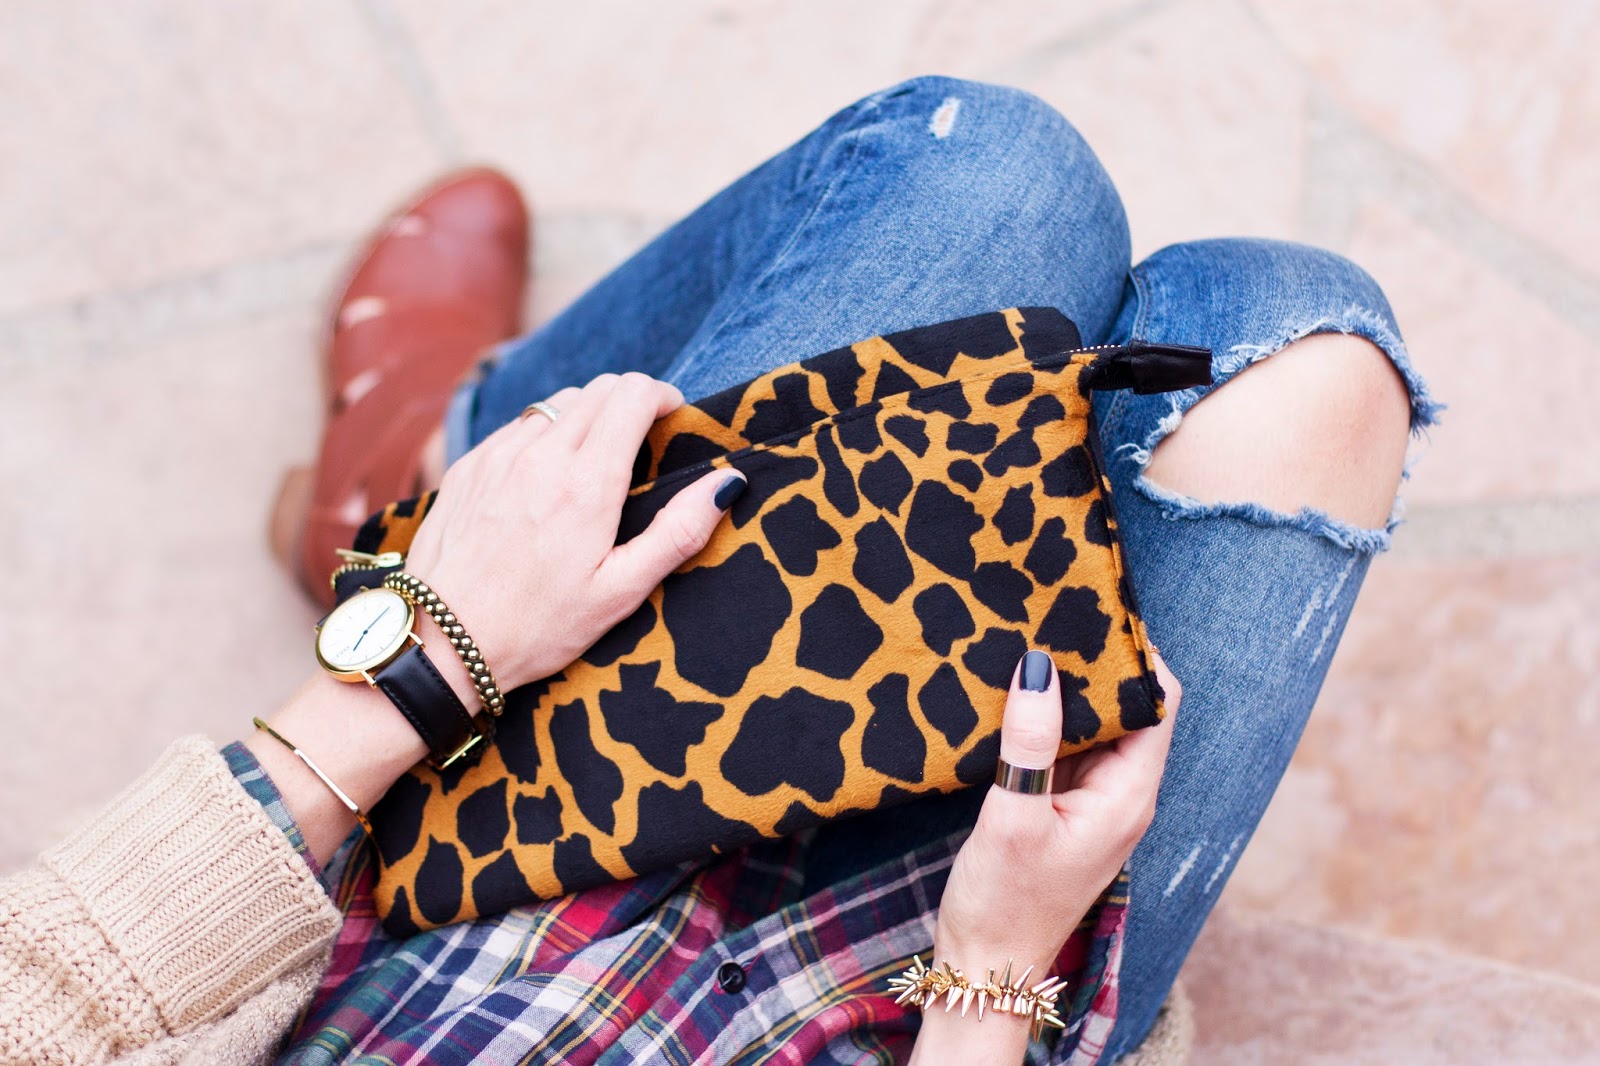
Sweater: Sheinside | Top: Front Row Shop | Jeans: Zara (sold out, similar) | Shoes: Seychelles c/o | Watch: Arvo | Bracelets: here and here | Nails: CND in Black Pool
A cute dishtowel (much cuter than any found in a store. believe me. I've looked) for your mom or mother-in-law...
A cute dishtowel (much cuter than any found in a store. believe me. I've looked) for your mom or mother-in-law...

And a pocket square for your stud muffin husband/boyfriend. He doesn't wear pocket squares? Make him. They are awesome.

These tutorials are are pretty simple and don't take much time at all. If you haven't given handmade gifts during the holidays before, start this year! It will be a lot more rewarding, I promise.
Compensation for this post was provided by Target via AOL Media. The opinions expressed herein are those of the author and are not indicative of the opinions or positions of Target or AOL.
Get all the tutorials after the jump below...


Materials:
- 1/2 yard of leopard print fabric (I used fabric like this one)
- 1/2 yard of black faux leather
- 3/4 yard of stiff interfacing
- exposed zipper measuring longer than 13" (this will be trimmed to fit the bag)
- matching thread

Step 1:
Cut 2 rectangles out of the leopard print and 2 out of the faux leather that all measure 13" W x 14" L. Cut 4 rectangles from the interfacing that measure 12" W x 5 1/2" L. Cut another 4 rectangles from the interfacing that measure 12" W x 6 1/2" L.
Step 2:
Fuse the interfacing onto the wrong side of both leopard pieces and both faux leather pieces (make sure the scratchy sticky side of the interfacing is touching the fabric). Place the shorter piece of interfacing on top, and the longer piece right below leaving a tiny space in between. When you are holding your iron on the interfacing and fabric, make sure you place an extra scrap of fabric on top, so that some of the interfacing doesn't stick to the iron. (learned that the hard way) This will allow your clutch to be stiff and not as flimsy.
Step 3:
Pin a leopard piece to a faux leather piece wrong sides together. Do this for the remaining 2 pieces. For one of your pinned pieces, stitch a line across the fabric right where the shorter interfacing fabric ends (about 6" down from the top). This will be on the inside flap and help give a natural fold line to your clutch.
Step 4:
Trim the zipper to be about 1 1/2" longer than the width of your clutch. Trim the side of the zipper that opens, not the end side with the stopper. Unzip your zipper, and sandwich the fabric side of the zipper in between the leopard and faux leather pieces. Fold the front edge of the zipper in between the leopard and leather fabric so that it disappears down inside. As you sandwich and pin, fold the top of both fabrics under to the center about 1/4" to give the top a clean edge. Make sure the top of the zipper is facing out. Stitch carefully along the edge of the zipper. You should have about 1 1/2" extra zipper hanging off the edge (this should be the side with the stopper). Repeat this with the other clutch section and zipper side. Make sure that the zipper is facing right side up.
Step 5:
With leopard print sides together, stitch around the sides and bottom of the clutch with 1/2" s.a. Trim a bit as needed. Then flip inside out. To give the section of zipper hanging off the side a more polished look, I sewed a scrap of the faux leather around it. Fold your clutch over with the stitch side on the inside. Lightly press with a warm iron or set a heavy book on it to secure that fold.


Materials:
- 3/4 yd of cotton fabric
- 40" pom pom trim
- Stop Fraying liquid (or any anti fray product)
- matching thread

Step 1:
Cut out a piece of fabric that measures 22" W x 28" L
Step 2:
Fold the edges over 1/2" twice, press, and stitch all around the edges.
Step 3:
Cut the 40" pom pom trim in half so that you have 2 sections long enough to stretch across the width of the towel. Pin one row along the bottom and stitch along the top. Pin the second row a few inches above and stitch.
Step 4:
Finish off the edges of the pom pom trip with Stop Fraying to secure the ends.


Materials:
- piece of fabric that is at least 17" x 17" big (so a larger scrap of fabric could be put to great use!)
- matching thread
- serger (optional)

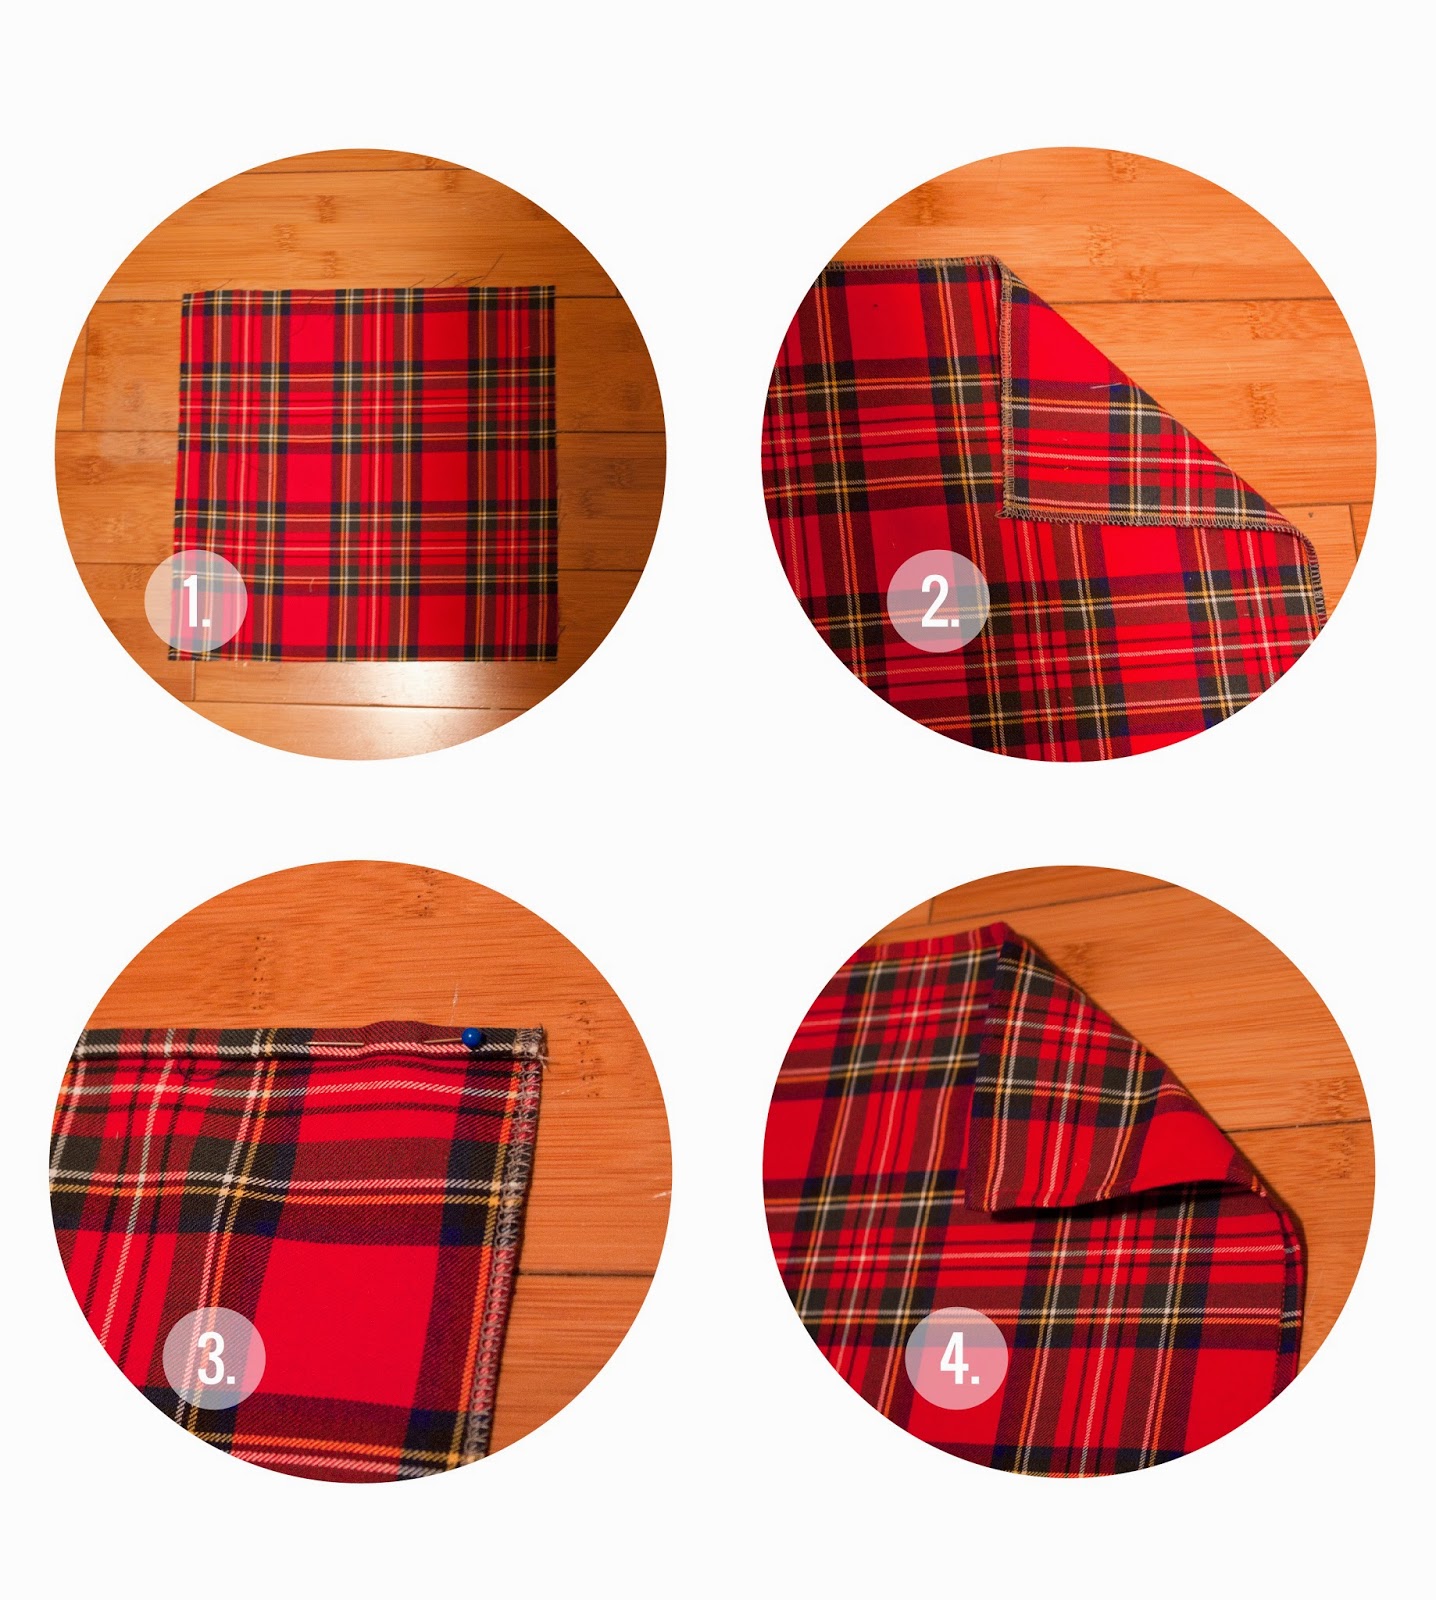
Step 1:
Cut your fabric to measure 17"x17". A 16"x16" square will work just fine too. I wouldn't go much smaller than that or else it will be too small and sink down into the pocket.
Step 2:
Serge around your square. This step is totally optional. If you have "sewing anality" as I like to call it, and get cold sweats from unfinished edges, then knock yourself out.
Step 3:
Fold all the edges under 1/4" twice. Pin and press.
Step 4:
Stitch all around the square as close to the fold as you can.
More posts from Leanne Barlow