Playful little playhouse
I'm so great at this blogging thing, I should totally rebrand & do this for a living.......is a lie I just told myself.
Has it really been months? It's becoming a trend that I would've forgotten my Blogger login if it weren't for Google Chrome ('sup, dude).
Quinn. Oh my firecracker. With each passing day, I'm more aware that in just mere months our girl will be starting preschool. It feels like it was just yesterday when we welcomed her to the world. I'm grateful that I've had the chance to have her by my side almost every day; I don't take that for granted. So I'm trying to be present in the moment which means limiting my blog reading & Instagram time (oddly freeing). My pixie girl's growing & more independent....this will all be an adjustment.

Or maybe I'll be running thru the hills, twirling in circles with arms wide open, music swelling & cameras panning around me, singing "I'm freeee!"

Probably maybe.
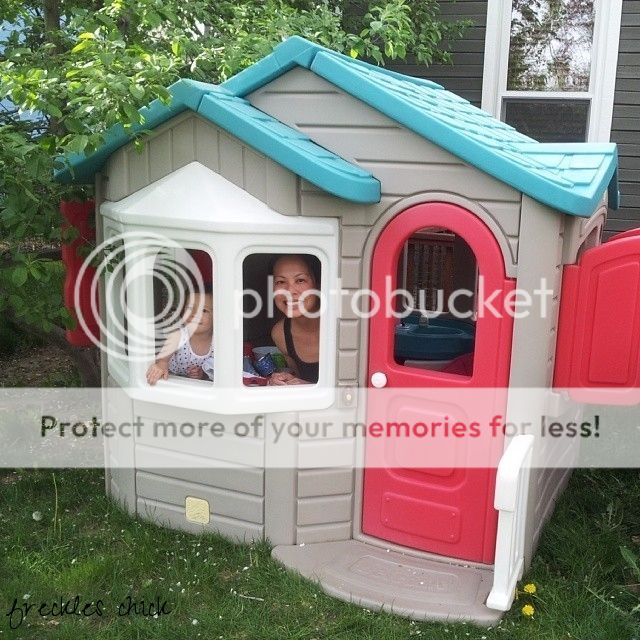
In other news, I've given Quinn's old playhouse a little makeover. Last summer, we got her one of those plastic playhouses from Craigslist (even though Craigslist makes me nervous these days, anyone else?). It's not one of those charming wooden playhouses like Stefani's but you know, nothing says "We love you, kid!" like a piece of bright plastic.
In other news, I've given Quinn's old playhouse a little makeover. Last summer, we got her one of those plastic playhouses from Craigslist (even though Craigslist makes me nervous these days, anyone else?). It's not one of those charming wooden playhouses like Stefani's but you know, nothing says "We love you, kid!" like a piece of bright plastic.


My plan was to spruce it all up somehow to give it some charm. So many people out there have spraypainted these plastic playhouses that I had lots of inspiration to piggyback from. The first one I ever noted was my blog buddy Emily's sleek playhouse makeover. As for the color scheme, I blatantly copied Jenny's (again with the charming wooden playhouse!). Hey, when I copy someone, I give that person full credit at least ;-) #selfless

The window box (actually just a plastic liner) was a bit tricky to attach, being that everything's plastic. The Mr. rigged it by threading nylon straps thru the drainage holes (creating a harness for the window box) & securing the whole thing by knotting it around the window frame. It's not exactly pretty but it's sturdy/hopefully kid-proof. Adirondack edging was chosen for the "picket fence" because I was afraid the kids were going to impale themselves on the picket fence edging that was my first choice.


The mailbox is attached on its underside by strips of heavy duty velcro. I still need to rust-proof it with a coat of clear sealant or something. ETA: Mailbox found here


P.S. Many thanks to Rhoda of Southern Hospitality for featuring our home on her illustrious blog! Rhoda, your kind words & lovely readers brought me much cheer, thanks so much for having me :-)

More posts from