
Quilting Basics 13: Ruler Foot Quilting for Beginners
On Monday we learned how to piece a beautiful Pointy Eight Dresden Plate quilt block and next Monday we'll learn how to quilt it with many awesome free motion quilting designs including ruler foot quilting!
So today let's learn more about ruler foot quilting and how to get started with this new style of free motion quilting on our home machine with a new Quilting Basics Video:
Click Here to find the pattern for Block #2 so you can practice ruler foot quilting on a real quilt block.
Wait? Did I say ruler quilting is another form of free motion quilting? What?
Yep, a ruler foot is just a type of darning foot so that makes this another form of free motion quilting.
That means you can quilt with rulers a bit, set your ruler aside and wiggle around with Stippling, then pick up your ruler again and get back to quilting straight lines, which is exactly what I did in the video.

This also means that whatever settings you use for free motion quilting are the same settings you should use for ruler foot quilting. For me that's stitch length 0 (or the lowest setting) and the feed dogs covered with a Queen Supreme Slider.
But this also means that your stitch length and quality is 100% up to you. You still have to balance the speed of your hands moving the quilt with the speed of your needle bouncing up and down. My best advice when getting used to ruler foot quilting is to quilt slowly. Move your hands slowly and steadily, keep the ruler / template in position on the quilt, and against the ruler foot and make smooth, steady movements as you quilt.

It's good to quilt slowly because it will feel easy to push the quilt under the needle. The additional ruler / template on the quilt will act as an extra grip, giving you more control over the quilt movement. It will feel very easy to shift with the help of the ruler, and very temping to move it quickly.
But that will result in big stitches so take it slow until you can balance that extra hand speed with extra machine speed.
What to Watch Out for with Ruler Foot Quilting
At the beginning of the video I shared the most important tip for ruler foot quilting - never drop your needle with the foot in the up position.
When you drop your needle to bring your bobbin thread to the quilt surface, always double and triple check that your foot is in the down position.
Take a look at the difference between the needle area on my Grace Qnique 14 longarm on the left and my Bernina 1230 on the right. See the difference in the needle bar?

On the home machine, I have a long needle bar that sticks out more than 1/2 inch to the right. The needle attachment on the longarm is completely different, which a small screw sitting almost flush with the metal rod above the needle.
When your ruler foot is in the up position, it has a tall enough base that it could potentially hit your needle bar and SMASH! there goes your needle bar, your timing, and potentially some other very expensive things in the top of your machine.
So save yourself a lot of money and hassle and never, ever drop your needle with your ruler foot in the up position. Easy peasy!
Explore Ruler Foot Quilting
Now what can we do with ruler foot quilting? How can this help us quilt our quilts?

A ruler or template basically acts as a guide for the foot. As you push the ruler, plus quilt through the machine, it gives you a guide to keep the foot in the correct place as you quilt.
Instead of veering off in wild wobbly lines like a drunken sailor, you can now quilt perfectly straight, evenly spaced lines without marking by using a straight edge ruler as a guide.
You can also quilt perfectly round circles, arcs, and any other shape that's been cut on a ruler. Think of the ruler as an assistant and it, combined with the ruler foot, allow you to quilt certain shapes perfectly.
This also means that quilting rulers are a new thing to collect. Oh yes, every ruler opens a new world of shapes and designs for you to quilt, but a good place to start is with straight lines, arcs, and circles and you can find rulers to quilt all of these shapes in the Dresden Plate Template Set.

This set of templates can cut dozens of Dresden Plates AND can be used for ruler foot quilting - how's that for multitasking!

The key is keeping the ruler in position on the quilt and next to the ruler foot. I like using True Grips which help keep the templates in place so they don't slip as I quilt. I also like wearing Machingers Gloves, which I always wear while quilting, but they seem especially handy for gripping both the quilt and the template at the same time.
After you get your templates ready to go the next step is just to practice! I'd start with a small block or fat quarter sized practice sandwich. This will feel just like free motion quilting, but managing the additional ruler on top of the quilt might take awhile to get used to.
I do think straight lines are the easiest so give them a go first. Mark some straight lines on your quilt as a guideline, then try quilting evenly spaced lines 1/4, 1/2 and 3/4 inches apart.
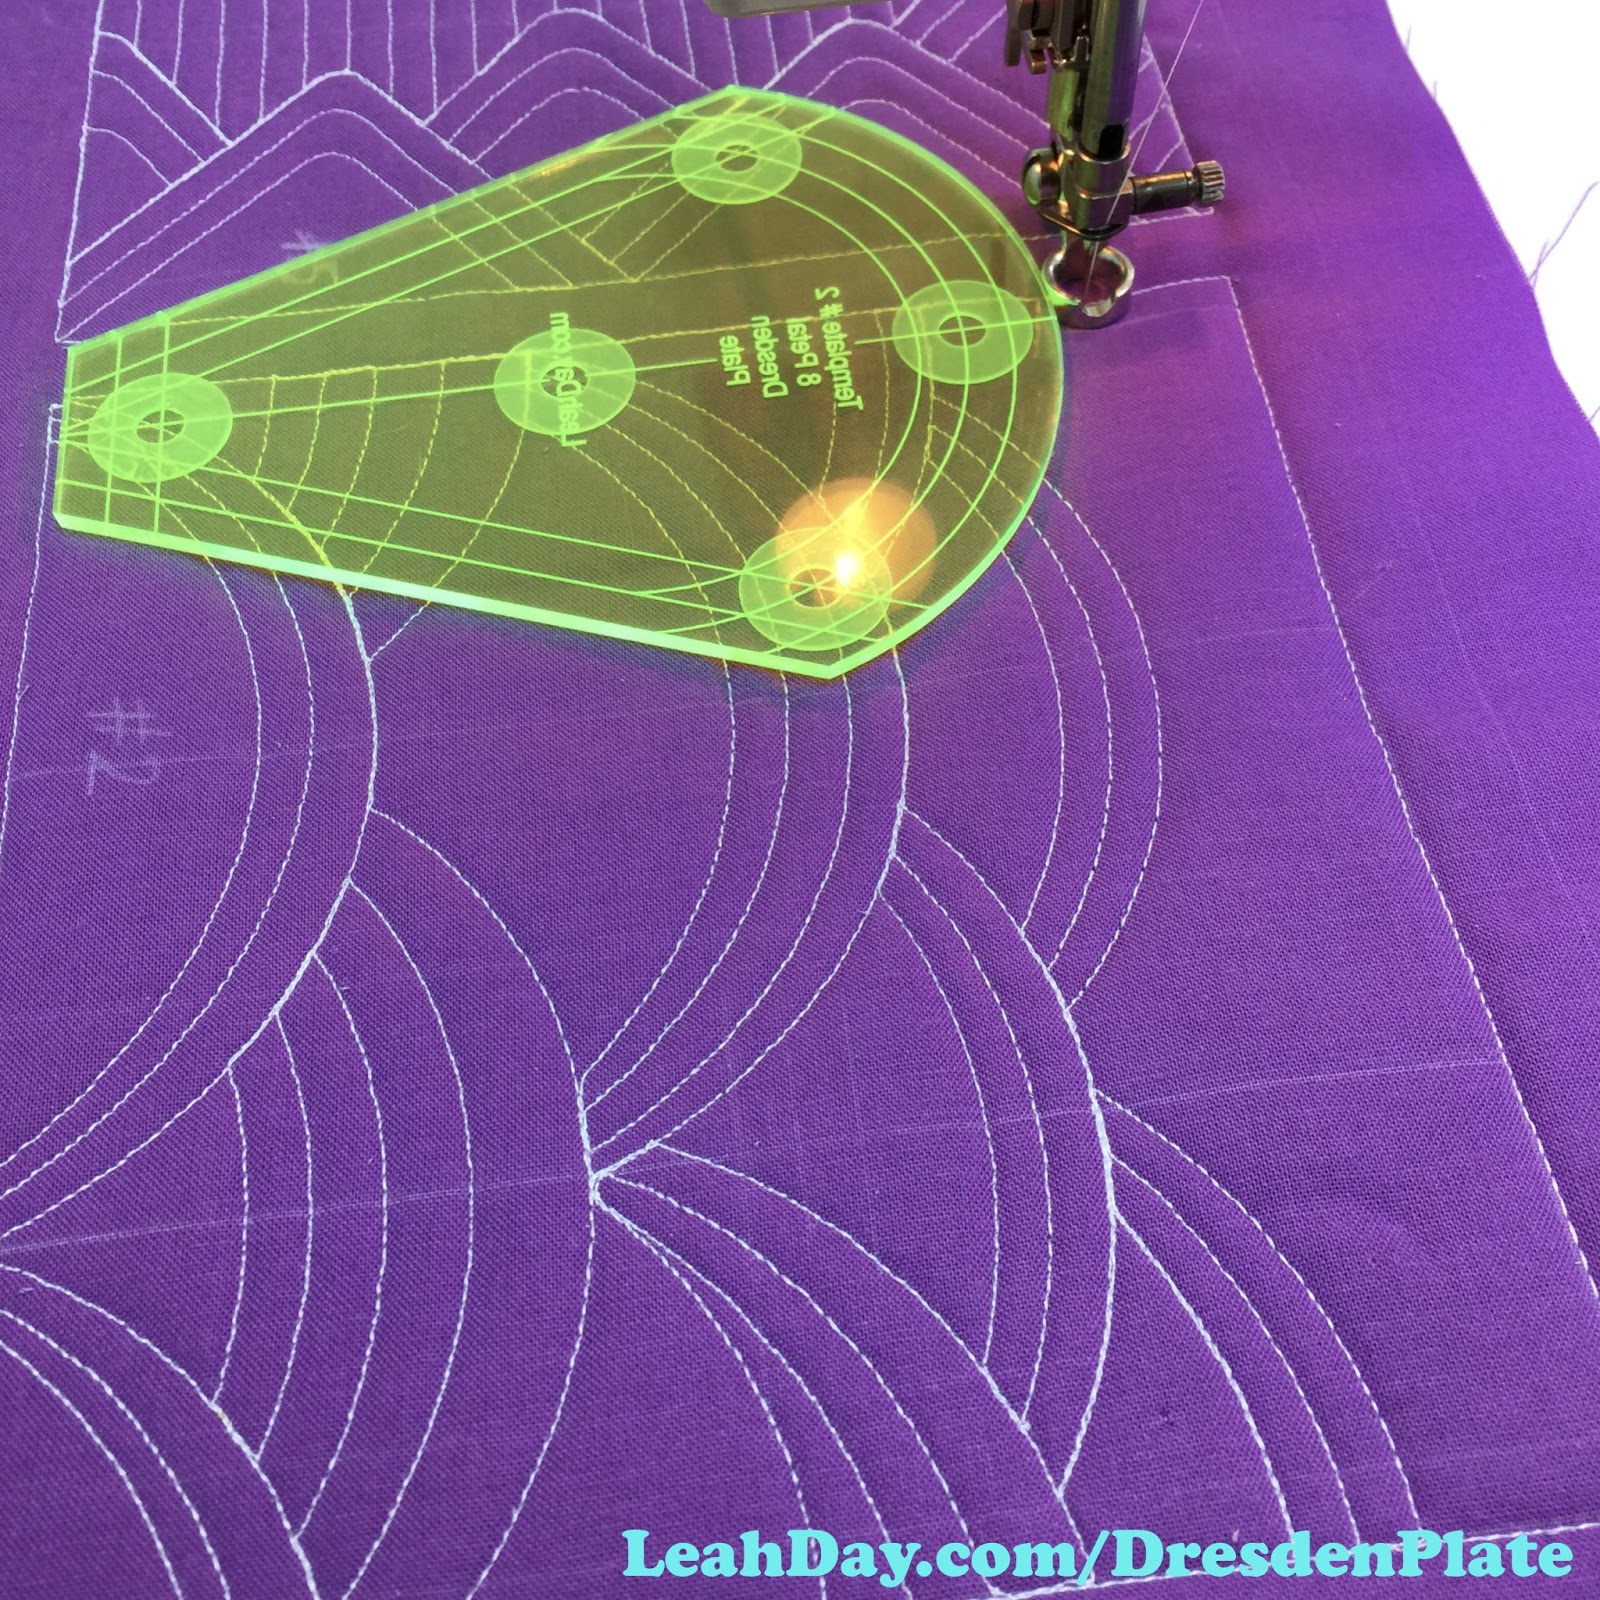
Once you feel comfortable with straight lines, branch out with other designs. Here I've used Template #7 from the Dresden Plate Template set to quilt overlaping shells. I marked straight lines 1 inch apart in order to space these shapes perfectly:
After you get your templates ready to go the next step is just to practice! I'd start with a small block or fat quarter sized practice sandwich. This will feel just like free motion quilting, but managing the additional ruler on top of the quilt might take awhile to get used to.
I do think straight lines are the easiest so give them a go first. Mark some straight lines on your quilt as a guideline, then try quilting evenly spaced lines 1/4, 1/2 and 3/4 inches apart.
Once you feel comfortable with straight lines, branch out with other designs. Here I've used Template #7 from the Dresden Plate Template set to quilt overlaping shells. I marked straight lines 1 inch apart in order to space these shapes perfectly:

The lines etched on the back of the rulers will help guide your ruler placement and I really think a quilting ruler is only as good as the guidelines provided on the back. Those guidelines help you align the ruler so you can easily quilt the same shape repeatedly and create cool stacking designs like all the pictures above.
So what do you think about ruler foot quilting? Have you ever tried this type of free motion quilting before? Make sure to post your questions to the comments below!
Let's go quilt,
Leah Day
More posts from Leah Day