
DIY Painted Kitchen Counters

Has it seriously been almost 2 months since my last post?! I apologize that I've been neglecting this blog for so long, and I'm especially sorry to each and every one of you who check in regularly and you keep seeing the same old post! I'm not making any promises, but I'm going to try my best to do better, at least weekly updates if nothing else. Even though things have been quiet on the blog doesn't mean things have been quiet at the farmhouse. It's quite the opposite actually. I've been working on so many projects that I don't leave enough time to blog about them and what fun is that?! I have some serious catching up to do, I know. I've become a big fan of Instagram lately and I tend to update pretty regularly there if you would like to follow along! You can check out my Instagram feed on the sidebar of this blog.
Anyways, on to the project that I just can't wait to tell you about, our painted kitchen counter tops! You guys already know that I've been choosing very budget friendly options for revamping our farmhouse. We have big dreams of bigger renovations one of these days, but until then I wanted to spruce things up enough so our farmhouse would feel more like our home! I have to say now that we have been here nearly 8 months it totally feels like home and I couldn't imagine being anywhere else!
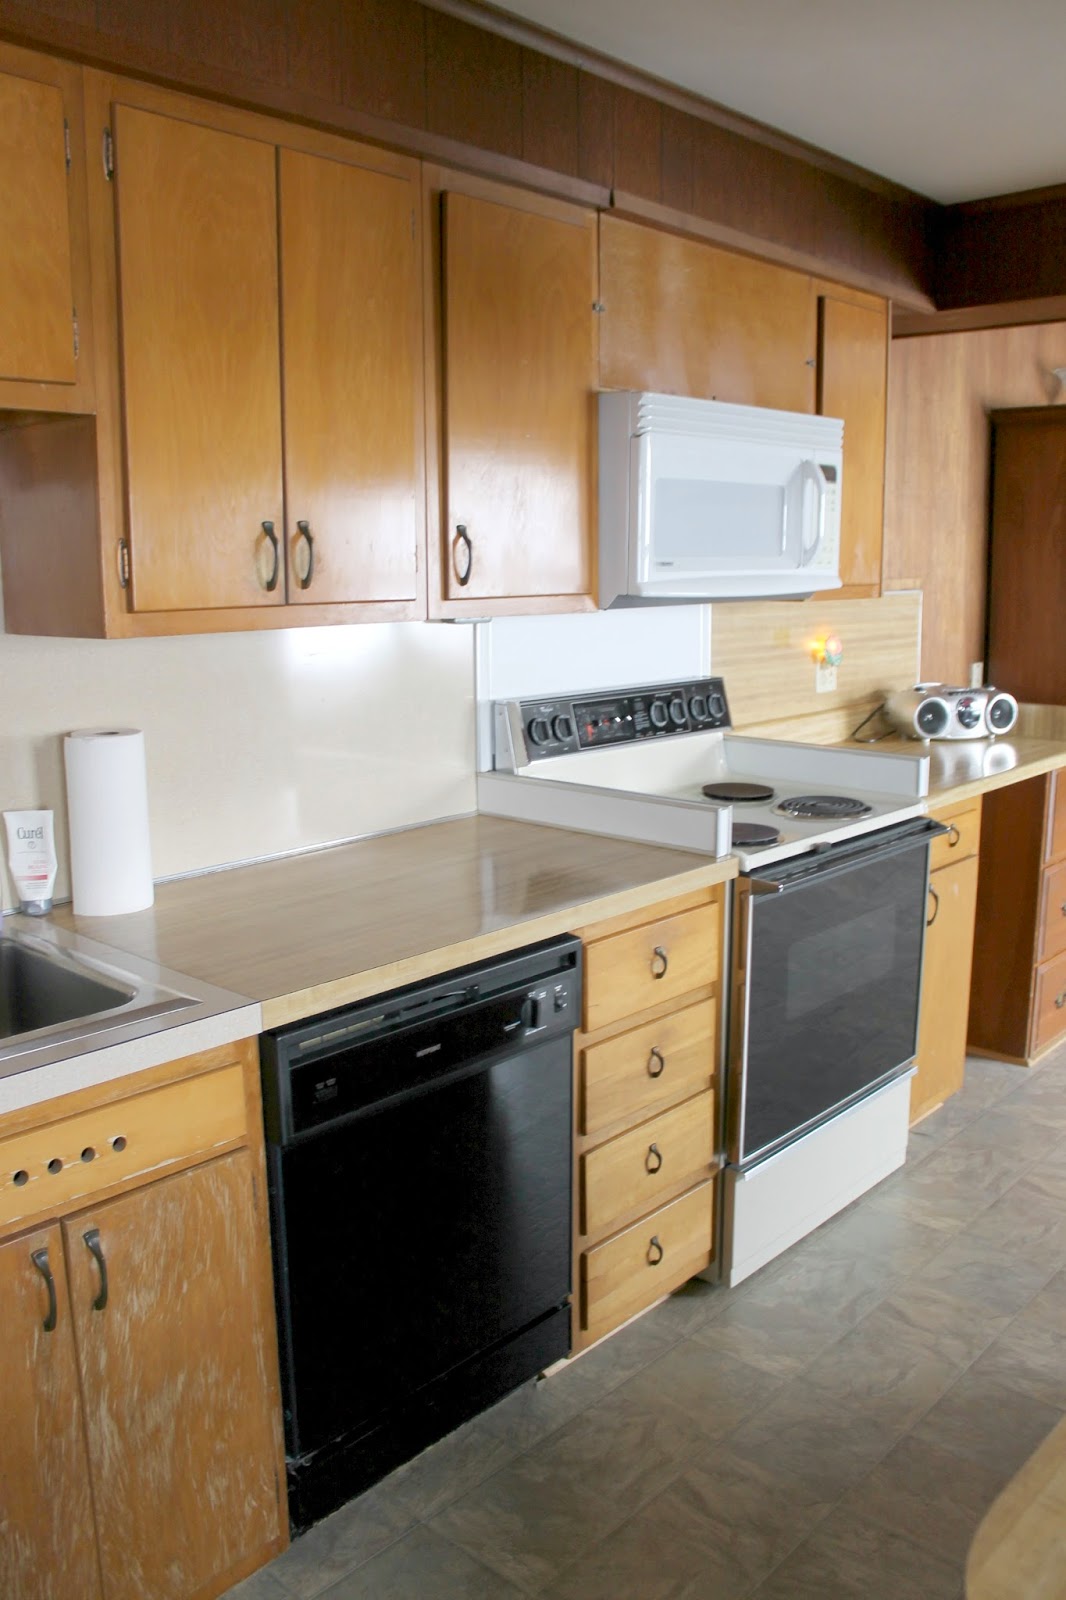
I completed this project right before we moved in and they are still holding up great! I had actually forgot what these counters looked like before until I started going through the photos for this post. In case you forgot too here is a reminder!

The first thing I did was lightly sand over the counters with a sanding sponge. Next I cleaned them thoroughly with a damp cloth. I didn't use any cleaner, only water. After the counters were completely dry I applied the primer.

I chose this Zinsser primer because of how well it has worked for other projects I've completed, plus I already had it on hand! I simply used a regular paint brush and brushed on one thin coat, and let it dry.

The next step is to choose the base color. I decided to use the same paint that I used for the lower cabinets. The color is Valspar Java and it just happened to be in a semi-gloss finish since I used it for the cabinets too. If you happen to have flat or satin instead, I'm sure that would work just fine as well.

After this coat was completely dry it was time to get to the fun part! I chose 4 different shades of gray craft paint for my counters.

I poured the paint in a paper plate and used a sea sponge to gently and lightly sponge the craft paint onto the counters beginning with the lightest shade of gray. As I went along I chose not to rinse out the sponge in between colors which created a more blended look. I also used the same paper plate to pour all the different colors onto, allowing them to slightly mix with one another which created more variation in the overall result. Unfortunately I wasn't able to photograph this process because I wanted to get all the paint applied at once so all the colors could dry together. This again contributed to more of a blended look. Below is a shot of what they looked like after the 2 lighter shades of gray were sponged on.


After the sponge painting was complete I lightly sanded over the counters to ensure there were no lumpy areas, and then I began to seal them. I chose Miniwax Polycrylic in a gloss finish for this final step. I really like this product because it's water based and it dries very quickly leaving no weird yellow residue behind. I used a paint brush to apply it, but it may be easier to use a foam roller, I'm not sure. I didn't have one at the time so I just used a brush. It takes about 4 coats or so to create a surface durable enough for regular kitchen wear and tear.


I'm beyond thrilled with the results, especially when I take a look back at the before photos! This was truly an easy and inexpensive project that changed the entire look and feel of our kitchen. Our counters are holding up really well after 8 months and believe me they get a lot of use!
I've shared a few updated kitchen photos on Instagram so you can see how things looks today now that we are all settled in and living here. I have a few more minor projects to finish up before I can share a full reveal, but hopefully soon.
Thanks so much for stopping by! You can also find me on Instagram & Pinterest!
Have a BLESSED day!

More posts from Leah