Super Scrappy Single Irish Chain - A Finish and Tutorial
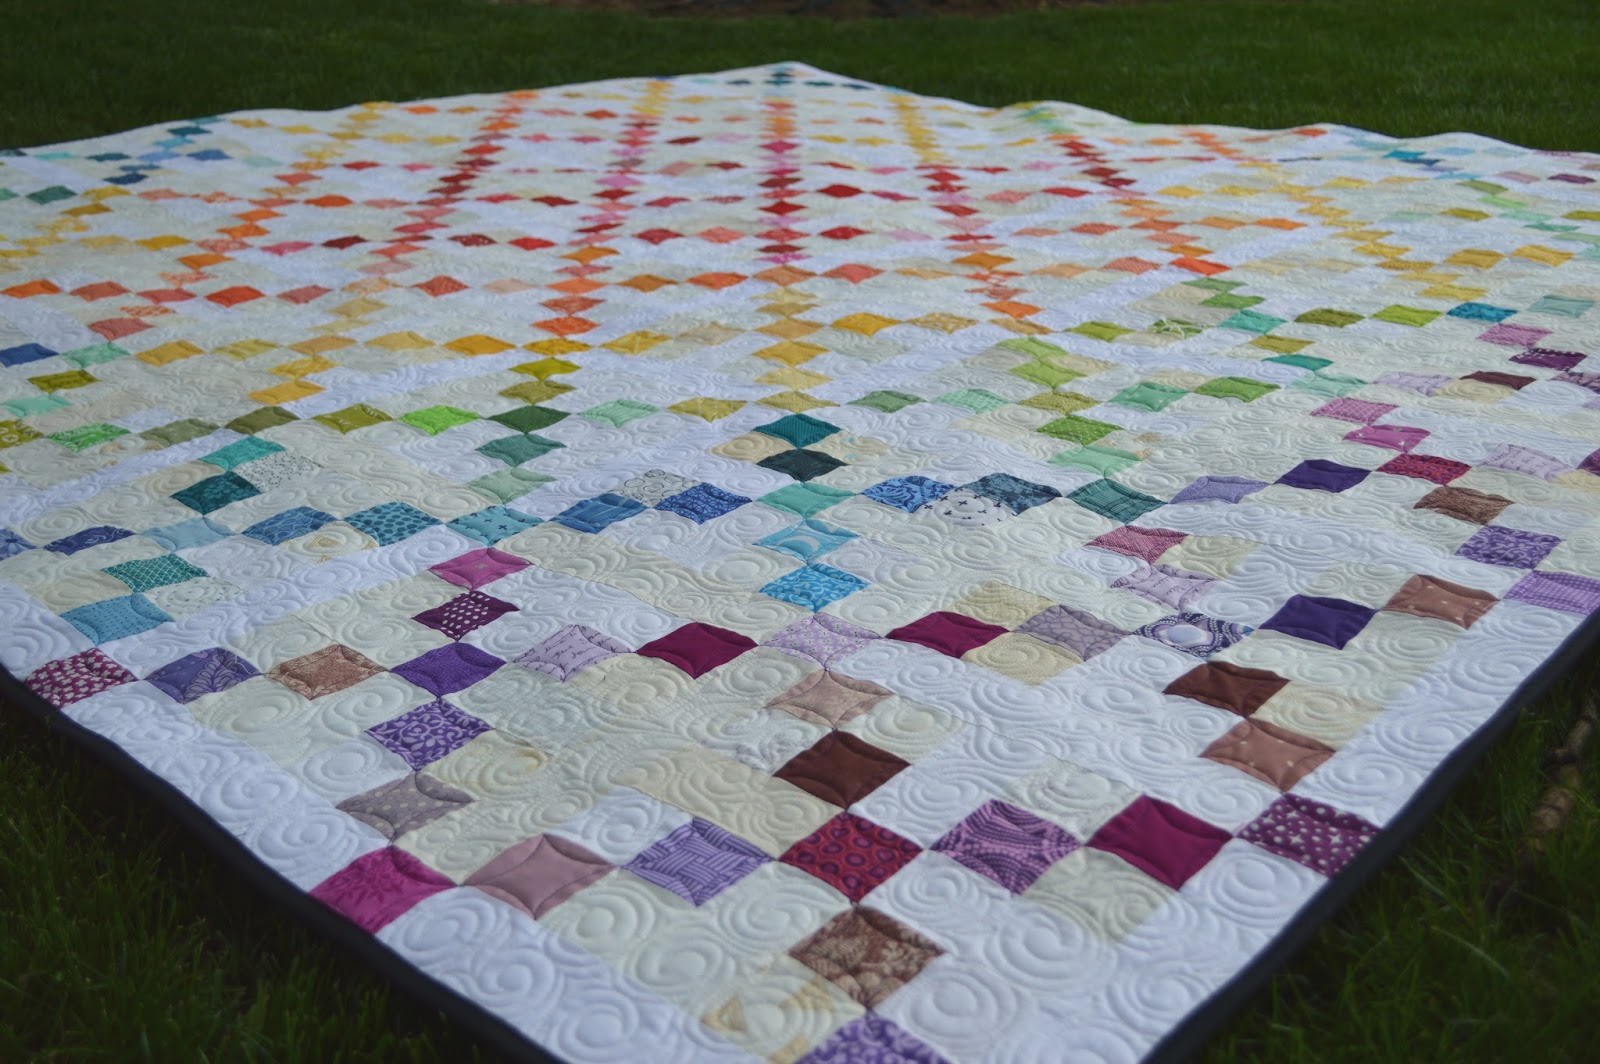
Hello All!!! I am so super excited to get to share with you my newest finish!!! I have been working on this project for quite some time and I am just thrilled to have it finished. So, without further ado, here is my Super Scrappy Single Irish Chain!!!

This project originated as part of the Go For It, APQ Quilt-A-Long, (#APQquiltalong) but then when I finished all my 4 patches and was trying to decide on a layout, it somehow morphed into an Irish Chain. What can I say, I have Irish Chain Quilts on the brain ;)

And since I ended up doing my own thing and going the Irish Chain route, I figured you might like to join in on the fun as well and make your own Super Scrappy Single Irish Chain Quilt too!!!. So I wrote up this little tutorial. I hope you like it!!!

To start off, this quilt is all about scrappy, so I am not going to list any yardage as you will be pulling from your scrap bins or pre-cuts. The little Candy 2 1/2" squares are perfect for this project!!! Also, you will be needing a few more colored squares than listed right here for the cornerstones of your quilt, but the colors will be determined by your layout, so they will be listed farther down in the tutorial ;) And just a note, all of those Low Volume rectangles are a great way to use up the extra bits and pieces of background from all your previous quilts ;)
STEP 1 - CUTTING
Alright, here is what you need to cut to get going!!!
(81) 2 1/2" x 2 1/2" Assorted Yellow Squares
(72) 2 1/2" x 2 1/2" Assorted Orange Squares
(72) 2 1/2" x 2 1/2" Assorted Red Squares
(72) 2 1/2" x 2 1/2" Assorted Green Squares
(72) 2 1/2" x 2 1/2" Assorted Blue Squares
(72) 2 1/2" x 2 1/2" Assorted Purple Squares
(392) 2 1/2" x 2 1/2" Assorted Low Volume (white to cream) squares
(196) 2 1/2" x 4 1/2" Assorted Low Volume rectangles
(112) 2 1/2" x 10 1/2" Assorted Low Volume rectangles

STEP 2 - MAKING 2 PATCHES
We will start by making 2 patches. To do this, simply place a colored square and a low volume square with right sides together and stitch a 1/4" seam along the edge. This is a fantastic Leader and Ender project. I did all of mine in this fashion while working on other projects ;) You can click here to see a Leader Ender tutorial if this process is new to you ;)

If you don't stitch them as Leader Ender's I highly recommend chain stitching the pairs. If you have never chain stitched before, it is simply just not cutting your threads between each pair. So just keep feeding the pairs through your machine one after another until you have a long snake of pairs. Then, when you are finished your stitching session, clip the threads between each pair.


You will be making a total of (72) Yellow 2 Patches and (64) Orange, Red, Green, Blue, and Purple 2 Patches. There is one extra yellow block in the quilt ;) You will have 9 extra yellow squares and 8 extra squares of the other colors.

STEP 3 - MAKING 4 PATCHES
Now, it's time to turn all those 2 patches into 4 patches. To do this, place two, 2-patches of the same color with right sides together, alternating the layout of the color and low volume patches. Pin or simply nest the center seam as you stitch a 1/4" seam along the edge. If you pin, pin a whole bunch and chain stitch them one after another, if you nest the seam, you can continue to use this as a Leader and Ender project.


You will make a total of 36 Yellow 4-Patches and 32 Orange, Red, Purple, Blue, and Green patches each. And now, you are ready to move onto blocks!

STEP 4 - MAKING THE BLOCKS
Layout (4) 2 1/2 x 4 1/2" low volume rectangles, (4) 4-Patches, and (1) 2 1/2" x 2 1/2" square of the same color as shown below. We will make rows first.

Place the center column units onto the left hand side units with right sides together. Stitch along the edge with a 1/4" seam. Once again you can either Chain Stitch or Leader Ender this step to speed things up.

Then, place the Left Hand side units onto the Center units with right sides together and once again, stitch a 1/4" seam along the edge, either chain stitching or using it as a Leader & Ender project.

Press the seam allowances towards the sashing. So the top and bottom rows will be pressed inwards and the center row will be pressed outwards.

Now, it's time to sew your rows together. Place the center row onto the top row with right sides together. nest and pin the center seams. Sew a 1/4" seam along the edge. You will save lots of time if you pin all of your row sets and then chain stitch them.

Then, place the bottom row onto the center row with right sides together. Again, nest and pin your center seams and then stitch a 1/4" seam along the edge. Chain stitch all your pinned sets. I like to press both seams open to help avoid bulk.

You will be making a total of 9 Yellow Blocks and 8 each of Red, Orange, Blue, Green and Purple Blocks ;) They should measure aprx. 10 1/2" x 10 1/2" unfinished.

STEP 5 - DECIDING ON A LAYOUT
And with the blocks made, you are ready to layout your quilt. This is where you can make some decisions. If you want to follow the same layout I used, use the diagram below. For this layout you will need to cut the additional 2 1/2" x 2 1/2" squares to be used as cornerstones between the 2 1/2" x 10 1/2" low volume sashing around the blocks.
(16) Purple (12) Blue (10) Green (9) Yellow (9) Red (8) Orange

Or you can do a more traditional rainbow row layout. For this layout you will need to cut the additional 2 1/2" x 2 1/2" squares to be used as cornerstones in the sashing.
(1) Purple (11) Blue (11) Green (13) Yellow (11) Red (7) Orange

Or, you can design your own layout. Just print out this diagram, and fill in 9 Yellow Blocks and 8 each of Red, Yellow, Green, Blue, and Purple Blocks. And be sure to add in 64 cornerstone color blocks as well.

Once you decide on a layout, you might find it helpful to right click the image and save it, and then print it out so you can refer to in when piecing your quilt top.
STEP 6 - PIECING YOUR QUILT TOP ROWS
With your layout decided upon, you are ready to start making your quilt top. I like to start with making the horizontal sashing rows. To do this, I start by simply sewing the cornerstones to the right side of the sashing. The quickest way to do this is to pull out the 8 cornerstones that are along the right side end of each row. Then simply sew all the rest of your cornerstones to a 2 1/2" x 10 1/2" sashing. Press the seam towards the sashing.
Now, following your diagram,, place the second sashing in the row, onto the first with right sides together and sew a 1/4" seam along the edge. Continue in this fashion until you have sewn the entire row. I found it easiest to chainstitch each unit in each row . . . So sew the first and second units in pairs for all 8 rows, then clipping my threads, then adding the third unit, then clipping threads, and so on.


Now, you are going to repeat the same process for the block rows. This time, you are going to start by adding a 2 1/2" x 10 1/2" sashing strip to the left hand side of all your blocks. Once again, chain stitching here will save so much time ;) (or you can Leader Ender it if you prefer) Press the seam allowance towards the sashing unit.

Now, referring to your diagram, sew the rows together. I did this the same way I did the Sashing rows. So sew the first and second sashed blocks in pairs for all 8 rows, then clipping your threads, then adding the third unit, then clipping threads, and so on.

Until you have finished sewing all your blocks into the 7 rows. Press the seam allowances towards the sashing rectangles.

STEP 7- PIECING YOUR QUILT TOP
Now, it is just sewing all the rows together. I like to start by sewing my sashing rows to my block rows. Place the sashing rows onto the block rows with right sides together. Pin each of the seams. Sew a 1/4" seam along the pinned edge.


Now, Place the second row onto the first row with right sides together, the fourth row onto the third row with right sides together, and the sixth row onto the fifth row with right sides together. Pin all of the seams in all of the paired rows. Stitch a 1/4" seam along the pinned edge. Press the seam allowance towards the sashing rows.

Now place the Third/Fourth row, onto the First/Second row with right sides together and the Seventh row on to the Fifth/Sixth row with right sides together. Pin all of the seams in the paired rows. Stitch a 1/4" seam along the pinned edge. Press the seam allowance towards the sashing rows. The repeat the process for the 2 halves (which I was so excited about, I forgot to take a picture of it, sorry)


STEP 8- FINISHING YOUR QUILT
Now all that is left is to baste it, quilt it, and bind it!!! I know, that is a whole lot of work in one little sentence. If you are new to this process, you can see my Finishing your Quilt Video Series here ;) It will walk you through each step of the process.

When it came time to quilt my quilt, I opted to do some free motion swirls in the background using my favorite 402 So Fine Thread that blended perfectly with the low volume background. Then I quilted arches in the chain, using the matching rainbow color of Fantastico Thread, for that extra little shine and pop!!!

And to bind, I choose a simple Black solid to really finish the quilt. You will need 356" of binding, so if you are using yardage, 9 WOF strips from 2/3 a yard and if you are making it scrappy, just keep adding to your strip until you reach 356" :)

STEP 9- ENJOY!!!!
Now, just sit back and enjoy your gorgeous Super Scrappy Single Irish Chain Quilt!!! It will measure 86" x 86" when it is done making it the perfect size to take along for your next picnic. I can't wait to use this all summer long!!!

I hope you have enjoyed this tutorial, and if you make your own Super Scrappy Single Irish Chain Quilt, I would love to see it!!! You can email me a picture at [email protected] or add it to my Flickr Group here ;)

And if you liked this Irish Chain love, be sure to pop back in next Monday for the start of Irish Chain Quilts Blog Hop!!!! I can't wait to share with you all the projects from my new book ;)